
Weblium is a website builder that allows you to create business websites, landing pages, and online stores, add forms for collecting inquiries, and accept orders online.

The Uspacy and Weblium integration automatically transfers online store orders and website form submissions to your CRM. Your team no longer needs to manually transfer client information—once the integration is configured, the data is sent directly to your Uspacy Space.
The connection process consists of three stages: first, create a connection in Uspacy and obtain the webhooks; then add them in Weblium; finally, return to Uspacy and complete the form configuration.
Let’s go through each step ⬇️
Initial setup in Uspacy
Step 1. Install the app
In your Uspacy Space, go to the Marketplace section and find the free Weblium by Uspacy app. Click Get.
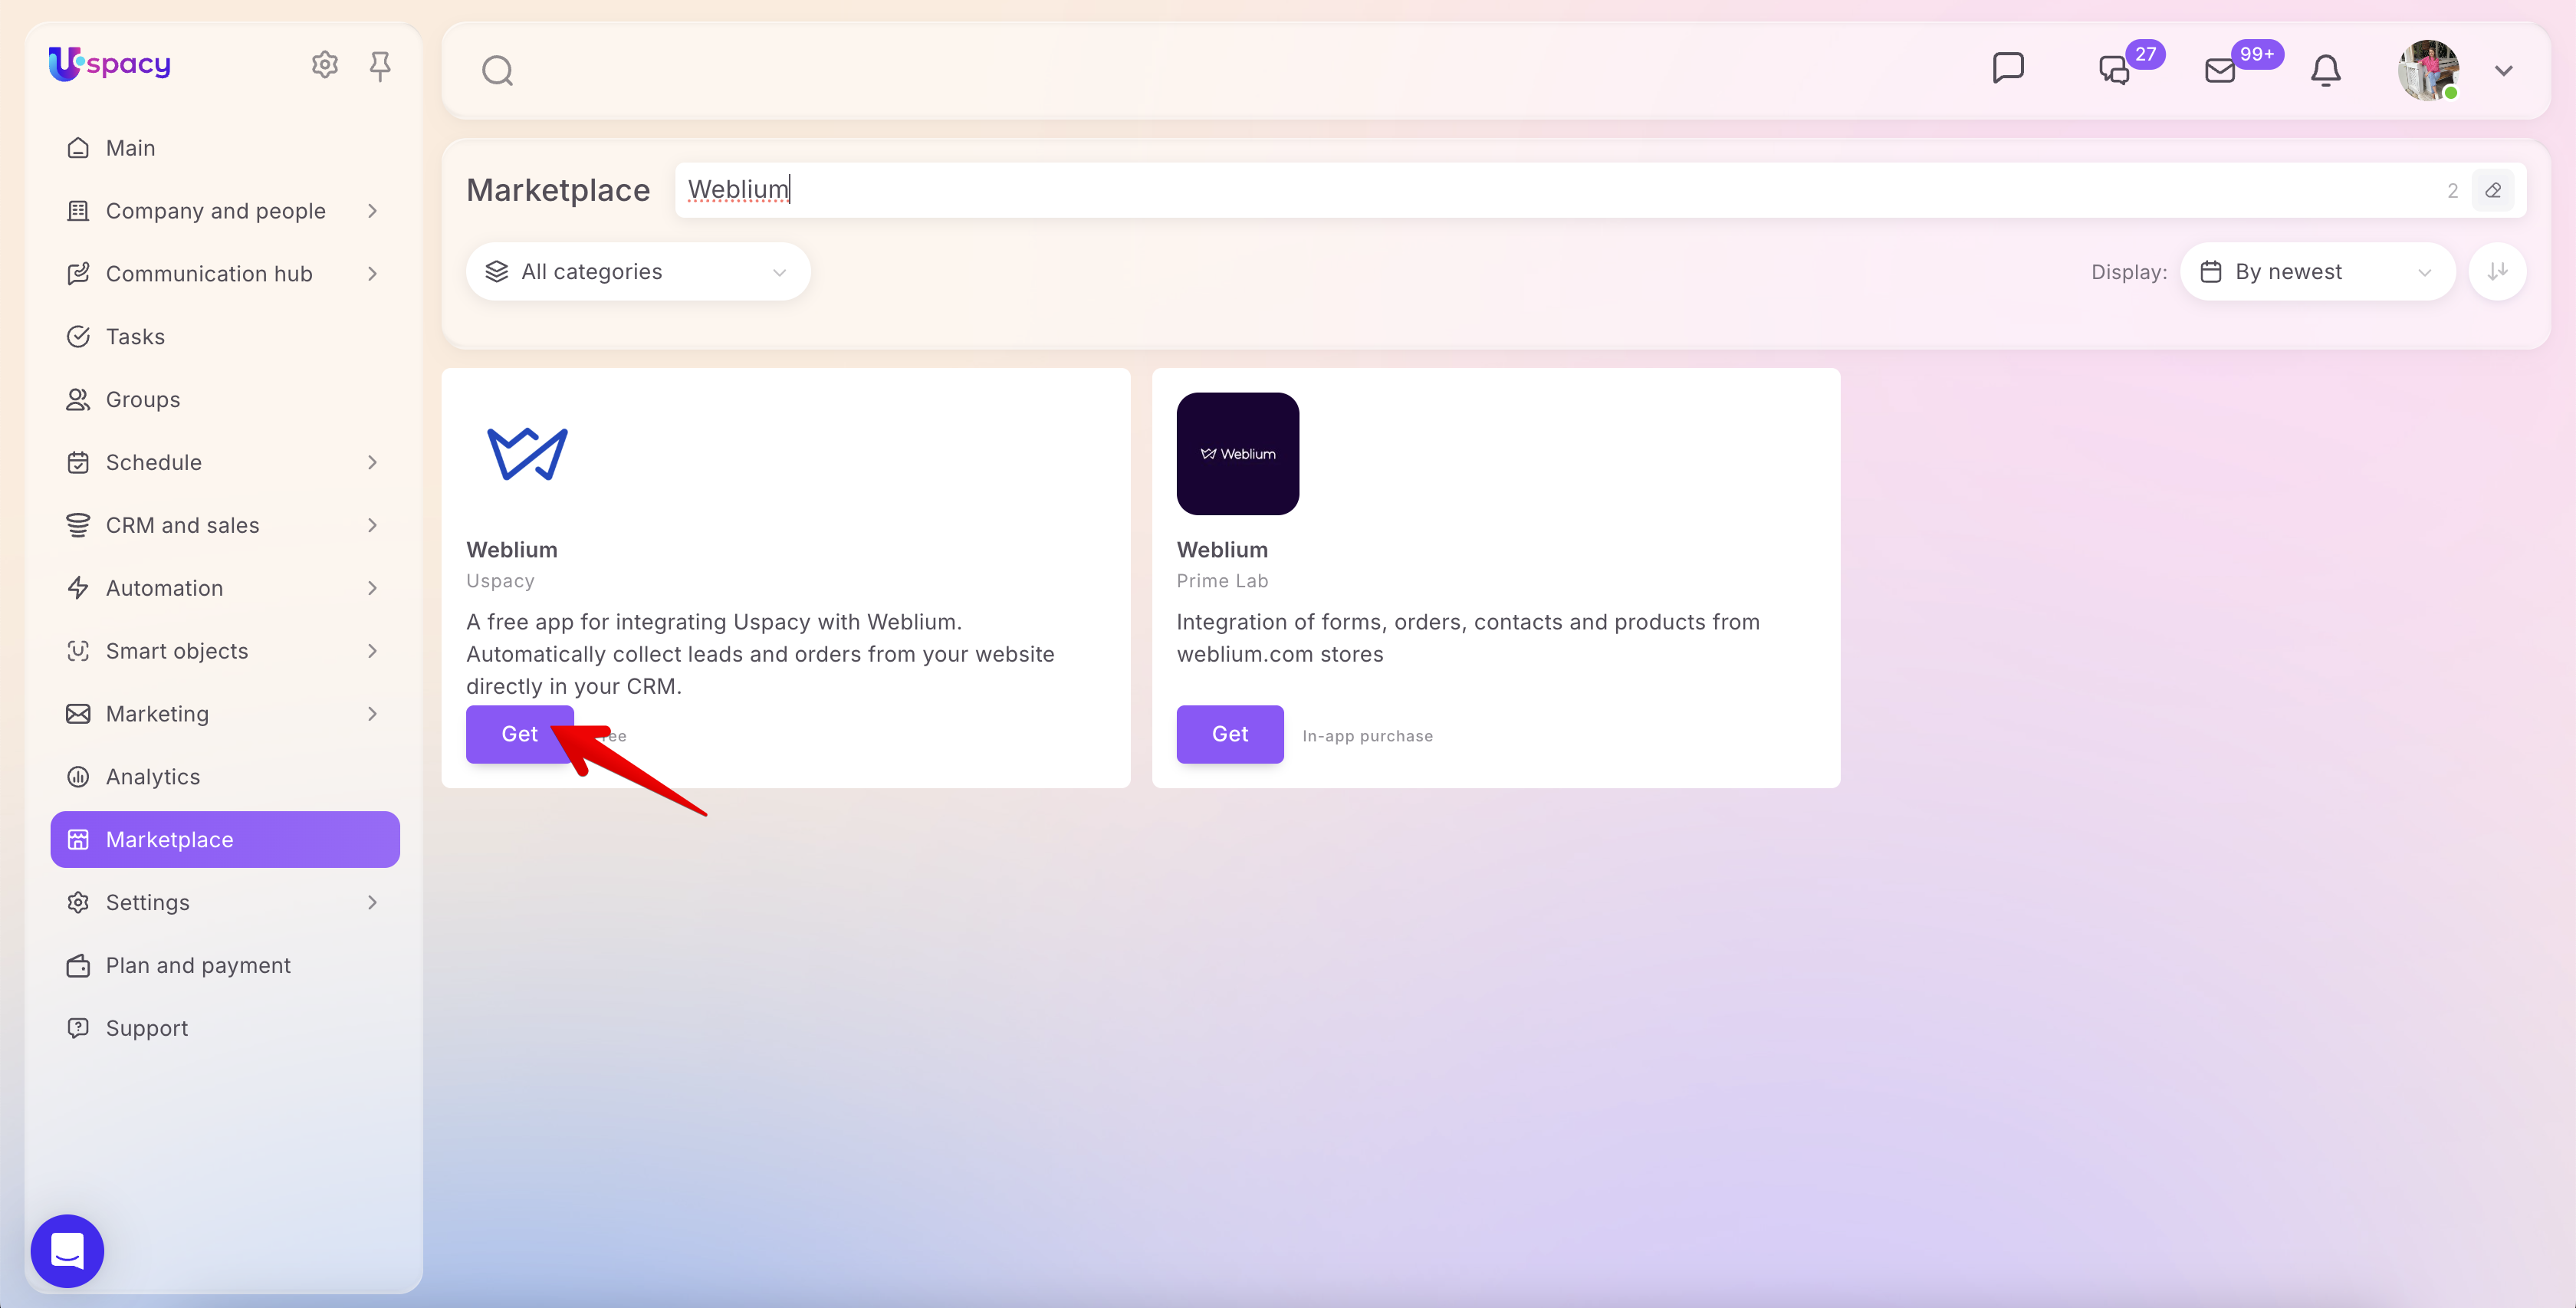
After the app is installed, its status will change to Installed, and the Get button will be replaced with a Configure button.
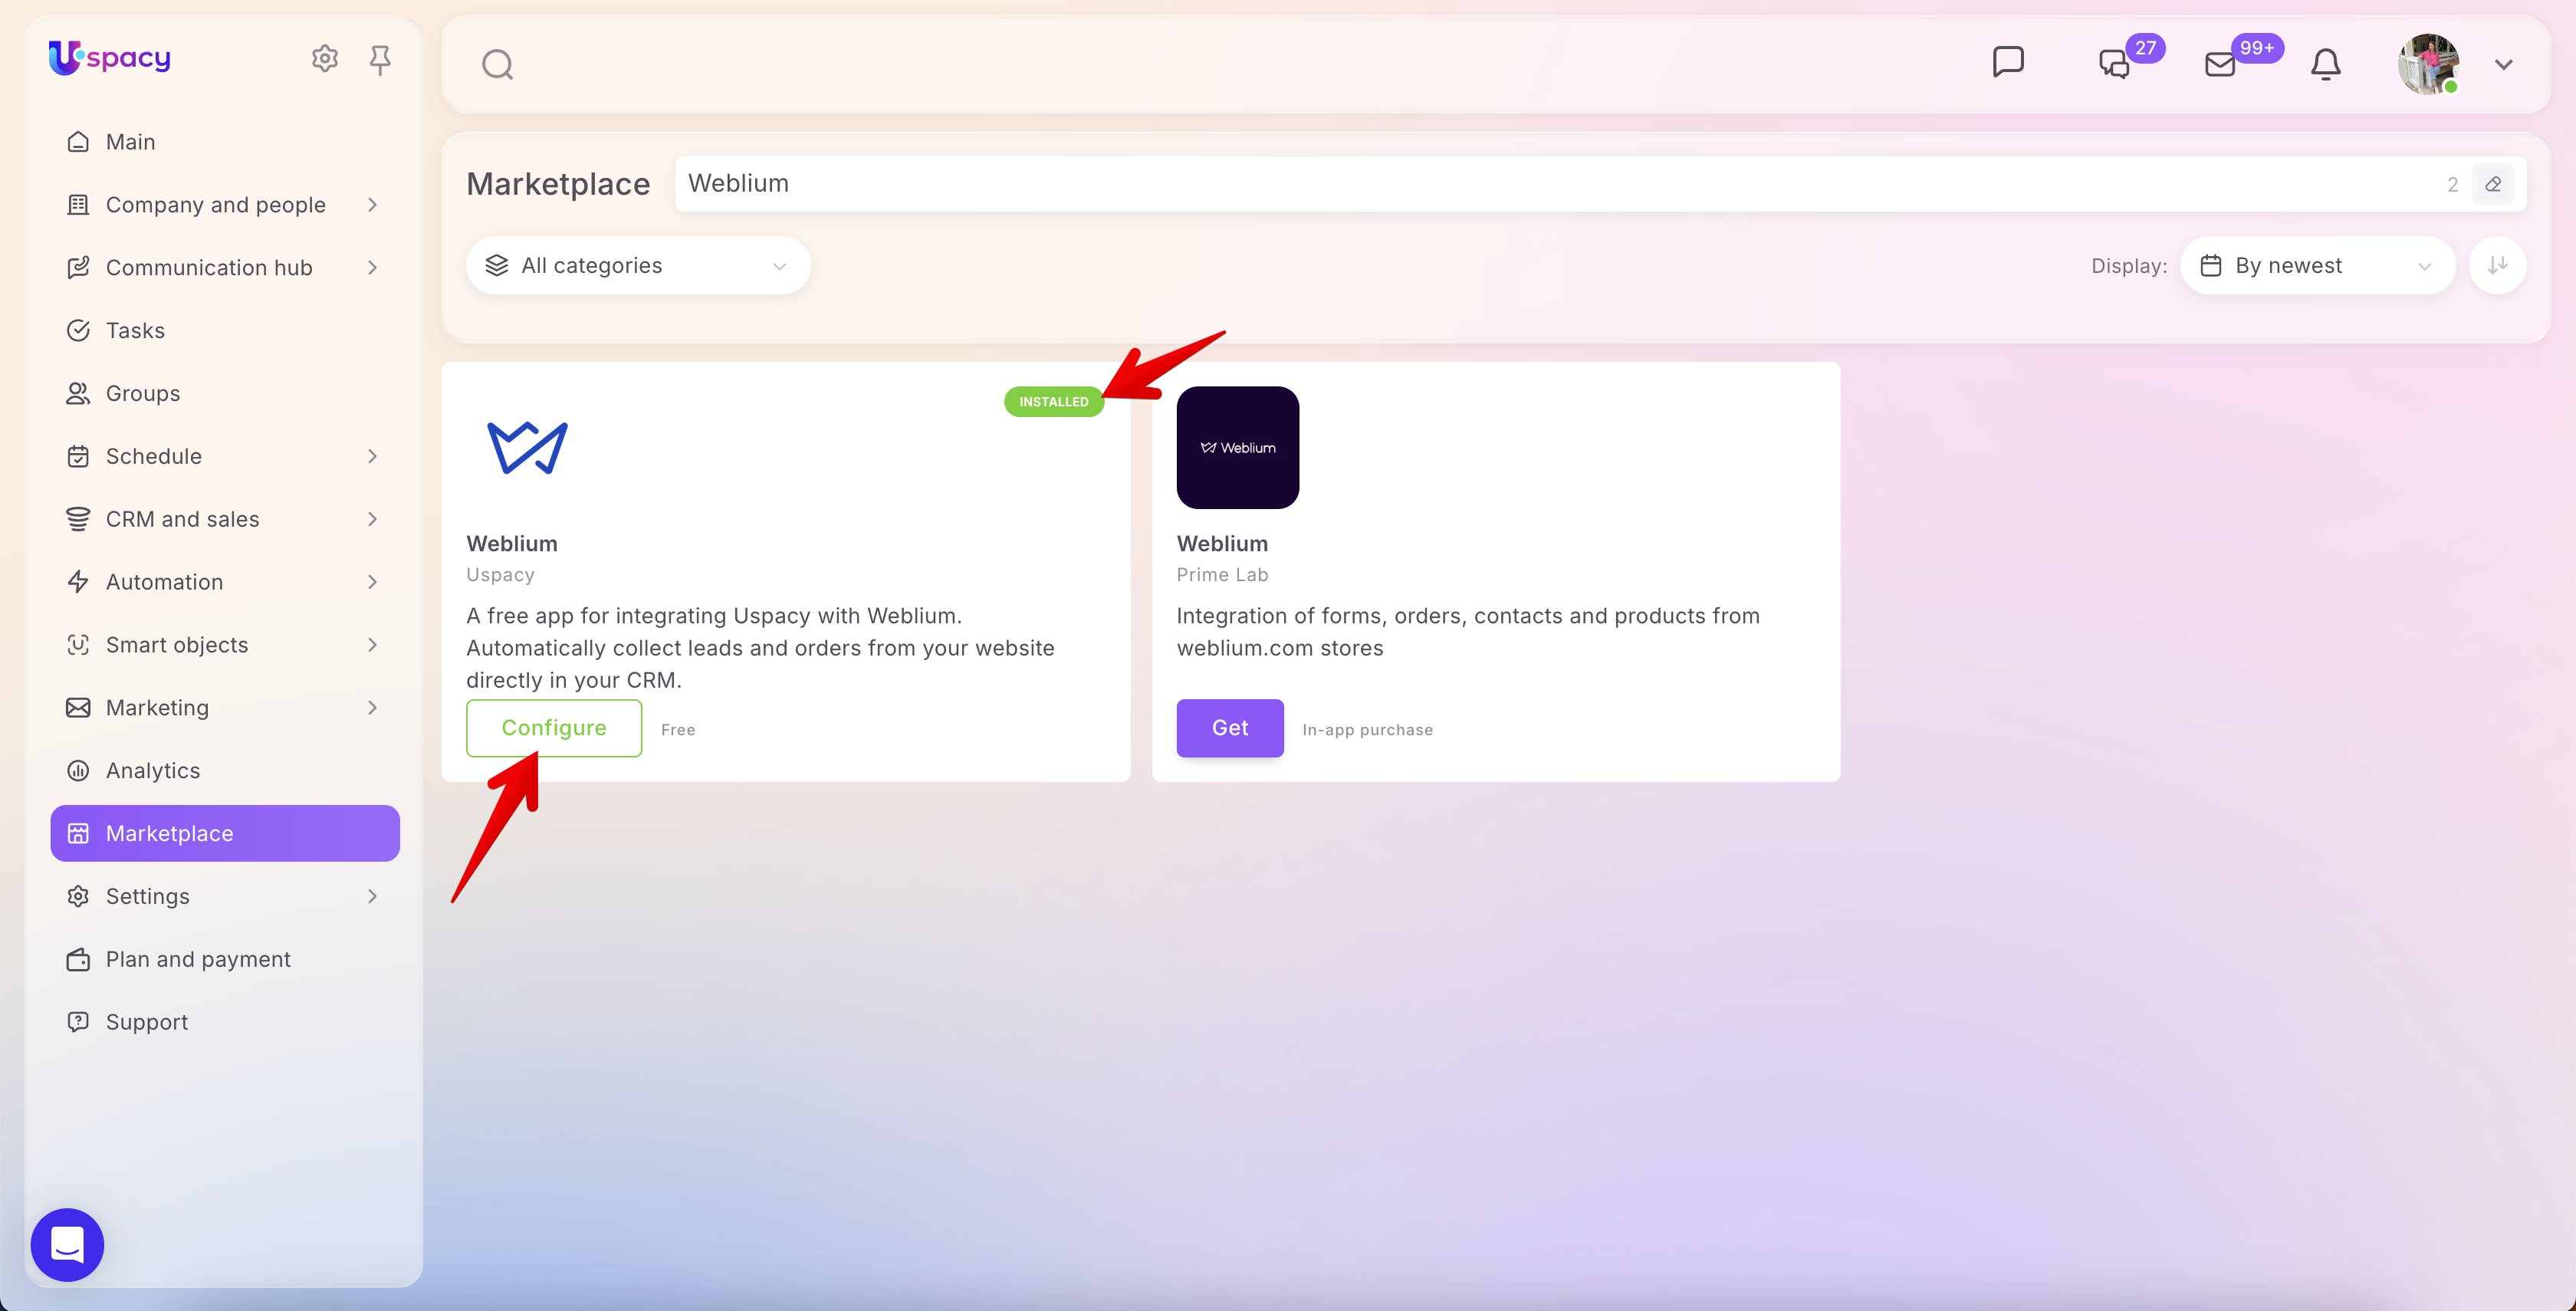
Click it to open the integration settings.
Step 2. Create a connection and configure CRM connections
In the app settings, click Add a new connection.
In the General information section, enter the Channel name. We recommend using a clear name that makes it easy to identify the connected website. For example, you can use the website’s domain name.
If you need to integrate multiple Weblium websites with Uspacy, create a separate connection for each website.
In the CRM connections section, specify how Uspacy should process new orders from your Weblium online store.
Currently, orders can be associated with Contact + Deal. The option to create a Lead will be available later.
Next, configure the following:
- Pipeline and stage — select where the newly created Deal should be added.
- Default source — specify the source that will be automatically assigned to the created CRM records.
- Default person responsible — select the employee who will be responsible for the new records.
This way, new orders will be automatically added to the appropriate funnel, while the source and responsible person will be automatically set for the created CRM records.

Step 3. Save the connection and get webhooks
Once you’ve completed the setup, click Save.
The connection status will change to Connected, and two URLs will become available in the General information section:
- Store webhook — used to transfer orders from the online store.
- Forms webhook — used to transfer form submissions.
Copy the required URL using the corresponding icon.
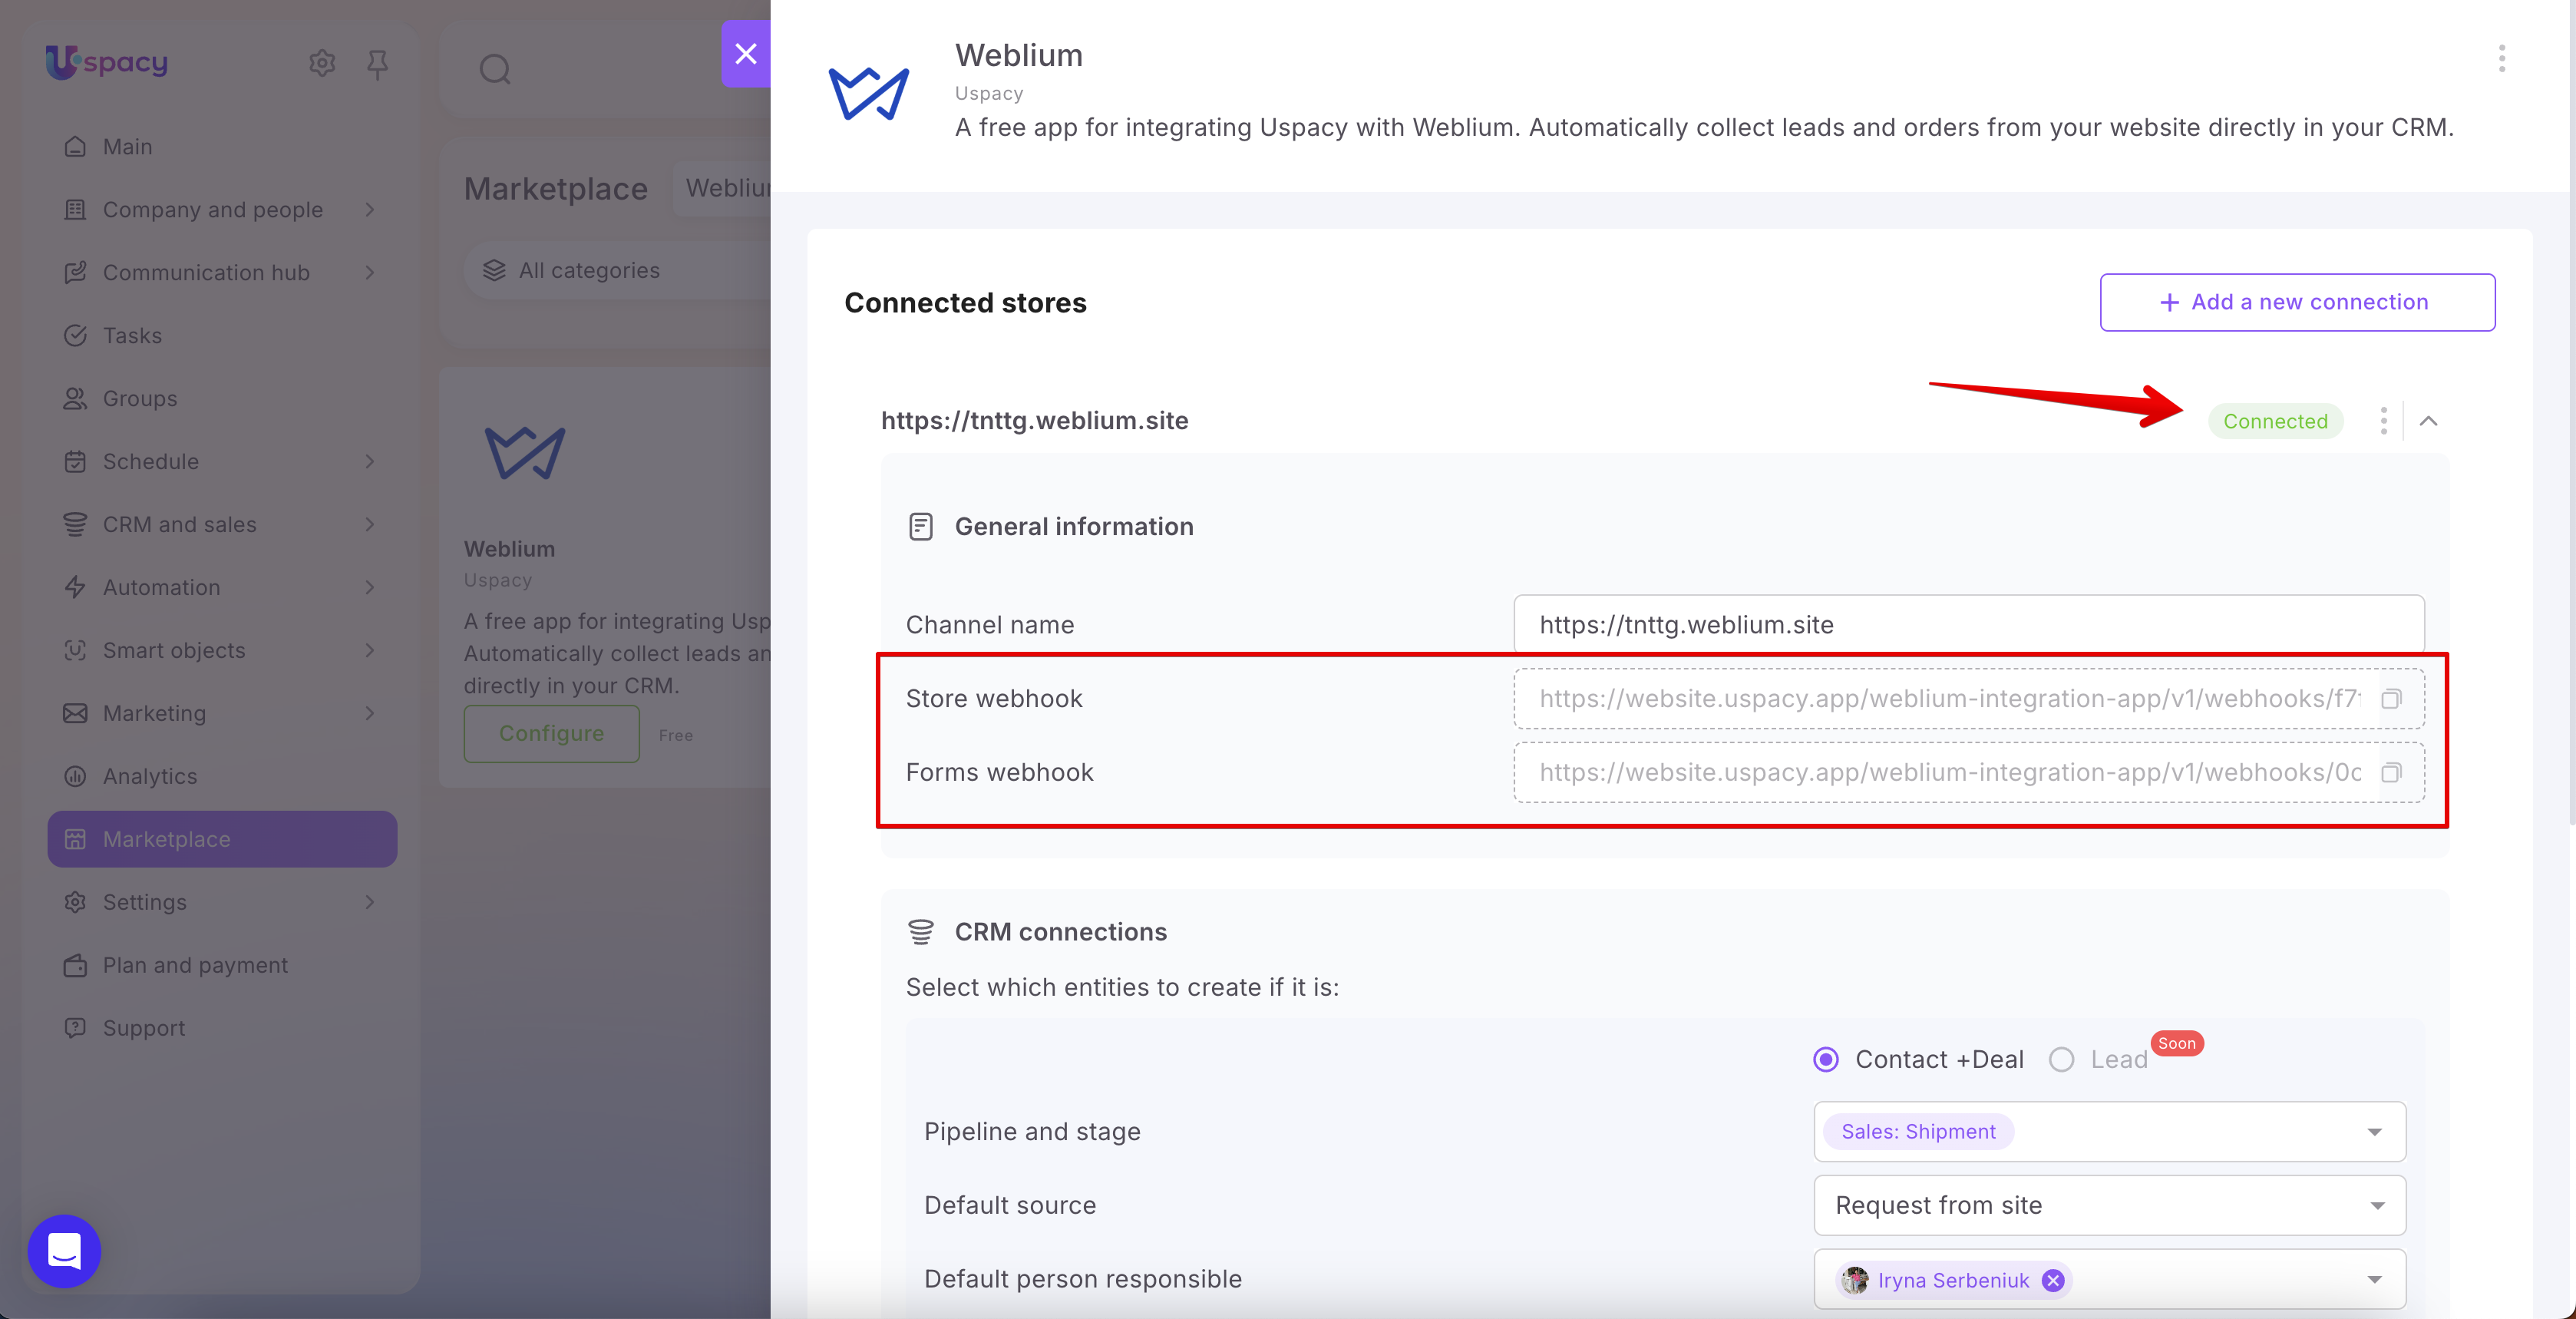
💡 Please note: The store and forms use different webhooks. Each webhook must be added to the corresponding section in Weblium.
Setup in Weblium
Step 1. Connect the store webhook
If you want to transfer orders from your Weblium online store to Uspacy, open your website settings.
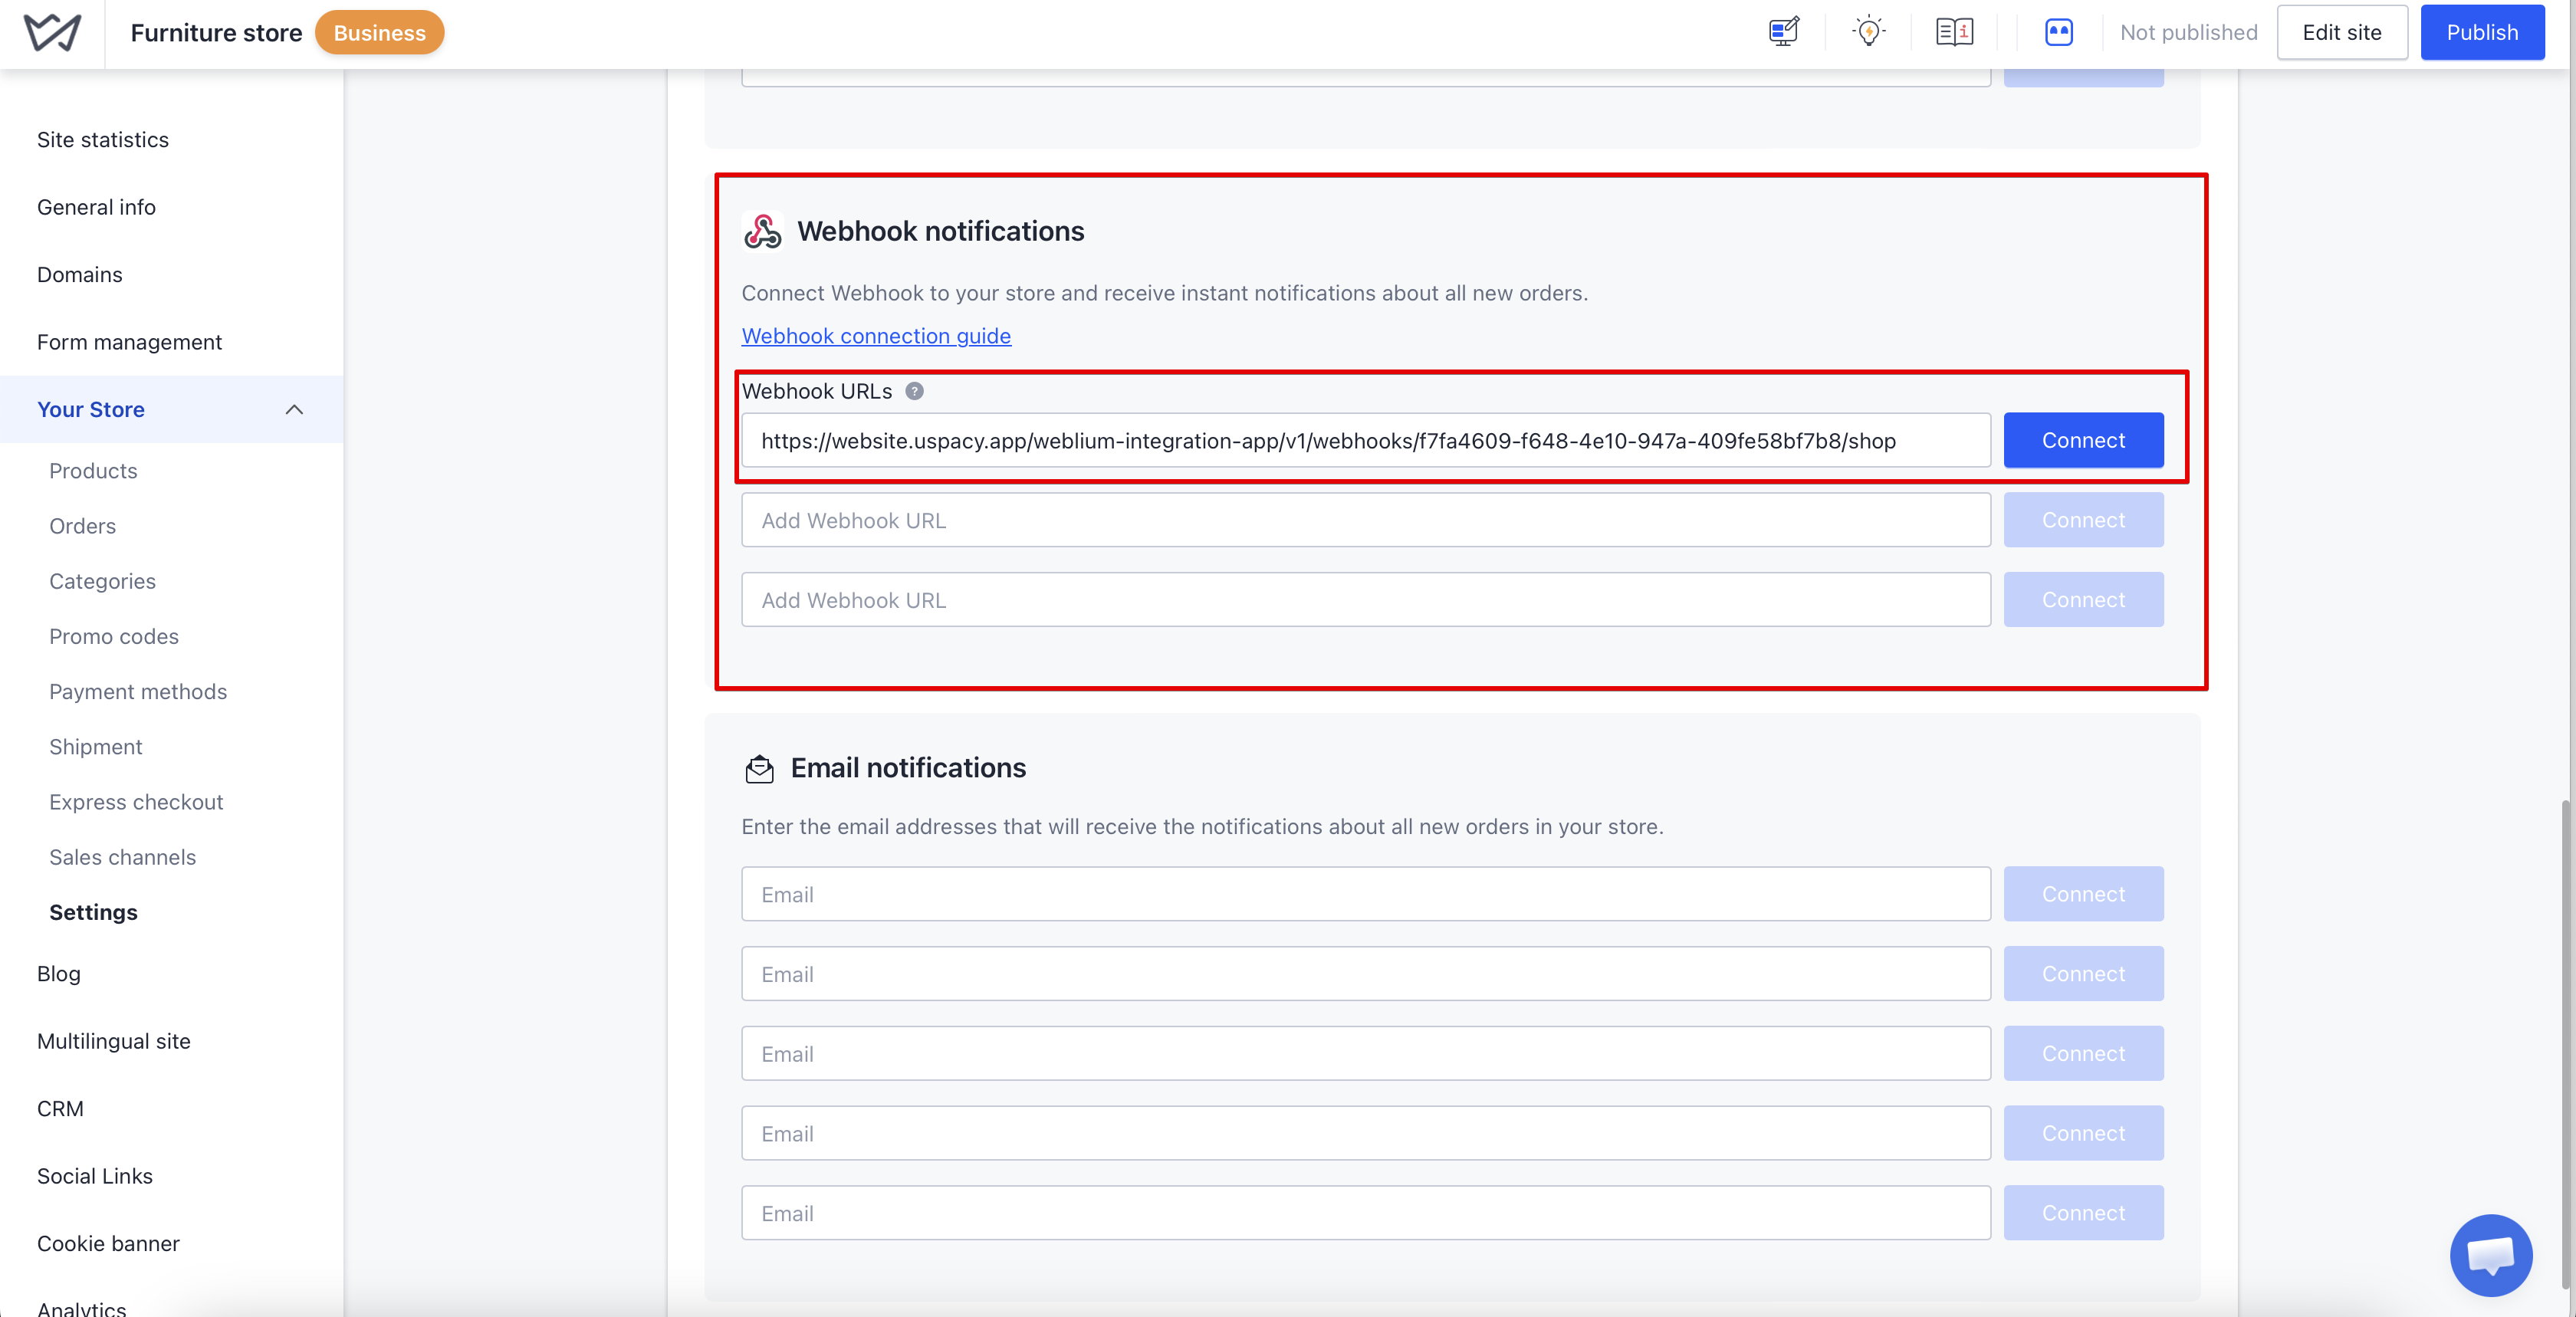
Go to Your Store → Settings → Notifications.
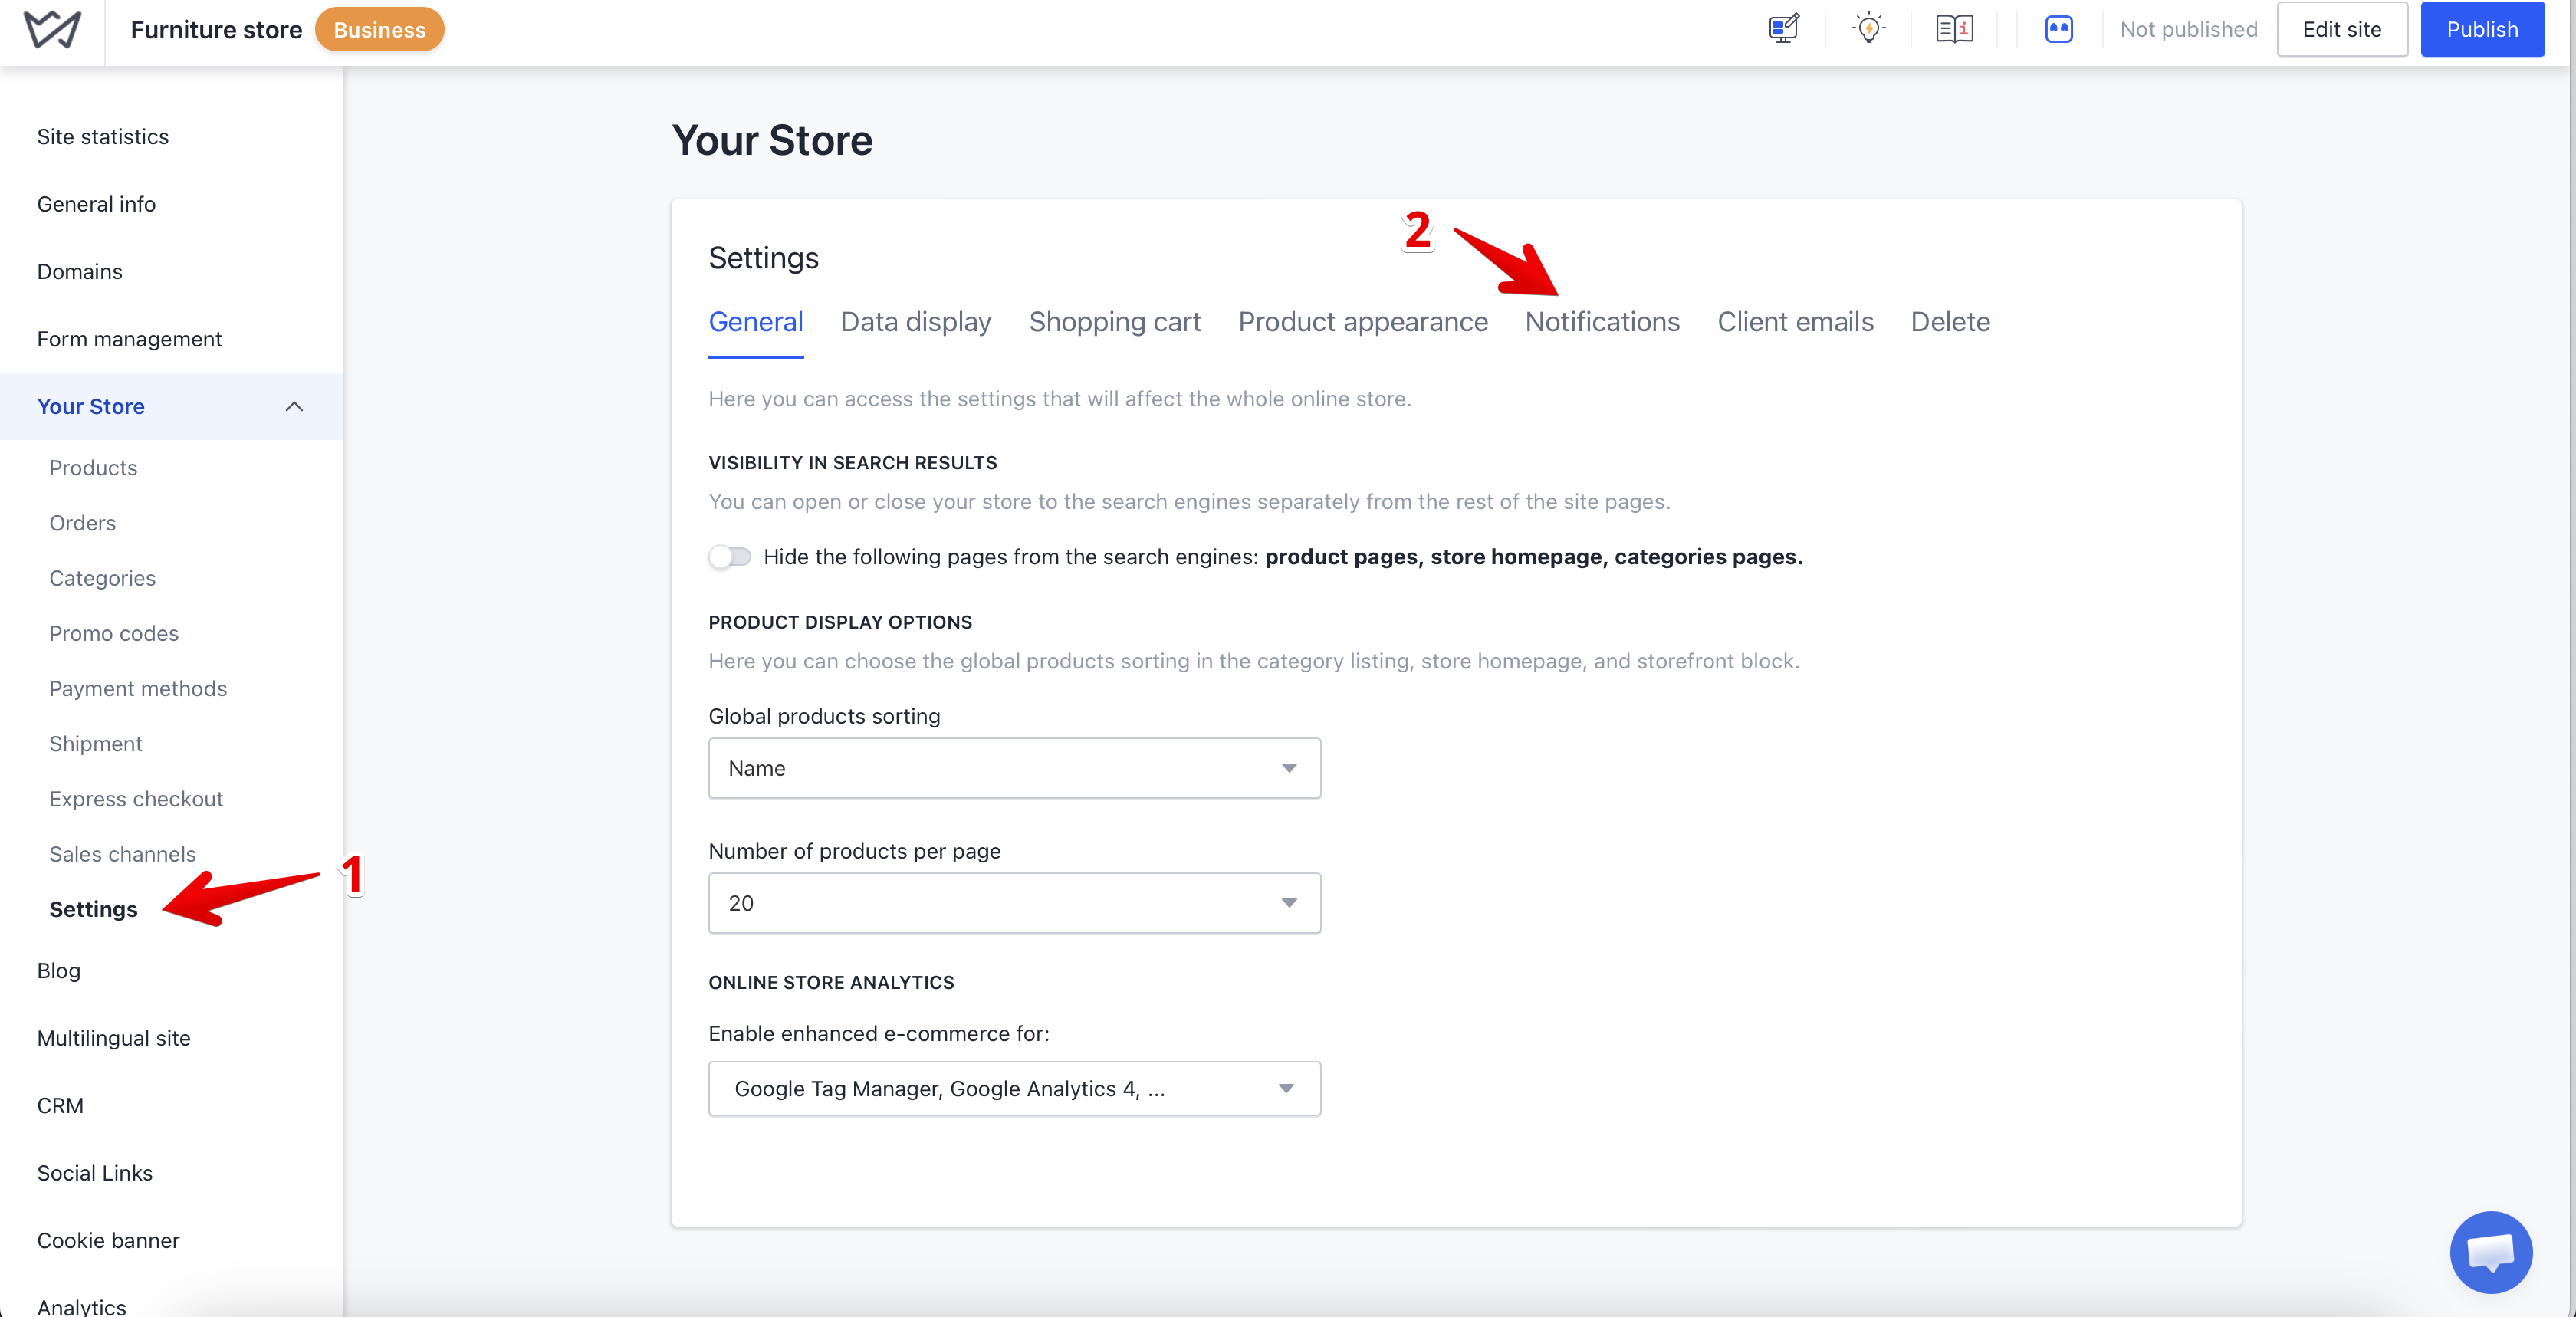
Scroll down to the Webhook Notifications section. Paste the Store Webhook copied from Uspacy into the Webhook URL field and click Connect. The URL will then appear in the list of connected webhooks.
Weblium can now send new orders to Uspacy.
Step 2. Add the forms webhook
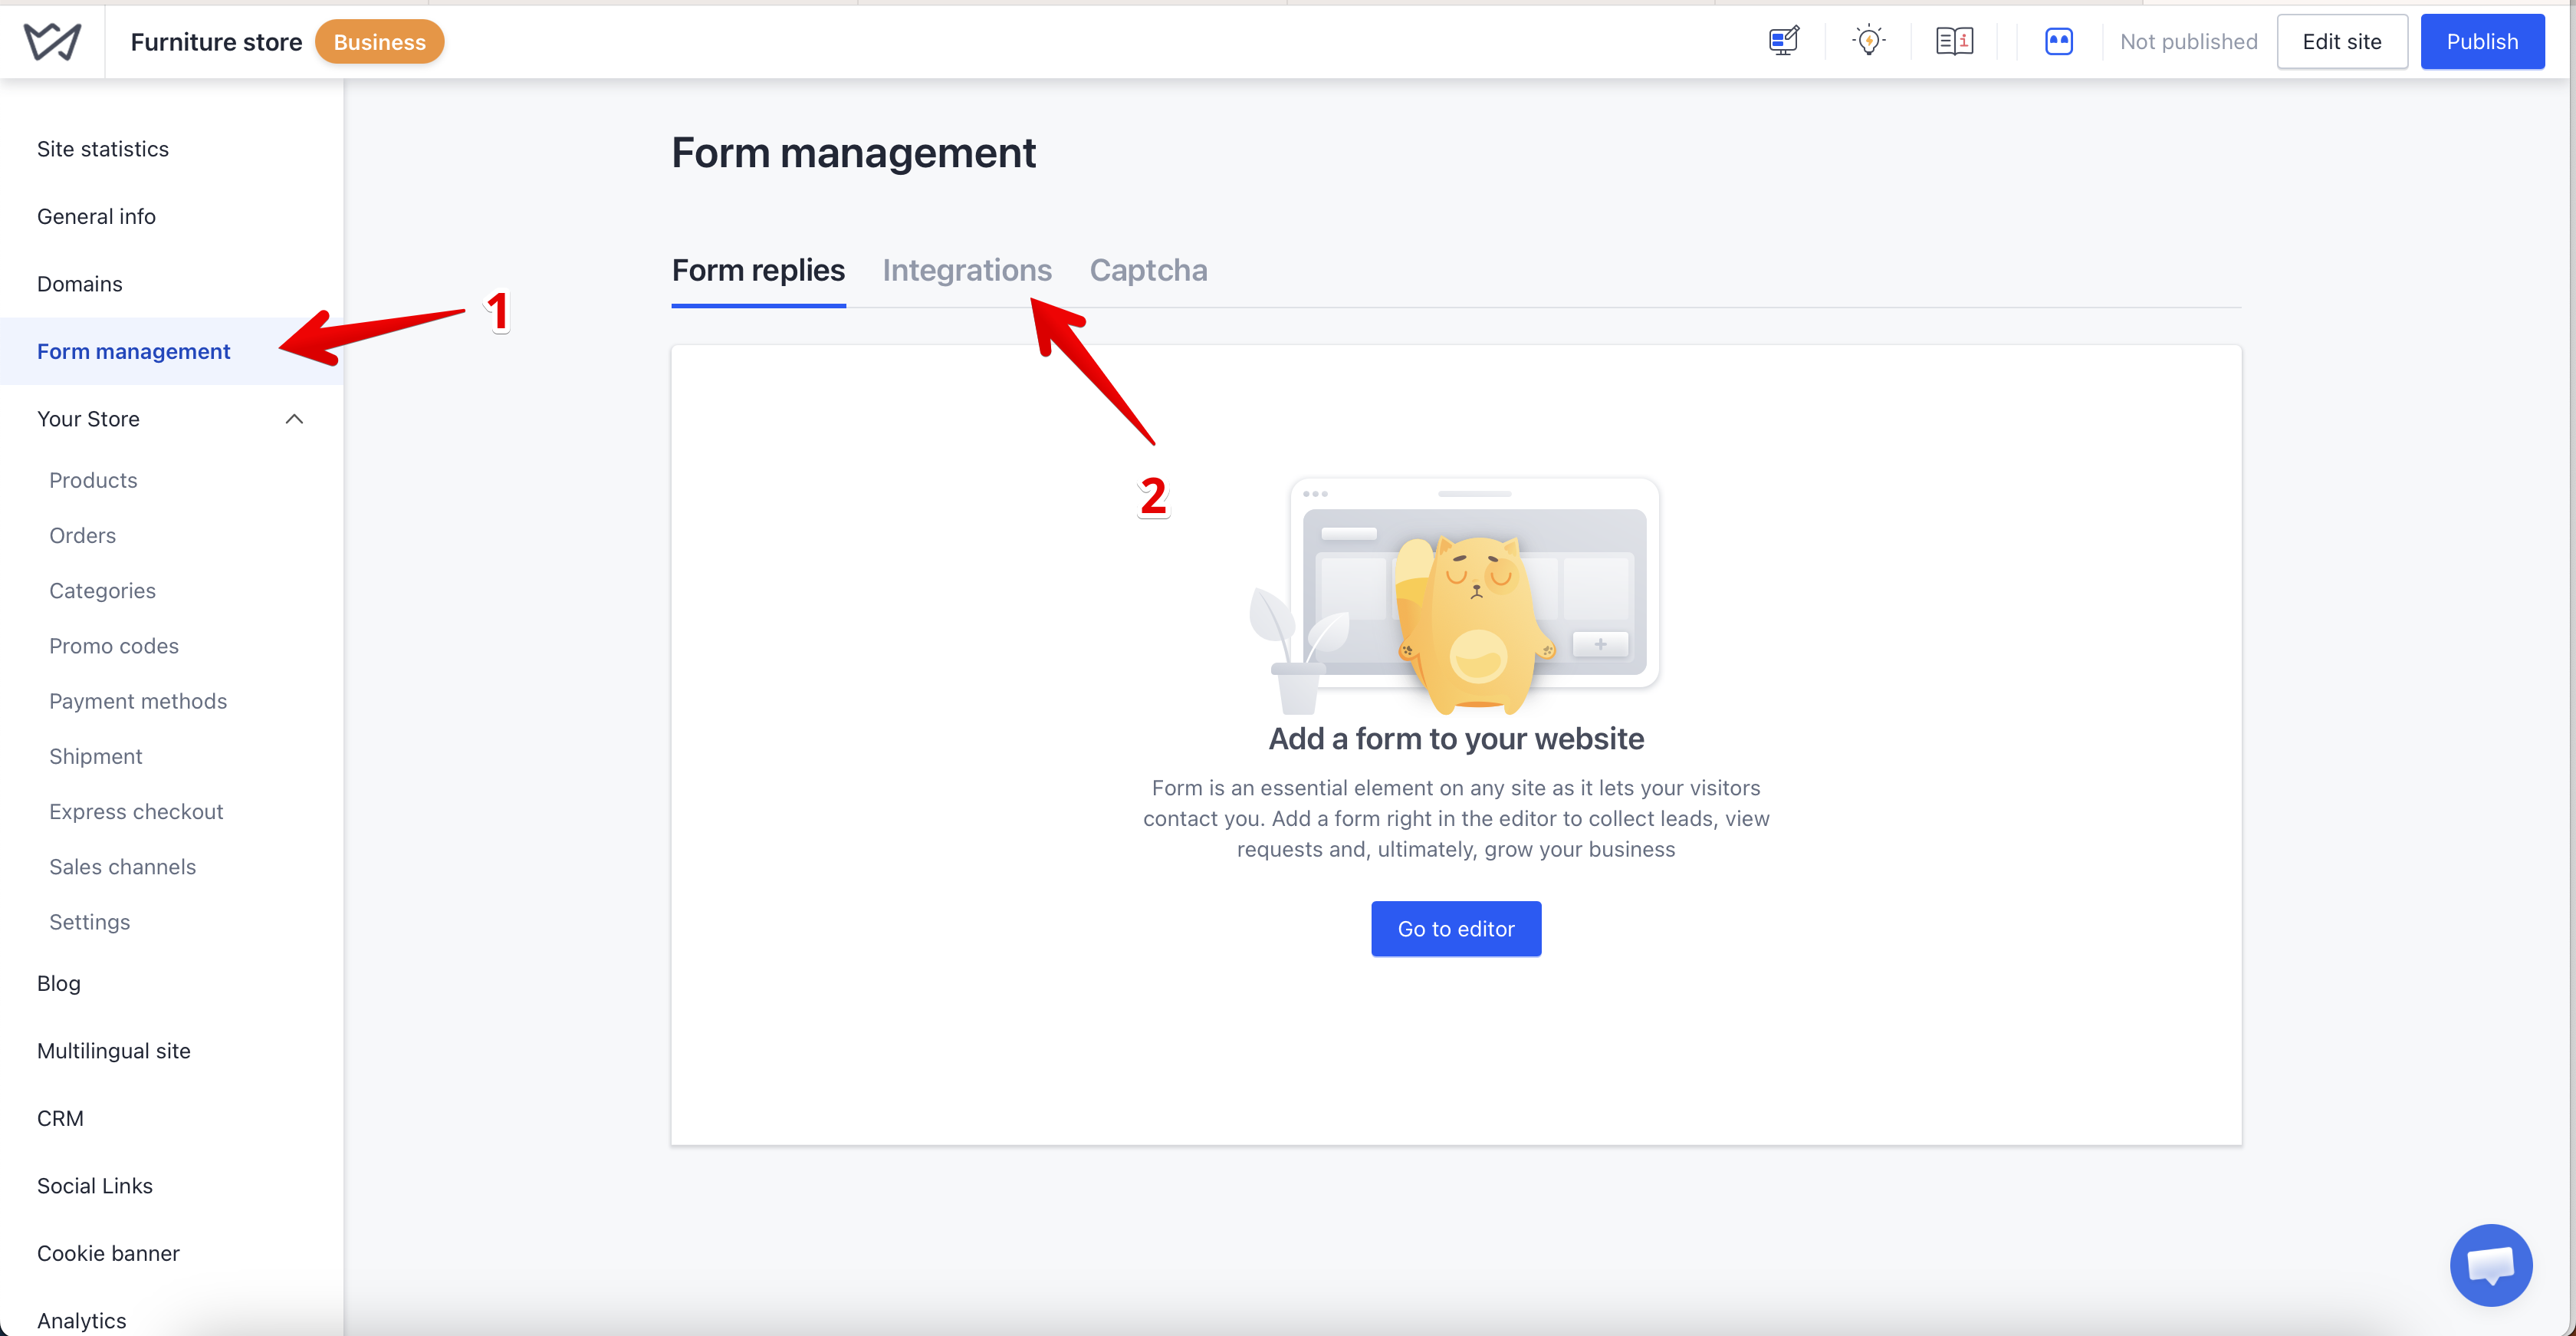
To transfer submissions that users make through website forms, go to Forms Management → Integrations in Weblium.
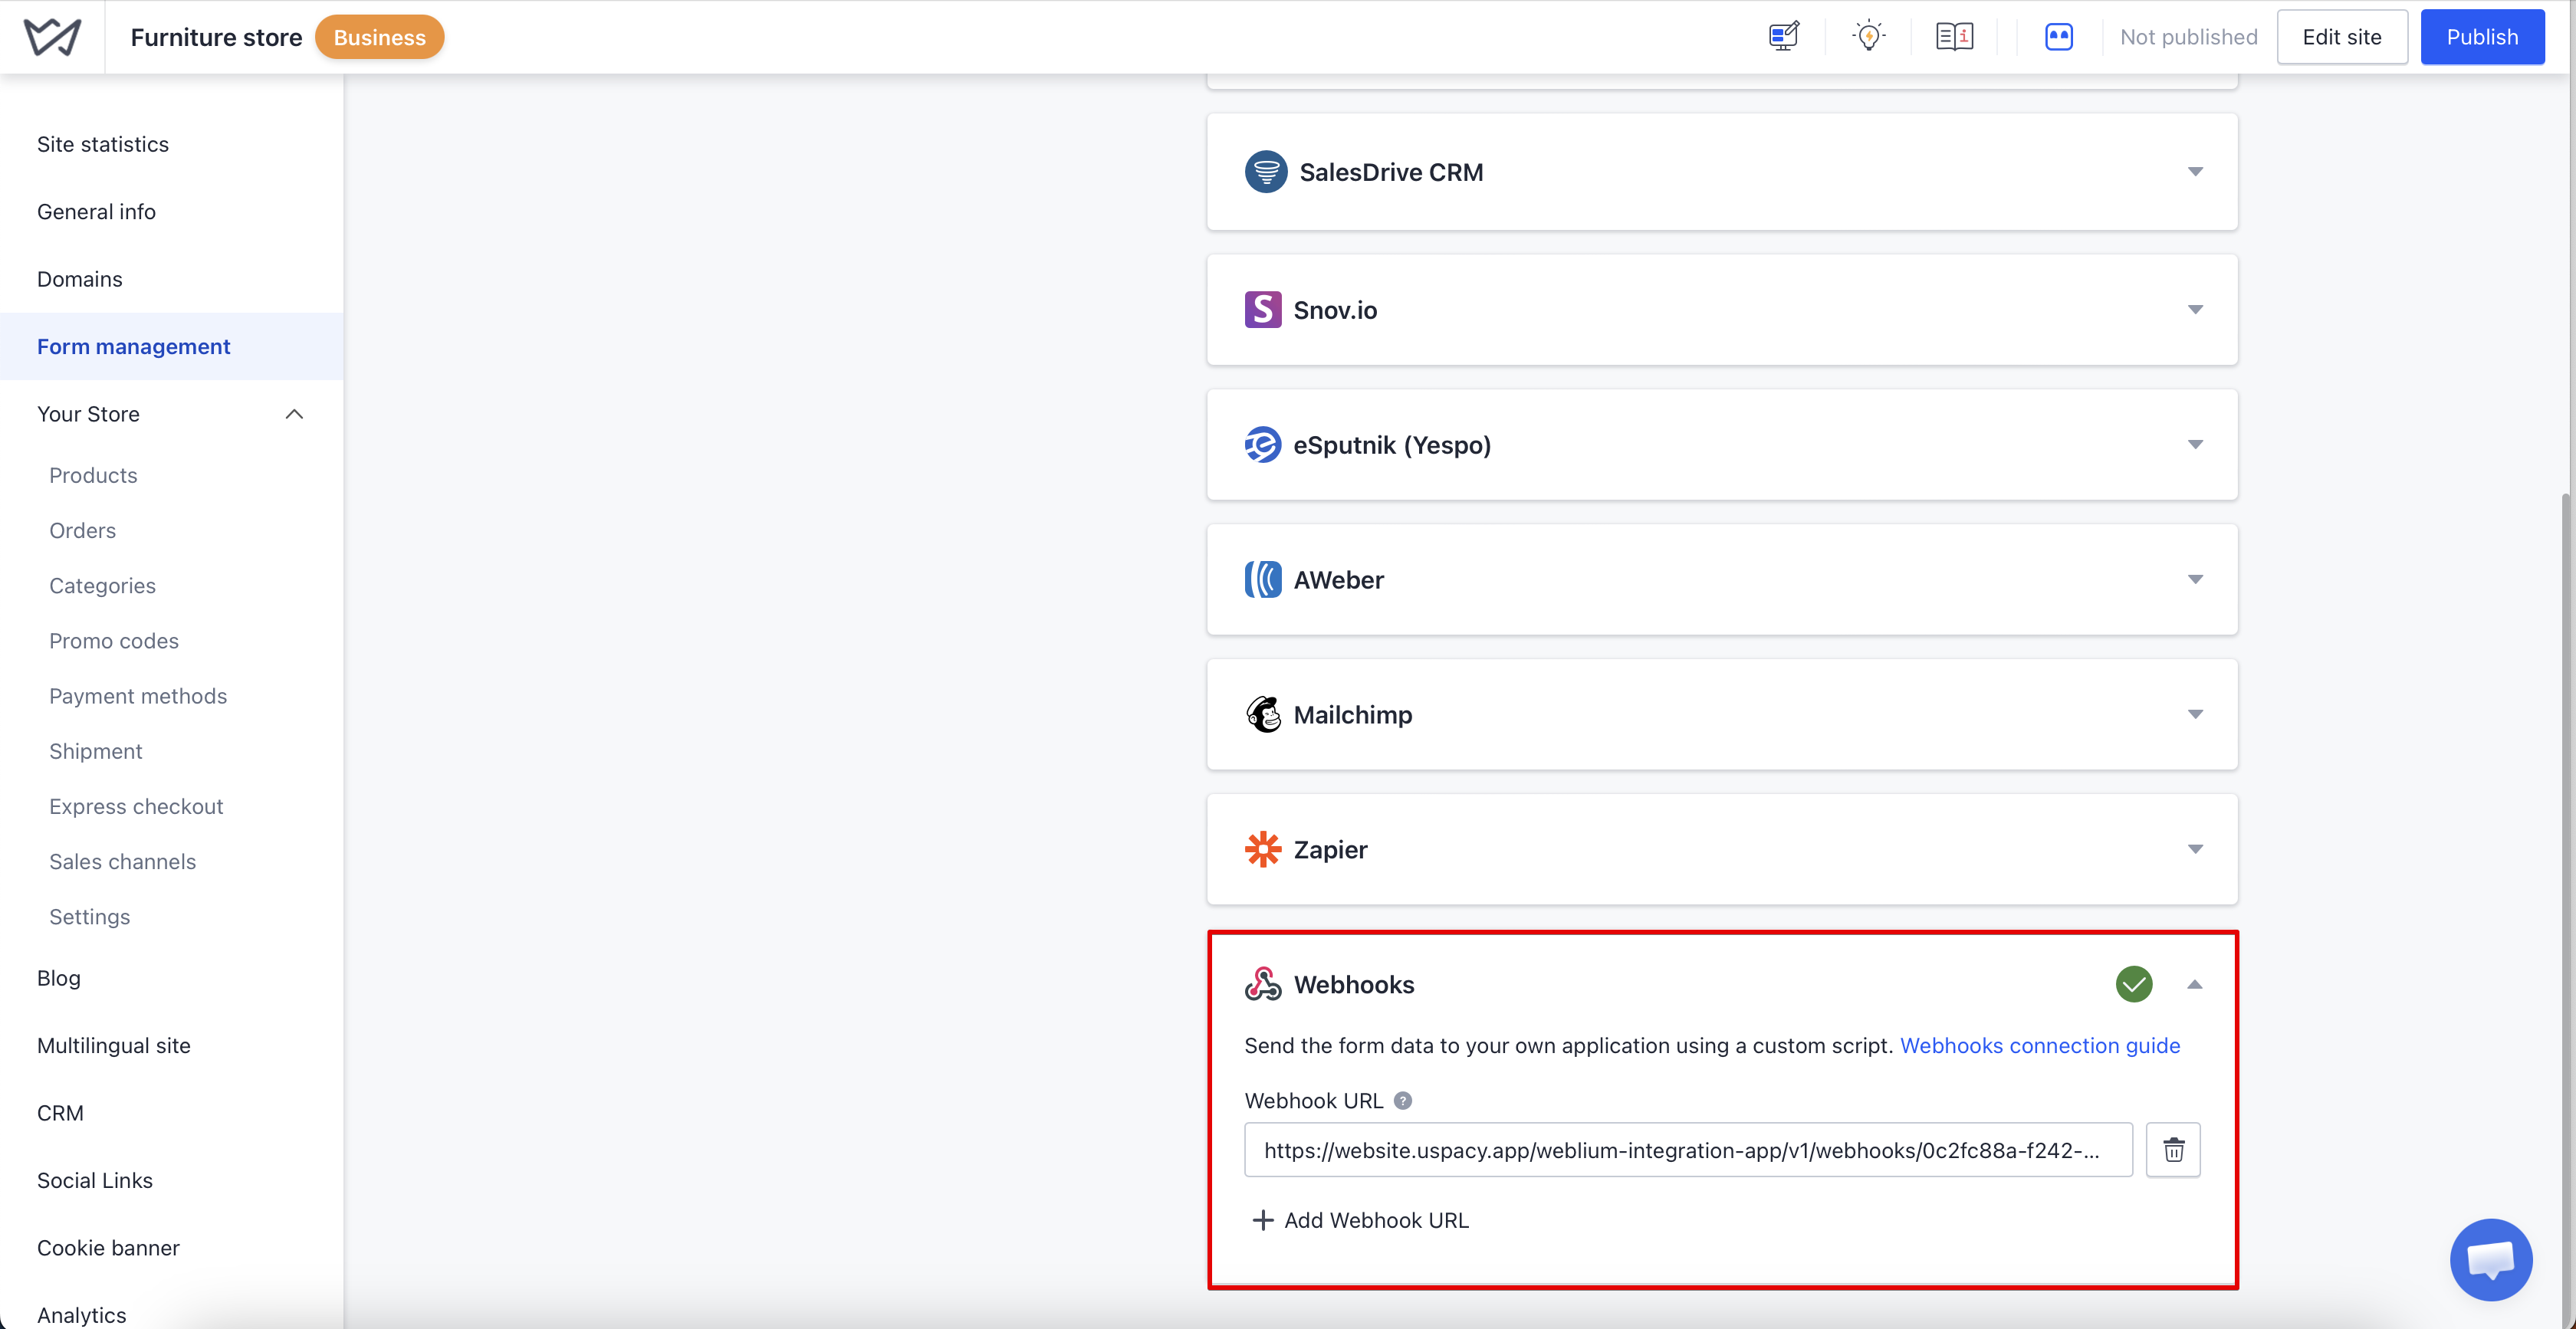
In the list of available integrations, find the Webhooks section and expand it. Click Add Webhook URL and paste the Forms Webhook copied from the Uspacy settings.
After the webhook is added, an active connection indicator will appear next to the Webhooks section.
However, this is not enough. You must separately connect the added webhook to each form whose data you want to transfer to Uspacy.
Step 3. Connect the webhook to a form
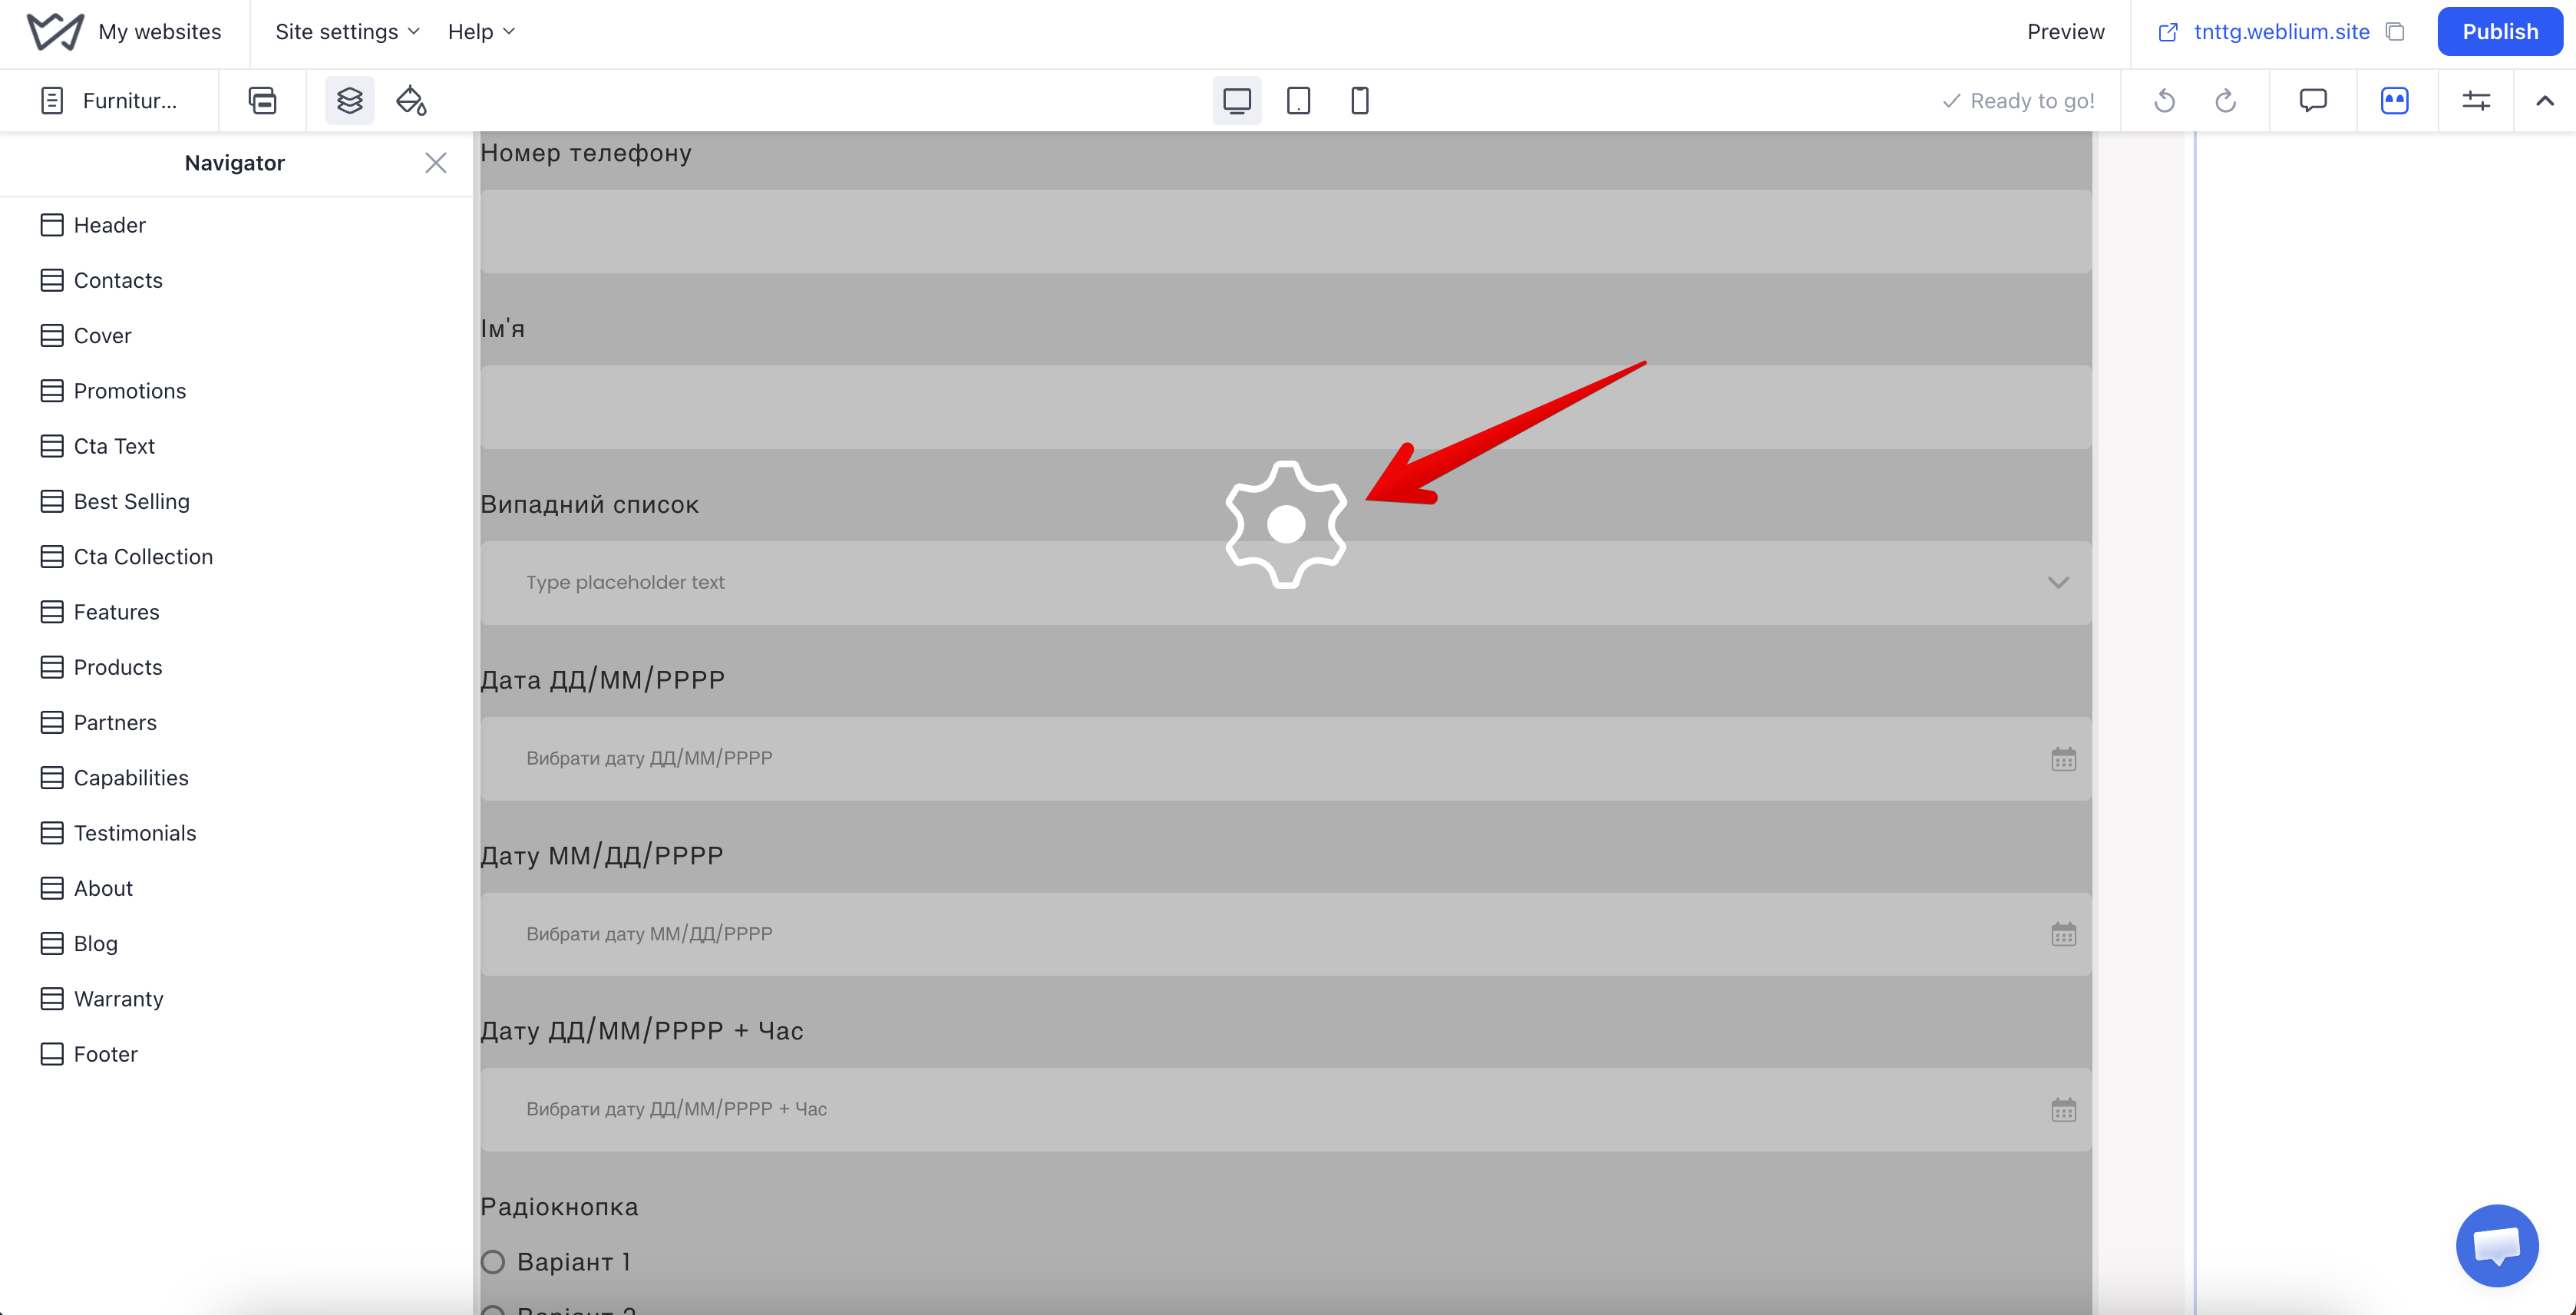
Open the Weblium site editor, find the required form, and open its settings.
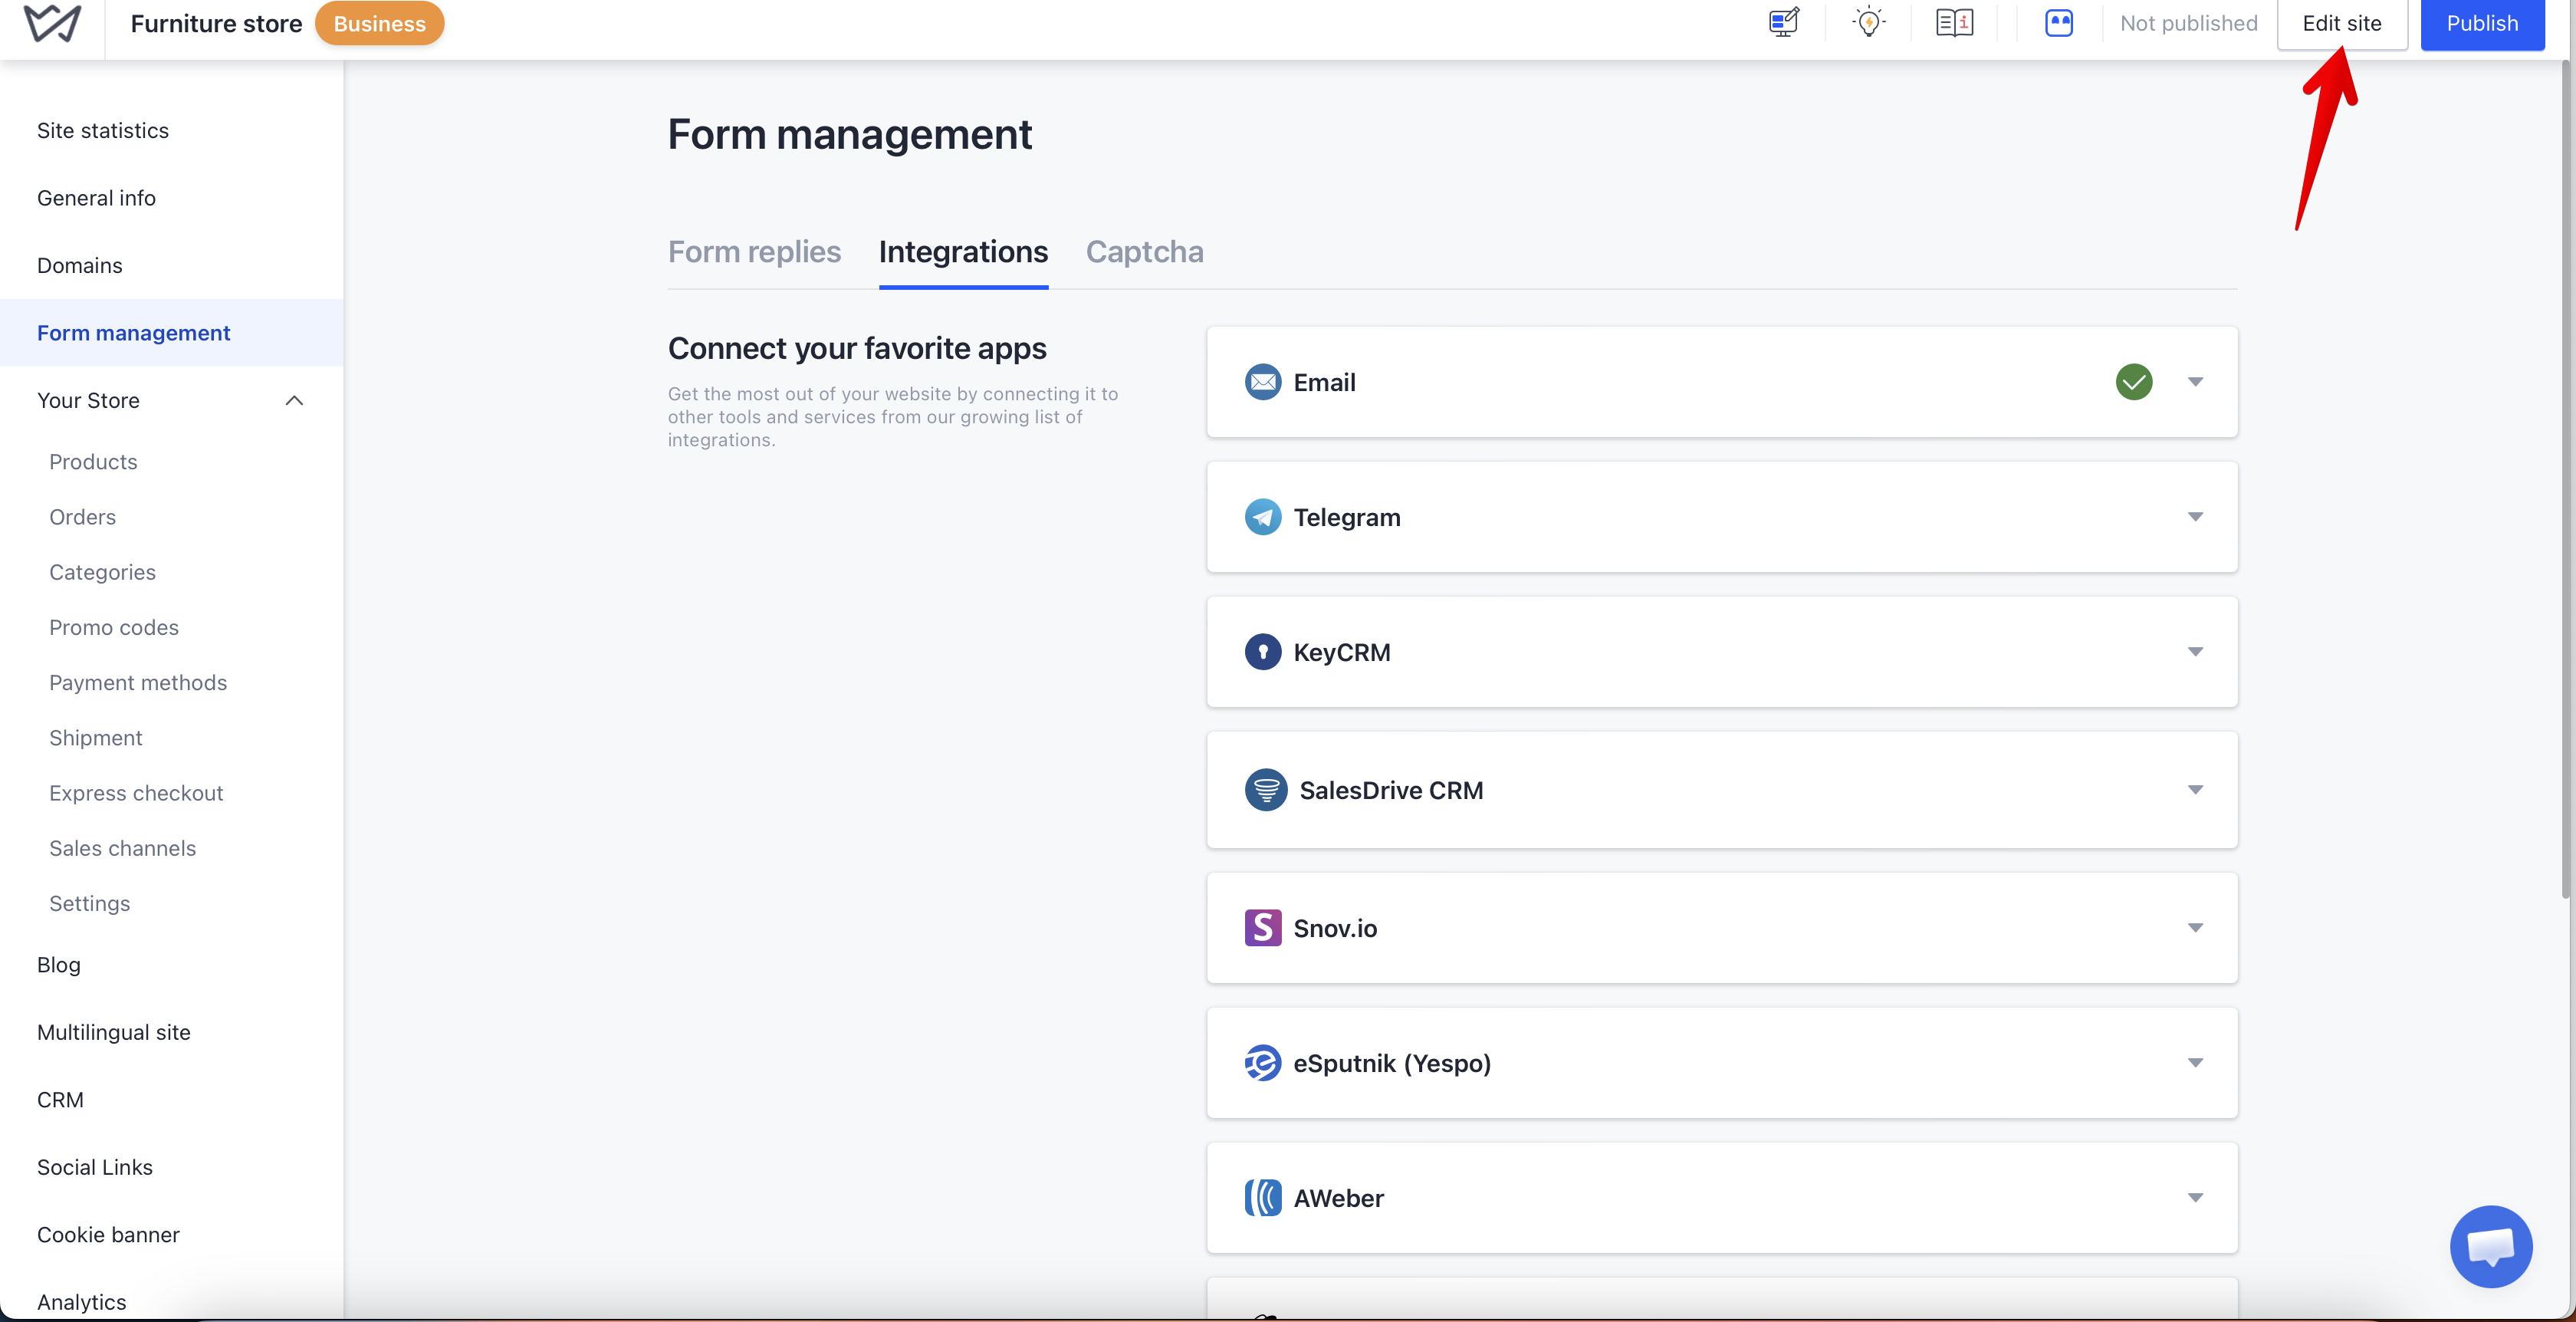
Next, go to the Integrations tab. Turn on Webhooks and select the Uspacy webhook you added earlier from the list.
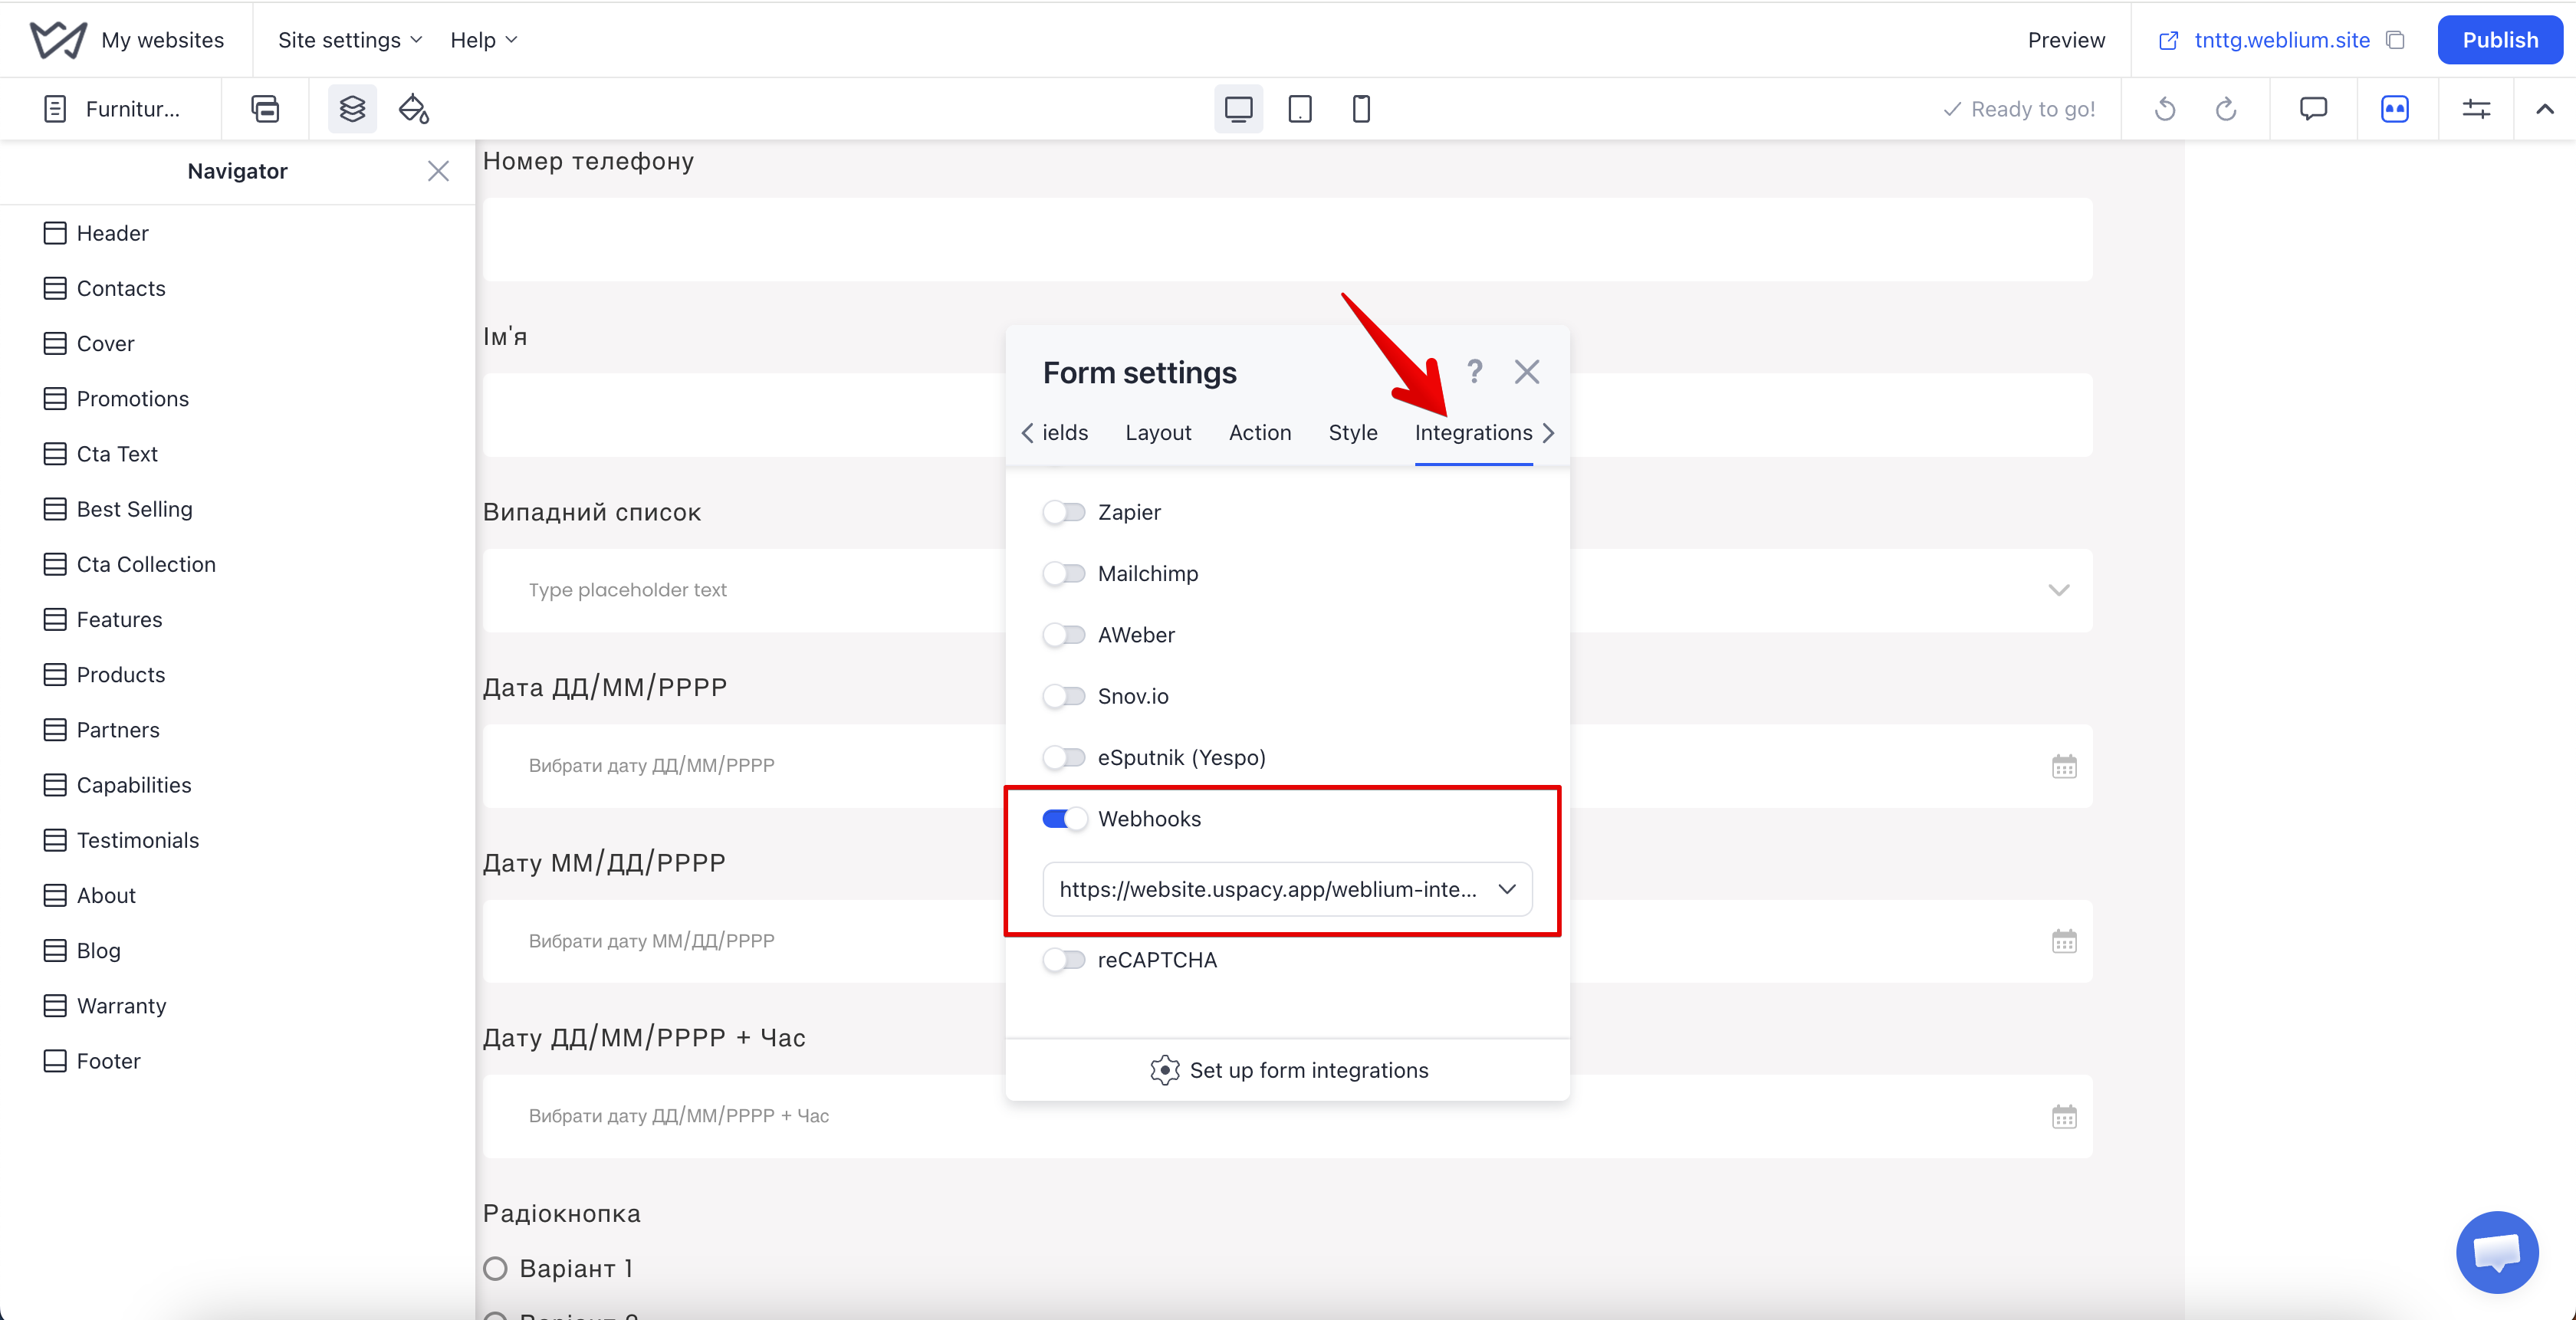
If you want to transfer data from multiple forms, repeat these steps for each form.
Step 4. Publish changes and submit a test form
After completing the setup, publish the changes on your website. Then open the page containing the form, fill in ALL of its fields, and submit the form at least once. This step is required.
Uspacy receives information about the form and its fields after the test submission. Until then, the form will not be available for selection in the integration settings.
💡 Tip: The Uspacy app also displays a reminder that forms become available for selection only after a test submission has been completed.

Final setup in Uspacy
After submitting the test form, return to Uspacy and open the settings for the Weblium connection you created.
Step 1. Add a form
The list will include Weblium forms that have already been submitted for testing after the webhook was connected.
The website from which each form was received is also displayed next to the form name.
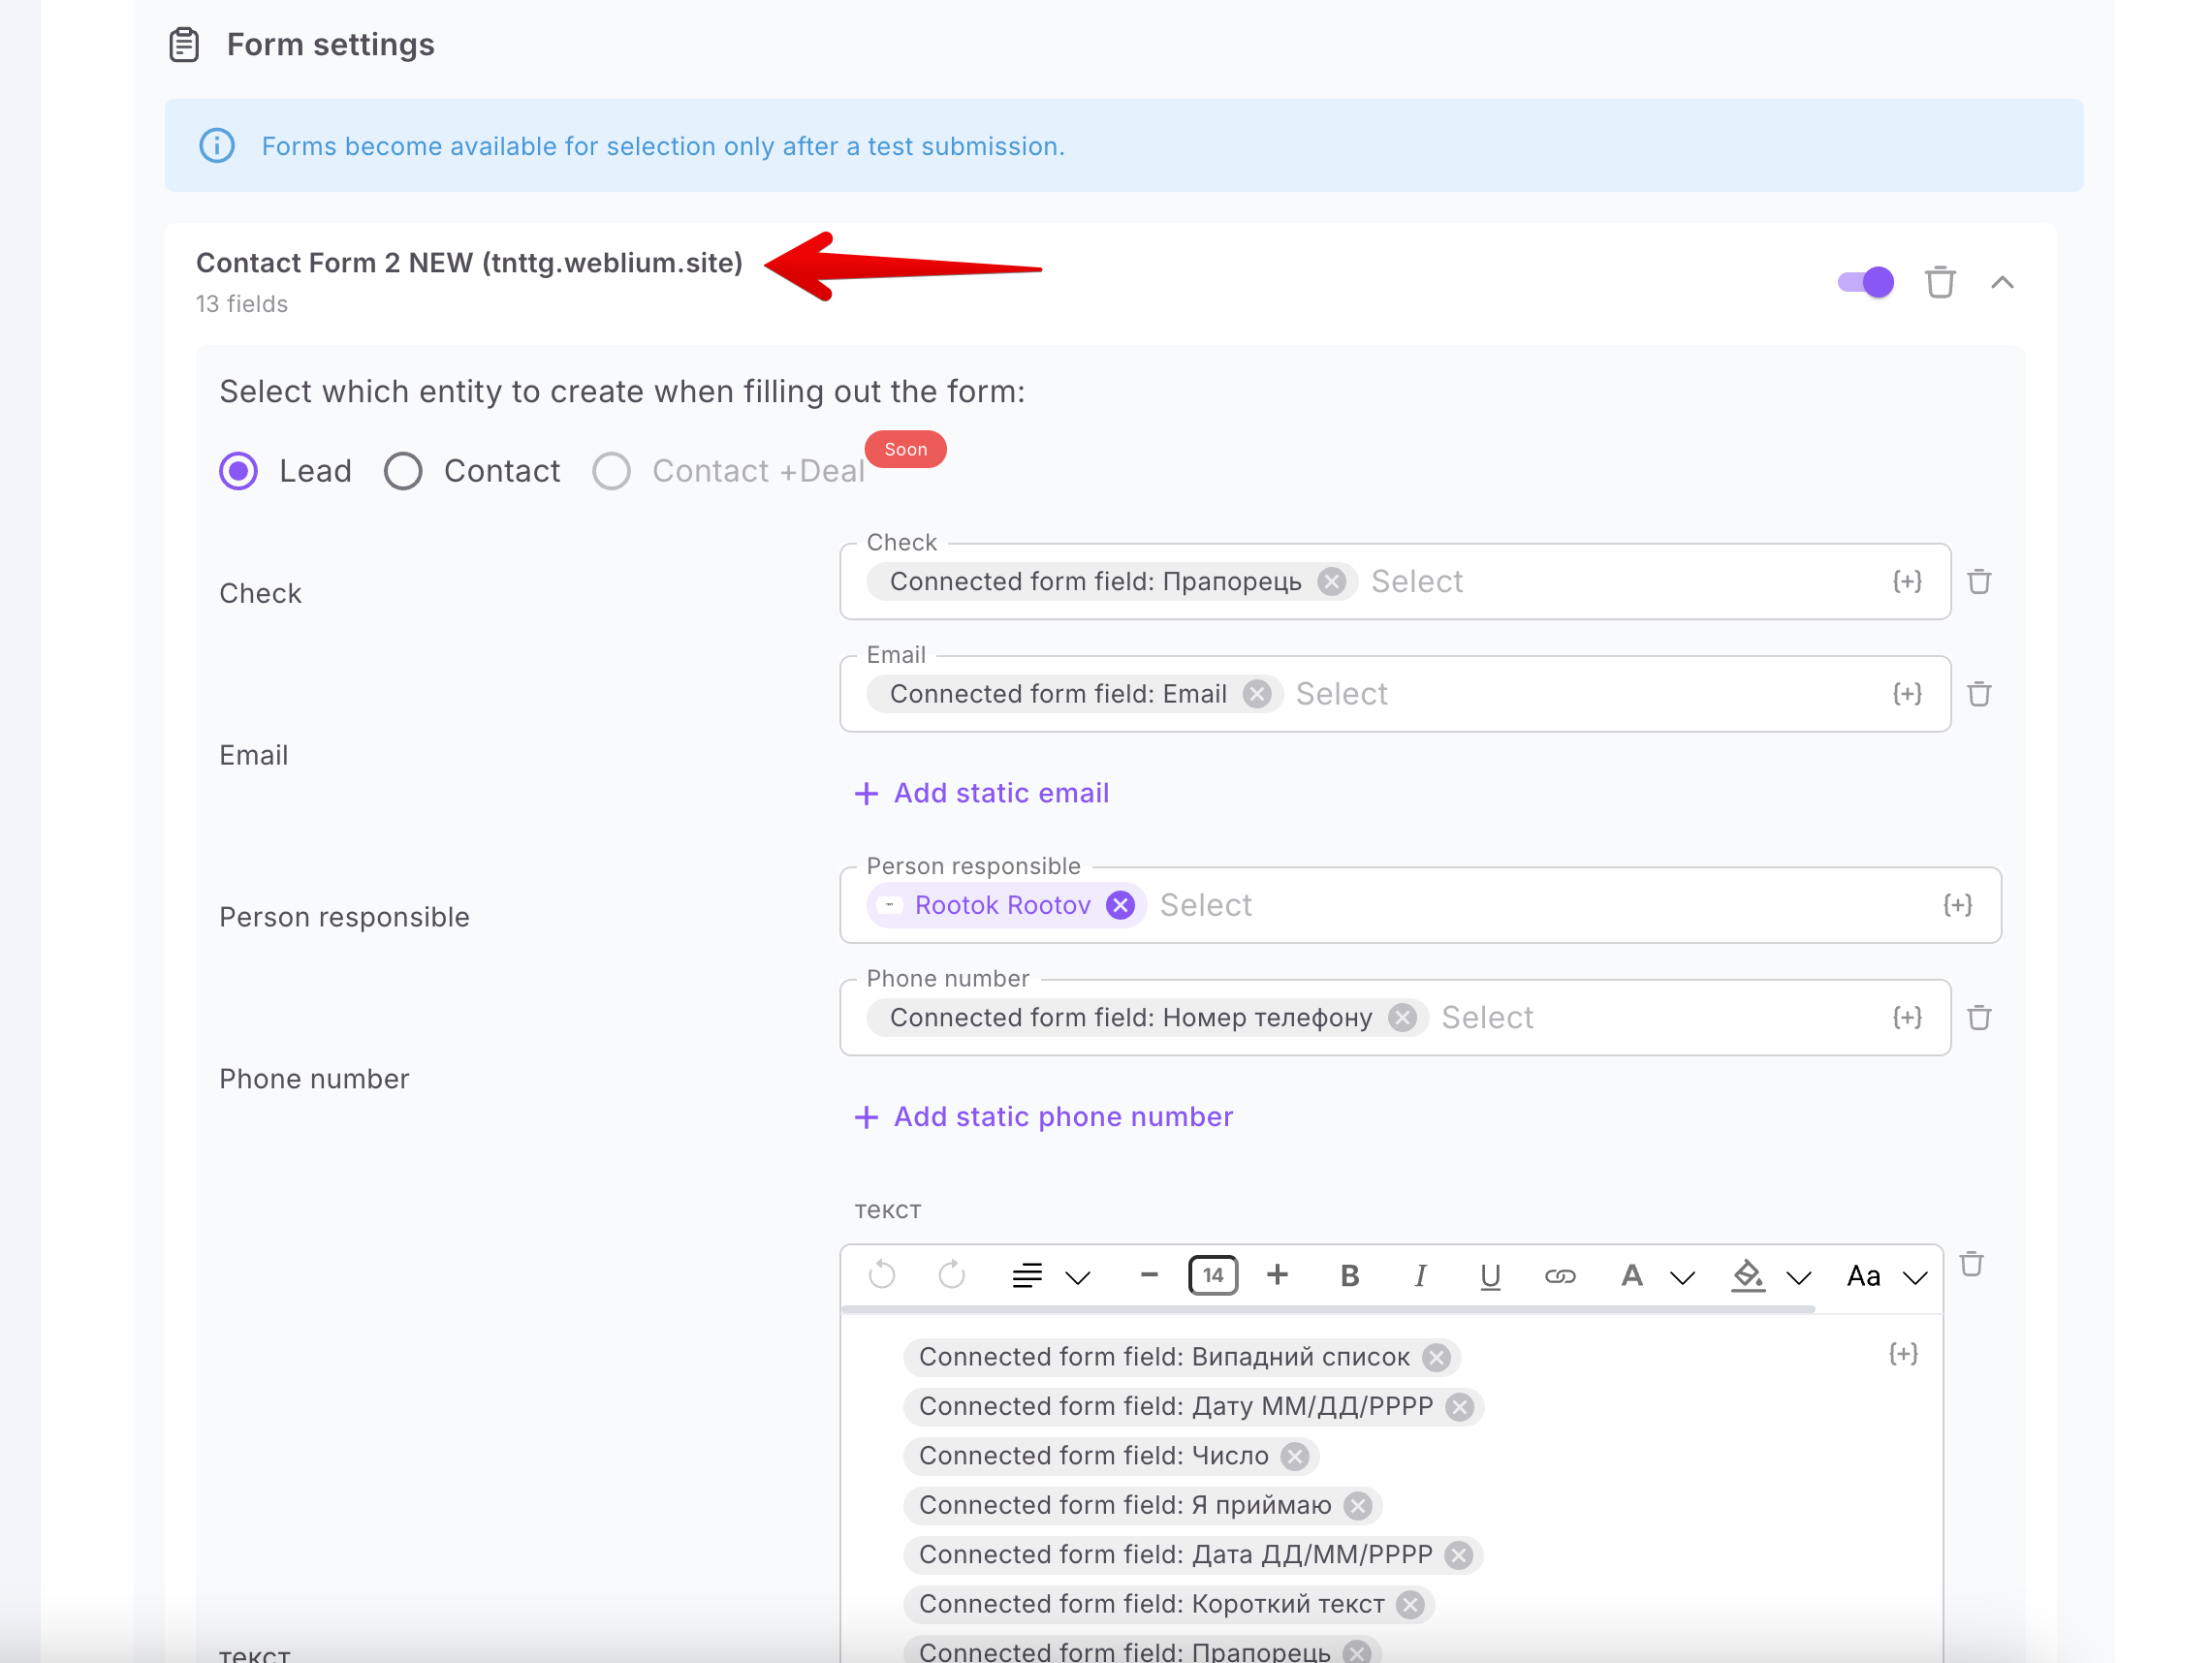
Step 2. Configure submission transfer and field mapping
Next, configure which data from the Weblium form should be transferred to the corresponding Uspacy fields.
For each added form, select which CRM record should be created when the form is submitted—Lead or Contact (1). Then configure how its fields should be populated (2).

Use the {+} button to add:
- Default field — a system value in Uspacy that can be used to populate a CRM field. For example, you can use a default field to automatically generate the name of a Lead or Contact.
- Connected form field — a specific field from the Weblium form and the value entered by the user when completing it. For example, a name, phone number, email address, text message, selected list value, and so on.
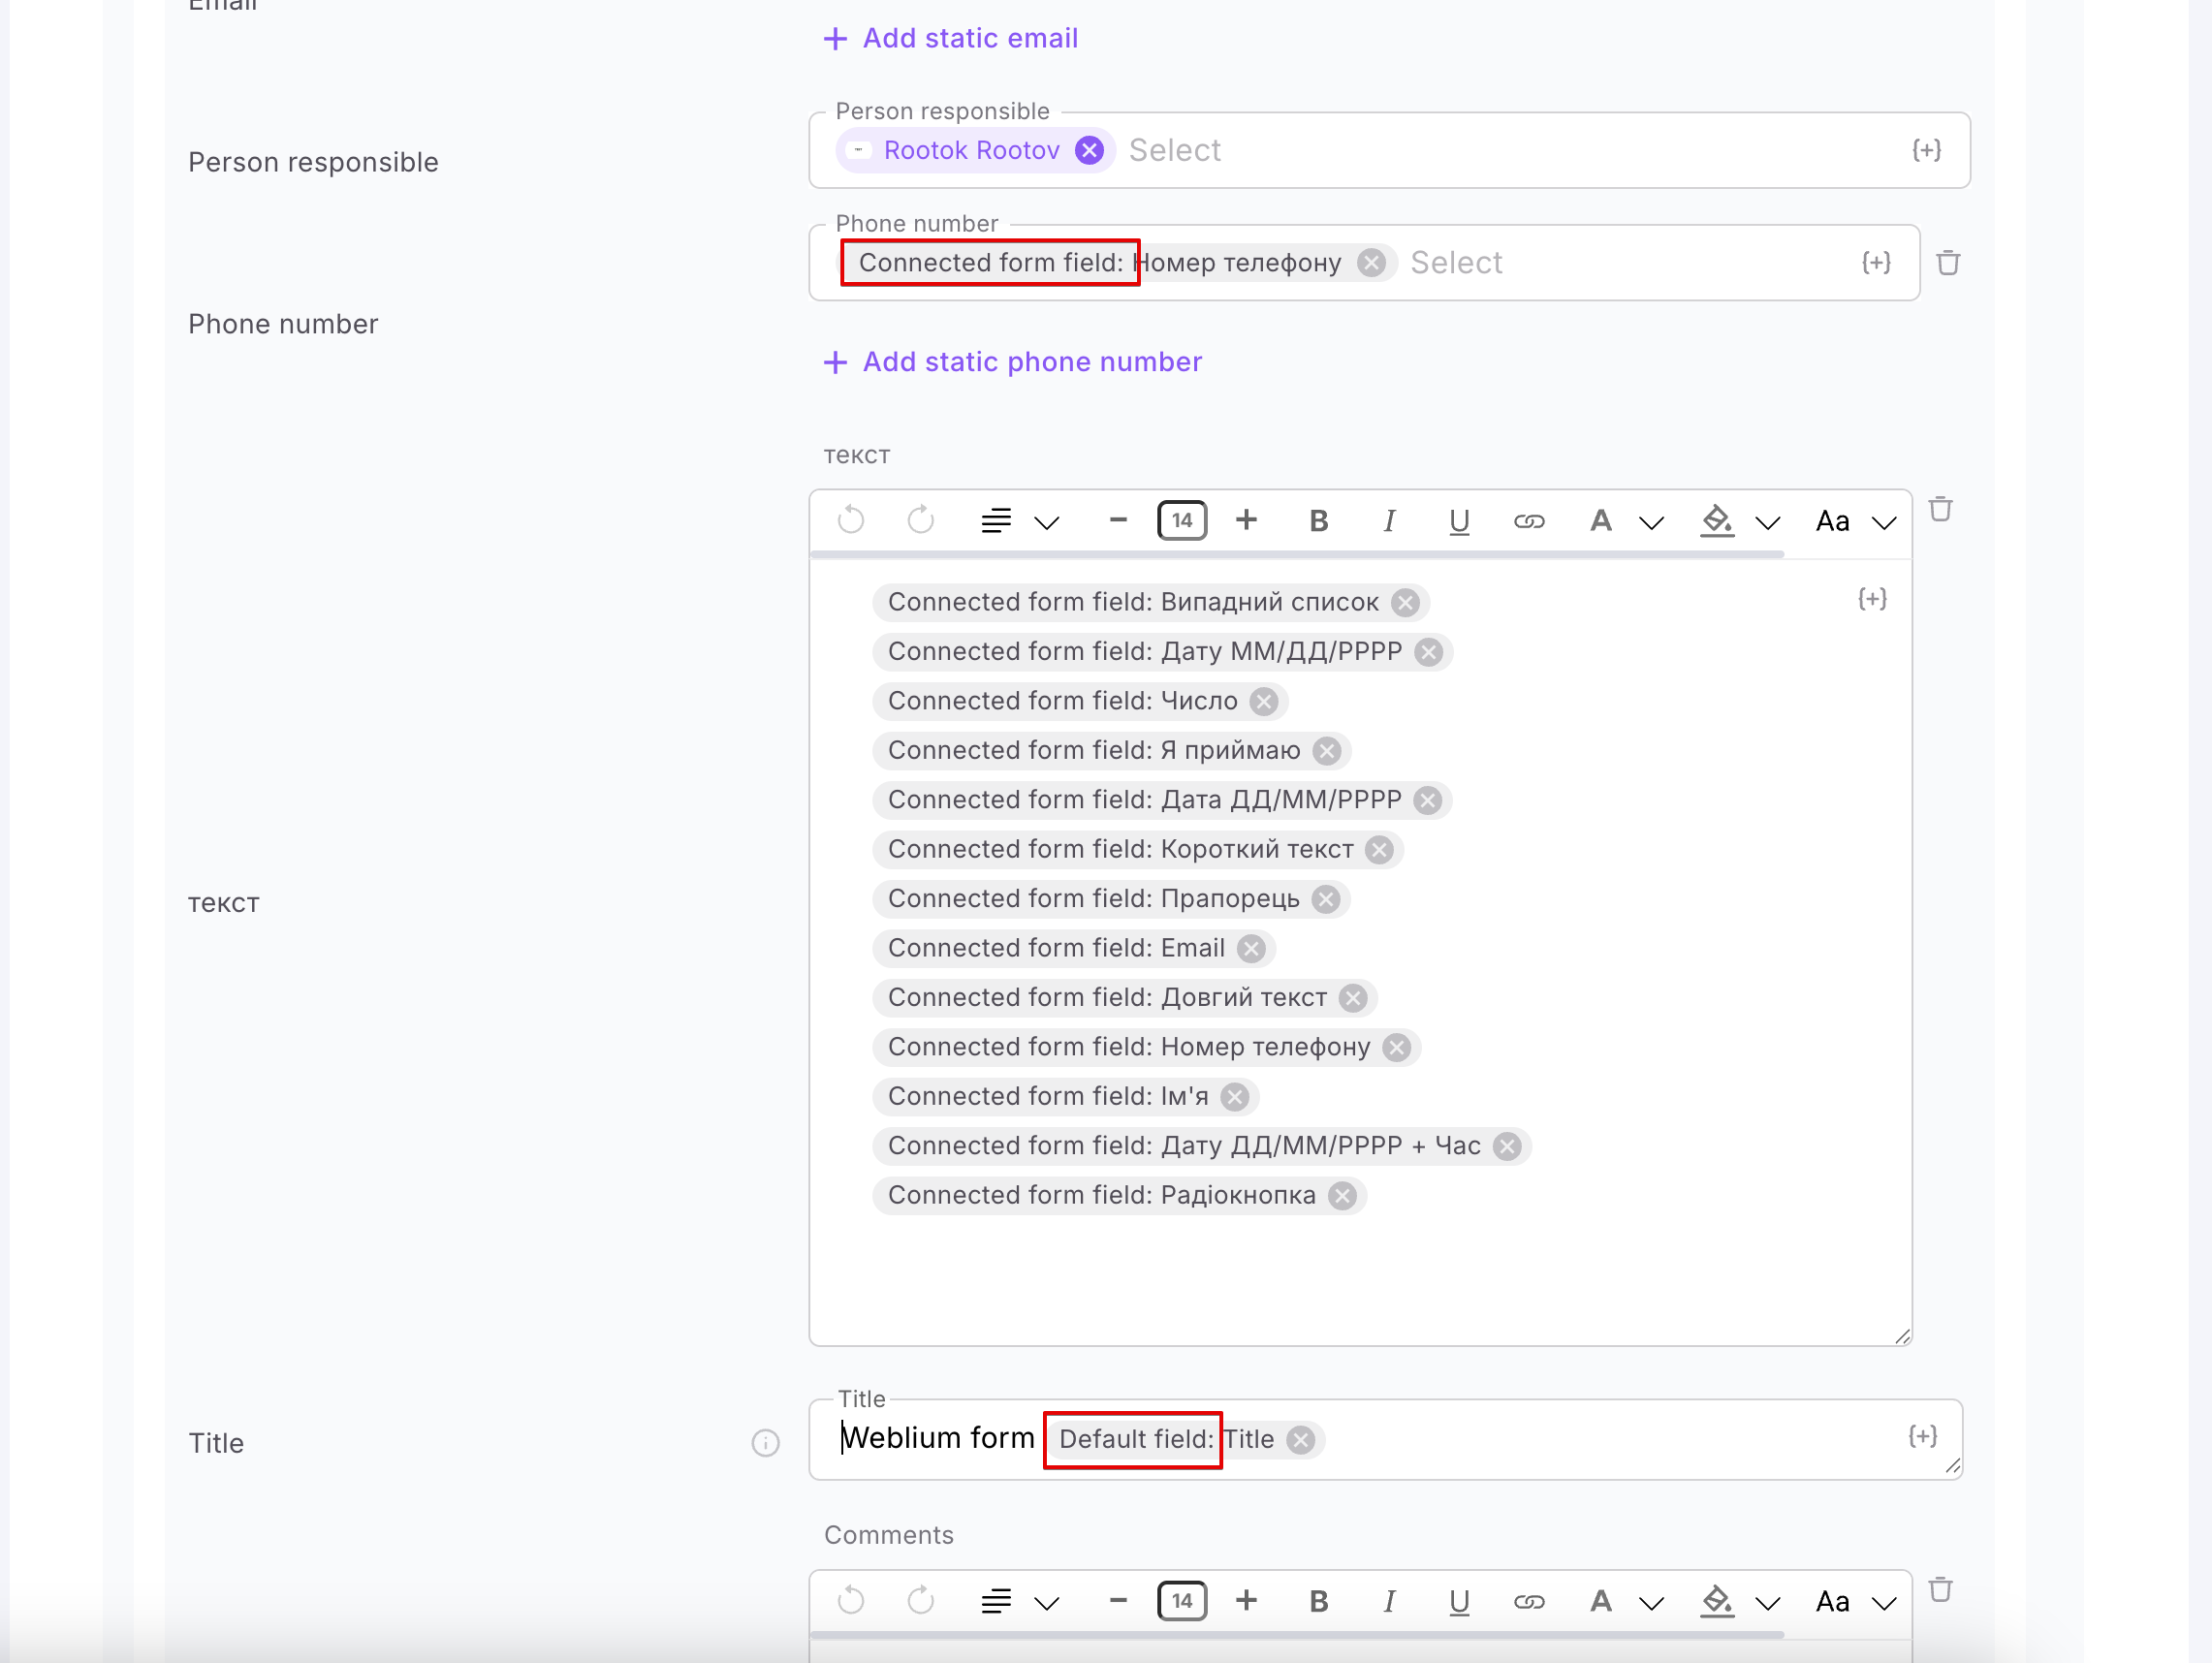
💡 Please note:
- A single field from a Weblium form does not have to be mapped to just one Uspacy field. If needed, its value can be transferred to multiple Uspacy fields at the same time.
- Similarly, a single Uspacy field can receive values from multiple Weblium form fields. For this type of mapping, we recommend using Text fields because Row fields are limited to 255 characters. If the submitted data exceeds this limit, part of the text will not be saved.
- For List fields, values will be transferred only if the options in Weblium and Uspacy match exactly. For example, if Uspacy contains the value “Rose,” the Weblium form must contain exactly the same value. If the wording differs—for example, “Rose” in Weblium and “Roses” in Uspacy—the value will not be mapped.
Step 3. Save the form settings
Once you have finished mapping the fields, click Save.

Done! ✅
New submissions from the connected Weblium form will now be automatically transferred to your CRM according to the configured settings.
Managing connected forms
All added forms are displayed in the Form settings section.
If needed, you can temporarily disable a form using the toggle.
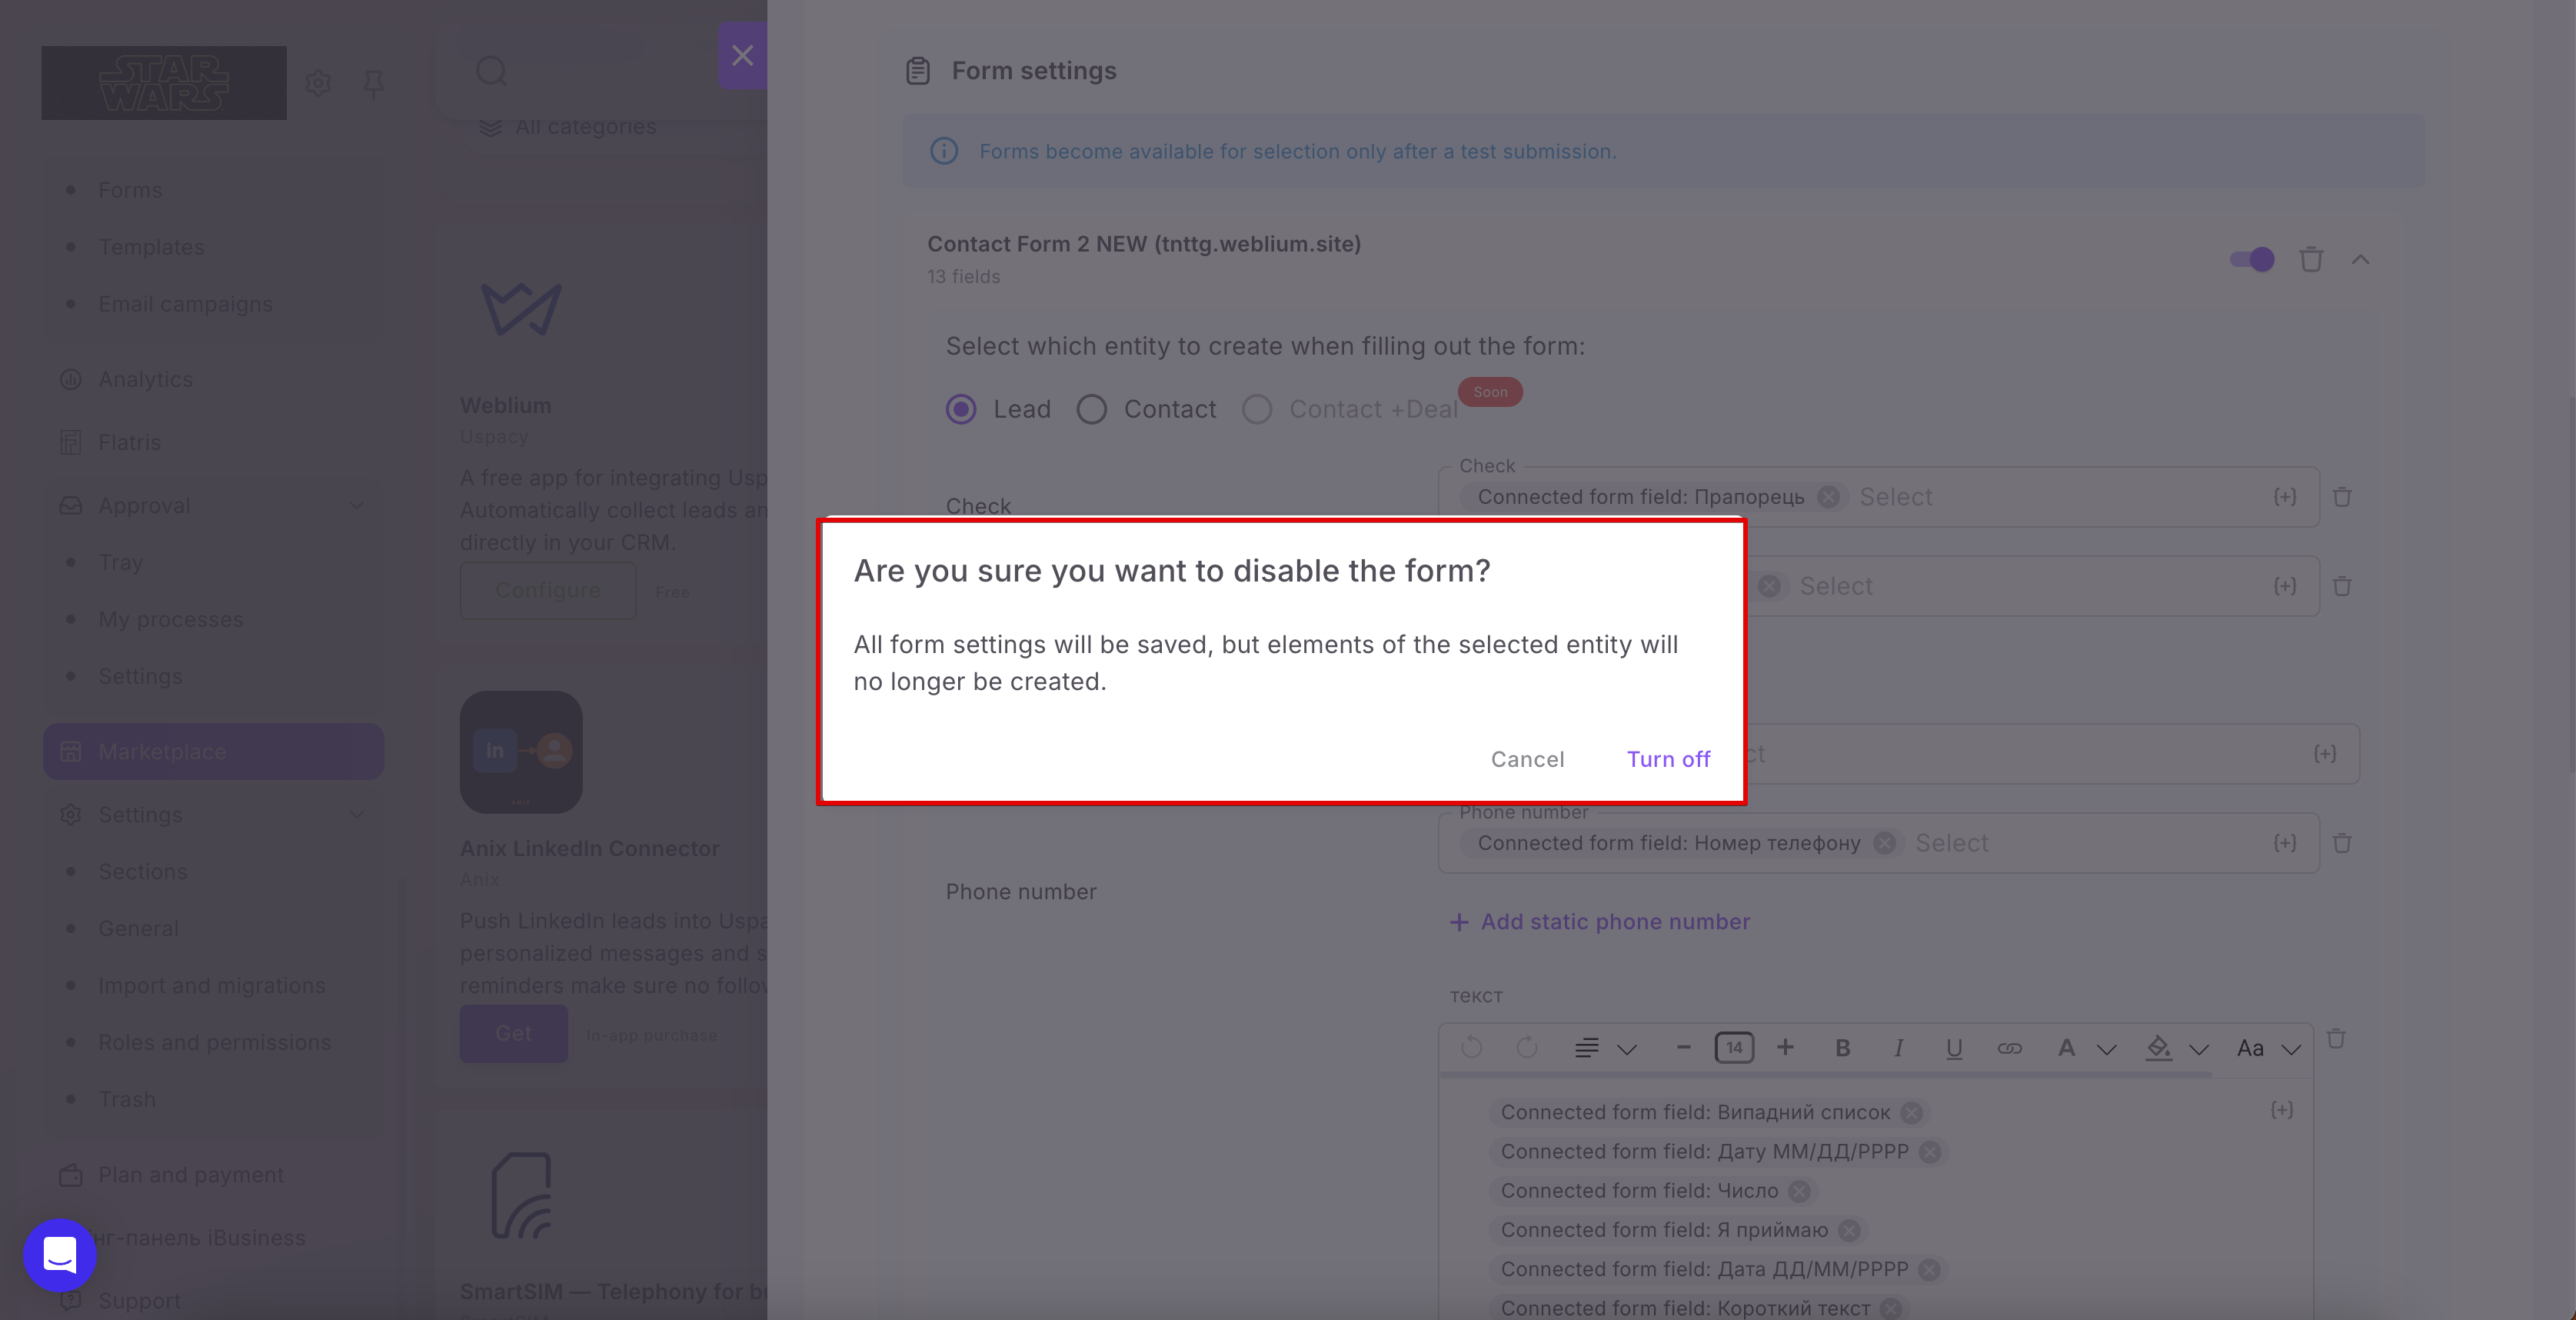
In this case, all of the form’s settings will be preserved, but no new CRM records of the selected type will be created when the form is submitted.
To resume transferring submissions, simply enable the form again.
You can also disconnect a form by clicking the trash can icon.

In this case, the form will become inactive, and all of its current settings will be deleted. If you need to connect the form again later, you will have to configure the field mapping again.
How does it work?
Once the integration is fully configured, it automatically transfers online store orders and form submissions from Weblium to Uspacy.
🟣 Online store orders
When a client places an order in Weblium, the data is transferred through the Store webhook.
In Uspacy, a Contact and an associated Deal are created.
The Deal is added to the pipeline and stage selected during setup, while the configured default source and person responsible are applied to the created records.
This means managers no longer need to manually transfer information about new clients and their orders from Weblium to the CRM.
🟣 Form submissions
When a user submits a connected form on a Weblium website, the data is transferred through the Forms webhook.
Uspacy automatically creates a Lead or Contact, depending on the settings configured for the specific form.
Data from the Weblium fields is transferred to the corresponding CRM fields according to the configured field mapping.
As a result, the Uspacy and Weblium integration makes it easy to collect website orders and form submissions directly in your CRM. Your team can manage client data in one Space, respond to new inquiries faster, and work with them without manually transferring information between services.
If you have additional questions or you need to contact the support, send a request to this email [email protected]
Created: October 2, 2026 / Updated: October 5, 2026