
Typeform is a service for creating online forms, surveys, and questionnaires that help you collect contact information and inquiries from potential customers.
The Uspacy integration allows you to automatically transfer responses from these forms to your CRM. When someone submits a completed form, a lead or contact is automatically created in your Uspacy Workspace with the relevant information. Your team can start working on the inquiry right away without spending time manually transferring data.
A free Typeform app is available in the Uspacy Marketplace.
Initial setup in Uspacy
In your Uspacy Workspace, go to the Marketplace and find the free Typeform app by Uspacy. Click Get.

Once the app is installed, its status will change to Installed, and the Get button will be replaced with a Configure button.

Open the app's settings page to review the information required to connect Typeform to Uspacy.

Typeform settings
To connect Typeform to Uspacy, you'll also need a Typeform personal access token. This is an access key that allows the app to retrieve form data and configure the transfer of responses.
To create one, click your avatar in the upper-right corner of Typeform and select Account settings.

Next, go to Personal tokens and click Generate a new token.

In the token creation window, enter a name in the Token name field. For example, you can use Uspacy to make it easy to identify the token's purpose later.

To configure access permissions, select Custom scopes:
- Keep the Read permissions enabled to allow data retrieval.
- Disable the Write permissions in all sections except Webhooks.
- In the Webhooks section, keep both Read and Write permissions enabled.

Once you've configured the permissions, click Generate token and copy the generated key using the copy icon.


💡 Important: Typeform displays the token value only once. Make sure to copy it before closing the window, as you'll need it to connect Typeform to Uspacy. If you lose the key, you'll need to generate a new one.

Make sure you have already created the Typeform forms whose data you want to transfer to Uspacy CRM. Add the necessary fields to collect contact information and user responses. When configuring the integration, you'll be able to select these forms and specify which CRM fields should store the submitted information.
Uspacy settings
Return to the Typeform app settings in Uspacy. Under Connected accounts, enter the details for your new connection:
- Channel name — Enter any name that will help you identify the connection. For example, Typeform: Feedback.
- Personal Token — Enter the access key you created and copied in Typeform.
Click Save.

Once the connection is successfully established, the status next to its name will change to Connected, and the Form settings section will become available below.

Click Add forms and select the forms whose responses you want to transfer to Uspacy. You can use the search bar to find a specific form more quickly.


Each selected form will appear in the settings section. First, choose which CRM entity should be created when someone submits the form: Lead or Contact.

Next, complete the required fields. For leads, these are Title and Person responsible:
- In the Title field, specify how newly created leads should be named. You can enter static text or use dynamic values available through the {+} button. For example, the lead name can be generated using the standard ID and Title fields.
- In the Person responsible field, select the team member responsible for handling new inquiries.
Click Add a field and select the CRM fields where you want to store information received from Typeform.
Then, assign the appropriate value to each field. To insert a user's form response, click {+} and select the corresponding field from the connected Typeform form.
For example, you can configure the Feedback form to transfer data as follows:
- First name from Typeform → First name in Uspacy
- Last name → Last name
- Phone number → Phone number
- Comments → Comments


When someone submits the form, Uspacy will automatically populate these CRM fields with the information they provided. For example, the phone number entered in the Phone number field in Typeform will appear in the Phone number field of the lead record.
You can also use static values when needed. These are values that remain the same for every record created through a particular form.
Review your settings and click Save at the bottom of the form settings section.

To connect additional forms, click Add forms again and configure each form separately.

How does it work?
Let's look at an example using the Feedback form, which we've configured to create leads.
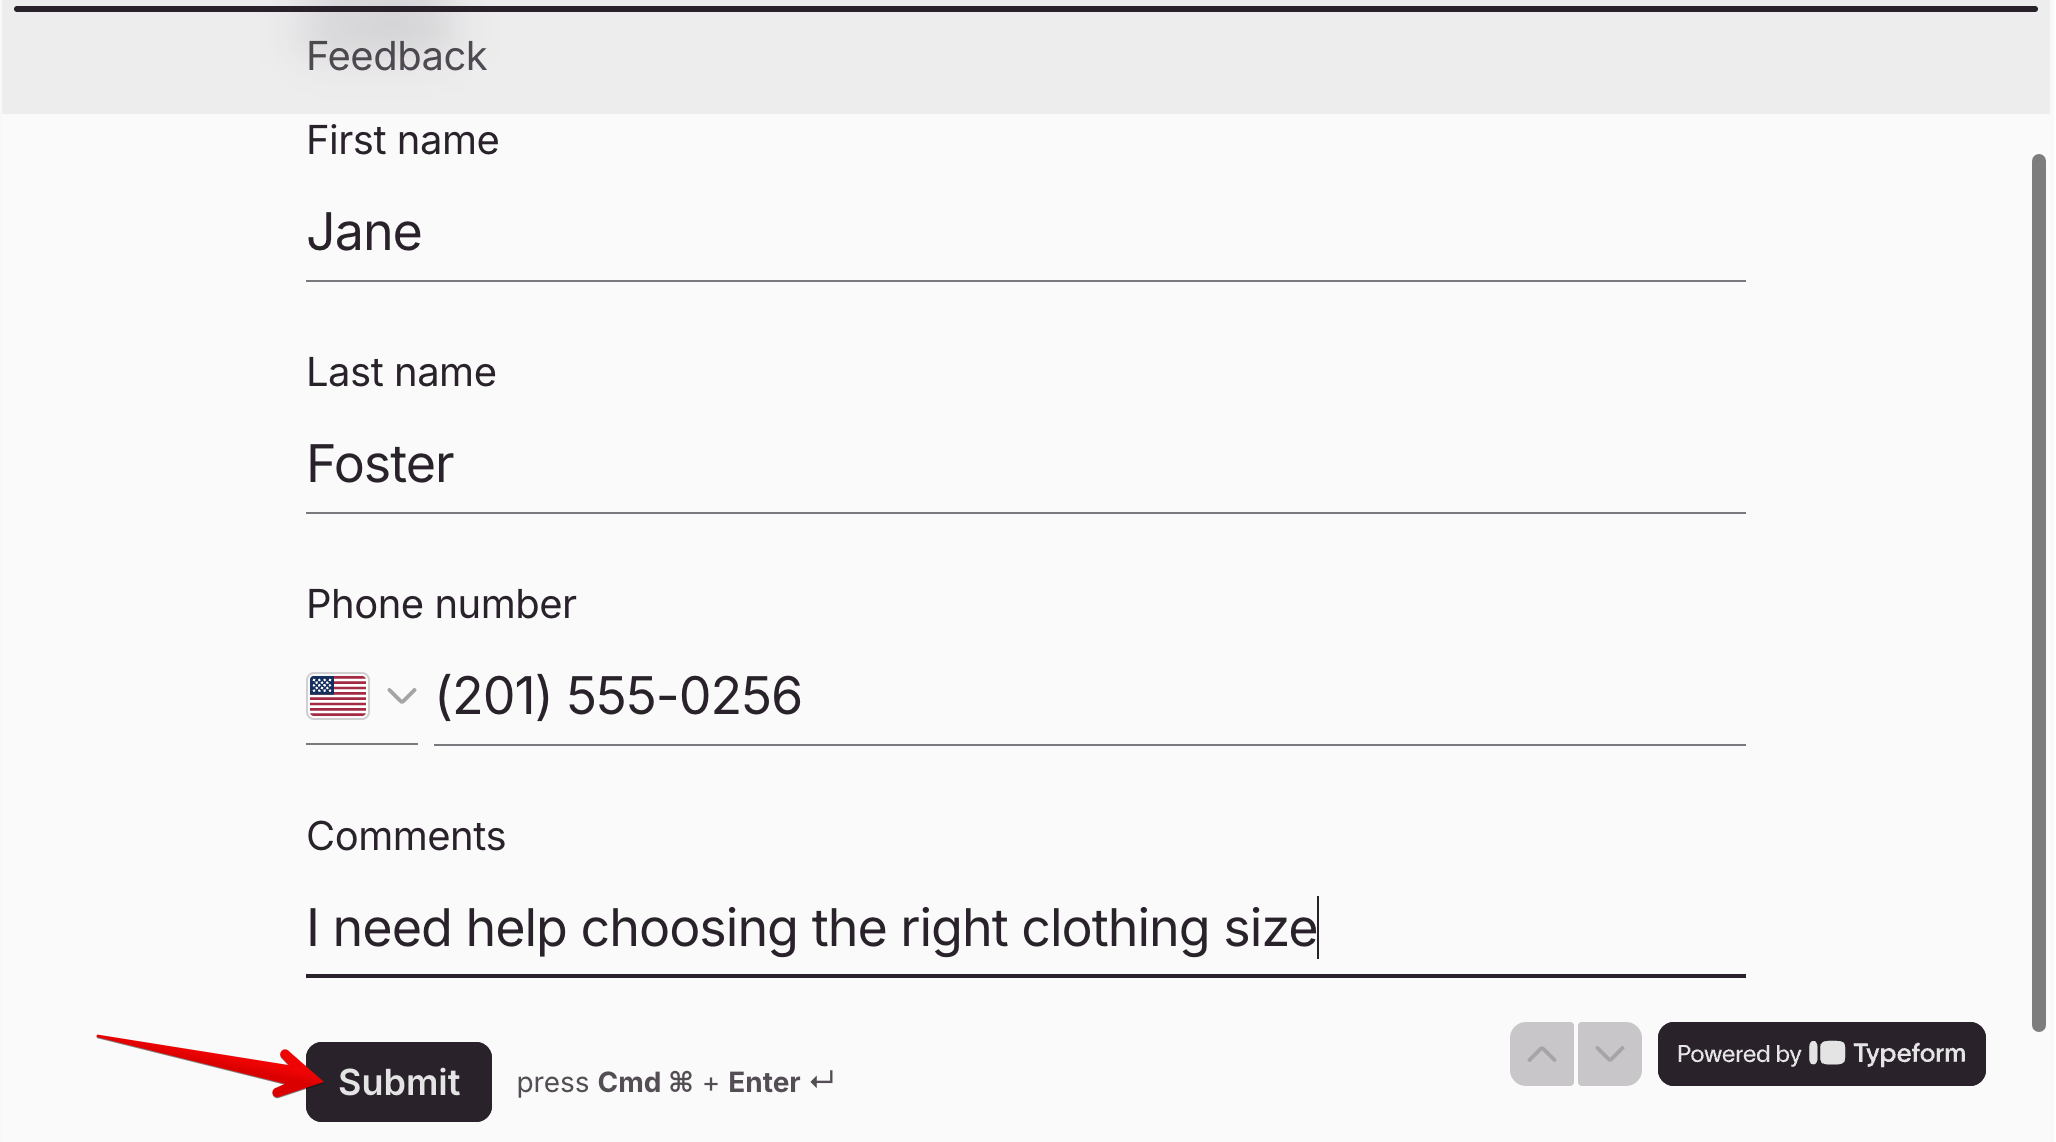
A customer opens the Typeform form, enters their first name, last name, and phone number, adds a comment, and submits the form.
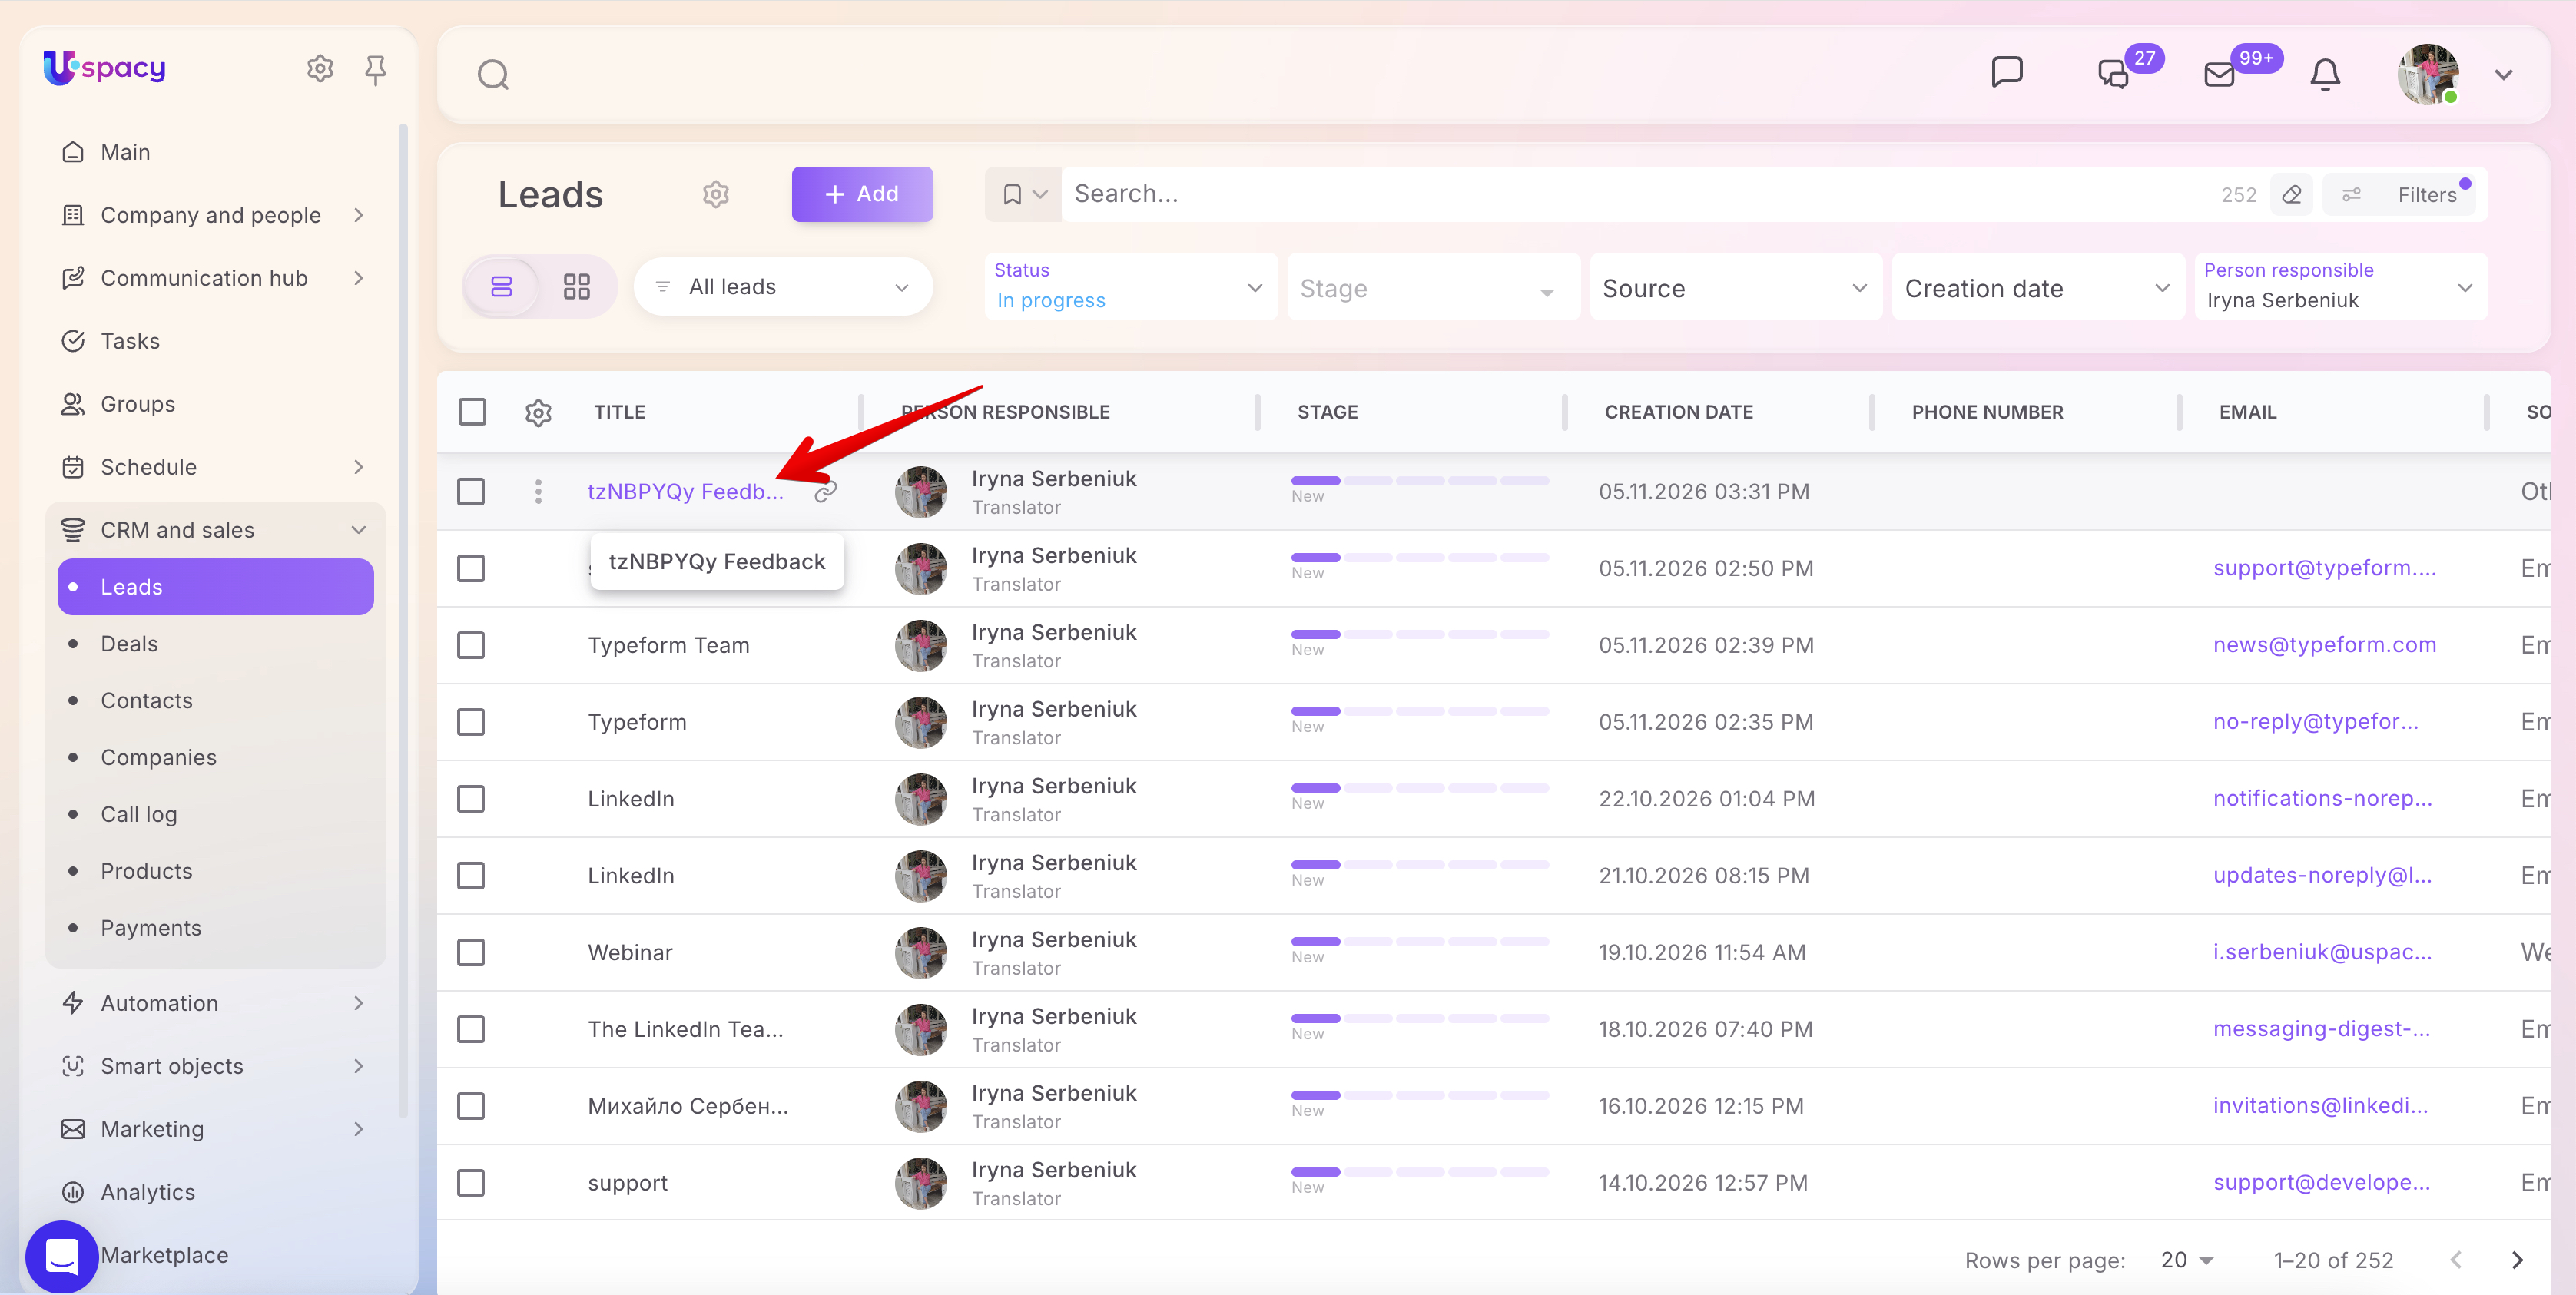
A new lead is automatically created in Uspacy CRM.
The customer's first name, last name, phone number, and comments are automatically added to the corresponding fields in the lead record based on the field mapping you configured. The lead is assigned to the team member selected during the integration setup.
Additionally, a note is automatically created in the lead record. It contains the form's name and the customer's responses, allowing the manager to review the entire inquiry in one place.
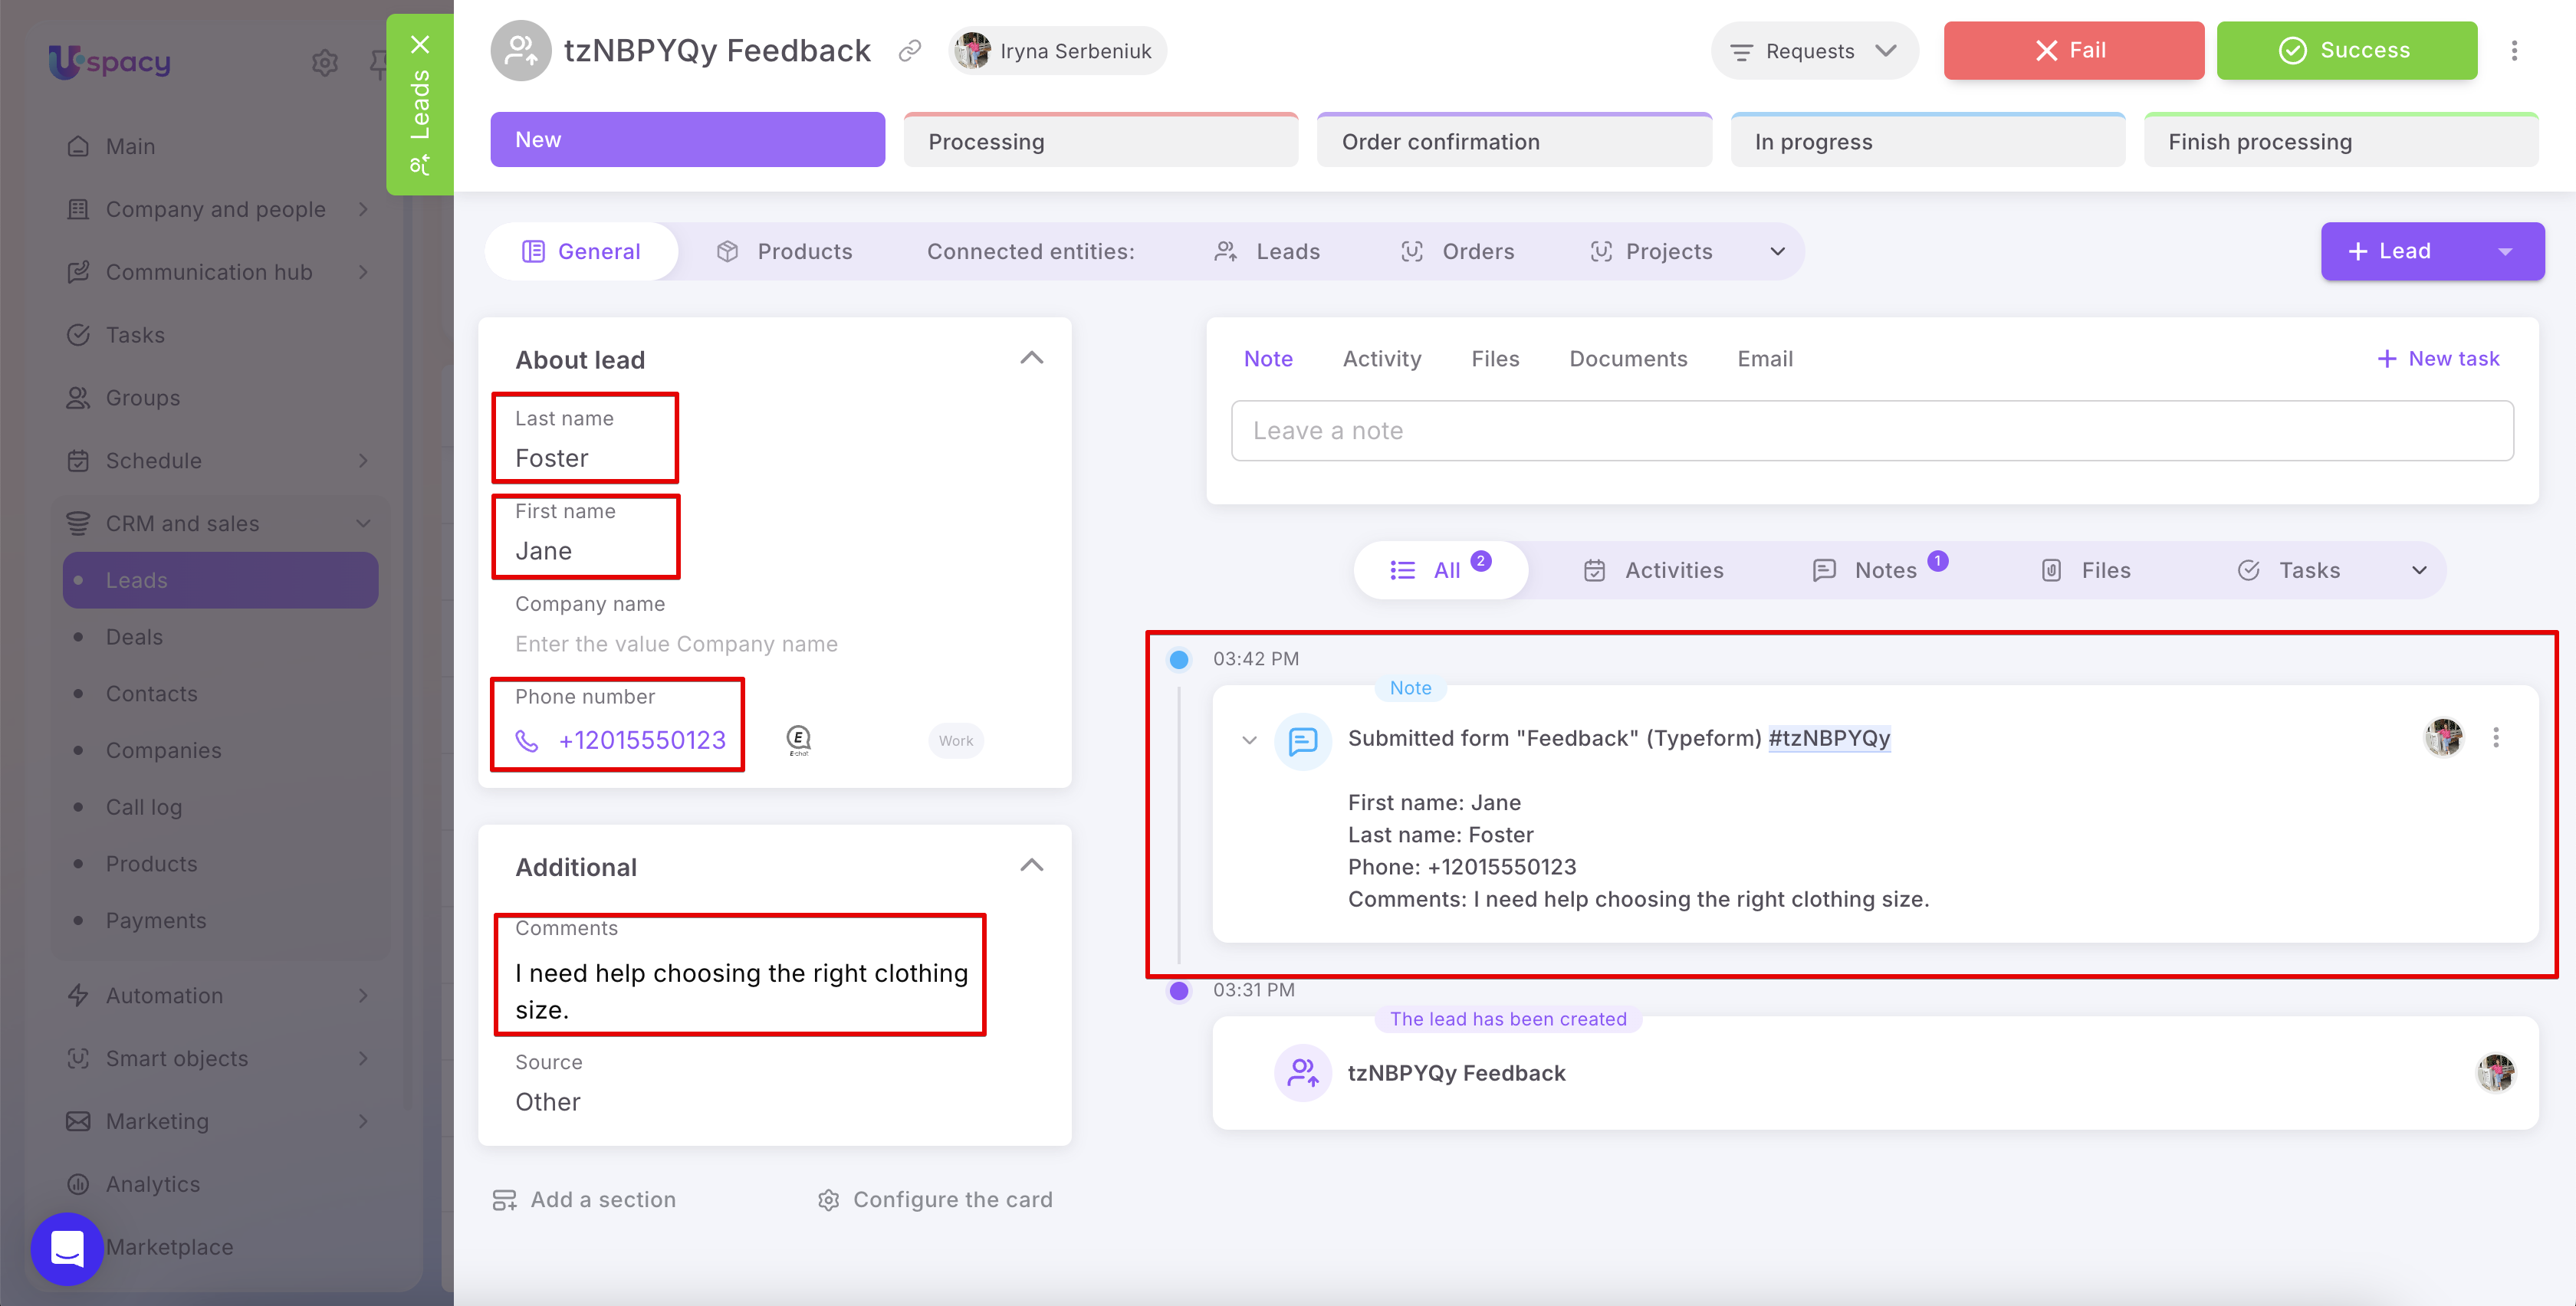
The manager can immediately open the lead record, review the inquiry, and contact the customer. All the necessary information is already available in the Uspacy Workspace.
Managing a form
If you need to temporarily stop transferring submissions from a particular form, use the toggle next to its name to deactivate it and confirm your action. All settings will be saved, but no new leads or contacts will be created from that form while it is inactive. To resume data transfer, simply turn the form back on.
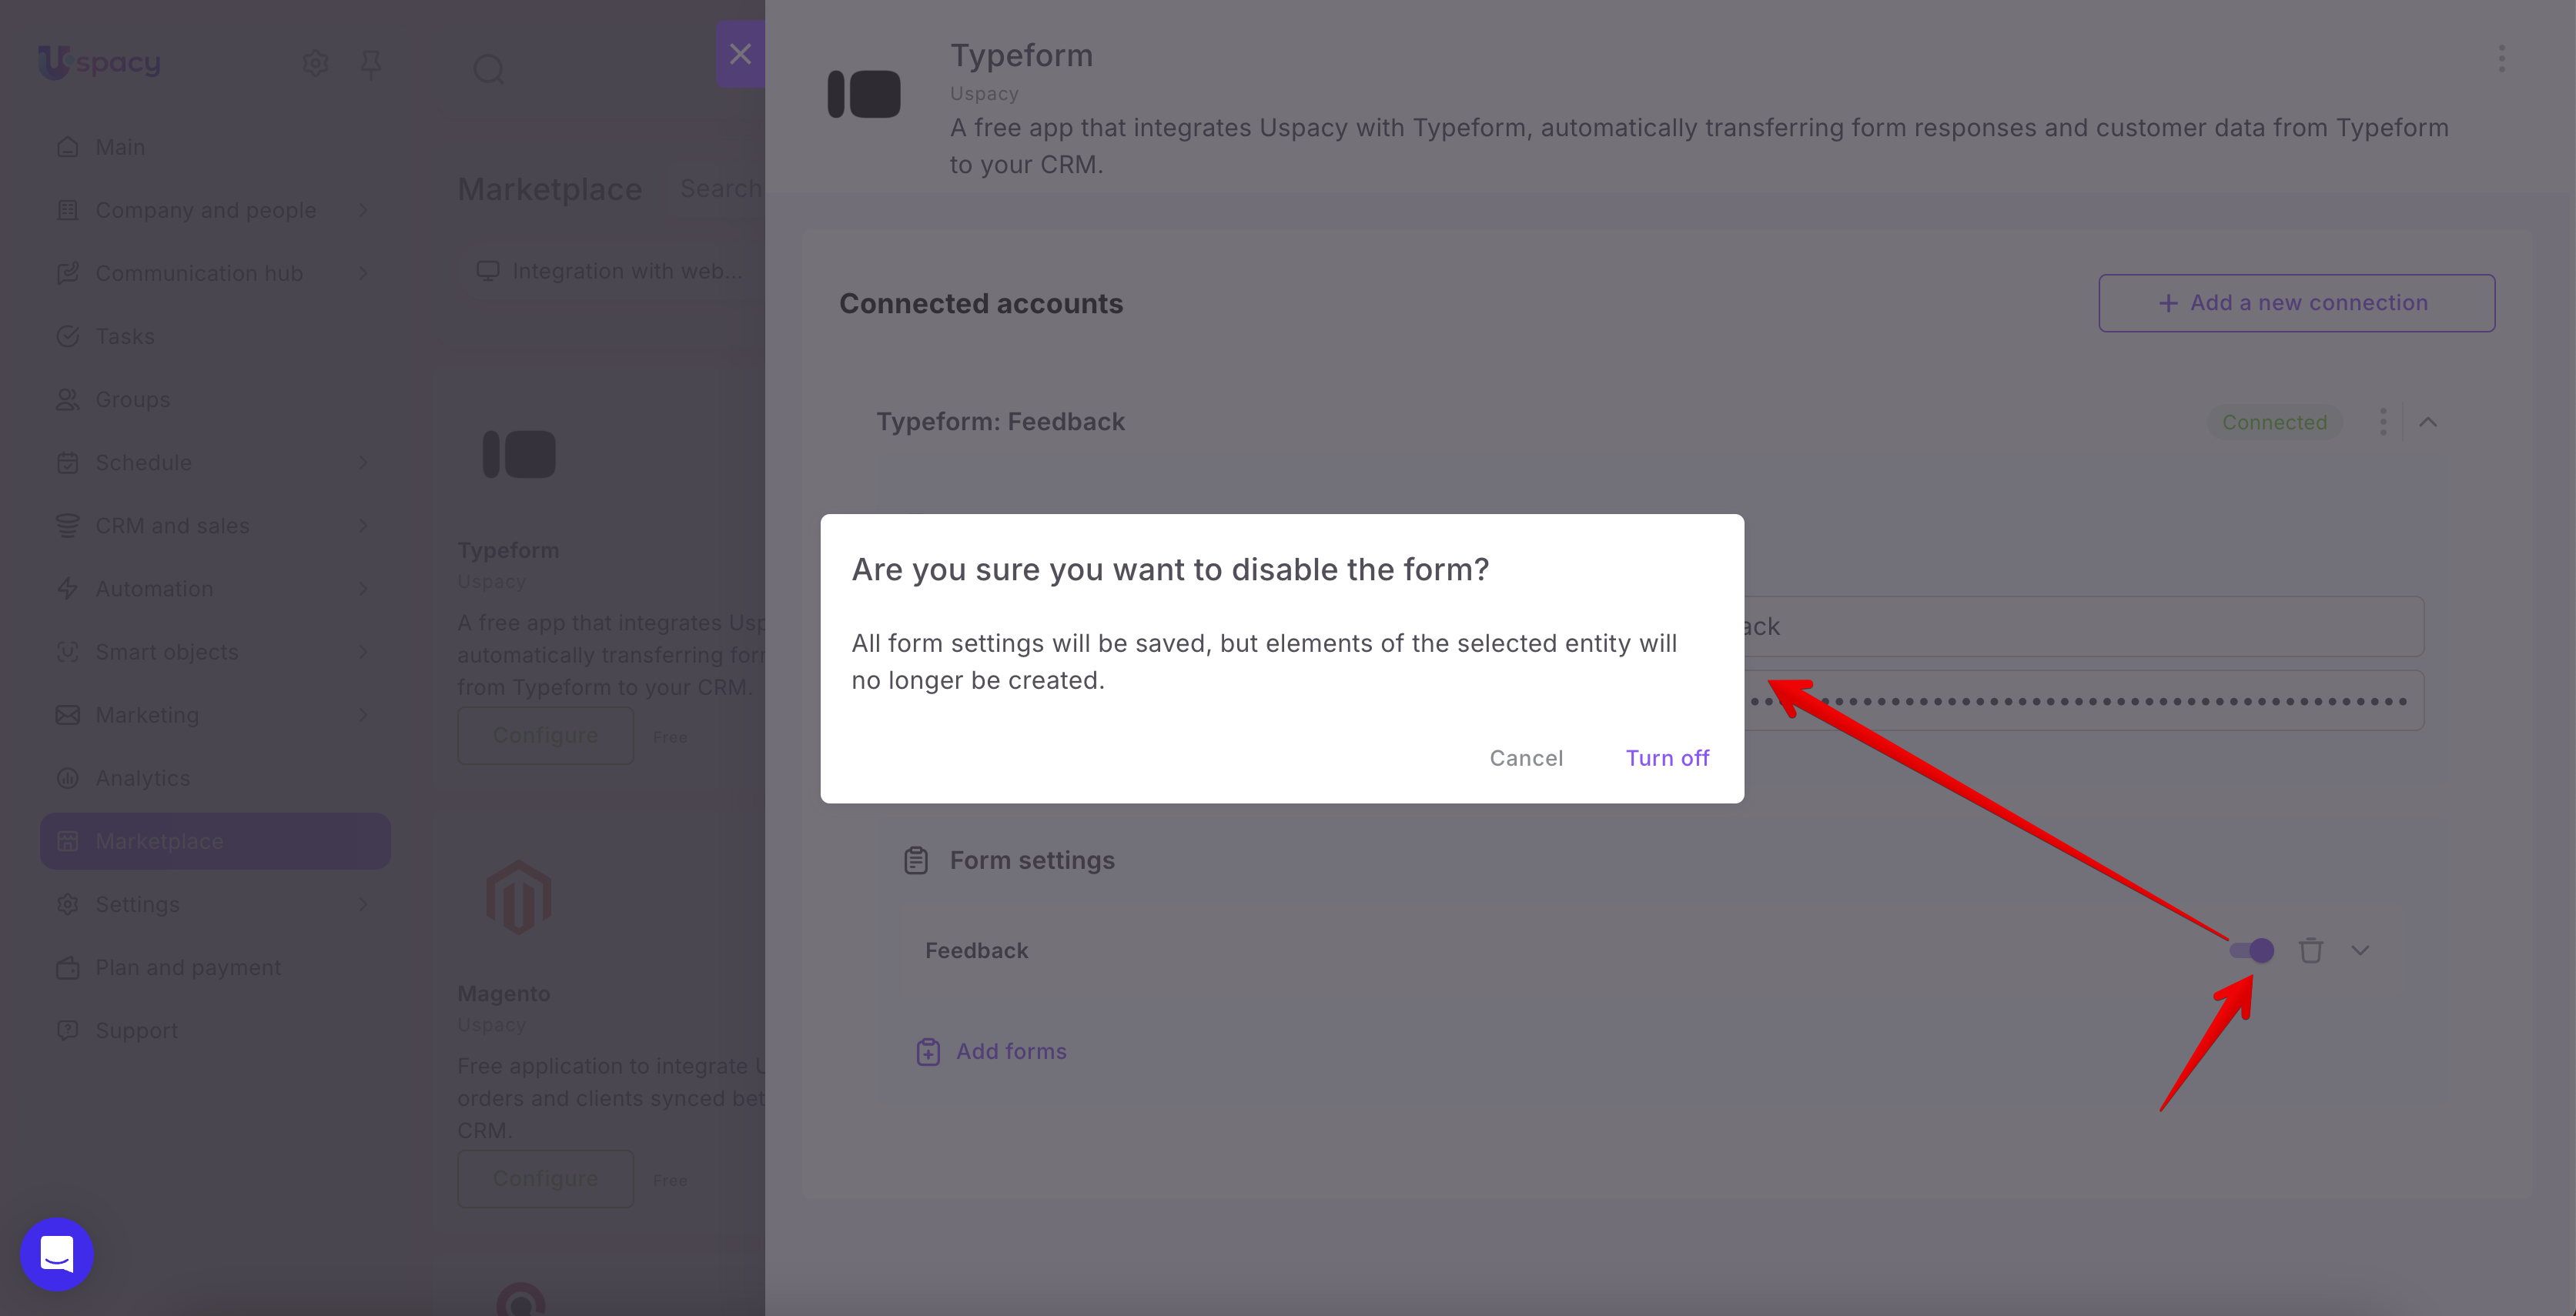

If you click the trash can icon and confirm the disconnection, the form will be removed from the list of connected forms, and all its existing settings will be deleted. If you add the same form again later, you'll need to select the CRM entity to create and configure the field mapping from scratch.
💡 Important: Deactivating or disconnecting a form in Uspacy only controls whether CRM records are created. The form itself remains available in Typeform.
The Typeform integration helps you automatically capture customer inquiries in Uspacy CRM and store customer responses in the corresponding record fields and a separate note. Your team gets all the information it needs without manually transferring data, allowing them to follow up with customers faster. Individual form settings also let you control which CRM records are created, who is responsible for handling them, and when new submissions are transferred.
If you have additional questions or you need to contact the support, send a request to this email [email protected]
Created: November 5, 2026 / Updated: November 5, 2026