To start working at Uspacy, you must first register your own Workspace.
You can go to the registration page in several ways:
- Through the button to create a new space on the Uspacy website.

2. By using the authorization form in any other already created Space.

The registration page looks like this:

Creating a Workspace
🟣 First you need to come up with a unique URL address for your Space.
This is a text field that contains only Latin letters, numbers and hyphens.

💡After filling out the field, the system checks the existence of such an address. If it is found, an error will be displayed. In this case, you need to come up with another unique address for the Space.
🟣 Next, you need to enter the email address that will be used for authorization in Uspacy in the future and will serve as the user's login.
❗️ Email addresses of domain zones .ru and .by are not allowed to register in the system.

💡You must enter a full and correct email address. That is, it is necessary to add the domain name of the server on which the mailbox is located after the @ symbol and enter it without mistakes. Otherwise, it will not be recognized by the system.

☝🏻Currently, the creation of each new Space requires its registration to a separate email address that has not been used in the system yet.
🟣 If you wish, you can enter your phone number right away. It will be saved in your profile.

💡 Before you enter the number, you can select the country code from the list. Alternatively, you can type the code in manually.

🟣 Next, check the box agreeing to the Terms of service and the Privacy policy.

💡 If you do not agree, the system will not allow you to go to the next step and create your own Space.

The second checkbox, namely the consent to receive marketing messages or special offers, is optional.

To go to the next step, click Create your Uspacy.

After that you will be immediately redirected to your Uspacy Workspace. Here you will need to complete the registration in order to start working.
Getting started with your Workspace
After creating your Workspace, you’ll see the initial setup form. It consists of three steps: Profile, Needs, and Team/Company.
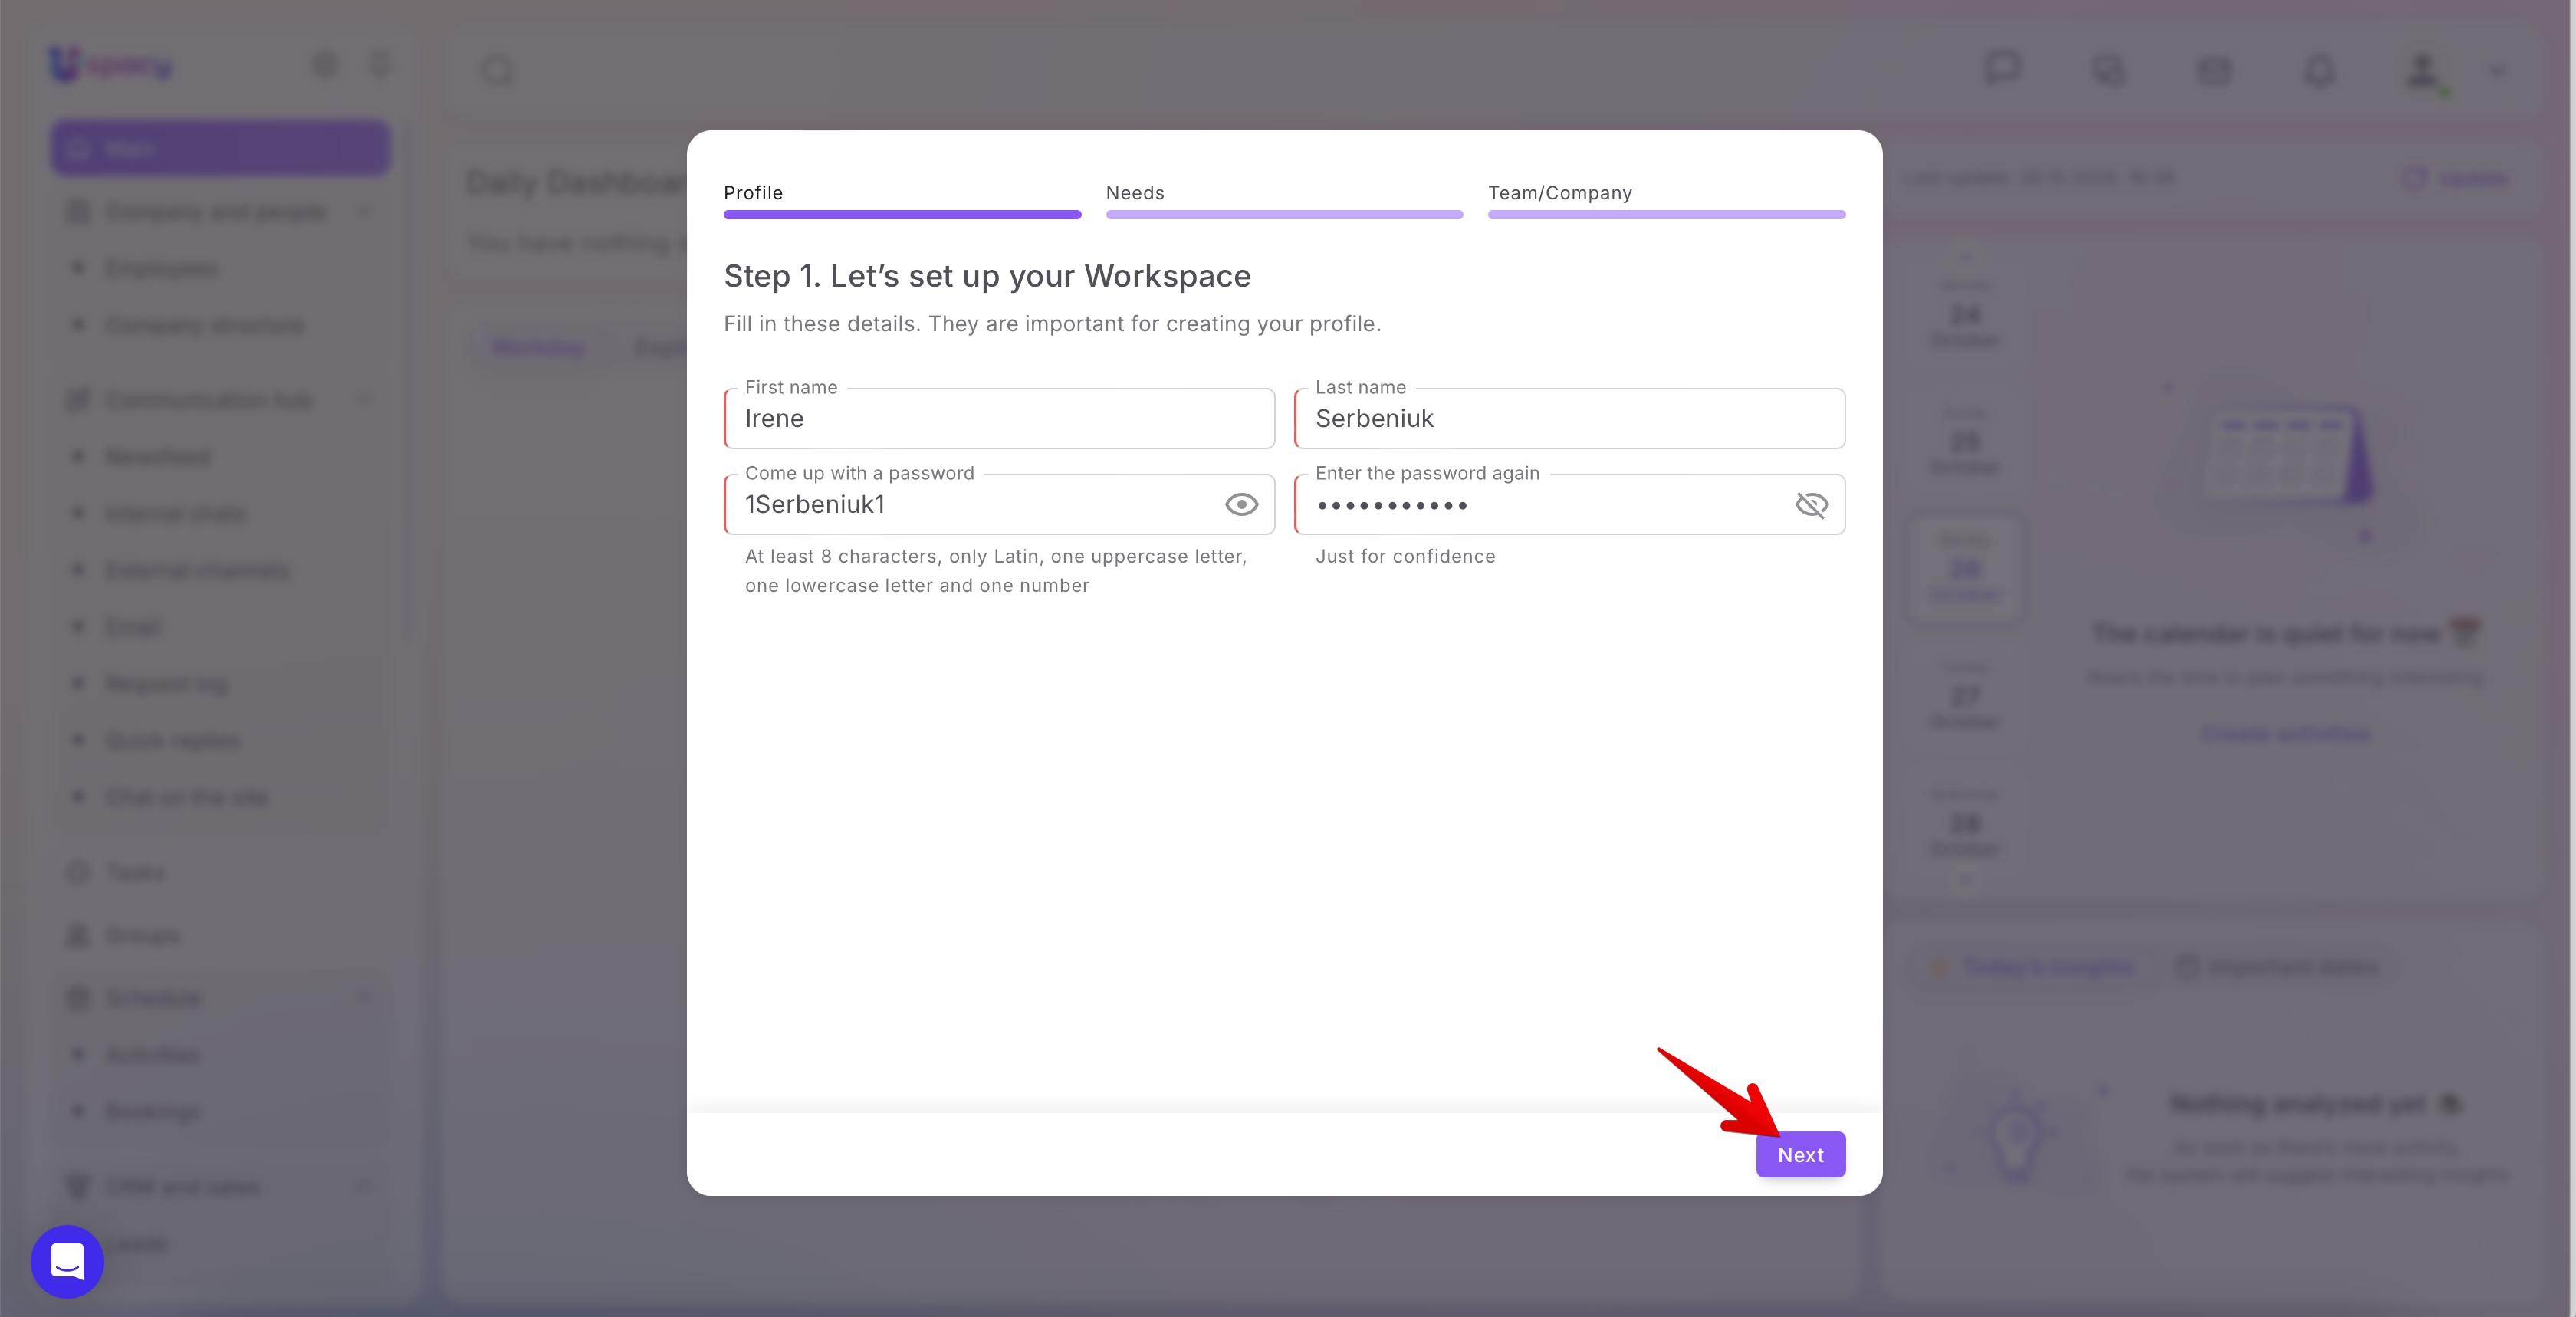
Step 1. Enter your profile information and create a password
Enter your first and last name. Next, create a password for signing in to your Uspacy account and enter it again to confirm.
Your password must be at least 8 characters long and include at least one uppercase Latin letter, one lowercase Latin letter, and one number.
If needed, click the eye icon to reveal your passwords and make sure they match.
Once you’ve completed all the fields, click Next.
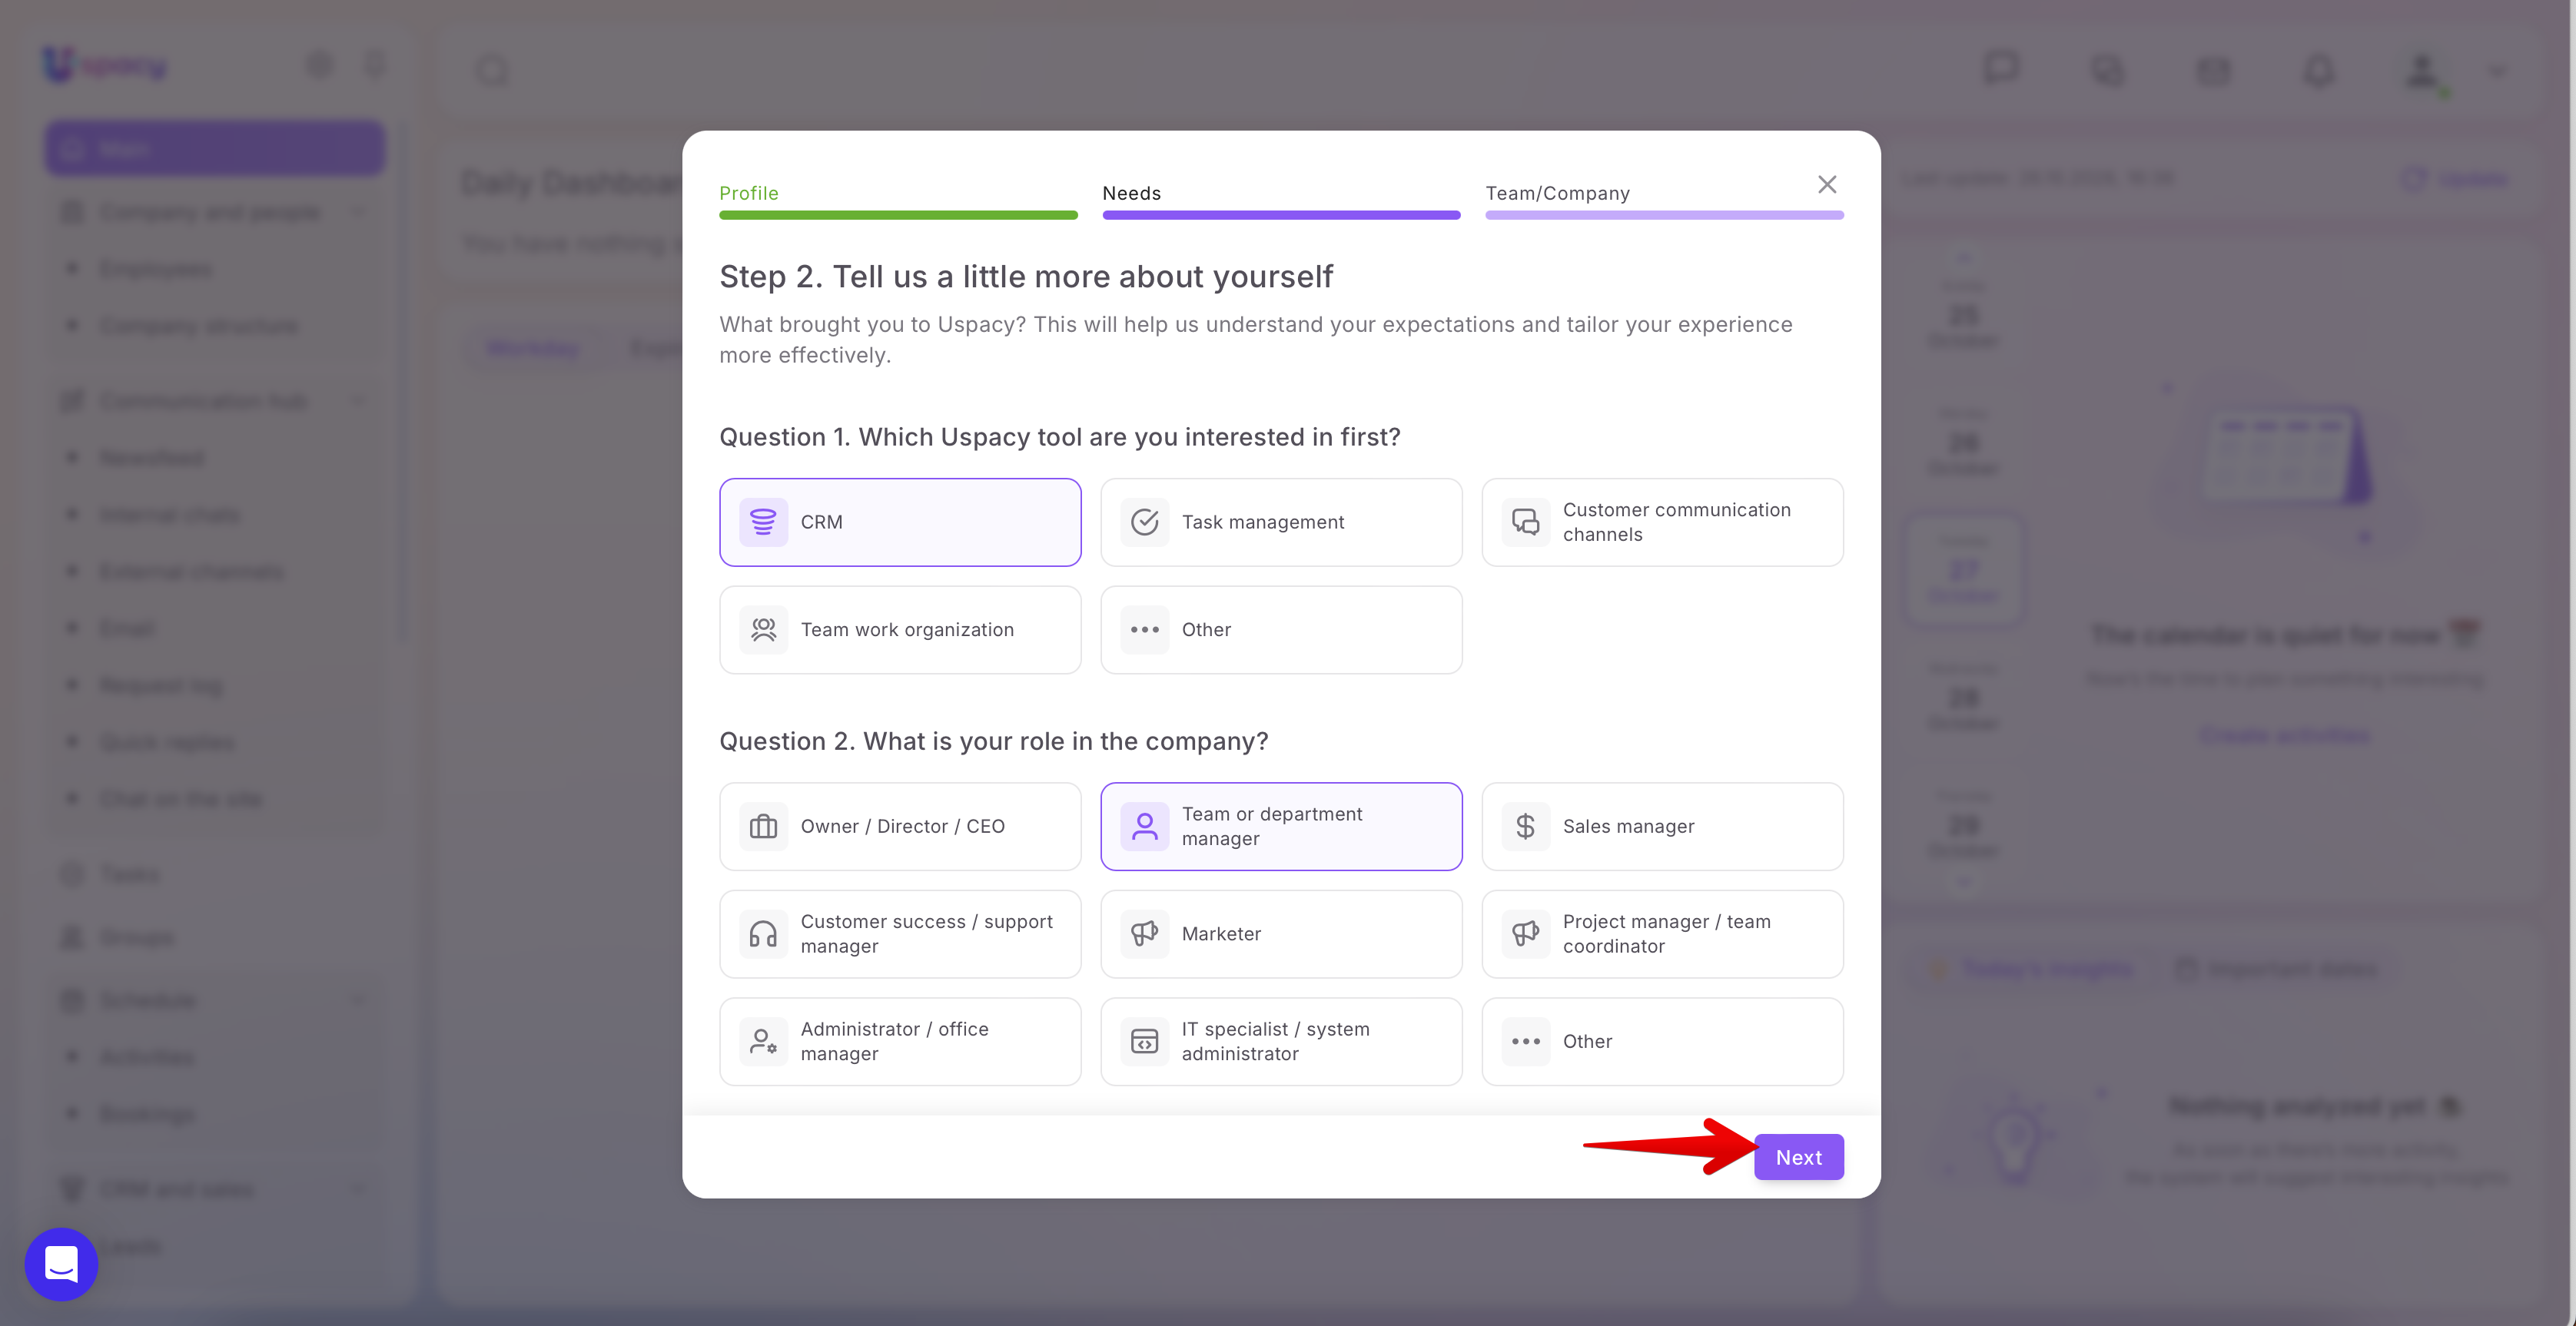
Step 2. Tell us a little more about yourself
On the Needs step, select the Uspacy tool you’re most interested in:
- CRM
- Task management
- Customer communication channels
- Team management
- Other — Select this option to enter your own answer in the field that appears.
You’ll also need to specify your role in the company. For example, you might be a business owner, team or department manager, sales manager, or marketer. If none of the listed options applies to you, select Other and enter your role.
Your answers will help us better understand your expectations for Uspacy and make your experience more relevant and useful.
Click Next to continue.
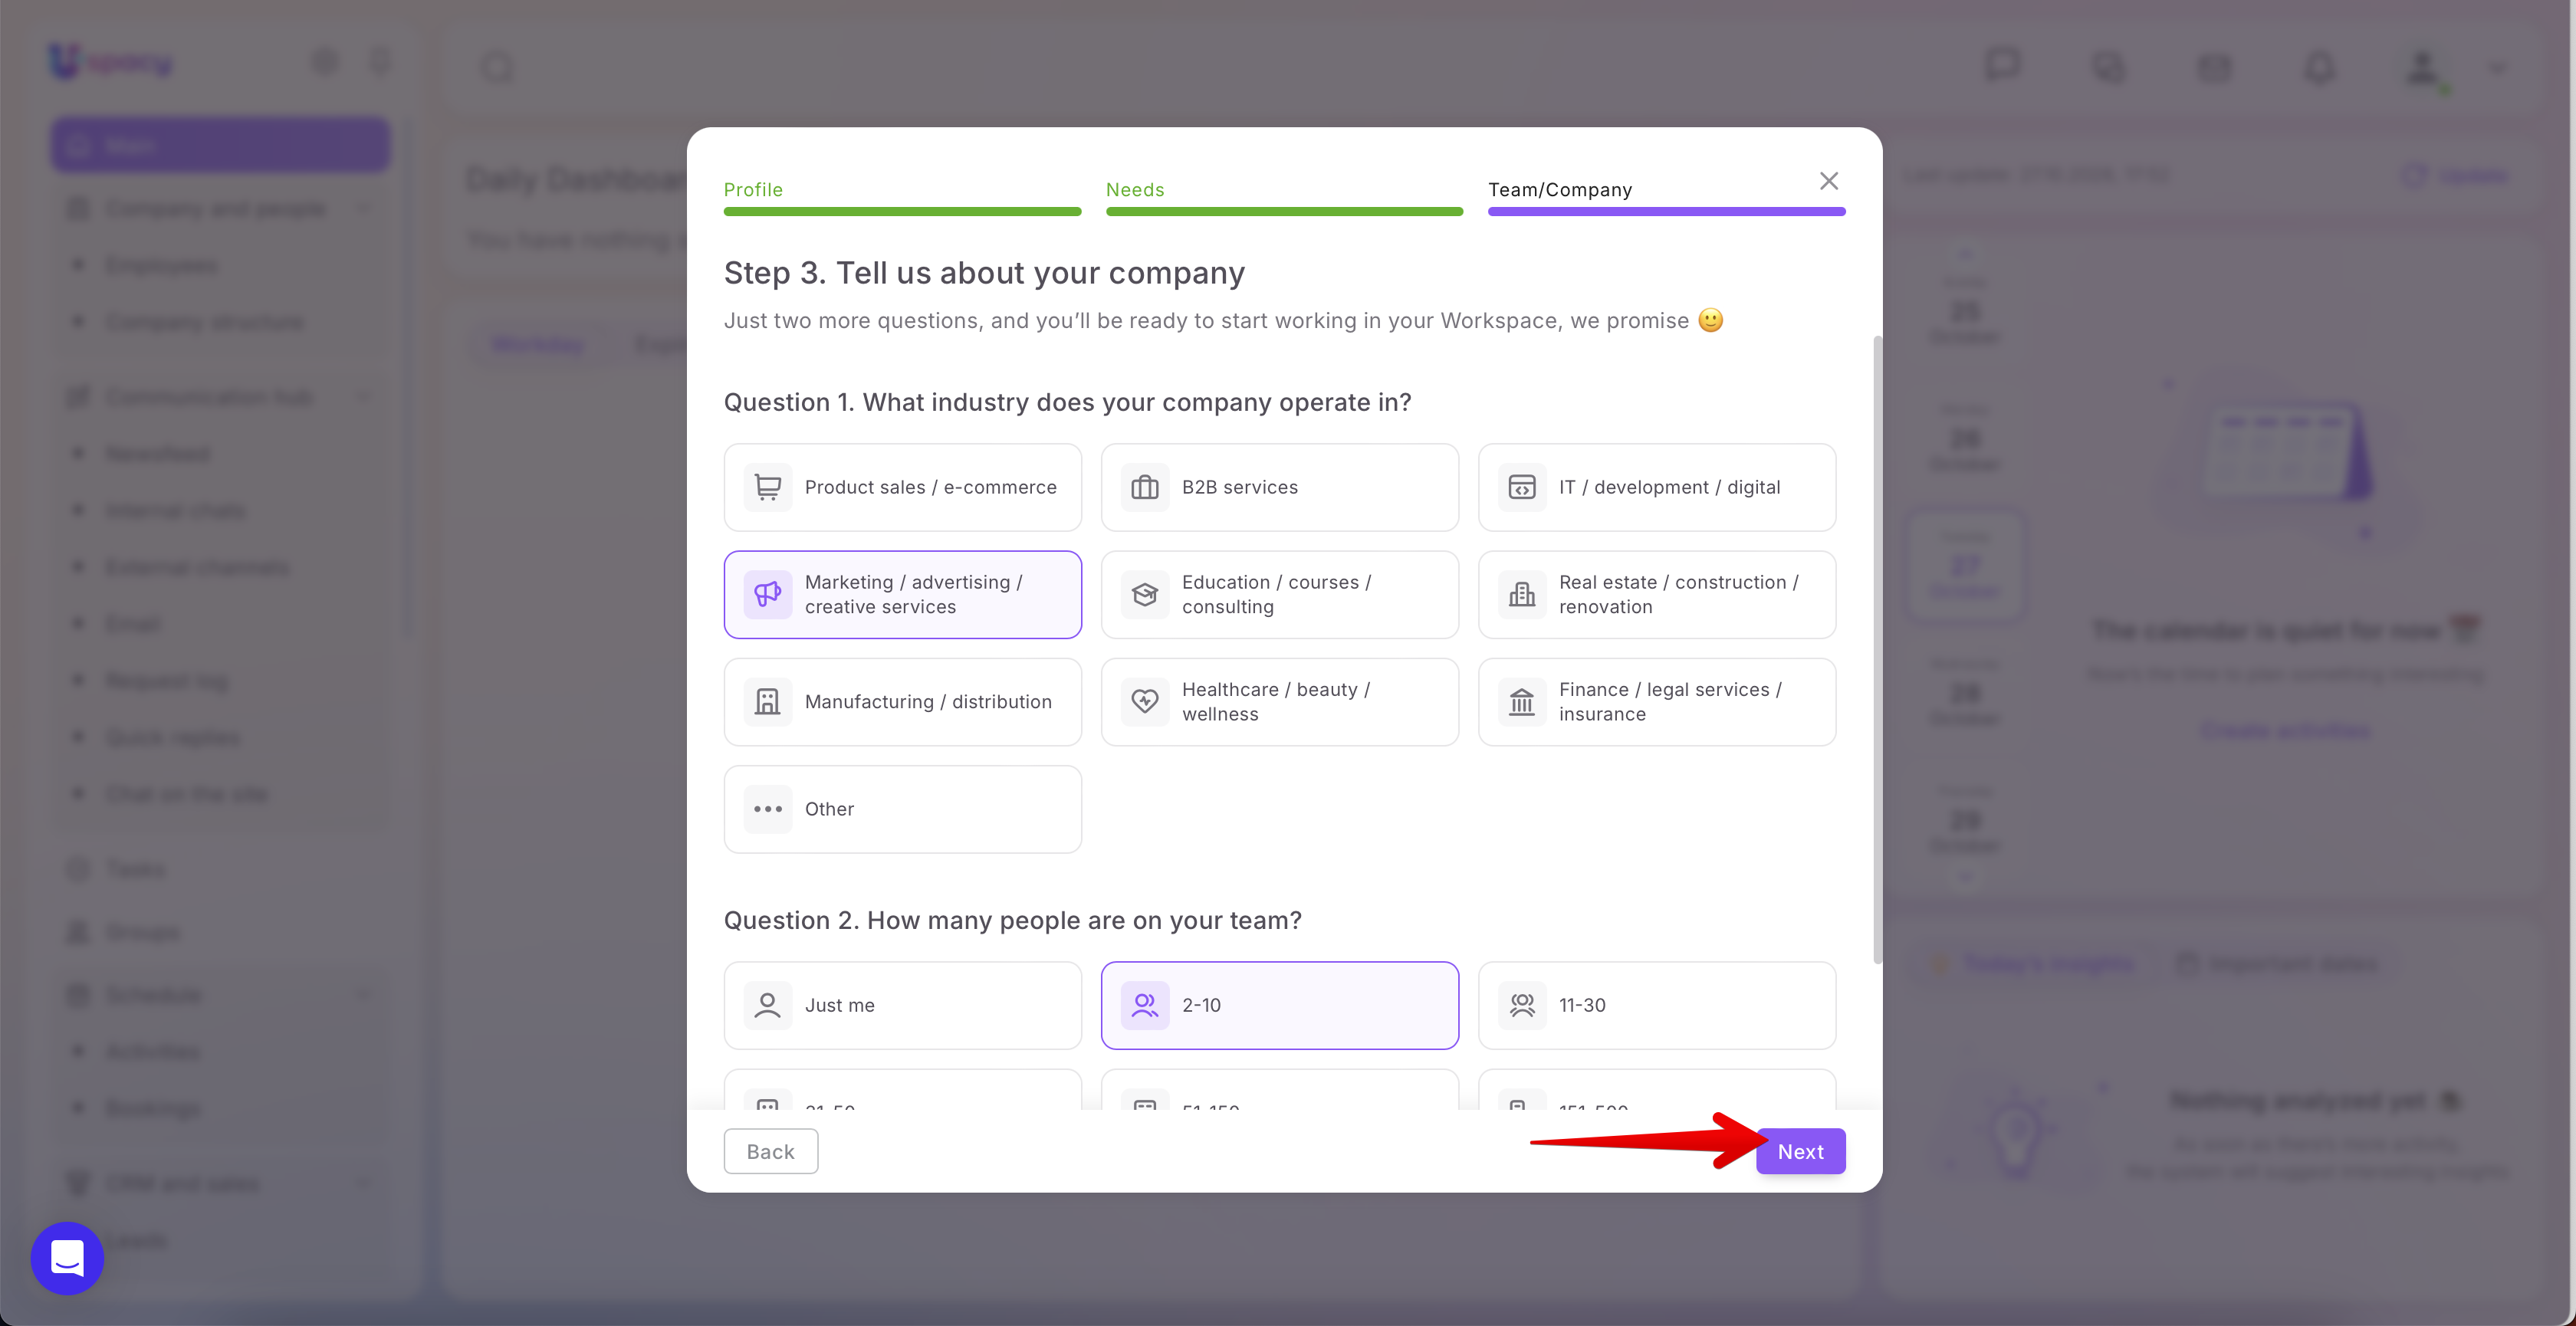
Step 3. Enter your company information
On the Team/Company step, select your company’s industry and the size of your team.
For example, if your company provides marketing services, select Marketing / Advertising / Creative services. If none of the listed options fits your business, select Other and describe what your company does.Then, select the appropriate team size. If you plan to work independently, choose Just me.
If needed, click Back to return to the previous step. Once you’ve completed the required fields, click Next.
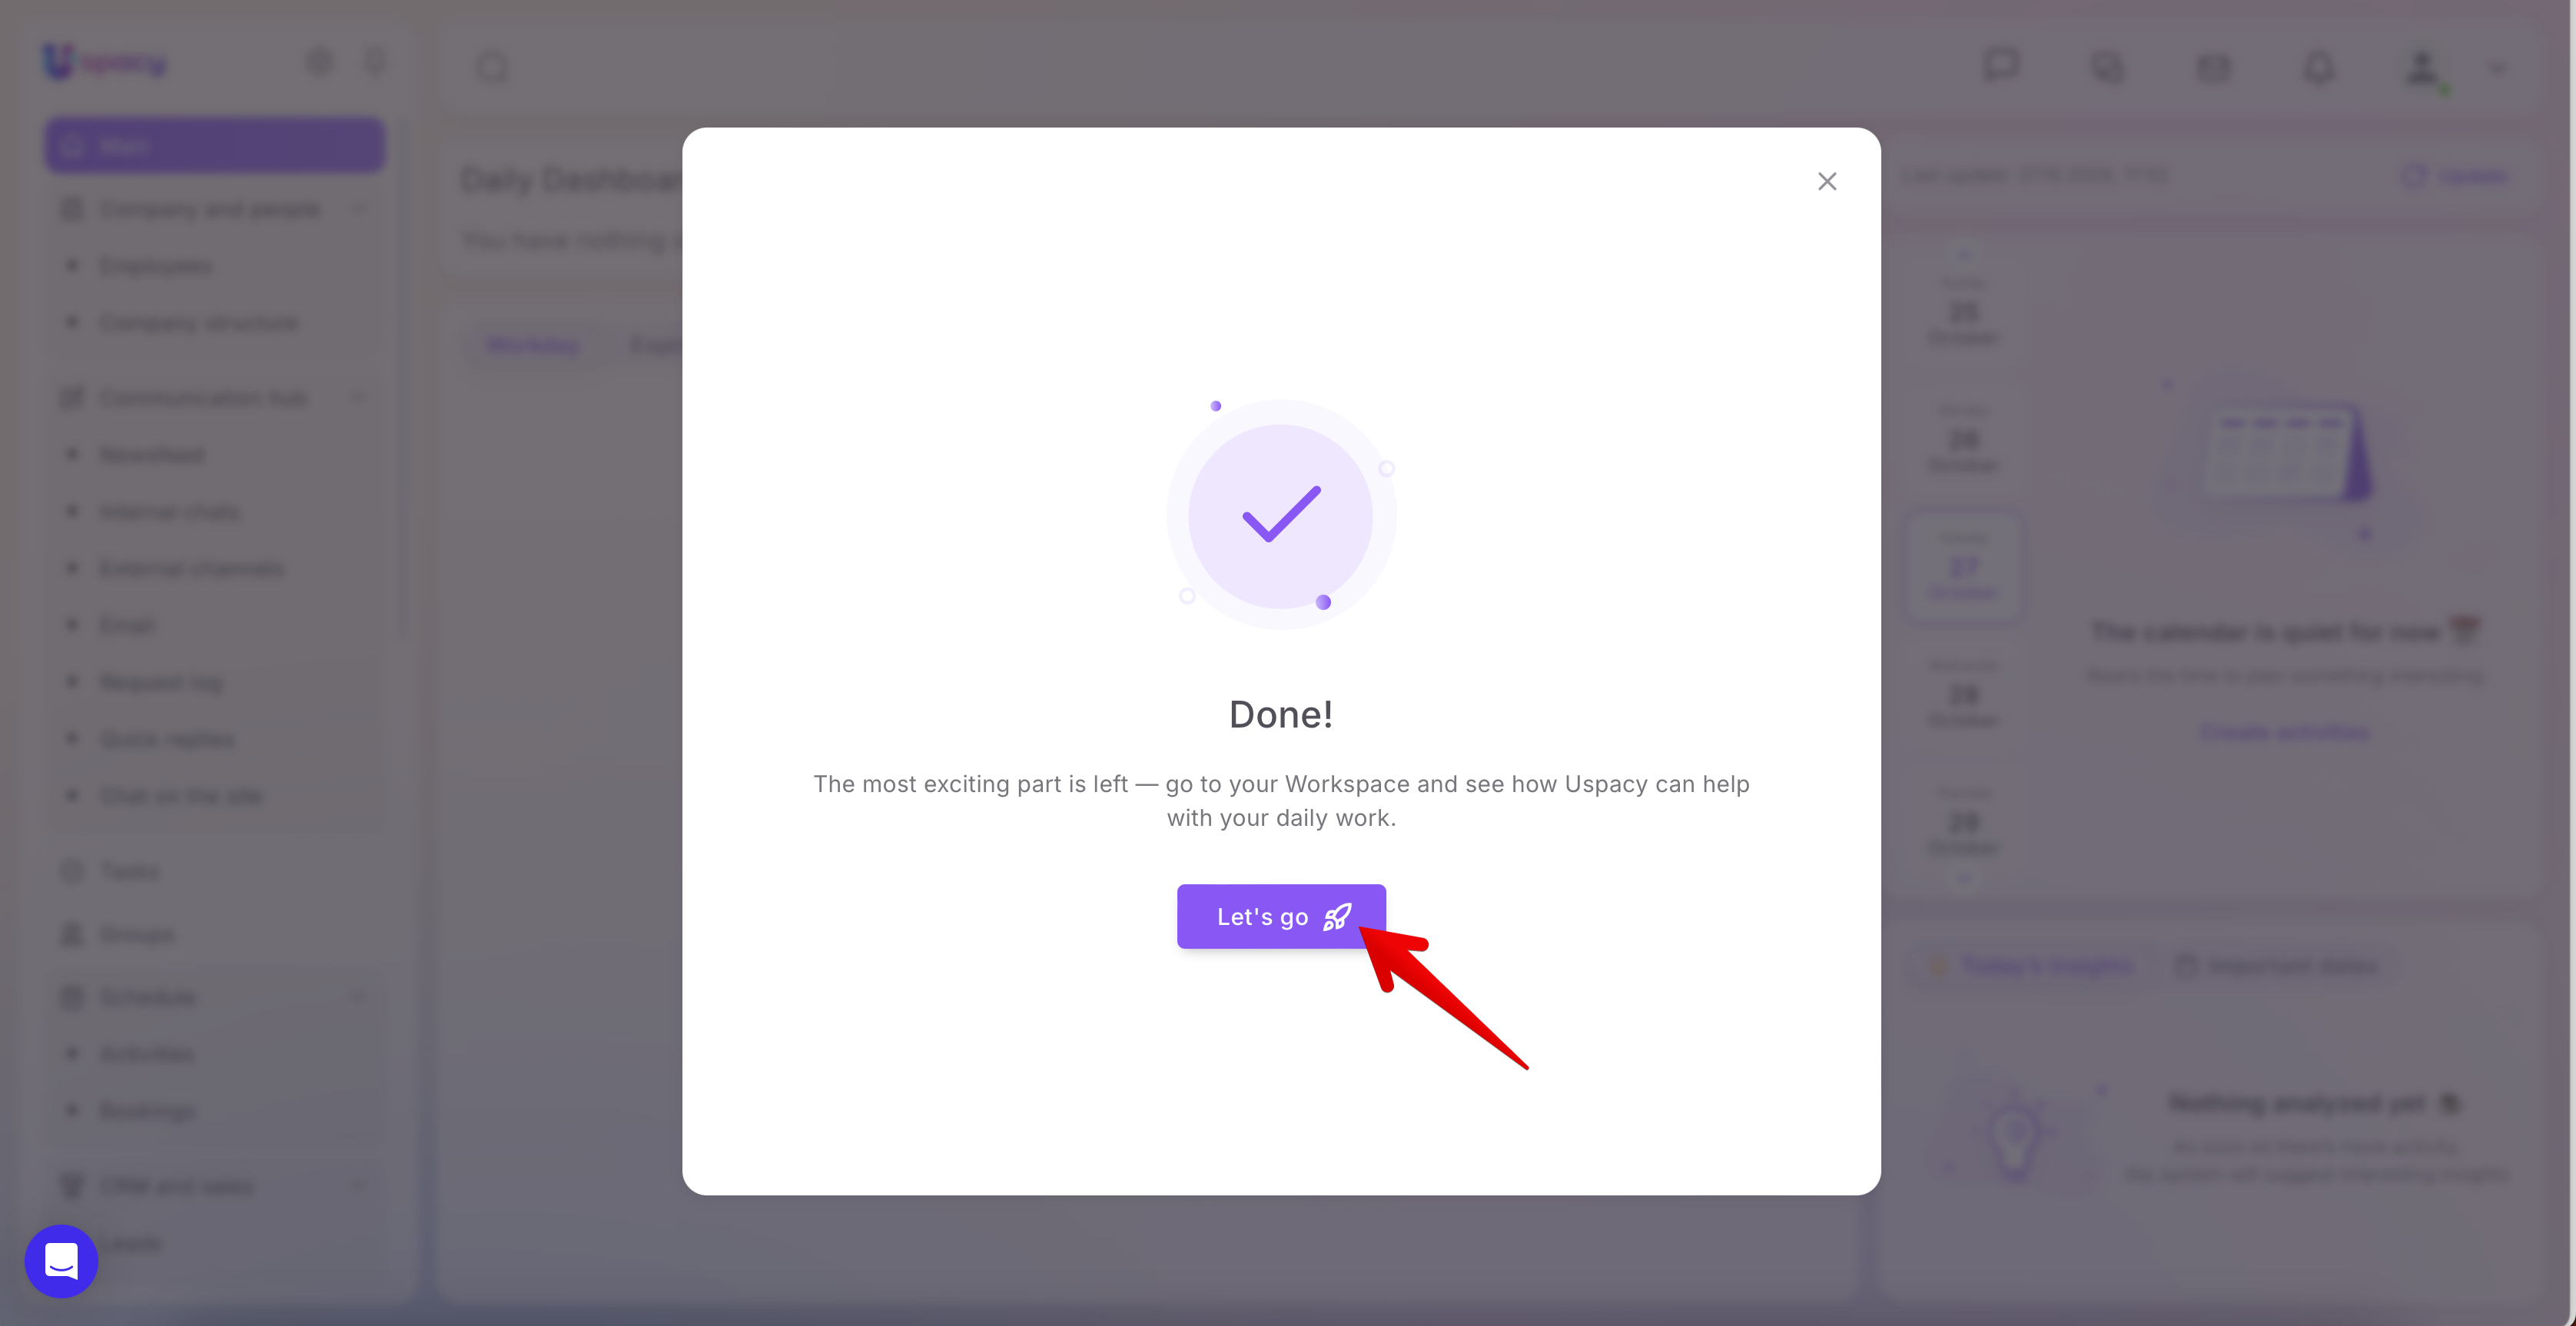
Once setup is complete, you’ll see the message Done! Click Let’s go 🚀 to start working in your Workspace.
You’re almost there! 😉 However, we still recommend completing the next step rather than skipping it. ⬇️
Confirmation of registration
A letter informing about the creation of a new Workspace will be sent to the specified email address. It will also contain the credentials you need to use to log in. In addition, you can use this letter to confirm your email. To do this, click on the corresponding button.

As a result of successful confirmation, you will be redirected to the Space, where you will be able to continue working in it.
On the registration page, you can Log in to other workspaces that were created earlier. To do this, click on the corresponding button at the bottom of the form.

🔍 You can read more about how to log in to Uspacy in the article "Authorization at Uspacy. How to log in to your own Workspace?".
Done! Get to know all the possibilities of Uspacy now. But first, it is better to fill out your own profile and invite colleagues to start working together.
Deleting a workspace
Here, in fact, two questions may arise:
- How to delete Space if I don't use it?
- What happens if I don't use my Space for a long time?
There will be only one answer to them ⬇️
In order to optimize resources and increase efficiency, Space is deleted automatically under such conditions:
🟣 it has a Free plan;
🟣 it is not used and there is no activity for 90 days non-stop.
If you have additional questions or you need to contact the support, send a request to this email [email protected]
Created: January 24, 2023 / Updated: October 23, 2026