Many tasks are repeated daily: moving elements between stages, triggering the next steps, monitoring the team’s workflow, and ensuring that important actions don’t fall through the cracks. This is why automation in Uspacy helps reduce manual work, organize standard workflows, and ensure more predictable execution of routine tasks.
Previously, automation in Uspacy was primarily represented by Conditional Actions. Now, Processes are also available—a new type of automation. Processes allow you to design the flow of a business process, define the sequence of actions, and better manage team workflows within a single scenario.
With Processes, users work not just with individual elements, but within a clearly organized process. This helps structure daily tasks, coordinate team efforts, and manage business processes more effectively. This approach is especially valuable for teams that need to standardize workflows, reduce the impact of human error, and make the interaction between tools in the Workspace more predictable.

All work with Processes takes place on the page of the same name in the Workspace. To access it, expand the Automation section.
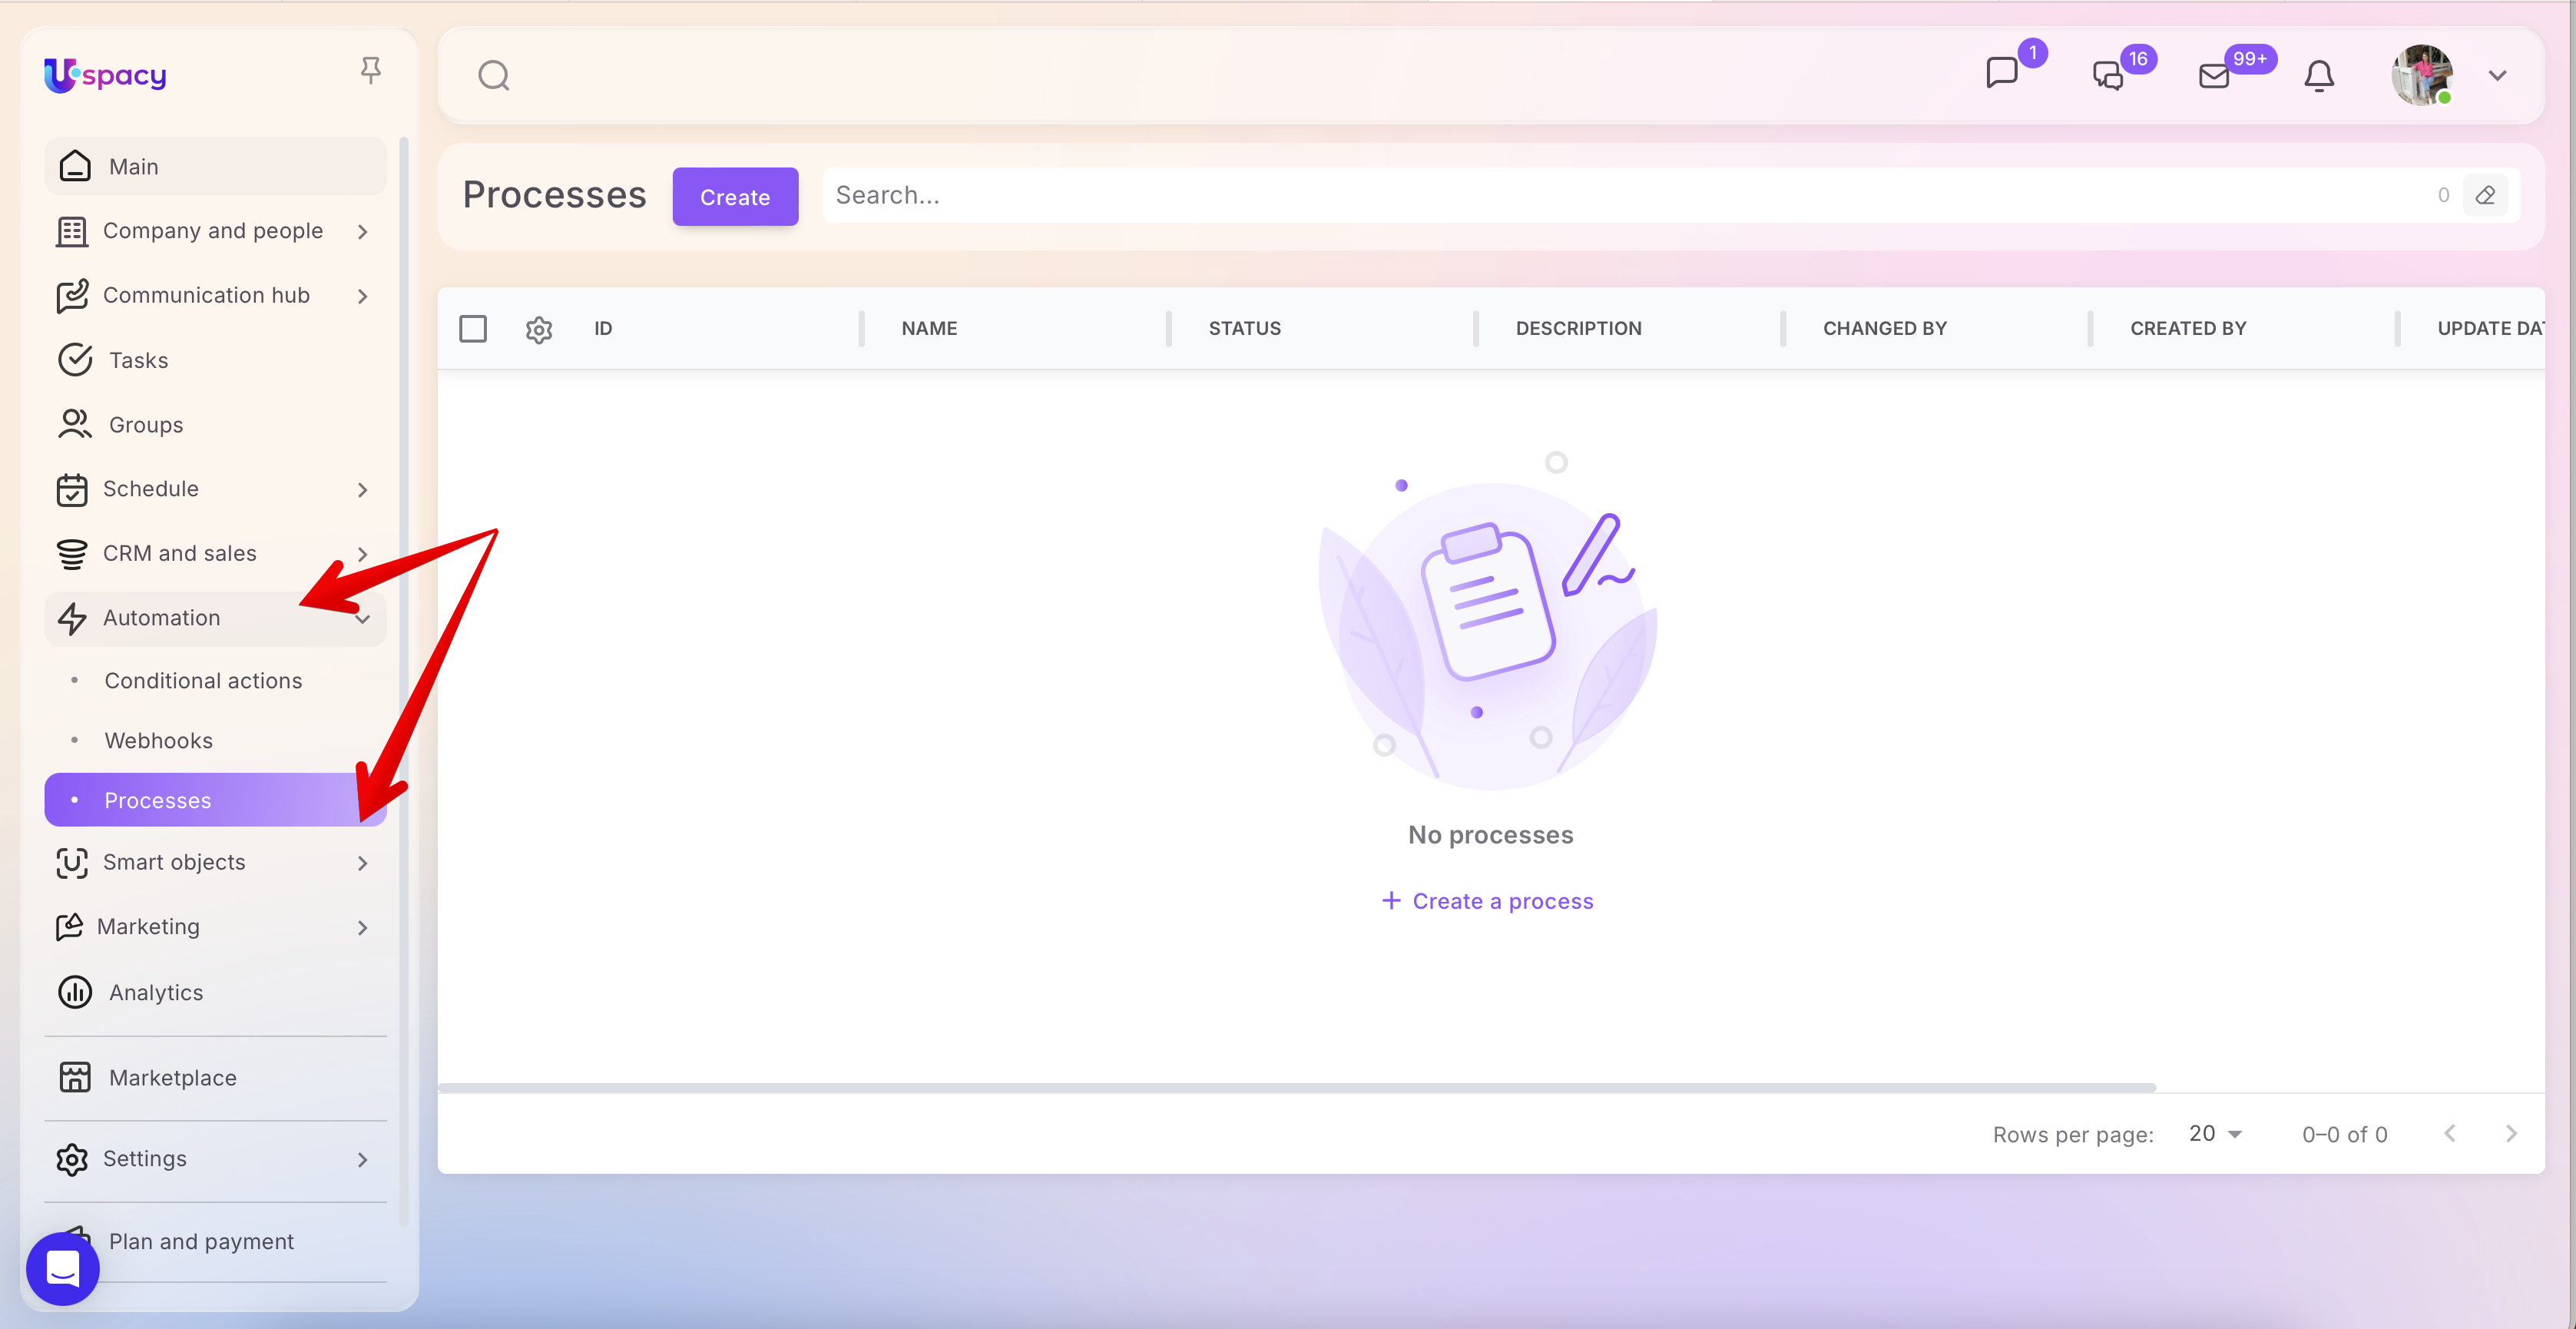
🌟 Note: Access to this section is available only to the Workspace owner and administrators.
How to create and configure a process
Click the Create button.
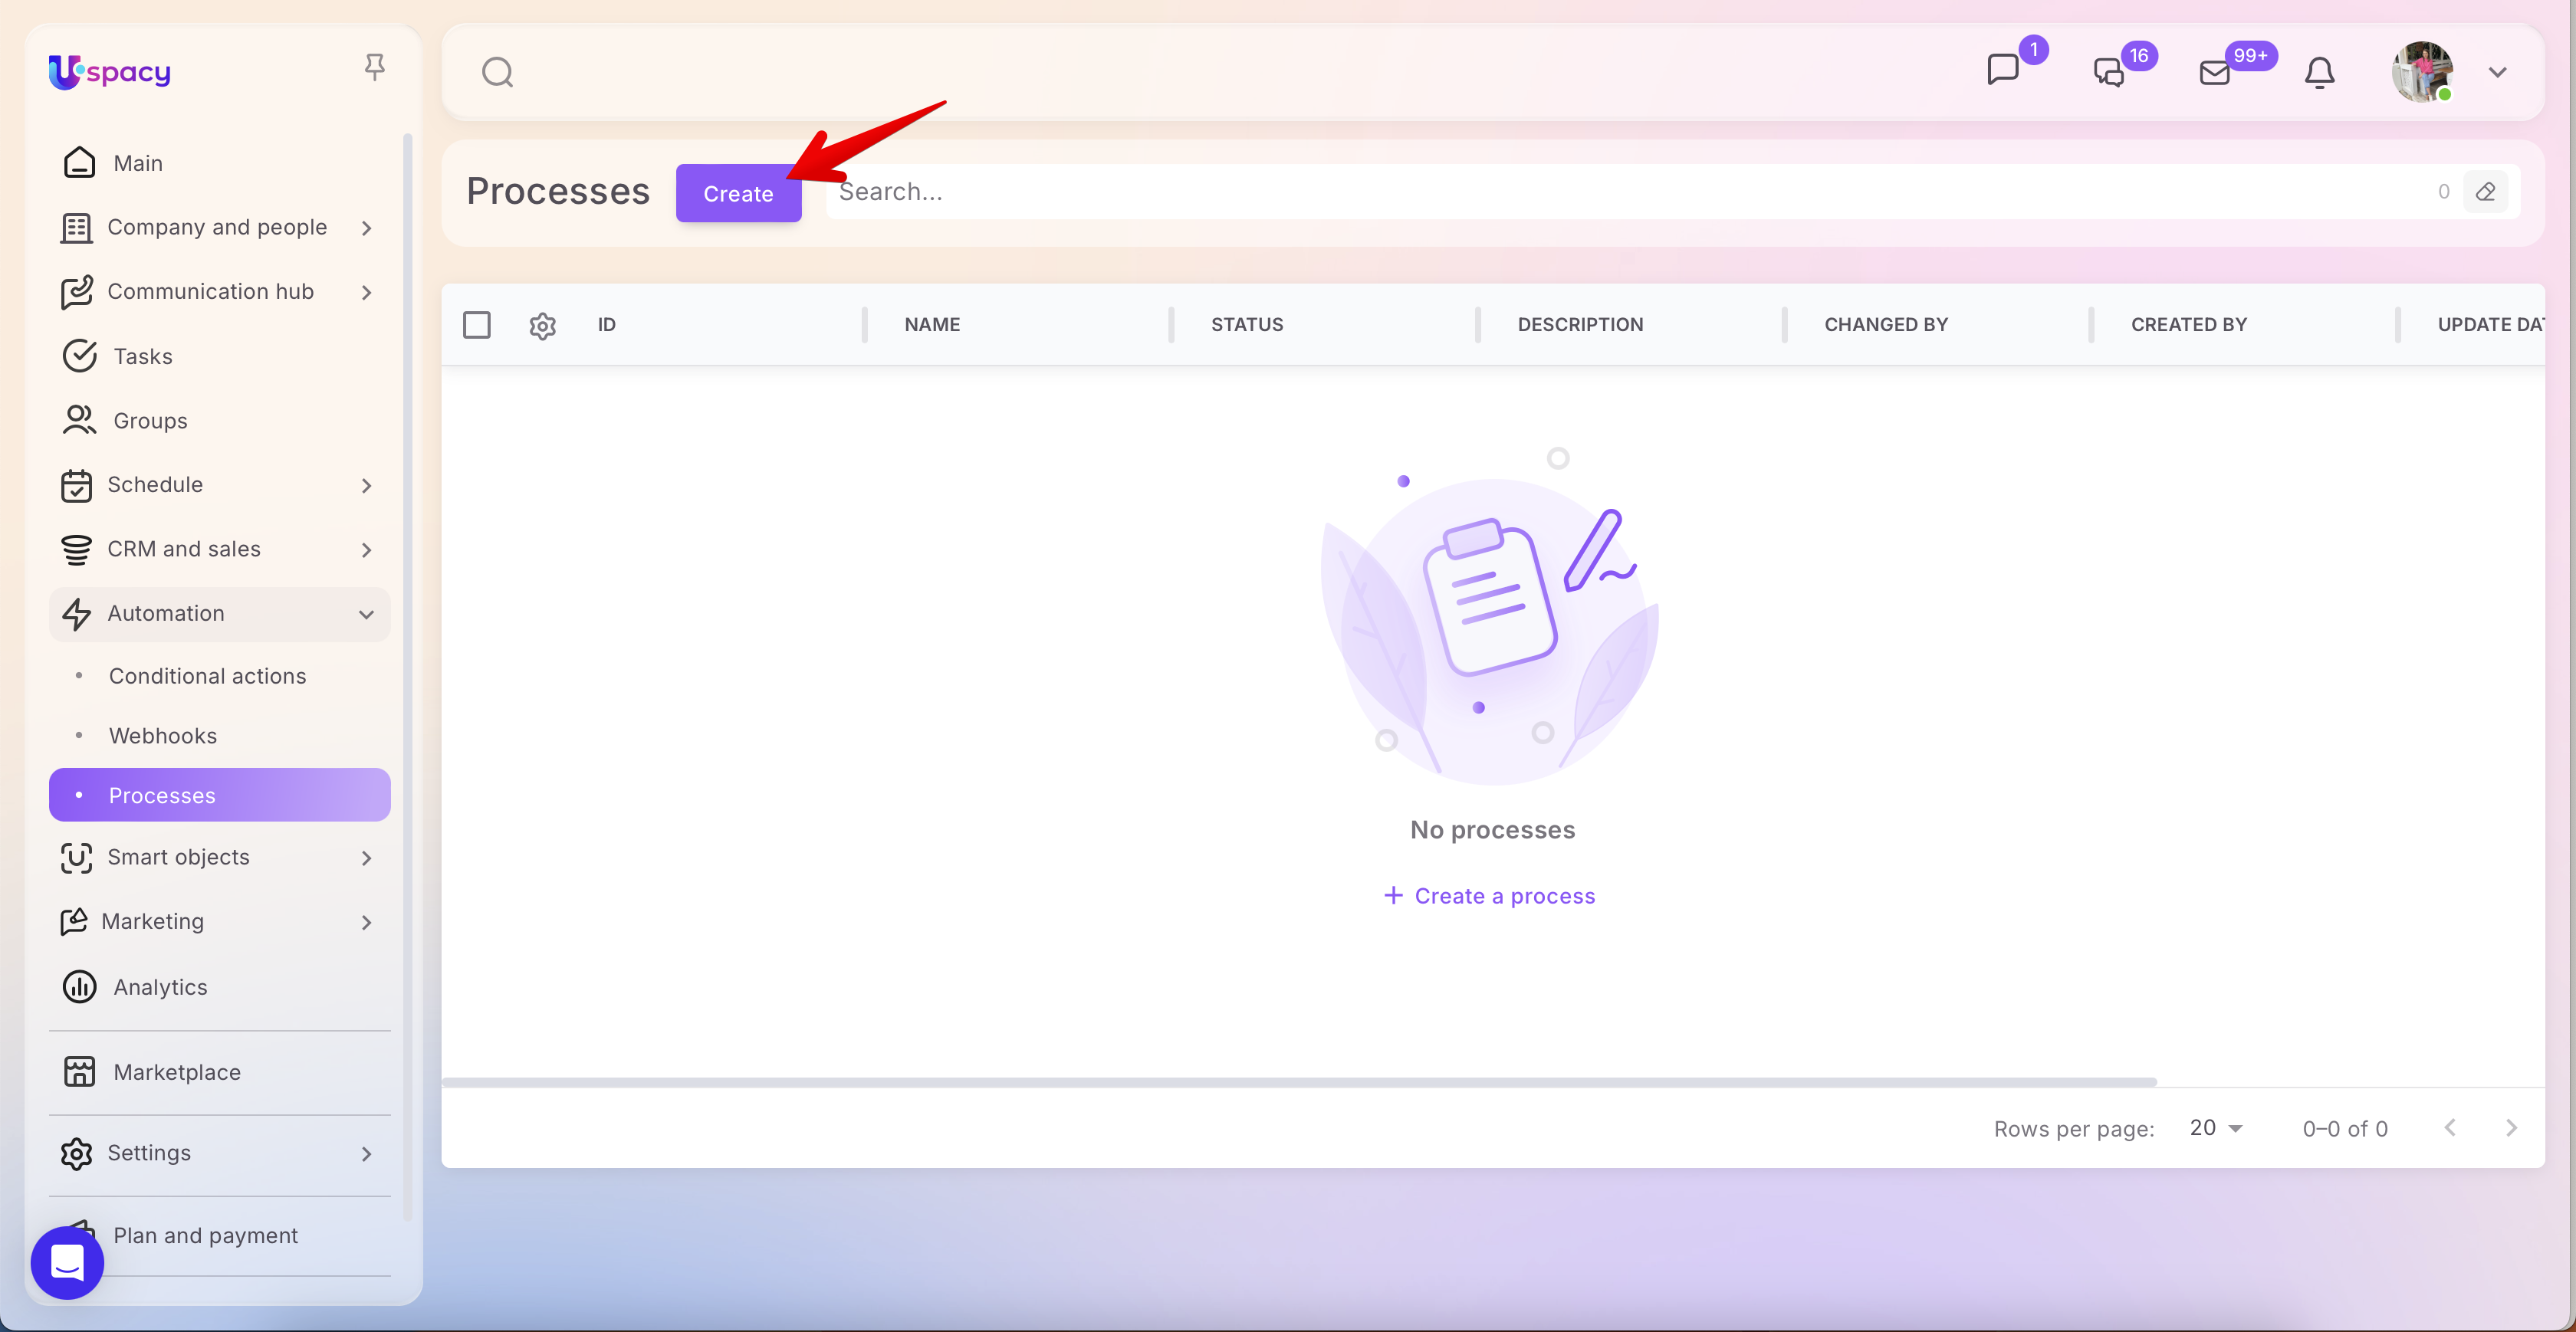
A window will open where you need to set the parameters for the process.
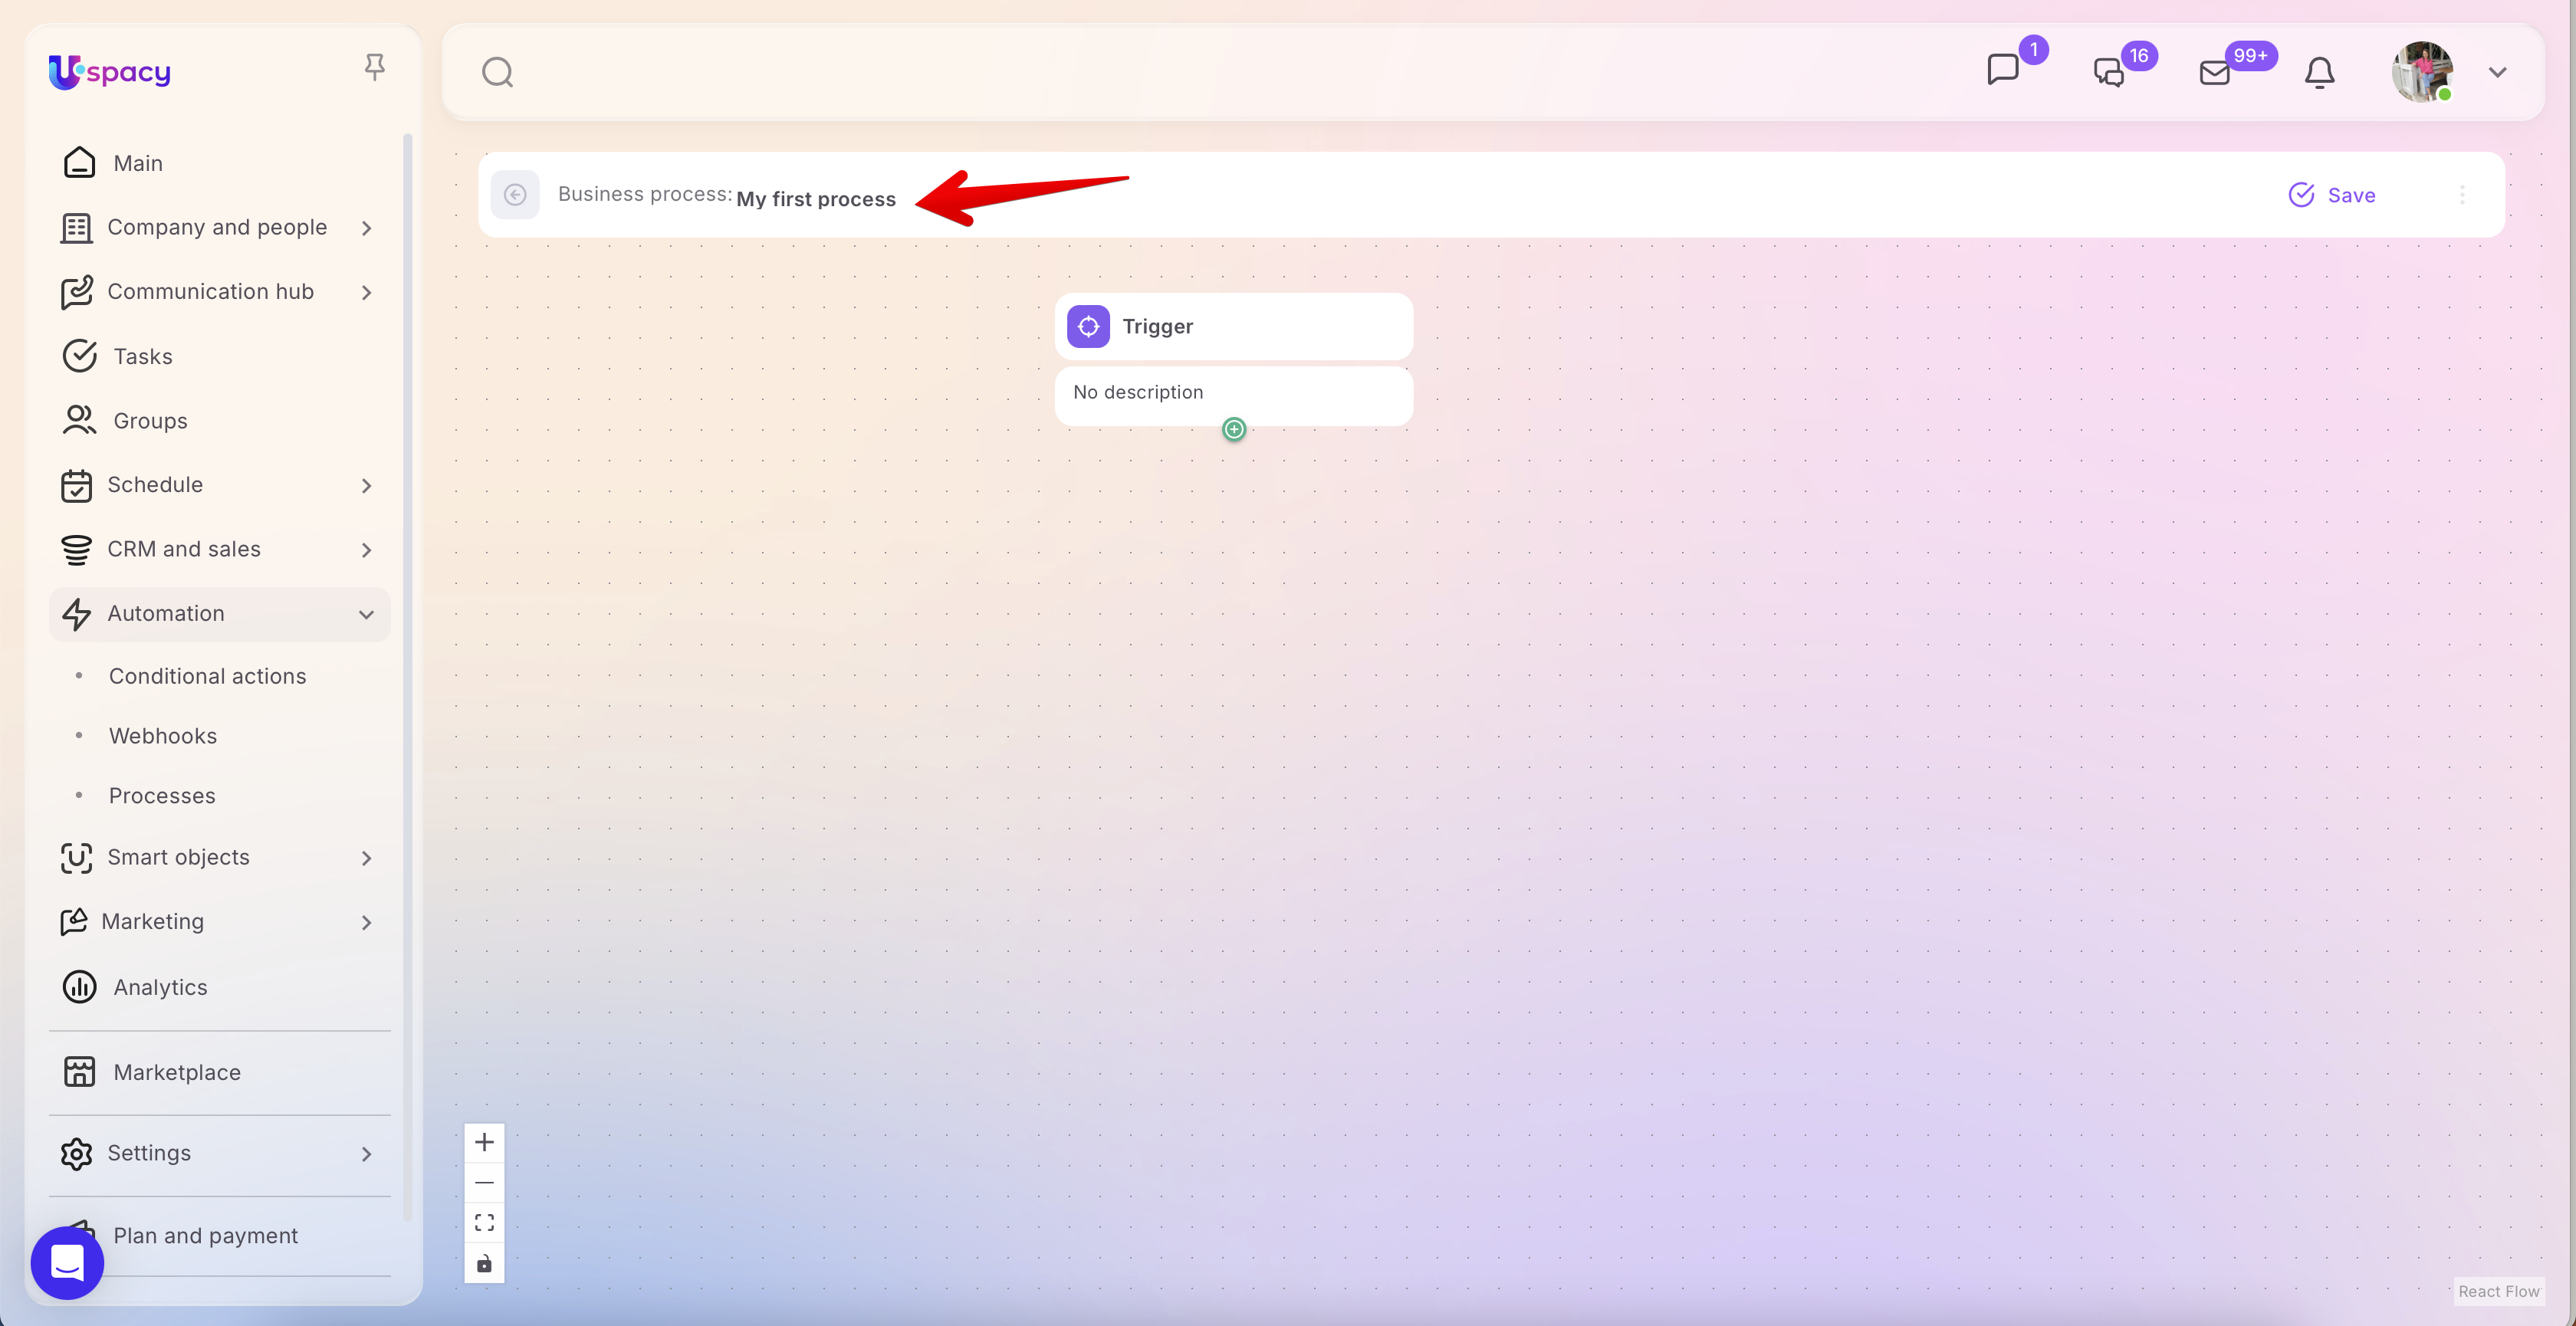
🟣 Set a name for the business process.
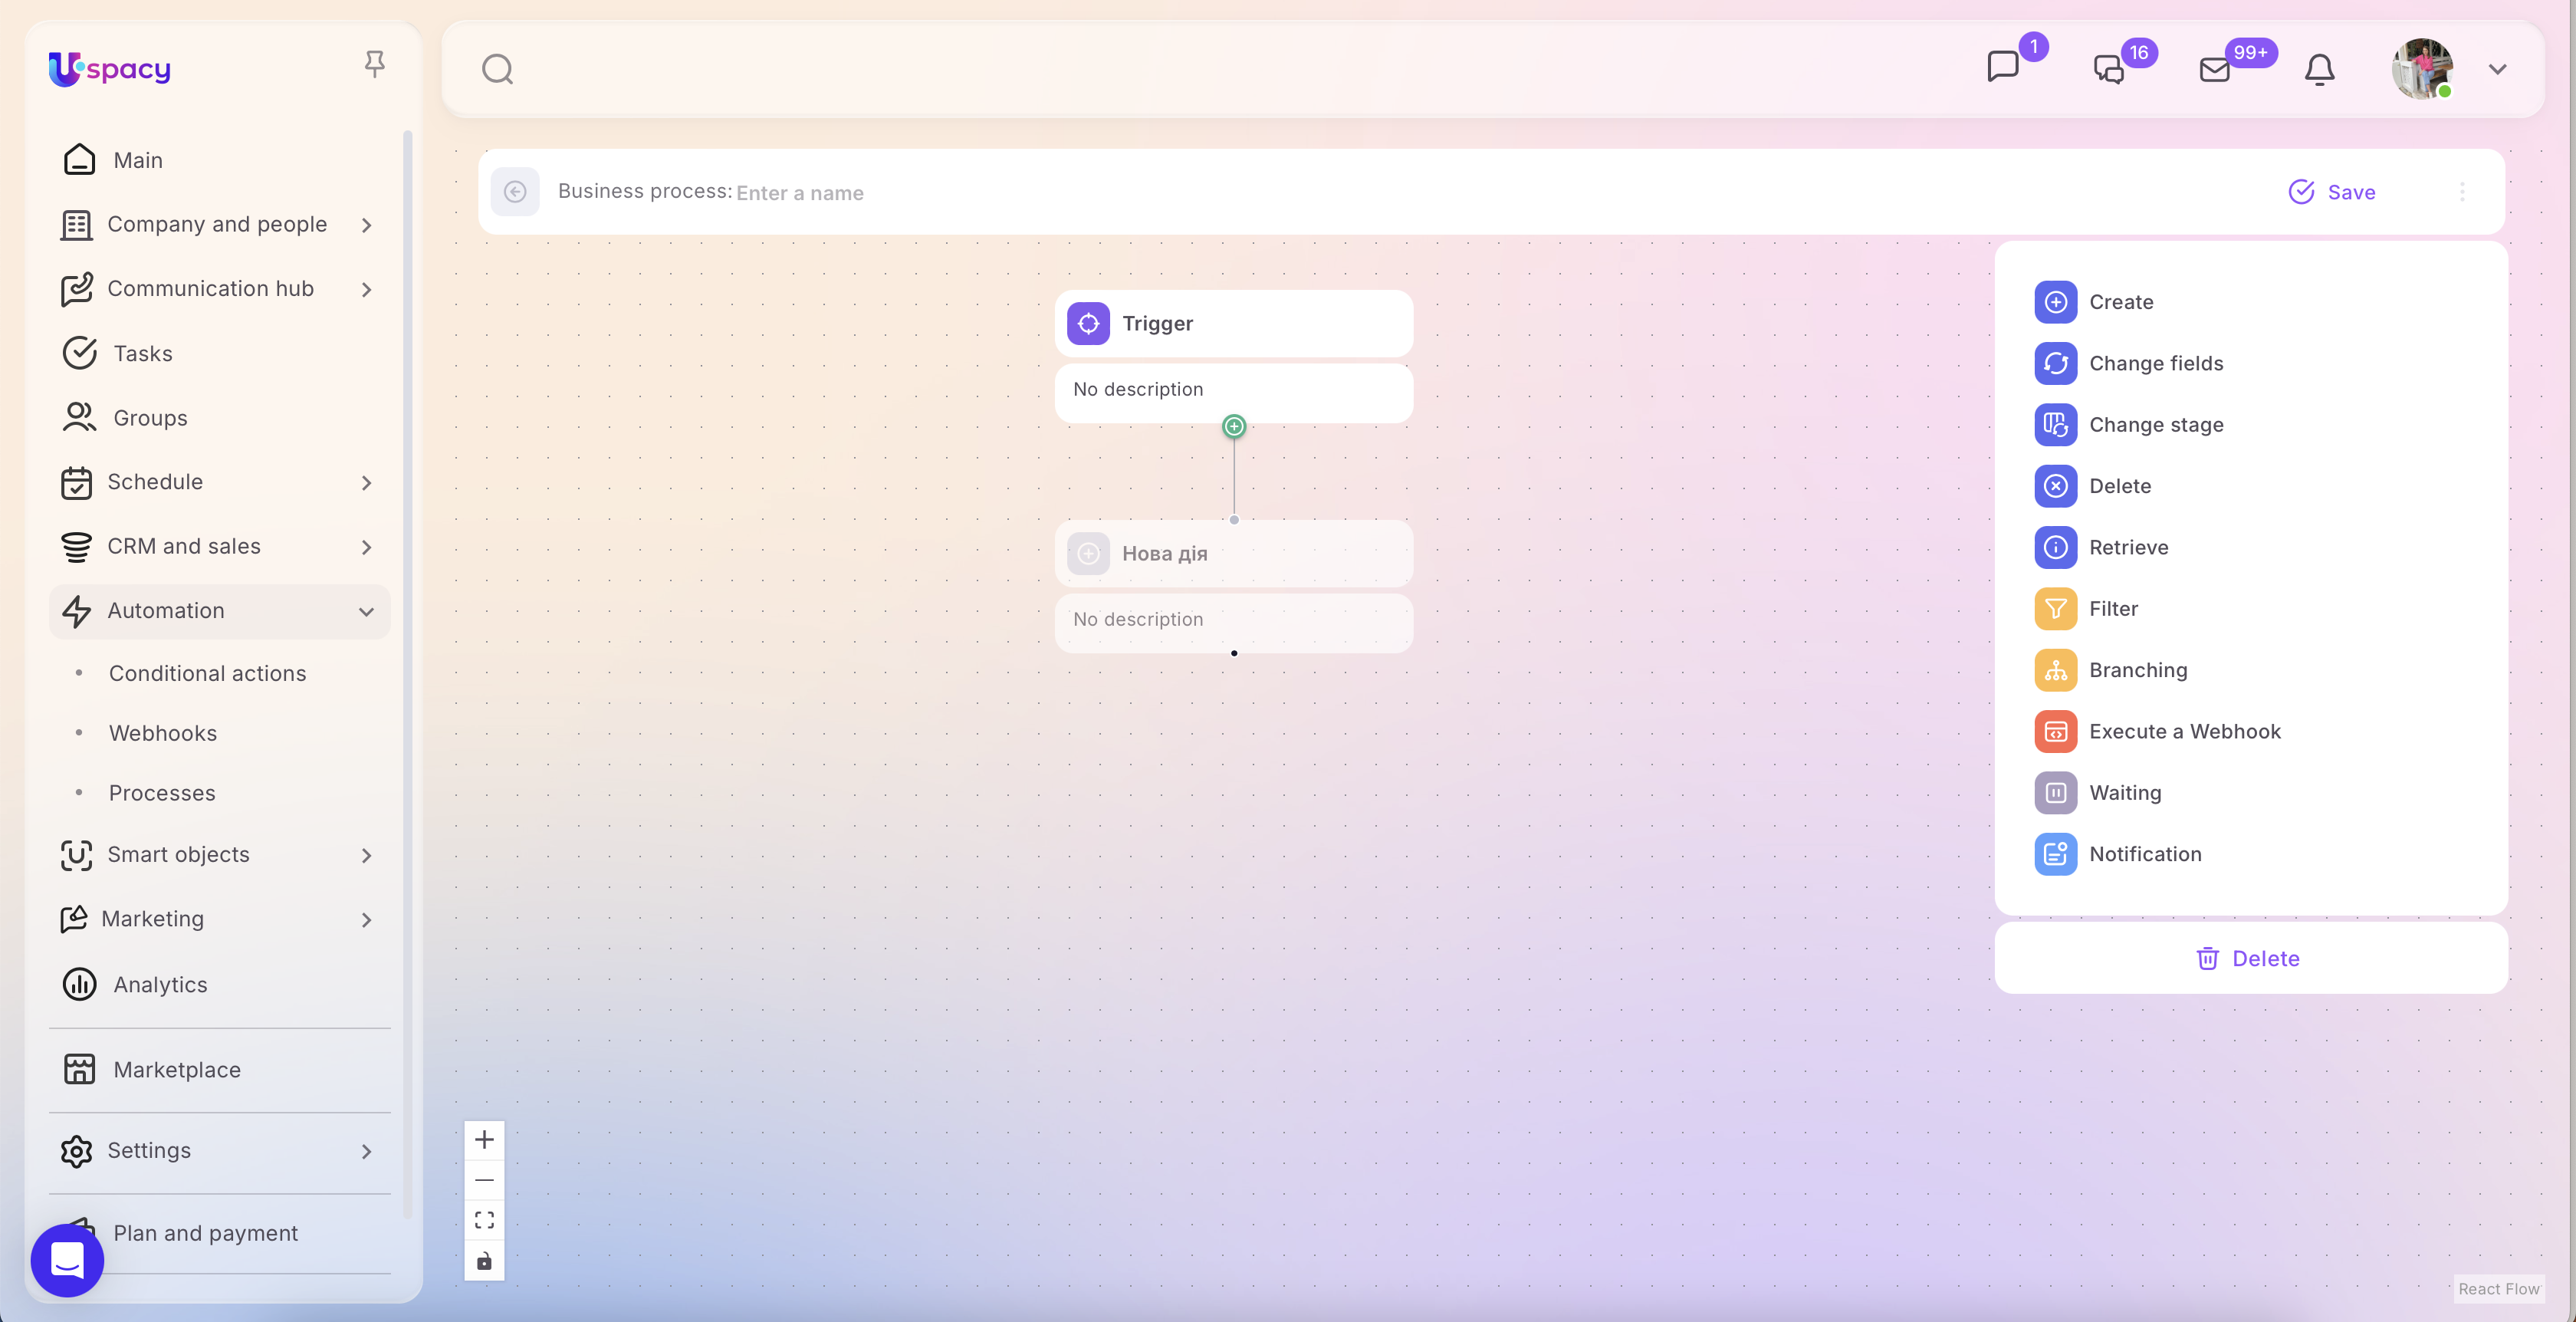
🟣 Define the trigger, i.e., specify what and how will start the execution of this process. This block has two components:
- Basic information: the name and description.
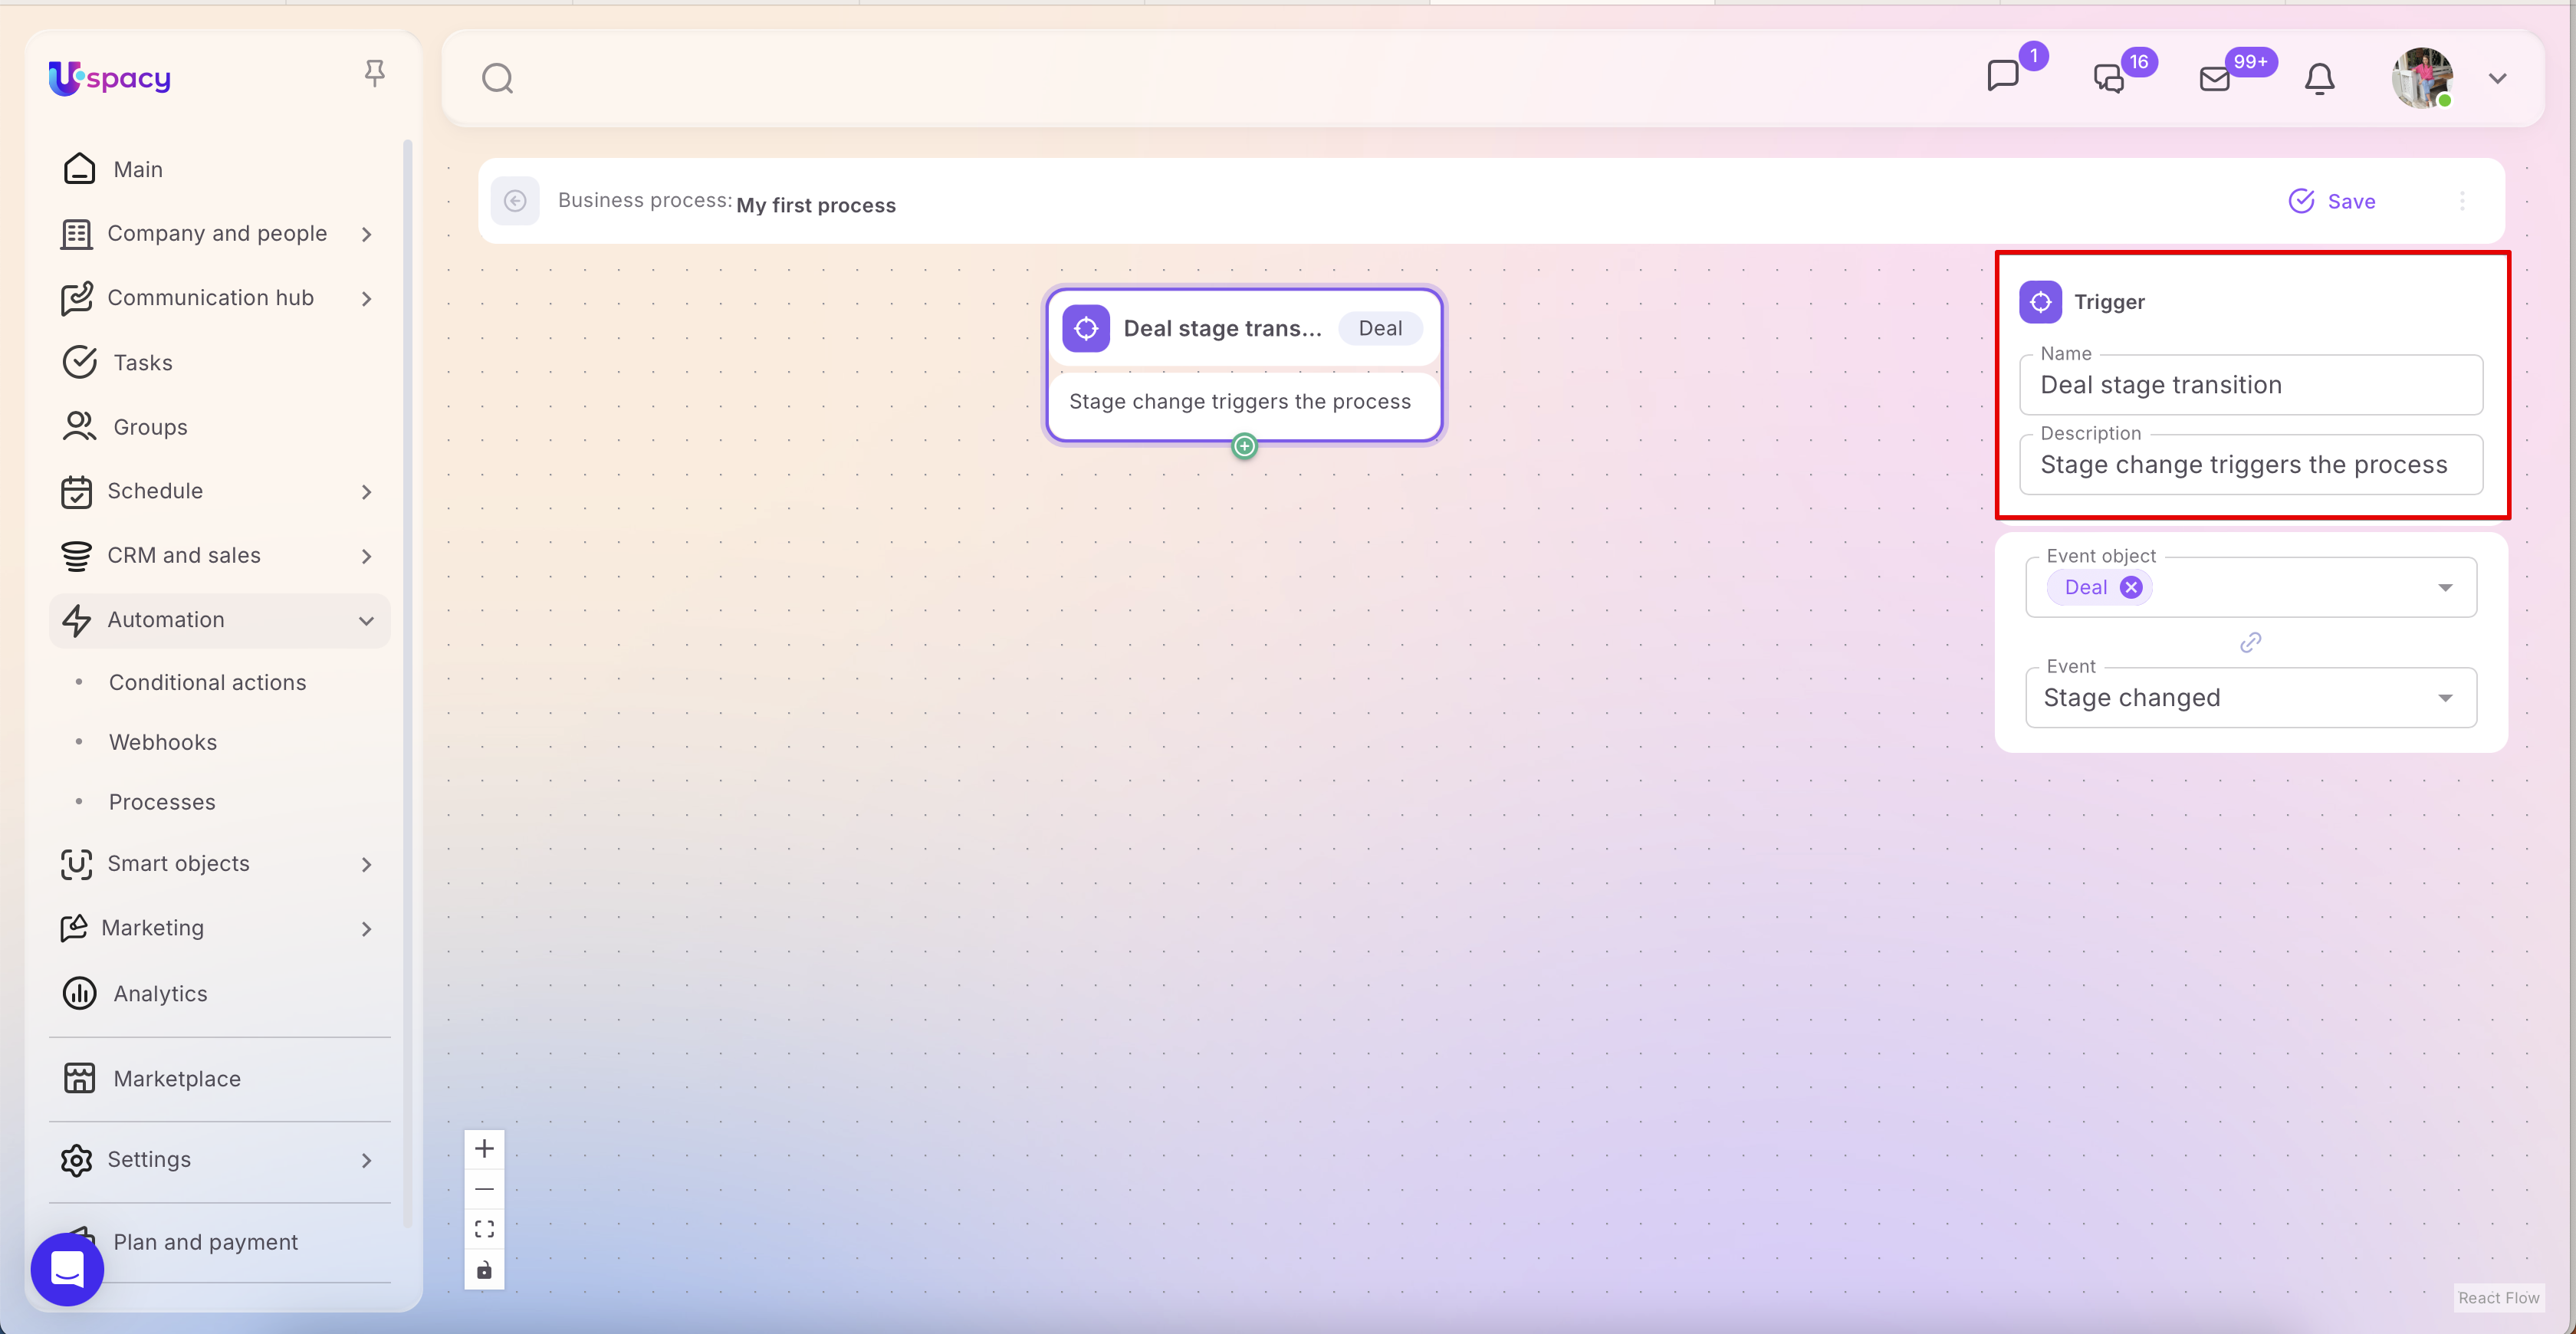
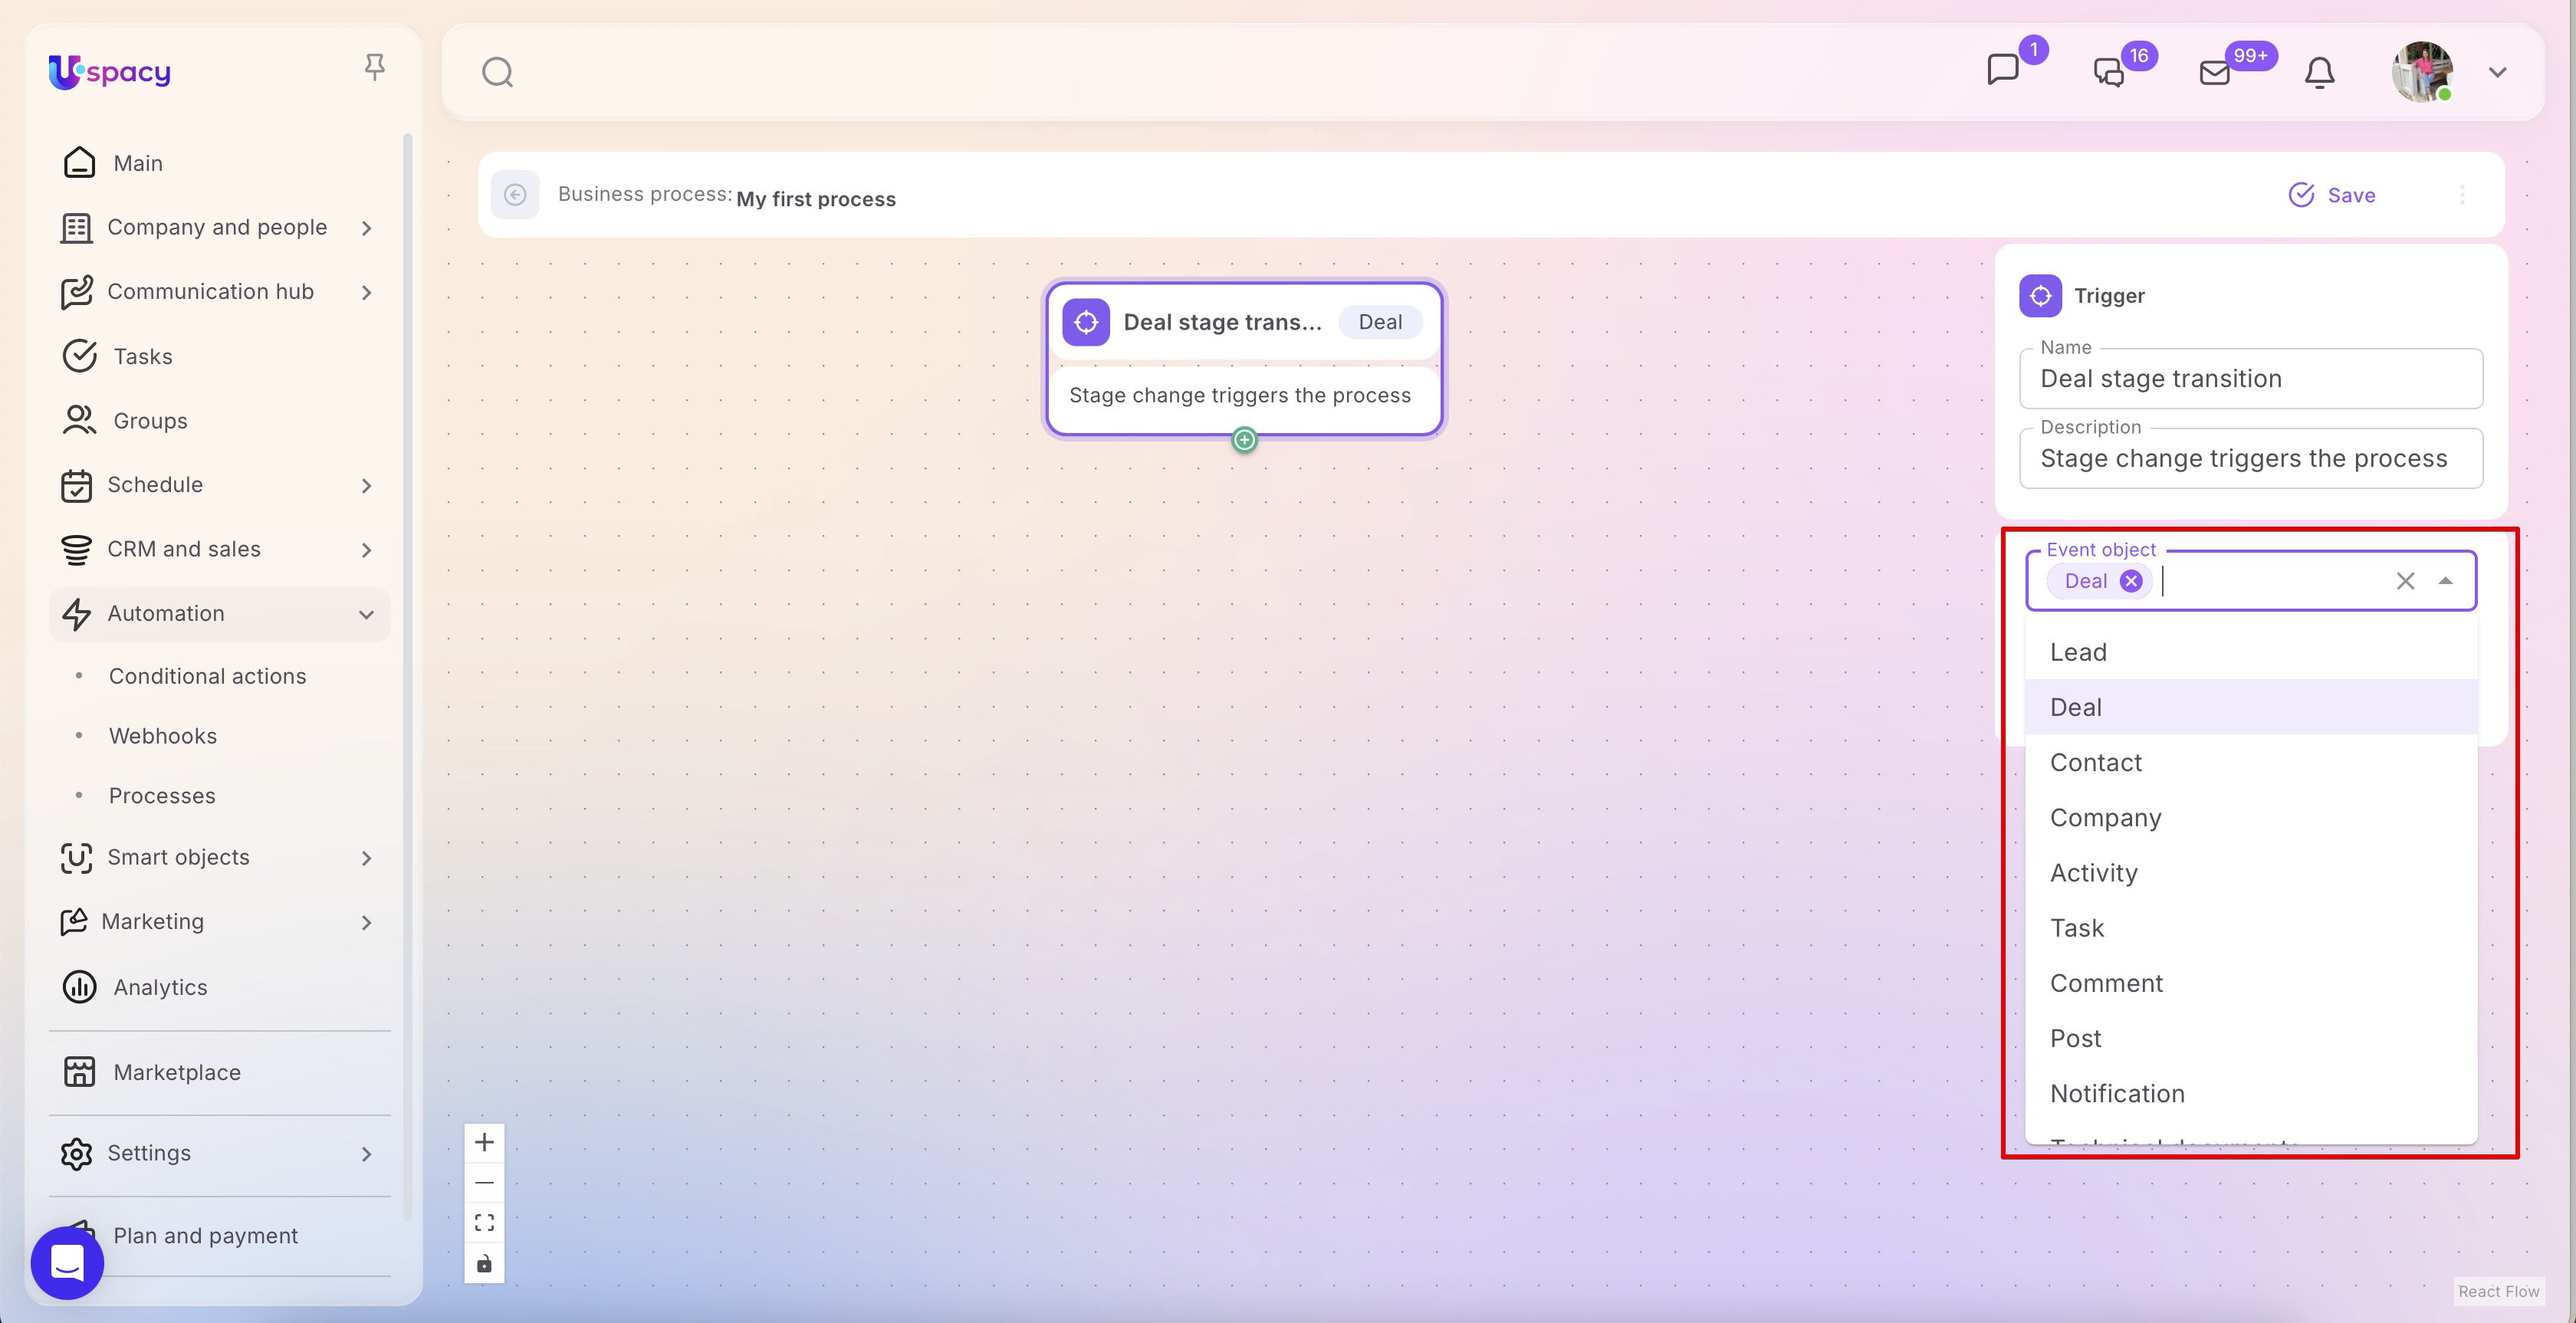
- Event object: the entity or tool in the Workspace that the process will interact with (lead, deal, contact, company, case, task, comment, etc.).
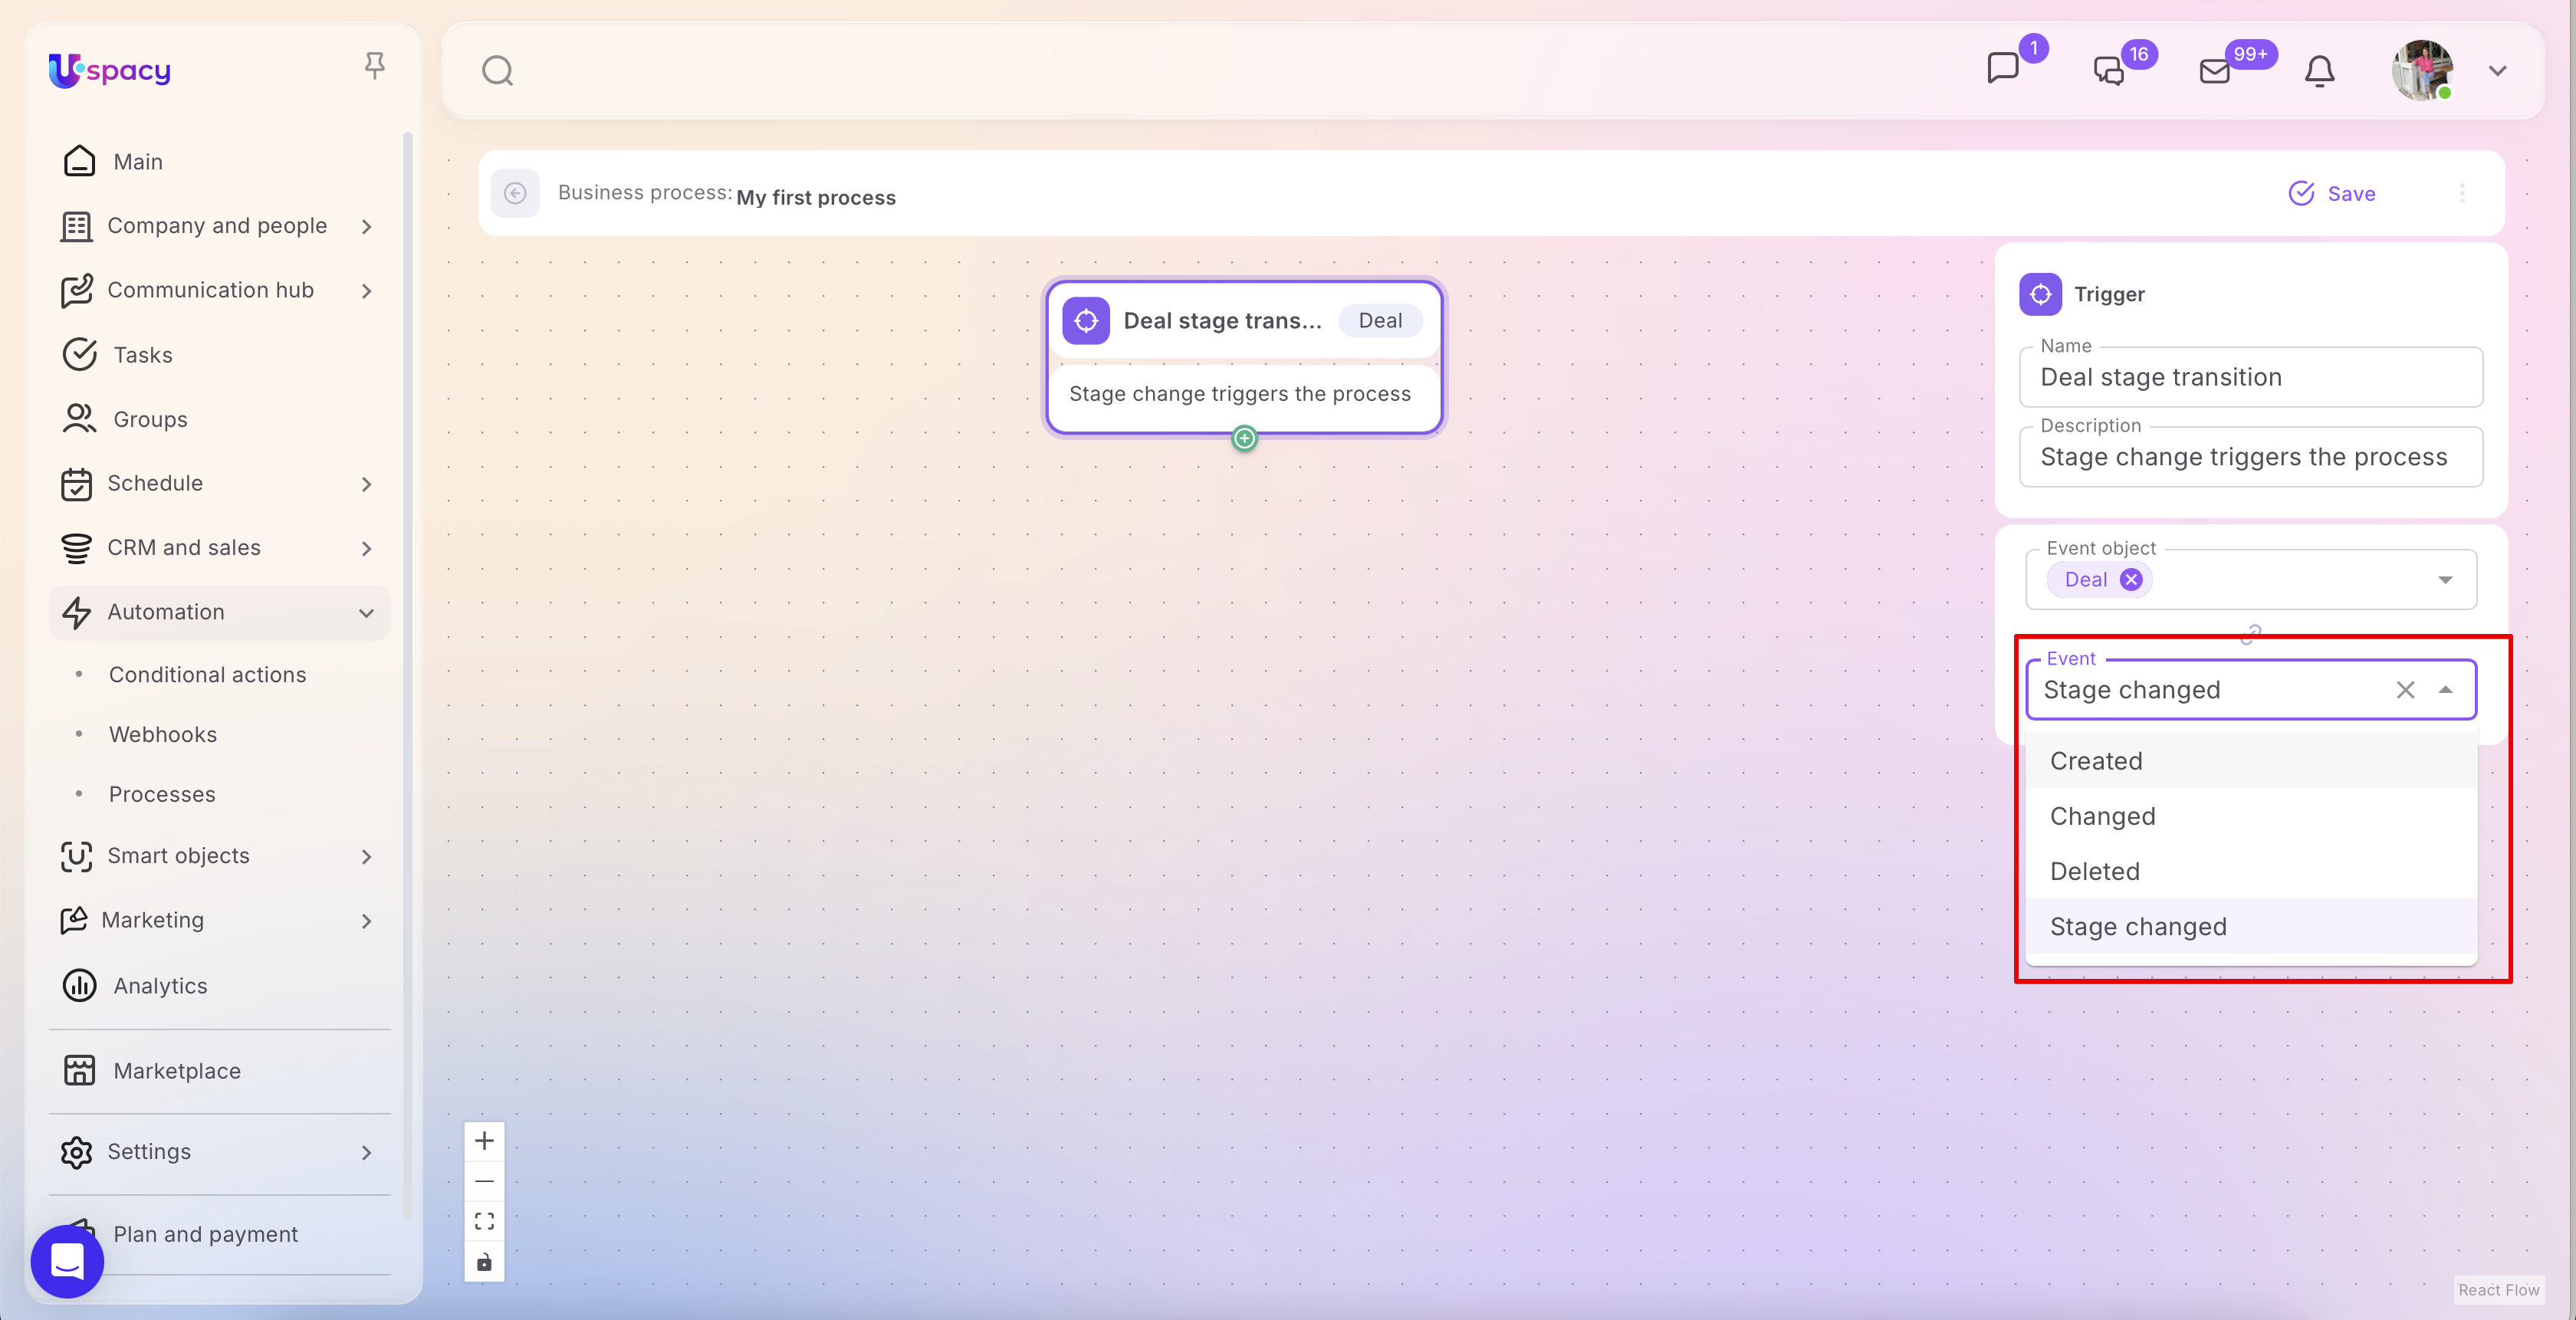
The same event, i.e., the type of interaction (whether the selected object was created, changed, deleted, or had its stage changed).
💡❗ Note: Some objects are incompatible with certain events. For example, you cannot set a trigger for “stage change” on contacts, companies, or activities, as it is not supported by these entities’ functionality.
❗ Important: If the trigger is a stage change for a lead or deal, the event must be set specifically to Stage changed. If you select just Changed, the process will not execute correctly.
🟣 Assign actions, sequences, or conditional steps—i.e., specify exactly what should happen when the trigger event occurs.
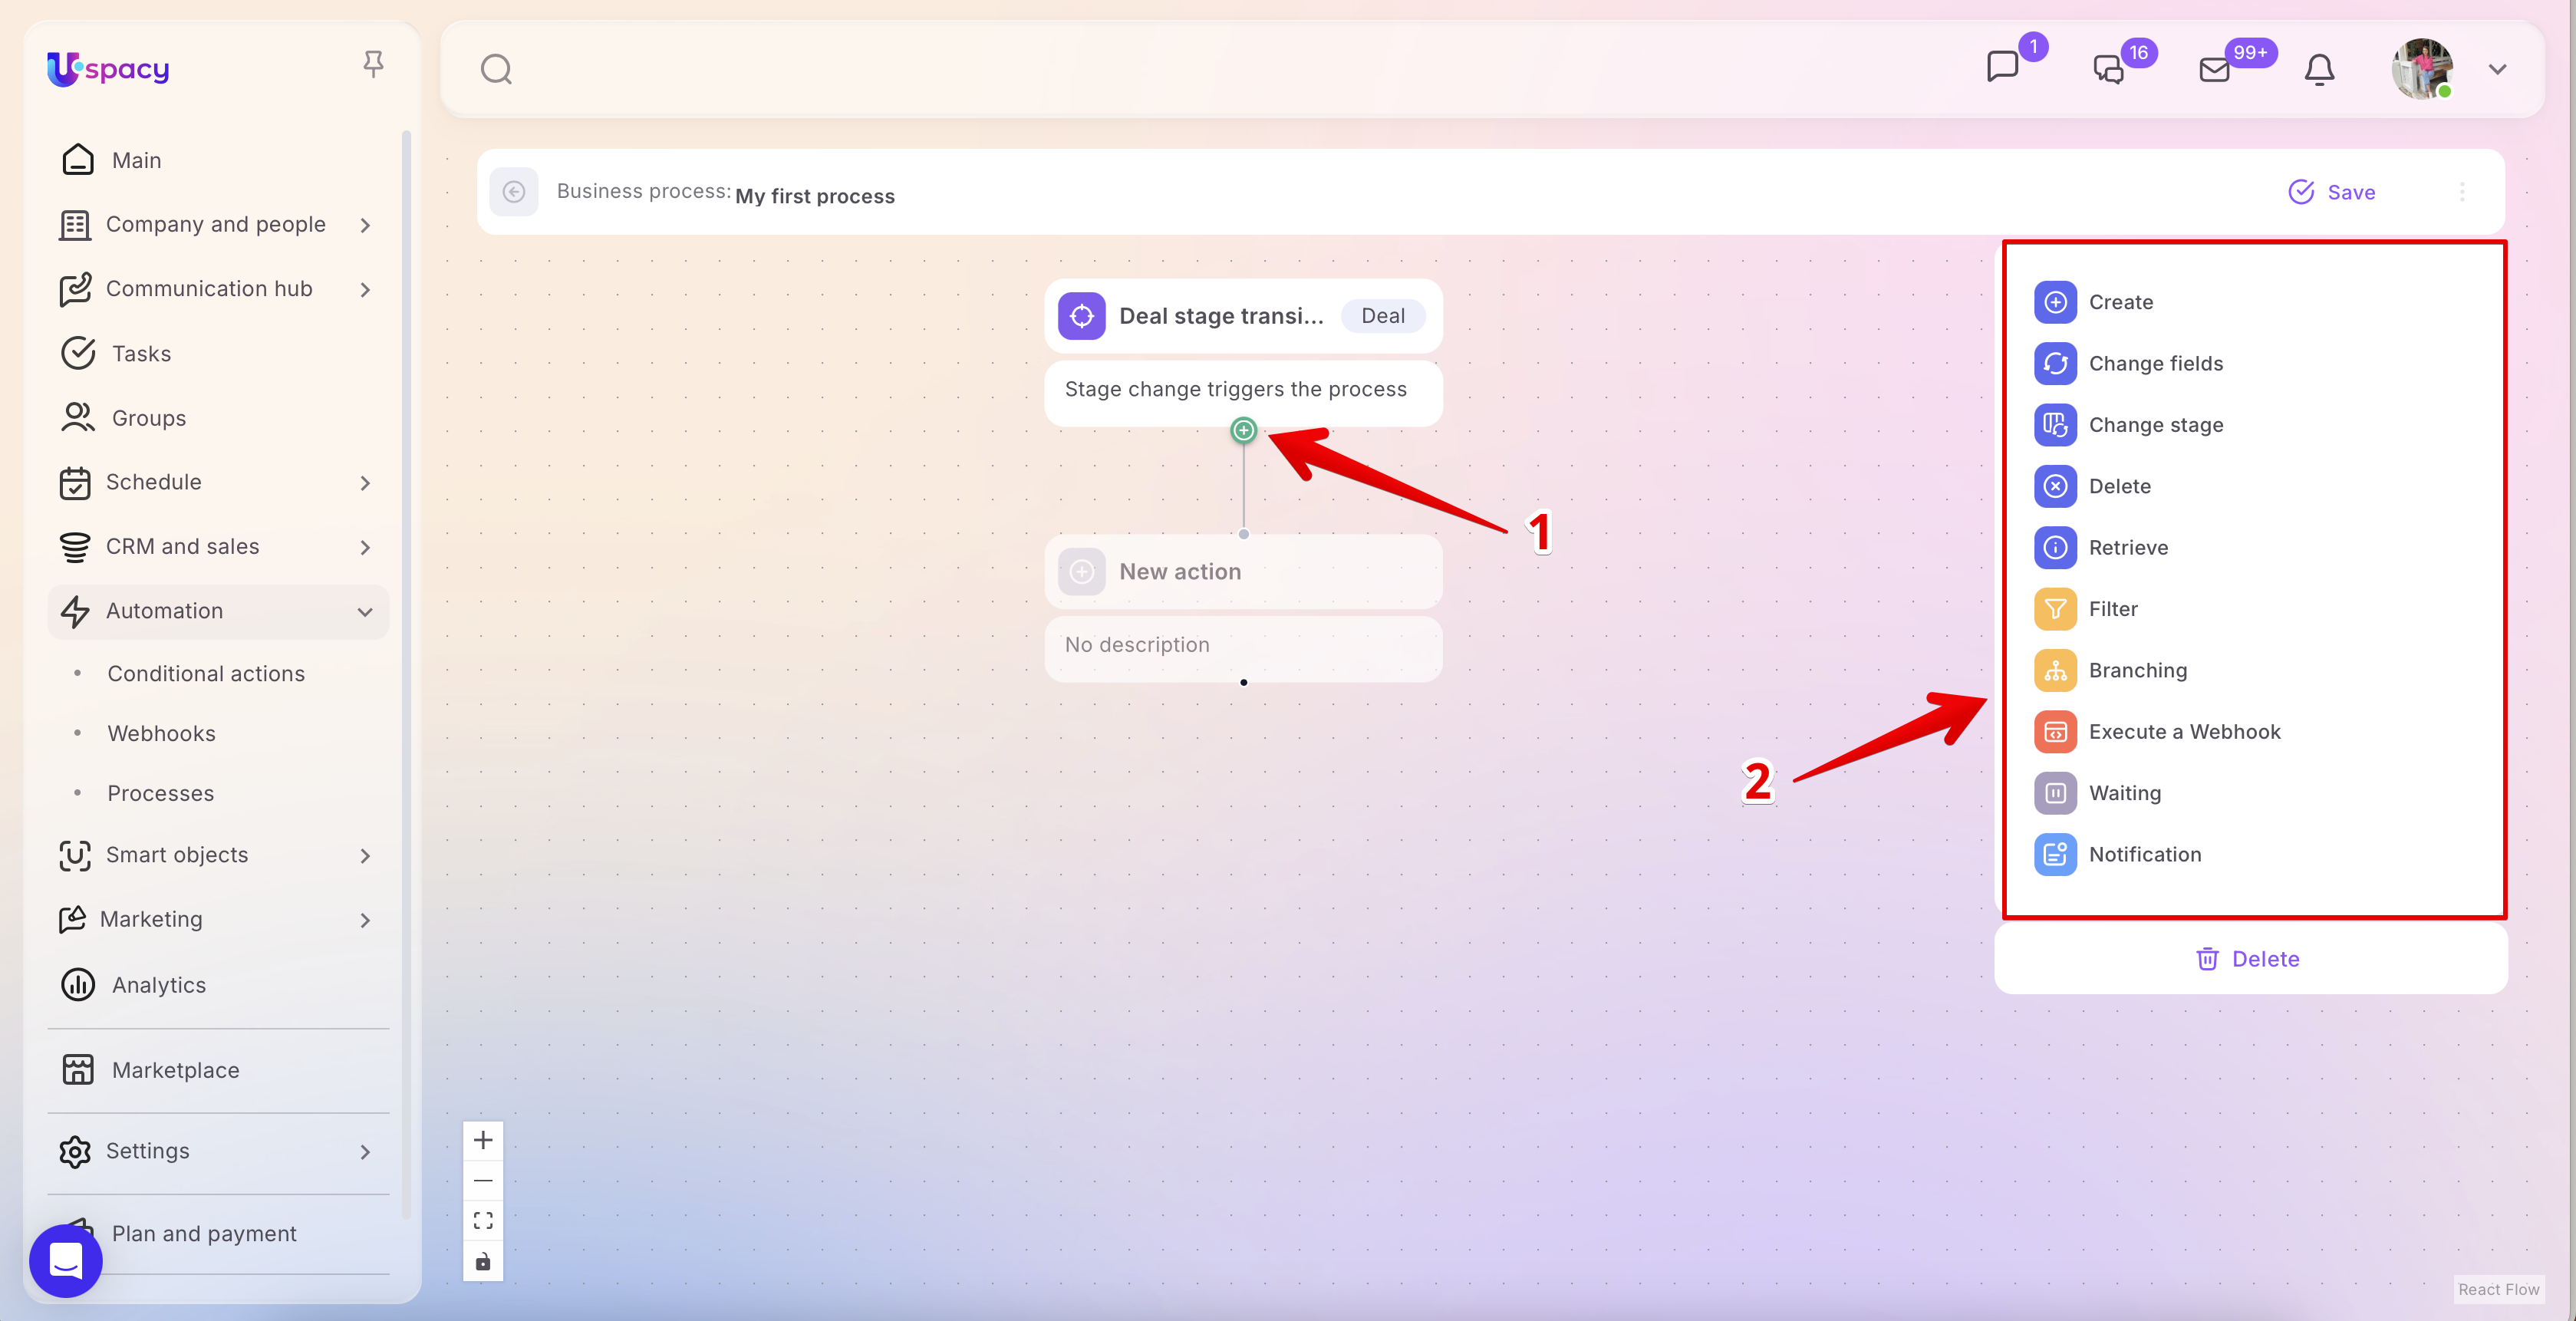
💡 Each action block contains a section where you must provide a name and description for the action.

Action: Filter
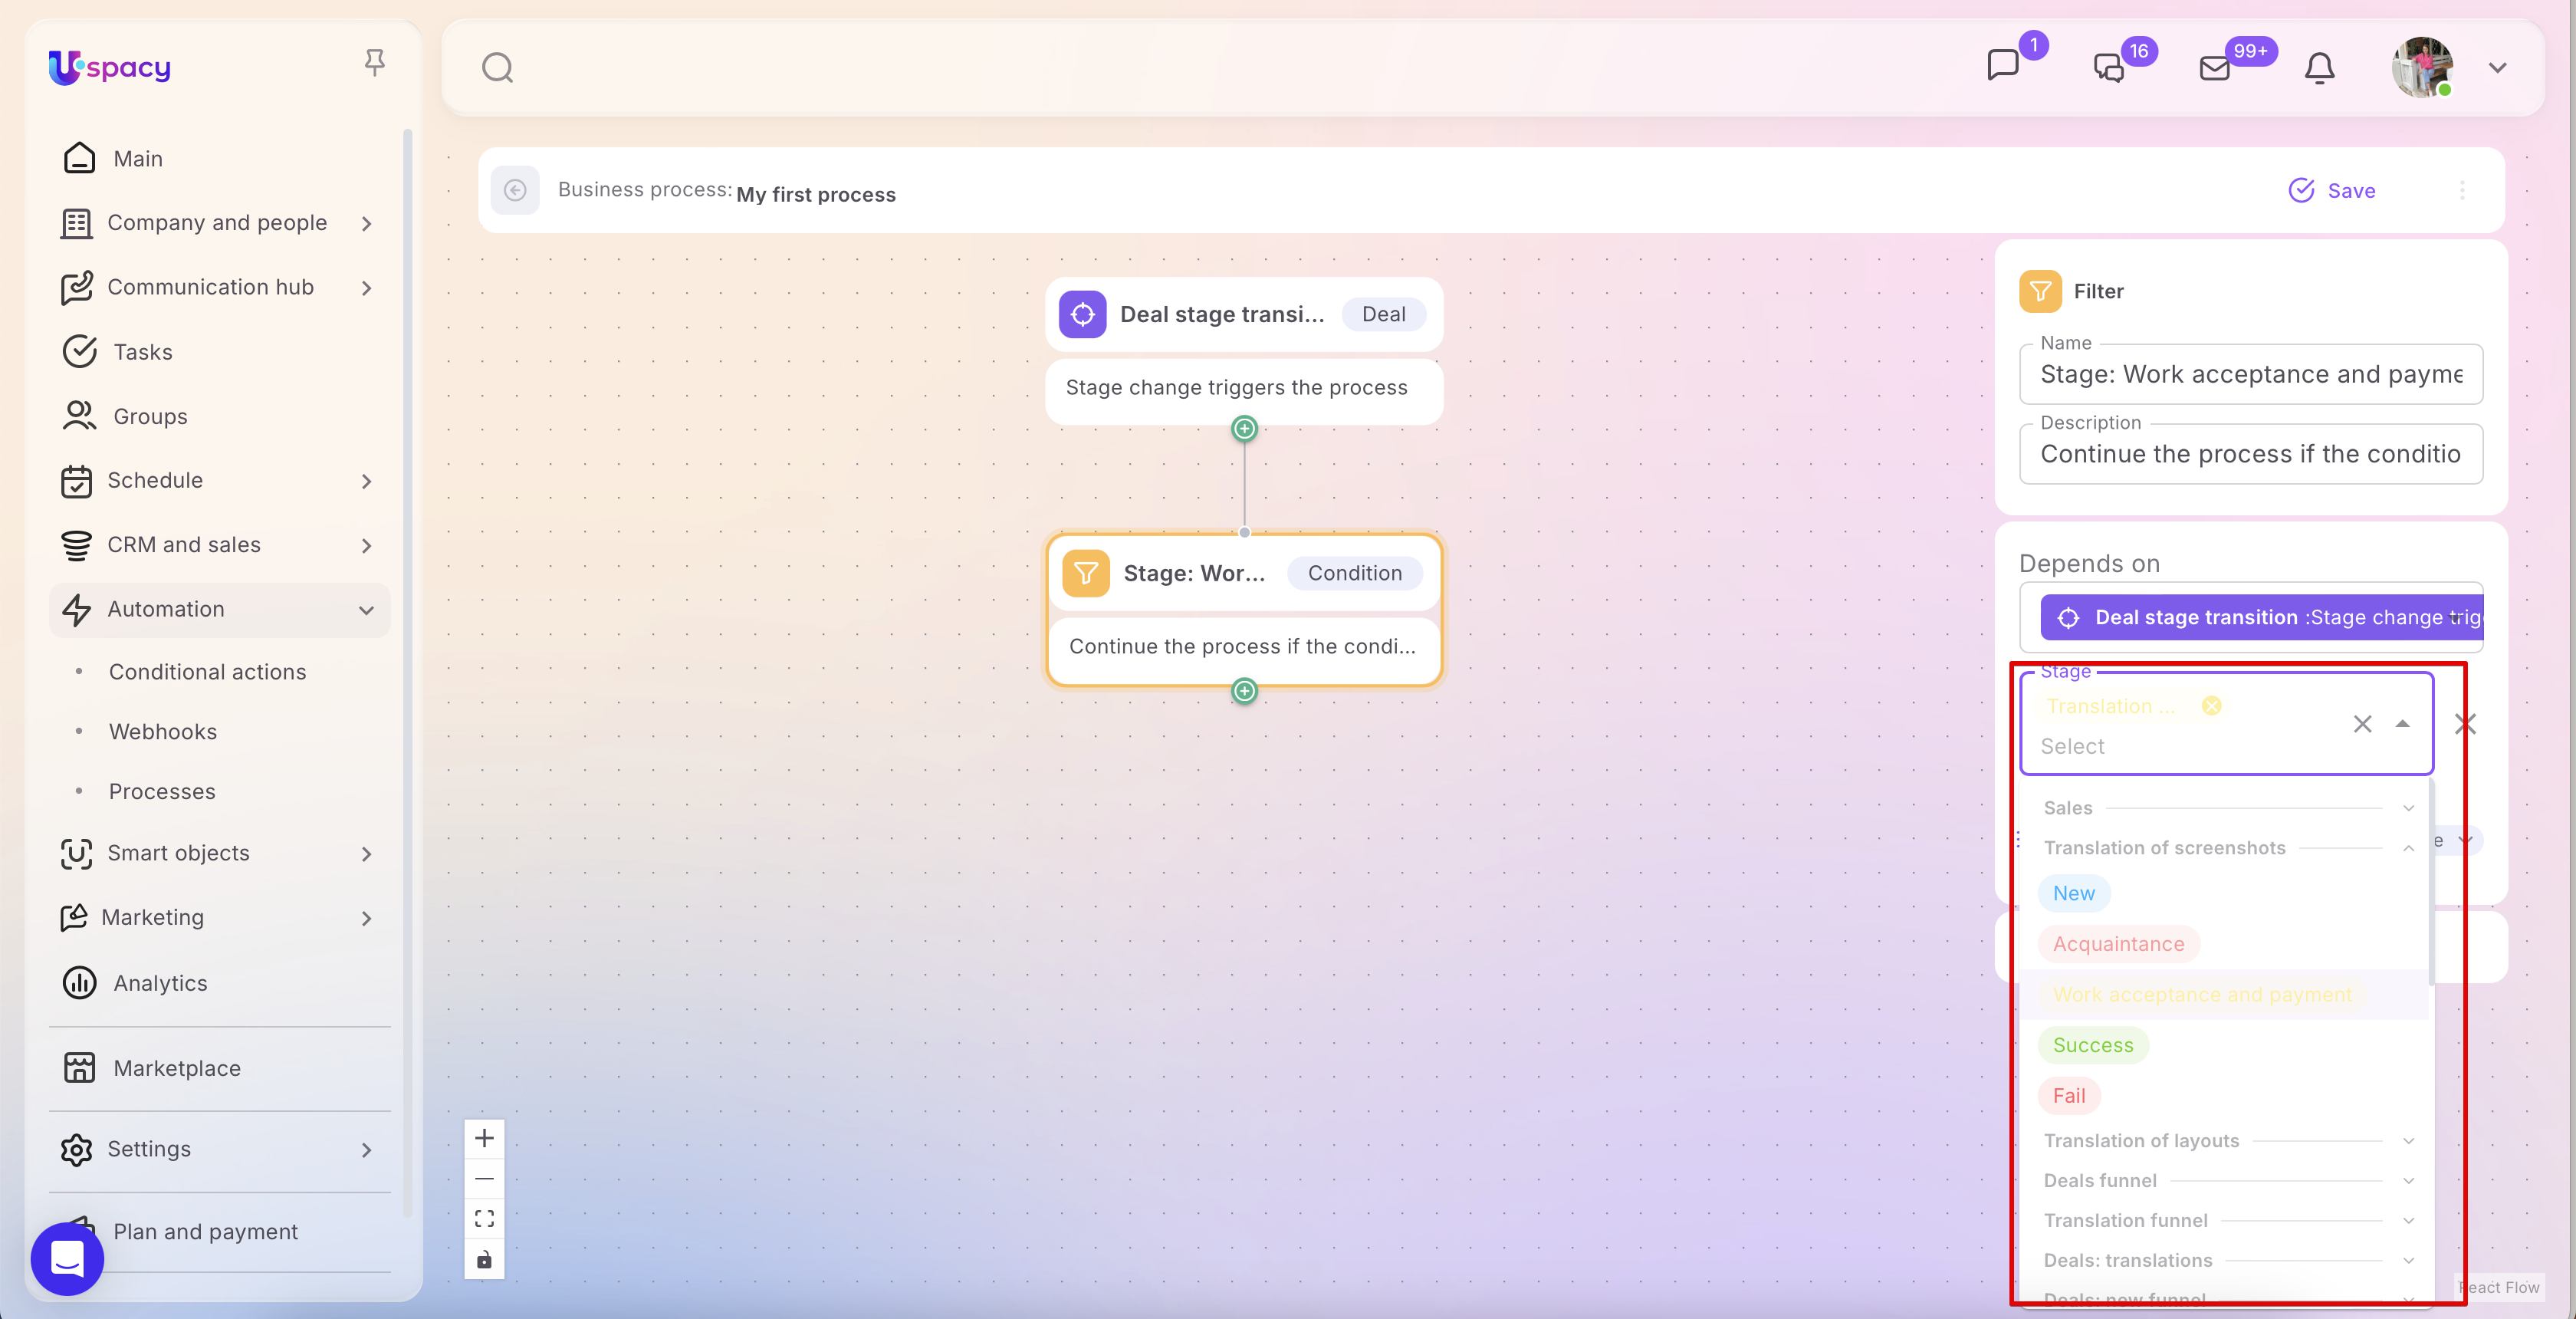
Let’s start with the Filter action, as it allows you to set the basic conditions under which the process will continue. It’s one of the simplest ways to check whether an element meets specific criteria before moving on to the next steps in a business process.
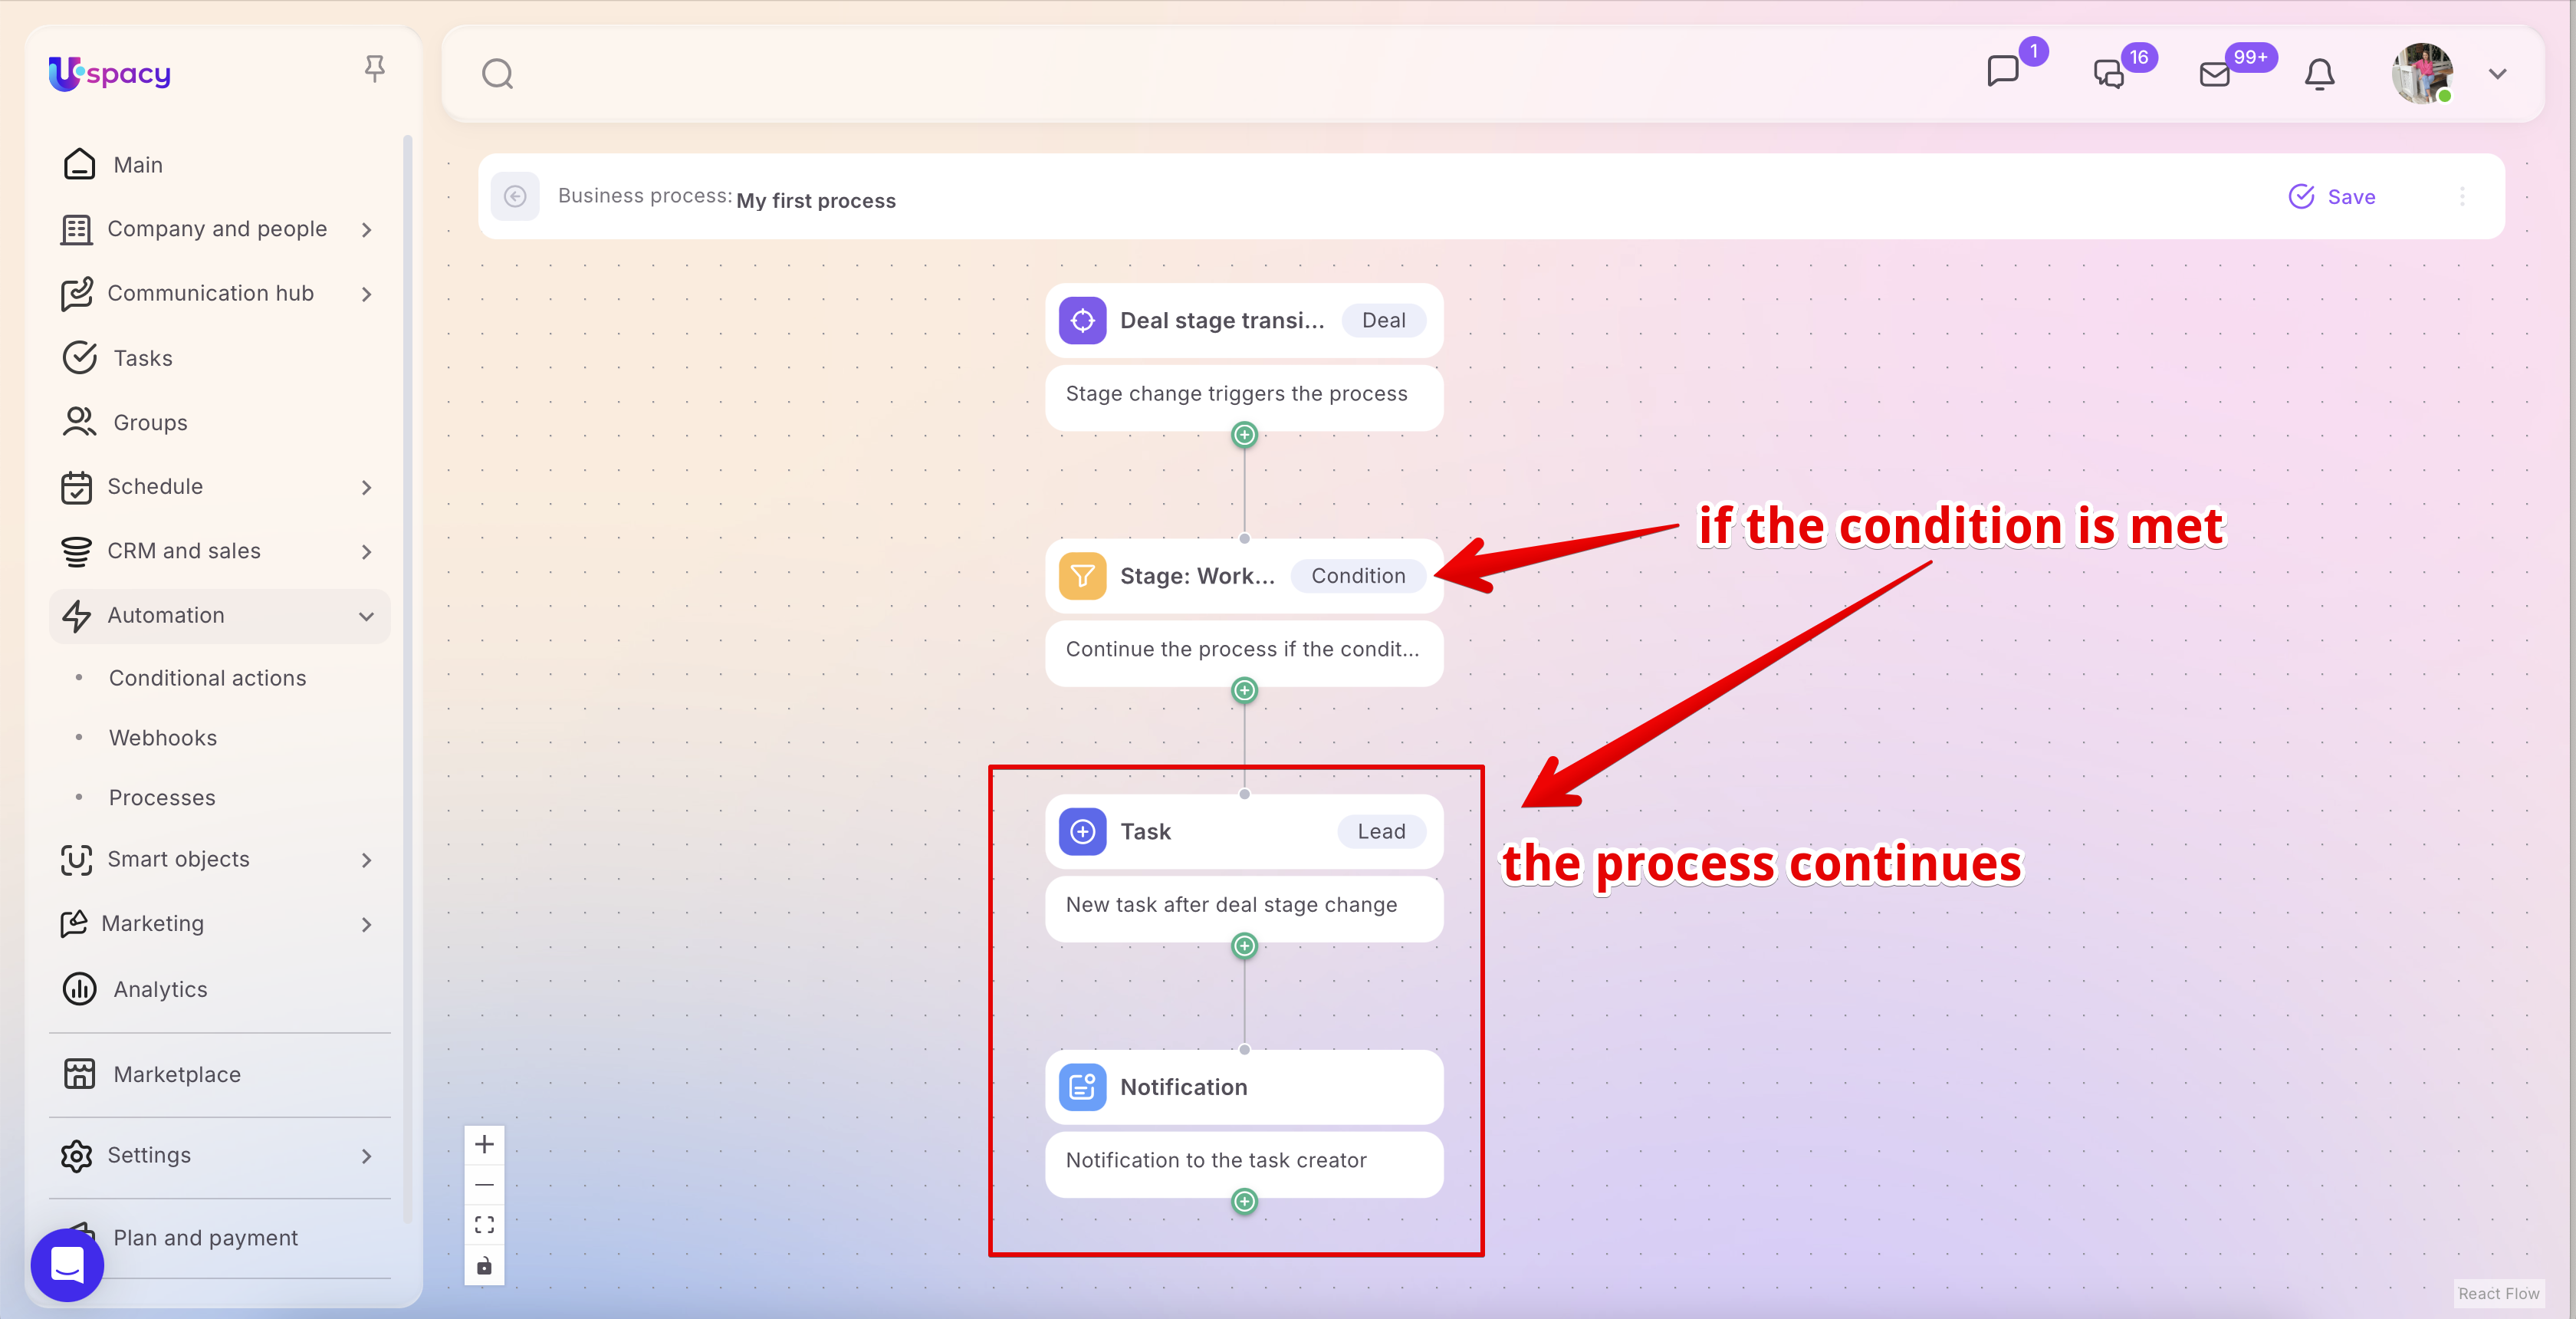
The logic of the Filter is straightforward: it has a single execution path. The system checks the specified condition (or set of conditions), and the process continues in only one of two ways. If the condition is met, the process moves to the next block. If not, the process stops at this stage.
➢ Example: In a process, you can set a condition that a deal must move to the “Work acceptance and payment” stage. If this condition is met, the process will continue and execute the next action. If the deal moves to any other stage, the Filter will block it, and the process will stop at this check.
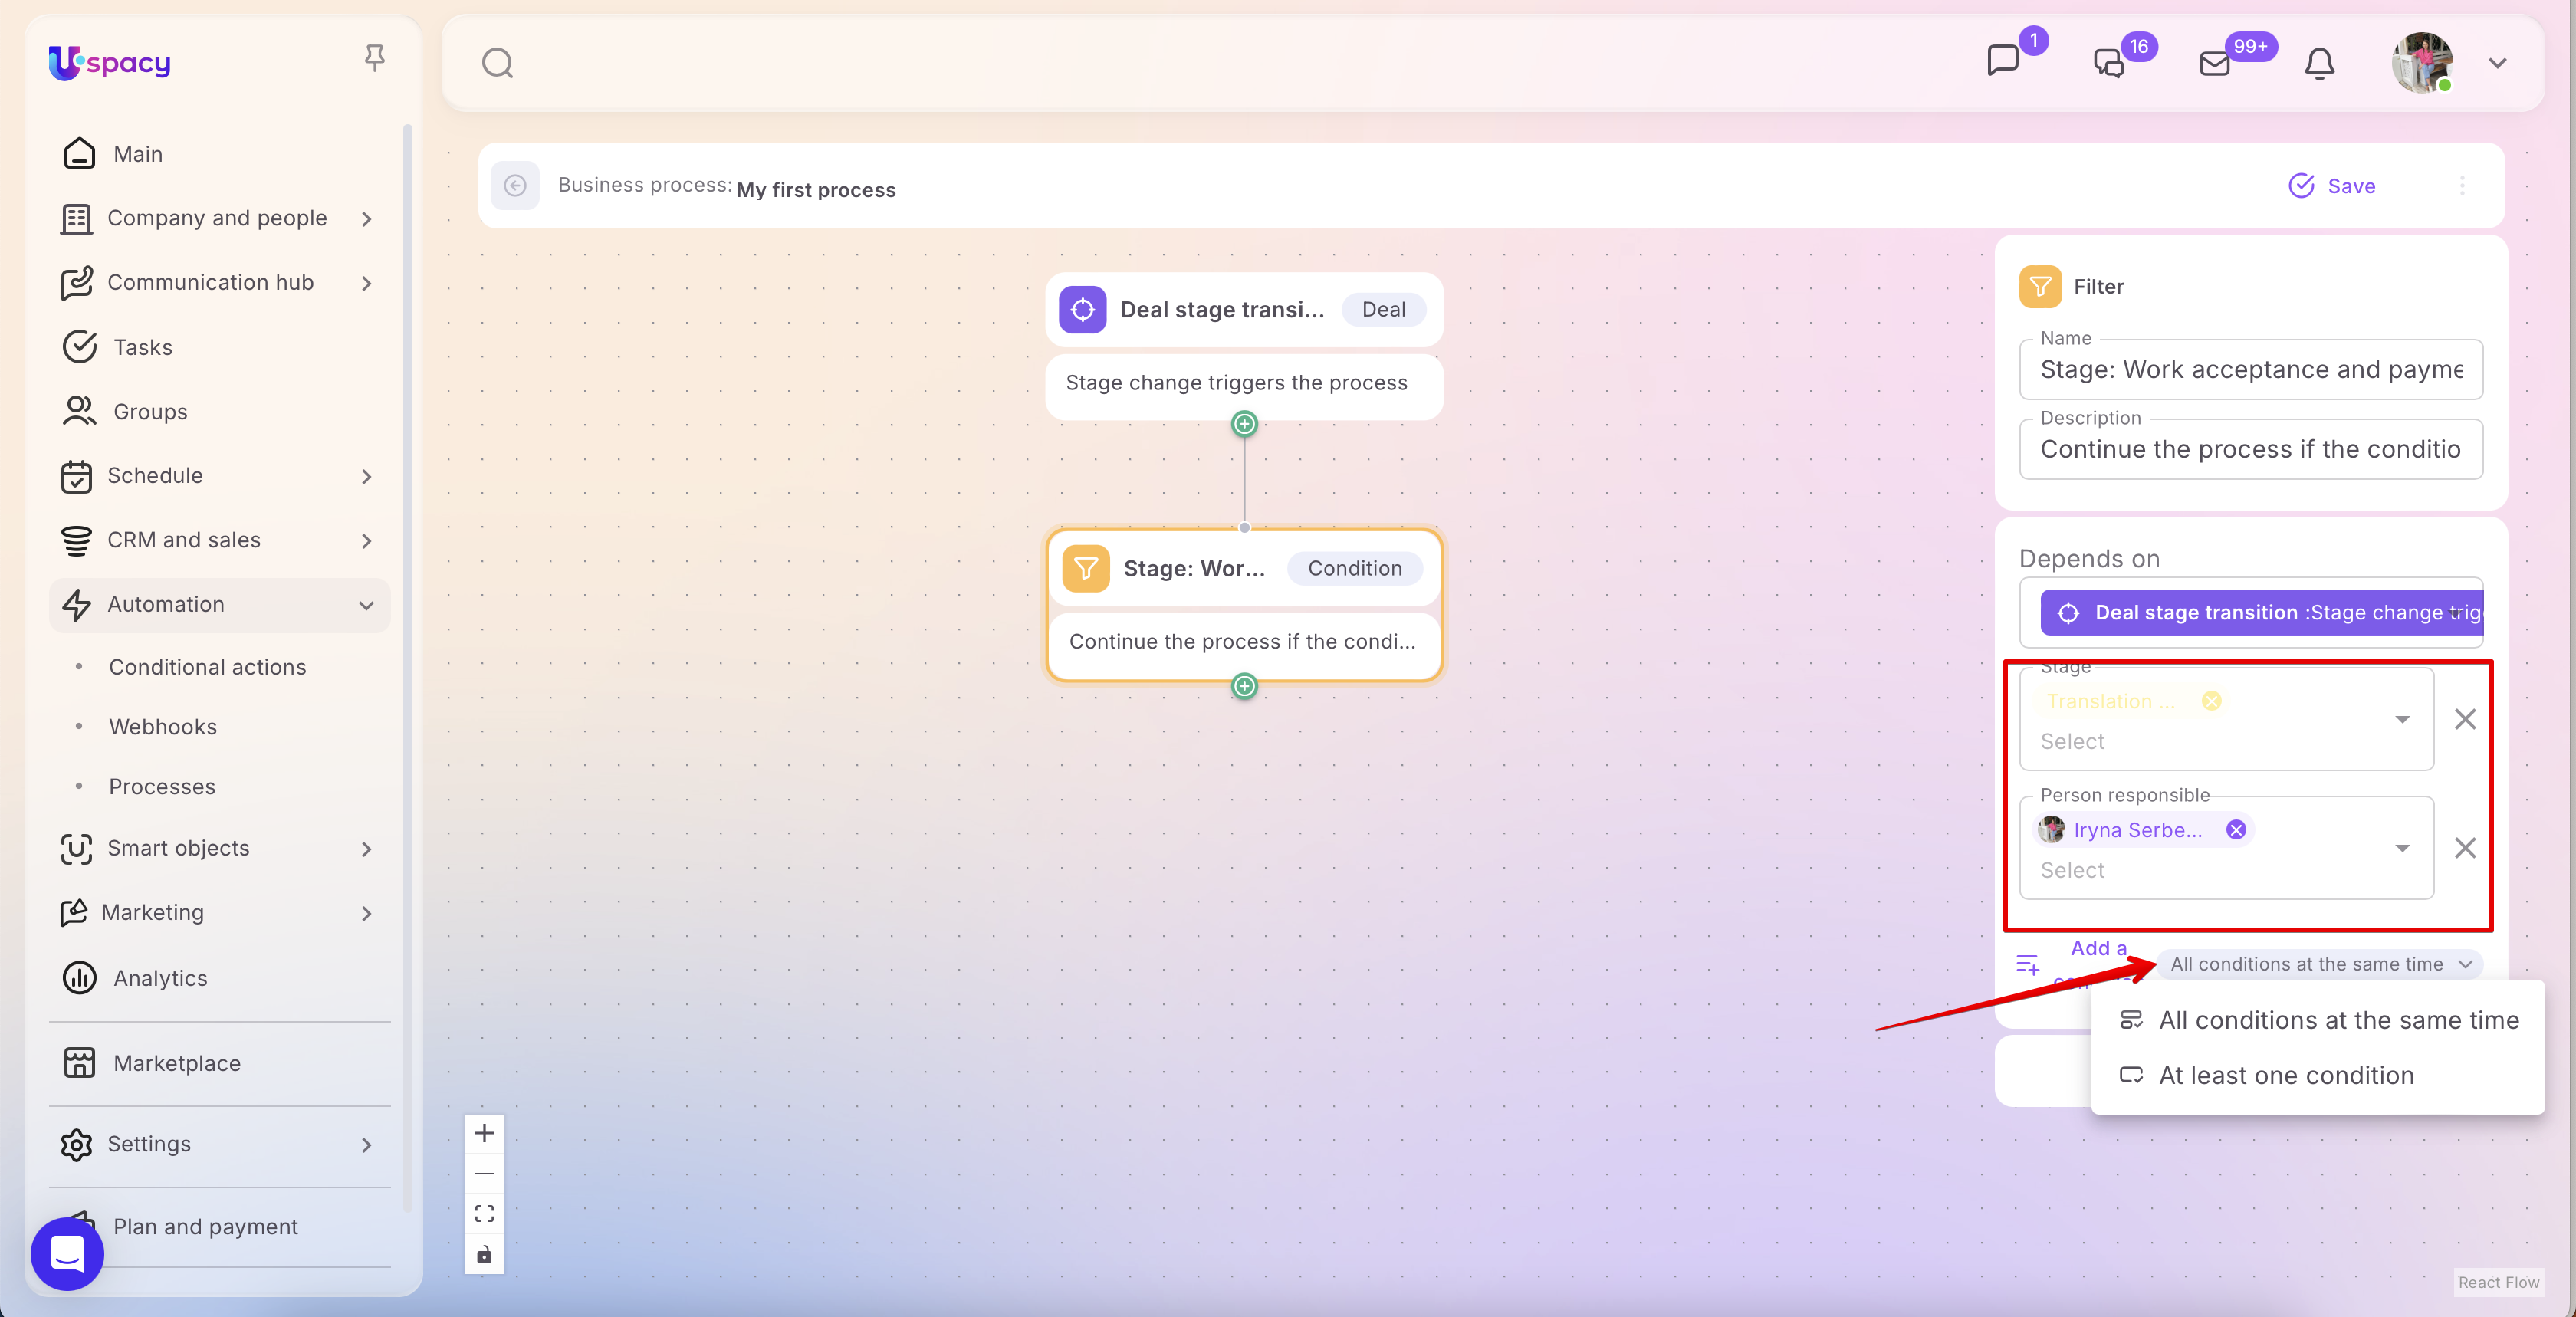
Of course, you can specify multiple conditions and configure how they are combined.
- All conditions at the same time. This option requires that the event object satisfies all specified conditions simultaneously. In other words, the logical operator “AND” is applied.
- At least one condition. This option requires that the event object satisfies at least one of the specified conditions. In other words, the logical operator “OR” is applied.
This approach is useful when you need to check a single specific condition and proceed only if it is met. If the process should account for multiple possible paths or outcomes, it’s better to use the Branching action.
Action: Branching
Unlike the Filter, the Branching action is not limited to a single condition or a single execution path. It allows you to set multiple branches with different conditions and define what should happen in each case. This is where the process logic is determined: where it should go next and which actions should be executed depending on the result of the check.
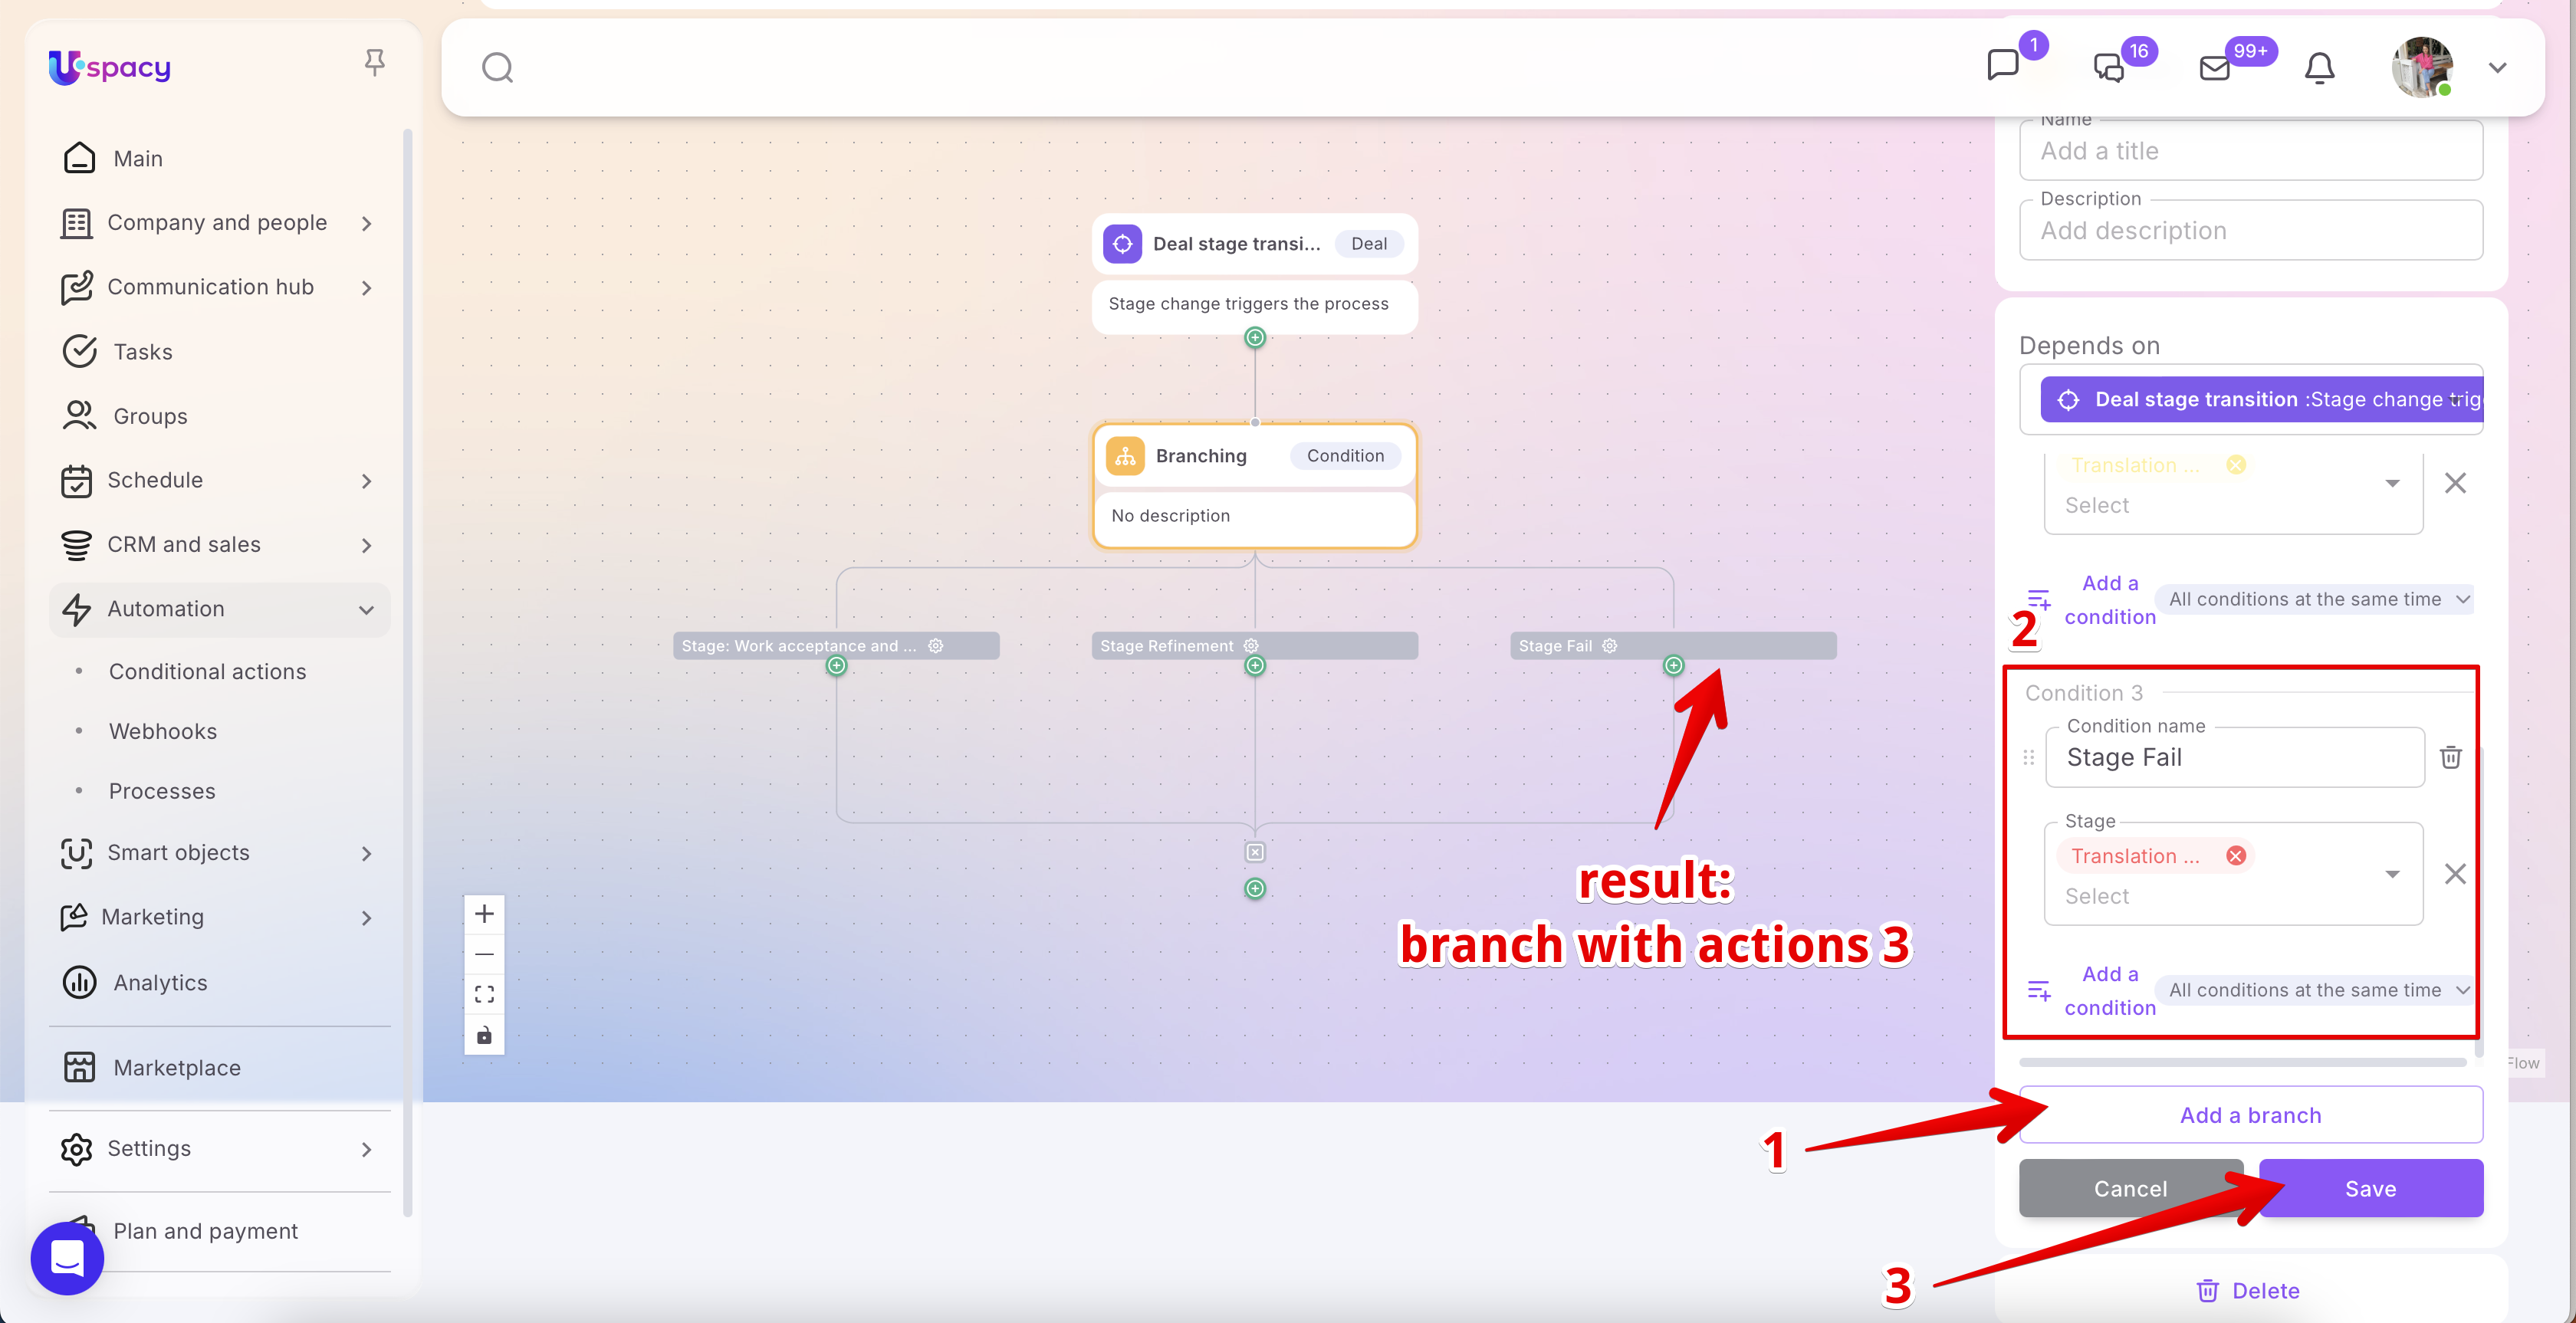
In other words, Branching can be seen as a tool that splits one process into multiple possible directions, allowing you to create several branches with different conditions. By default, the action creates two branches, but more can be added if needed.
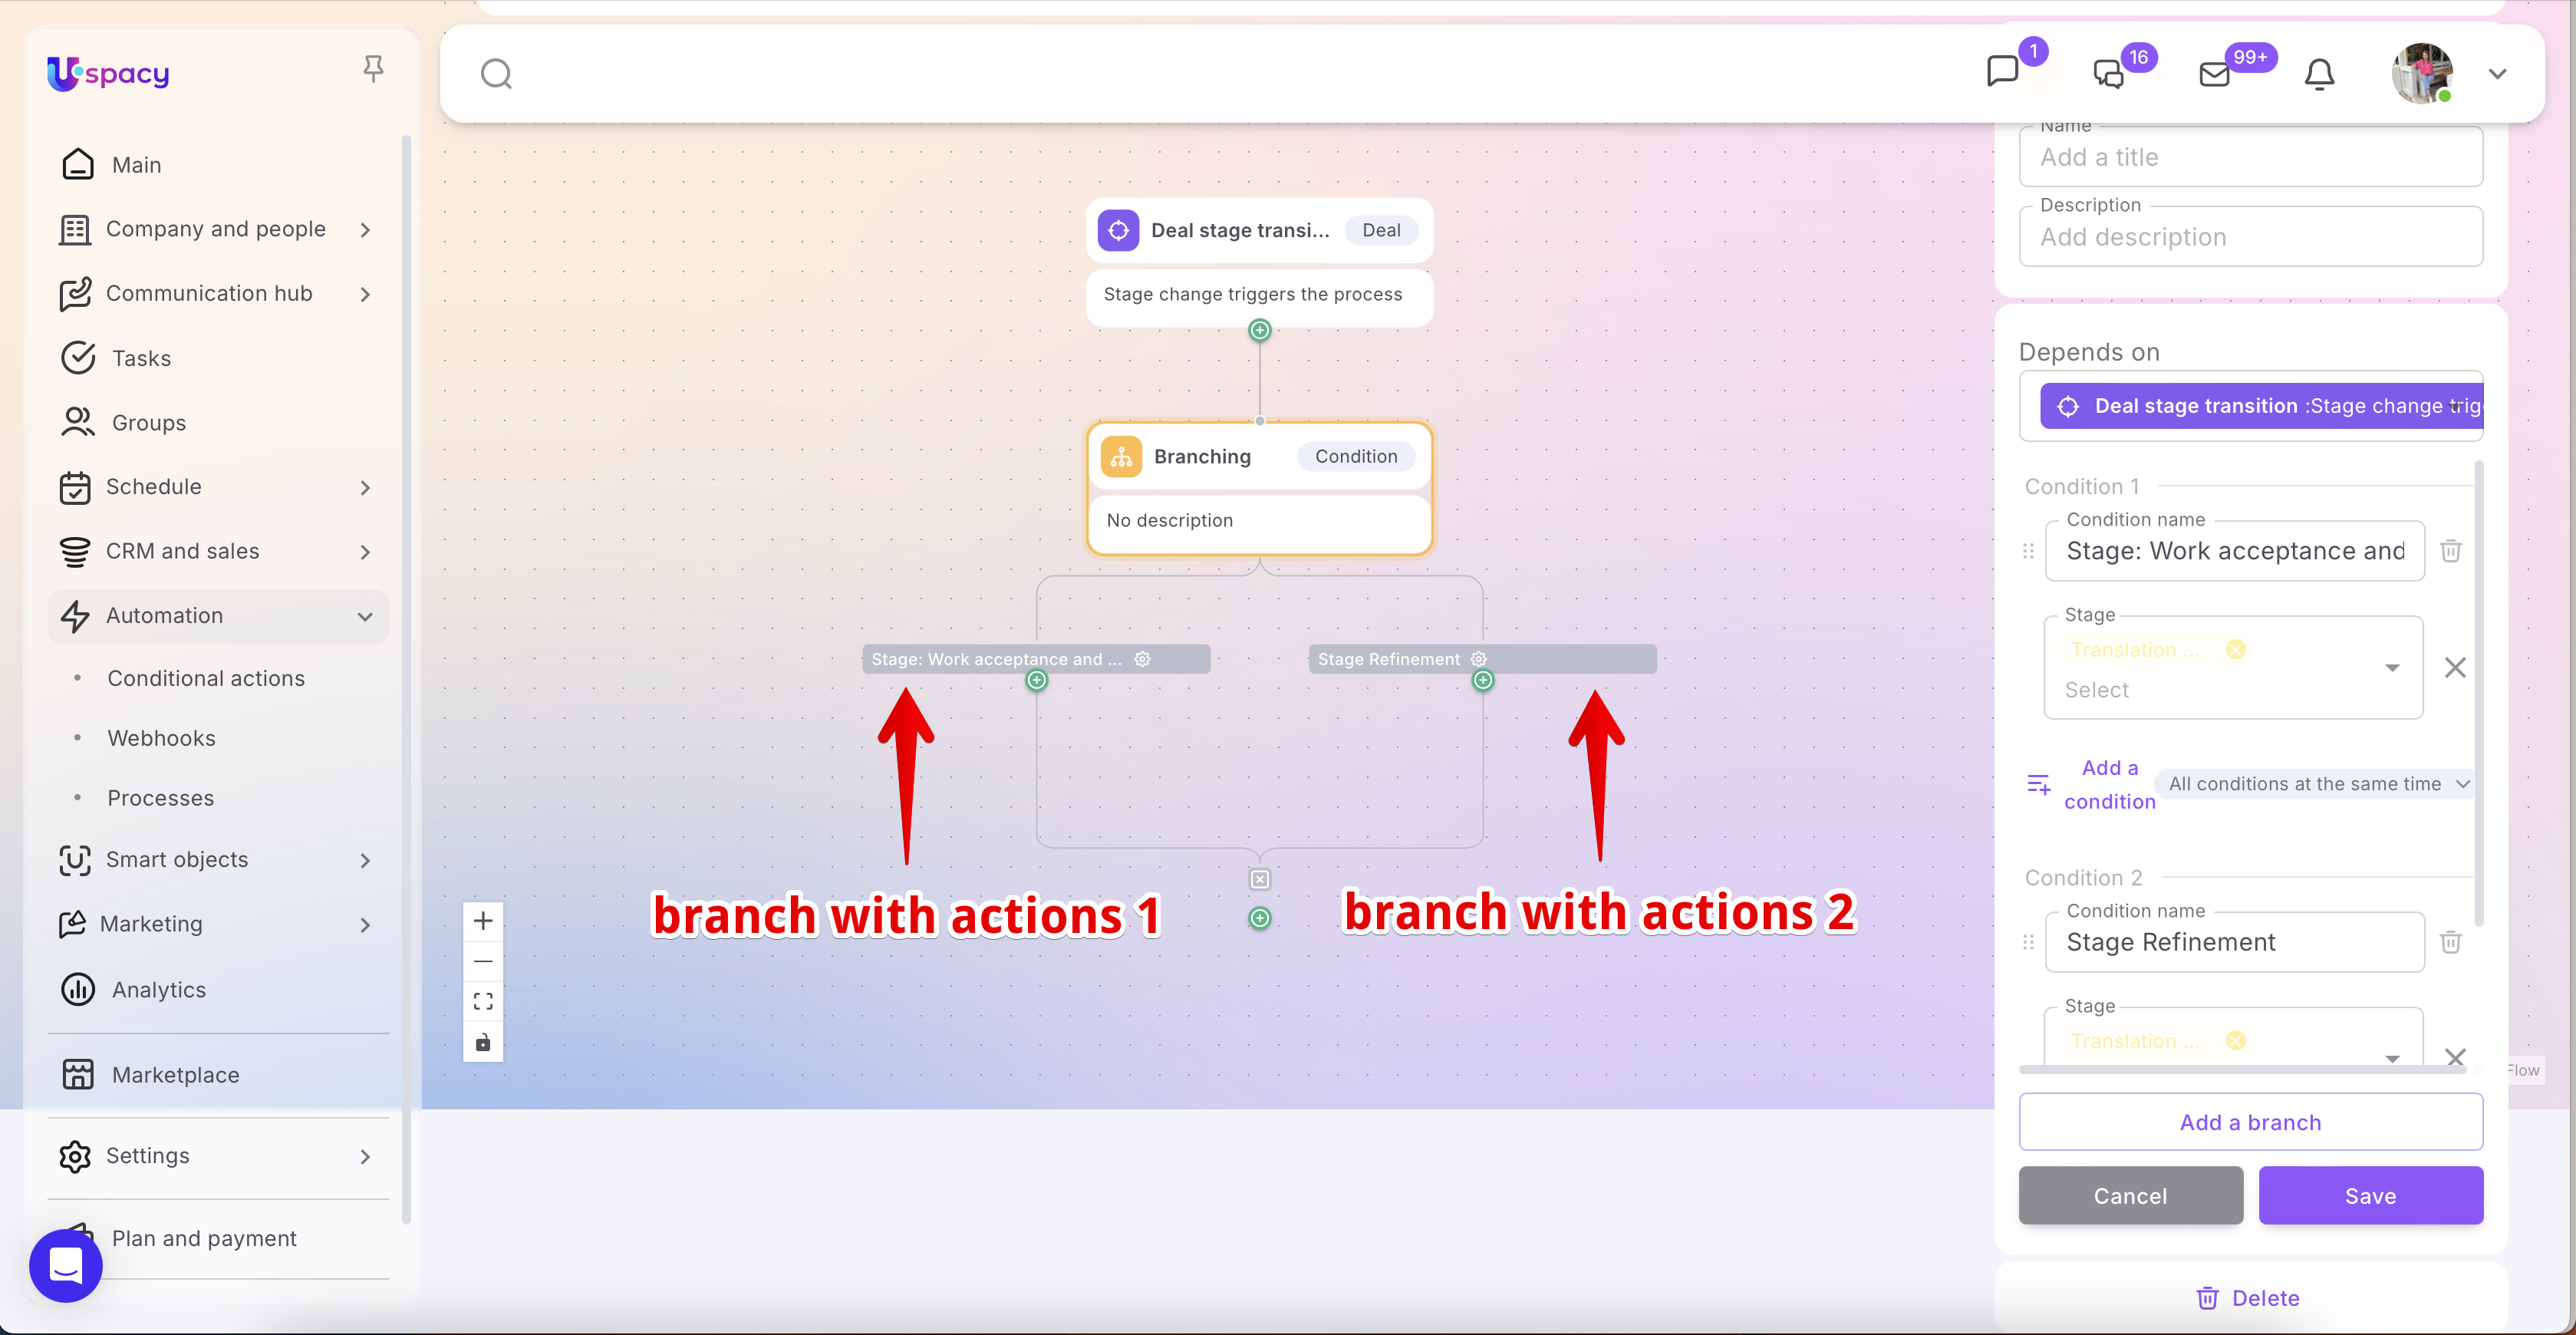
The system checks the conditions in each branch sequentially—from left to right. As soon as it finds a branch whose conditions match the data of the element, the process continues along that branch, and the actions configured for that path are executed.
It’s also worth noting that one branch can be left without conditions. In this case, it becomes a fallback option for all situations where none of the previous conditions are met. This is useful when you don’t want the process to stop but need to define a specific action for an exceptional case—for example, sending a notification to the responsible employee.
If all branches have conditions but none are met, the process stops at this stage and does not continue. This makes Branching not only useful for splitting a process into multiple scenarios but also for controlling under which conditions the process should proceed.
The main advantage of this action is that it allows you to combine multiple checks within a single process. Instead of creating several separate automations for different conditions, you can build one clear process with multiple branches. Branches can also be nested to configure more complex and flexible workflow logic.
Of course, for each branch in a Branching action, you can specify multiple conditions and configure how they are combined.
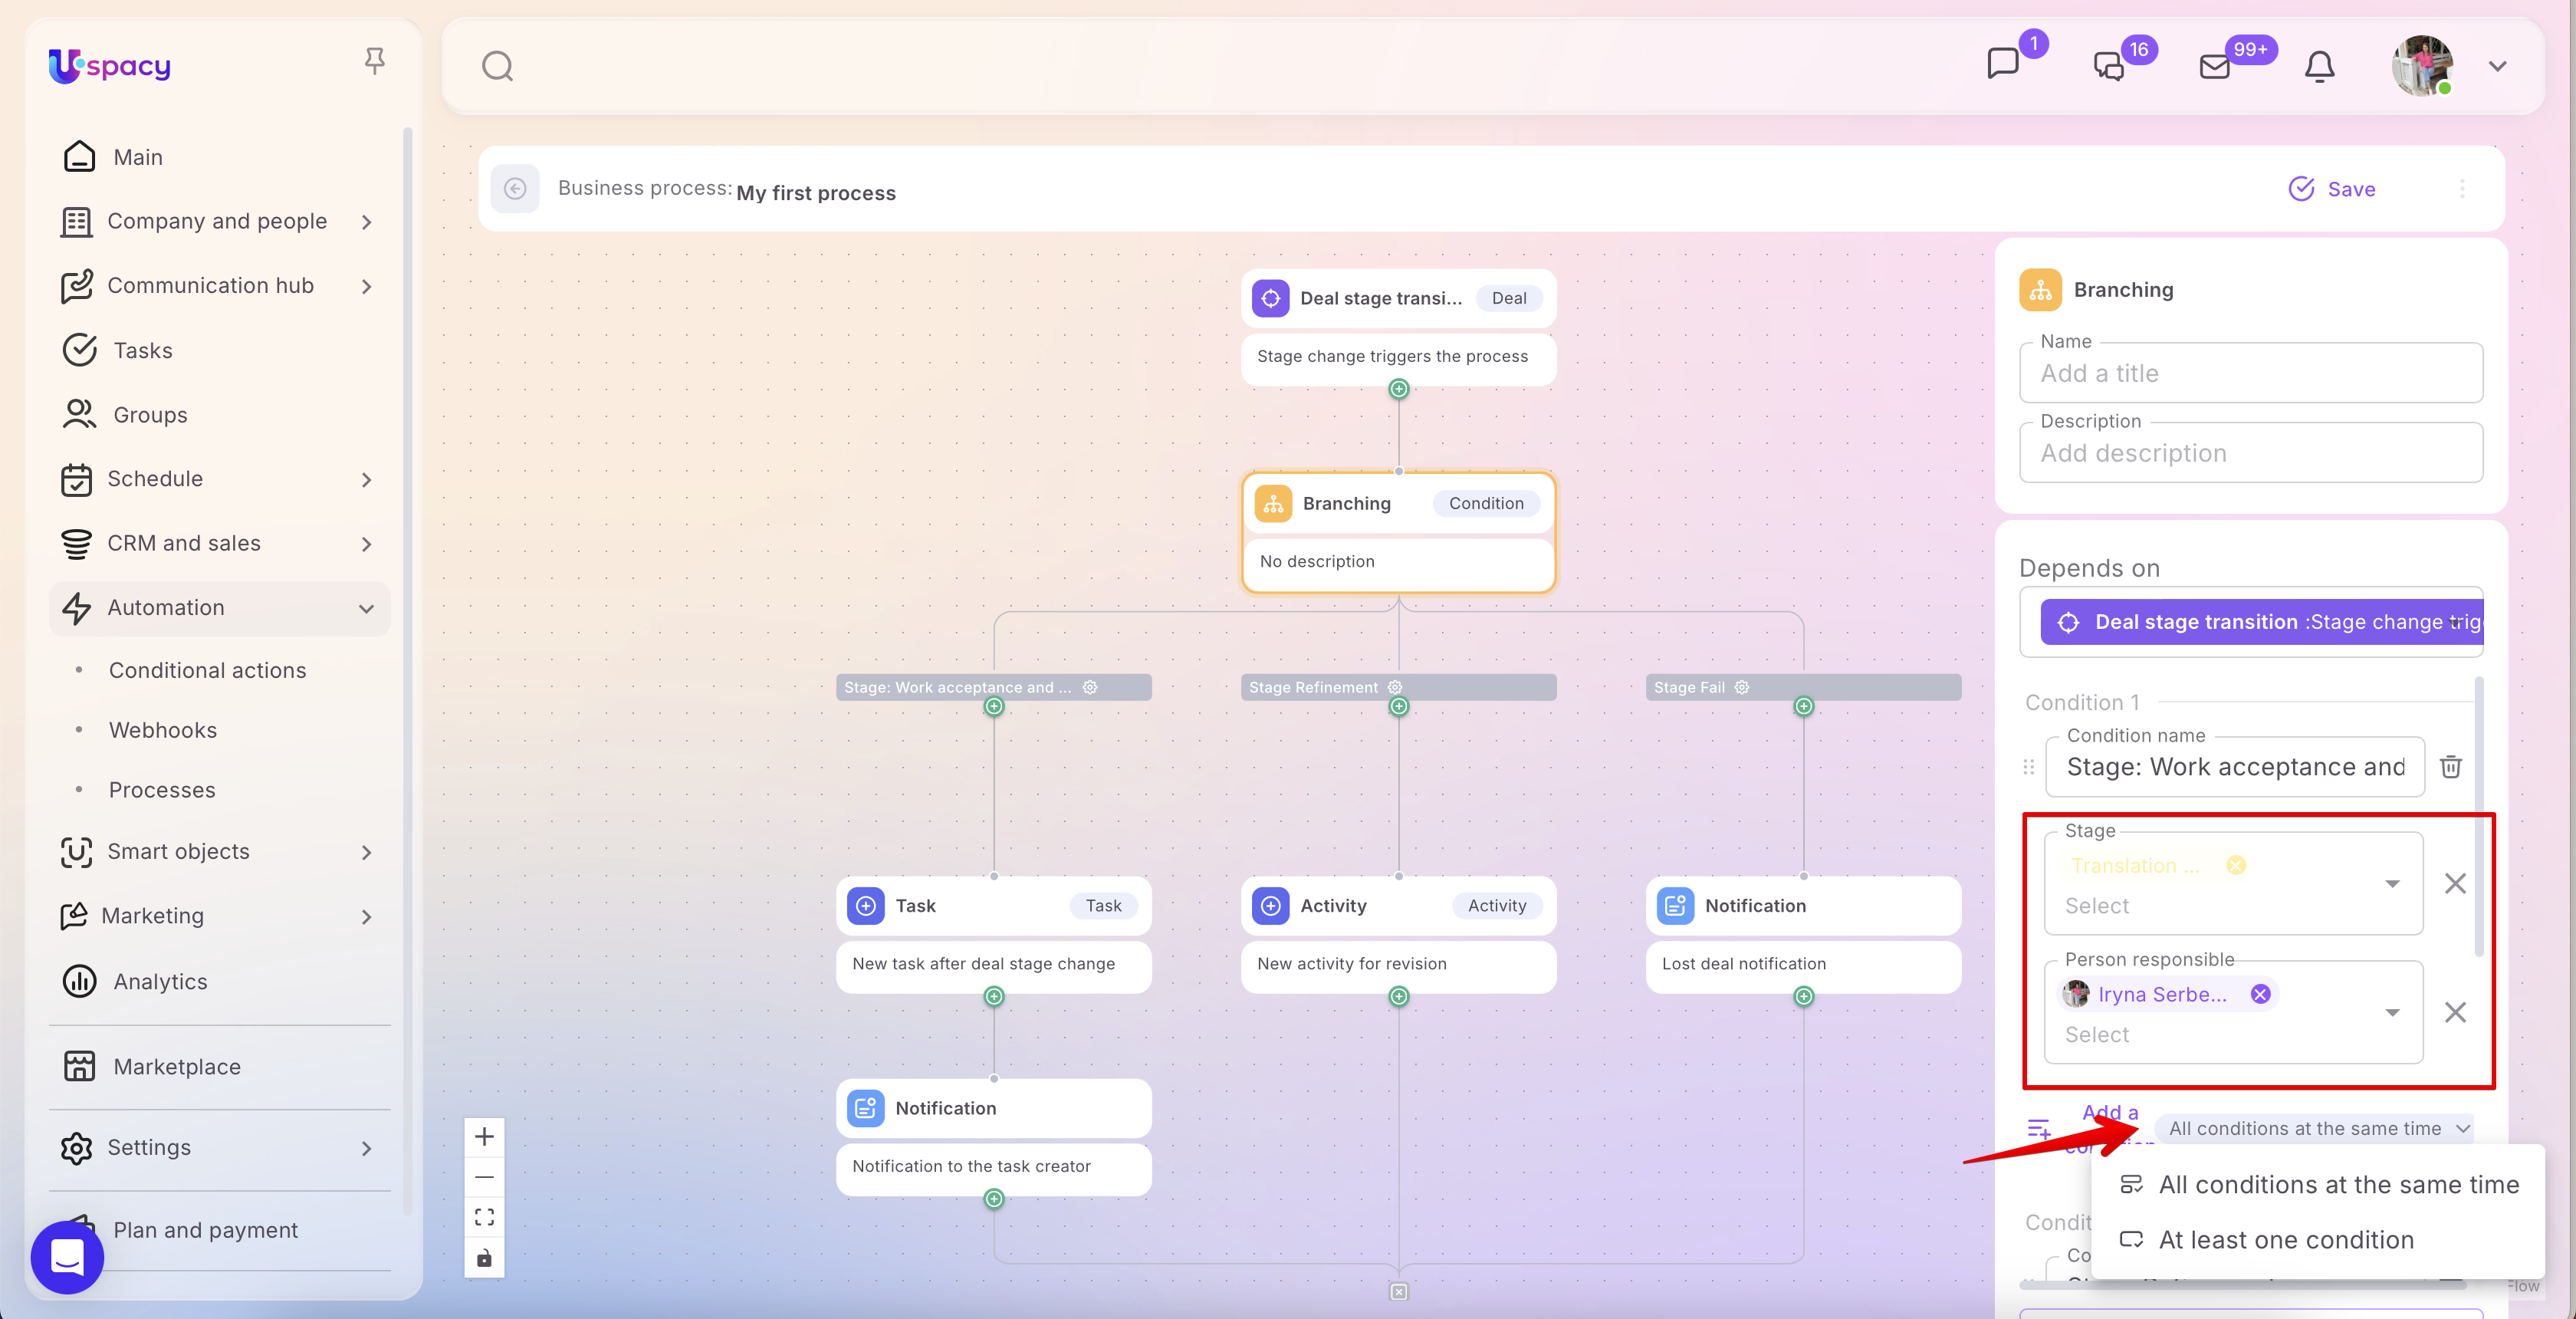
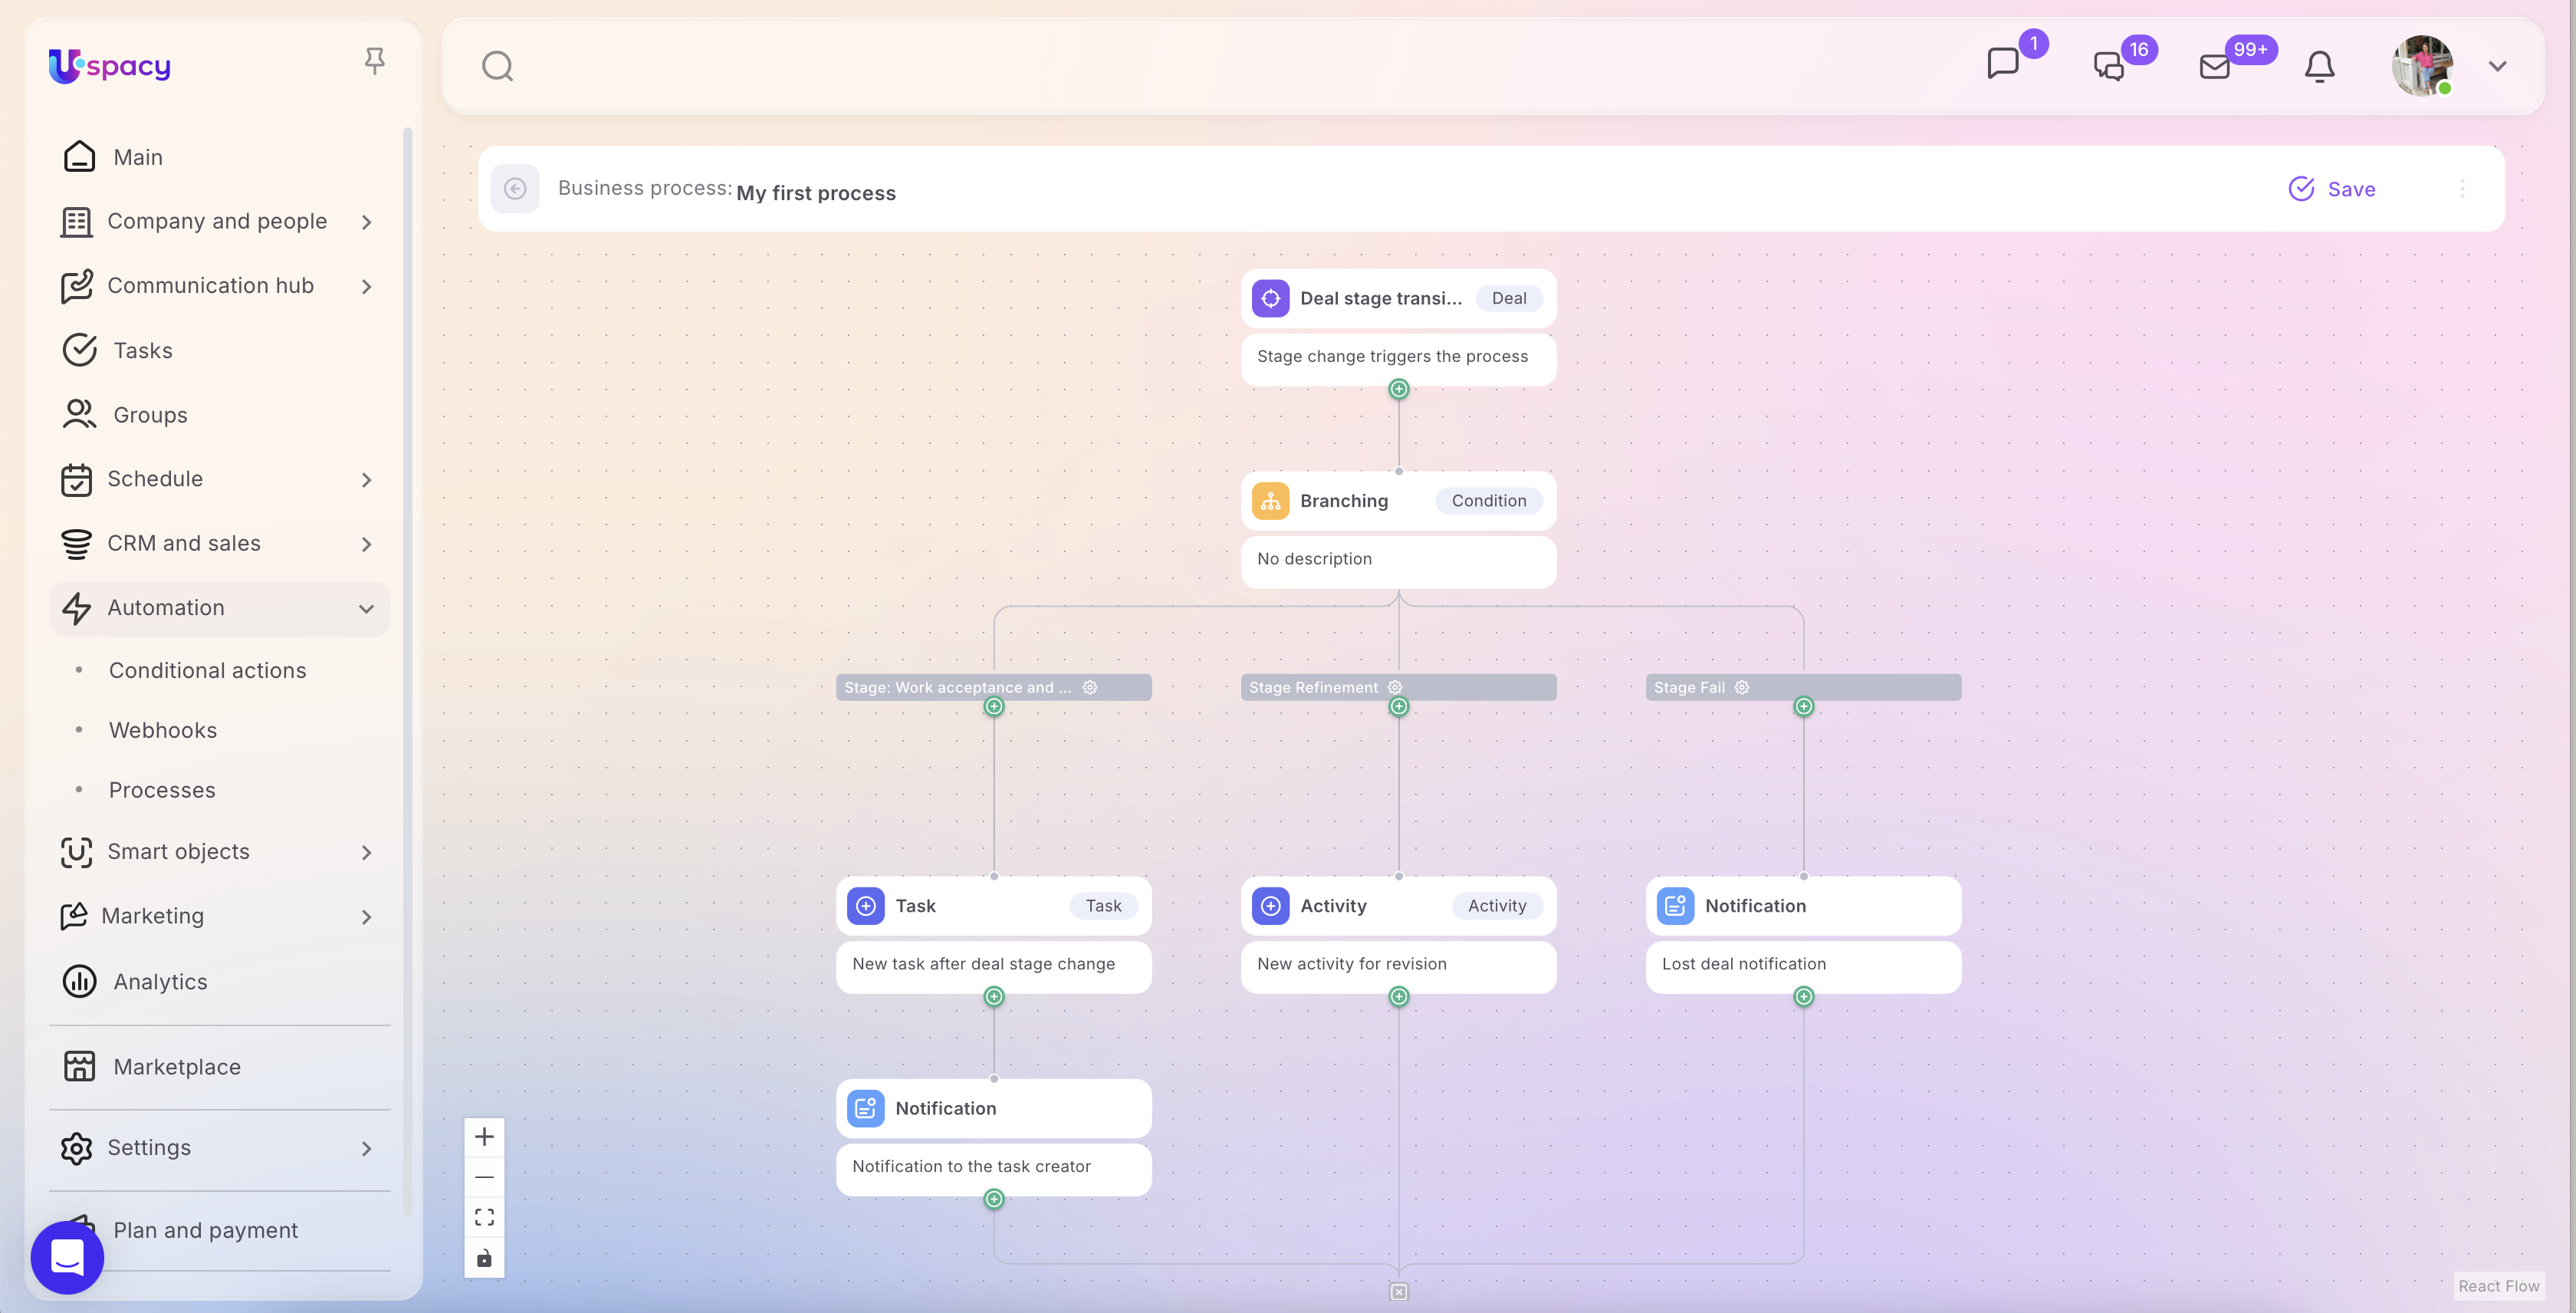
➢ Example: In a process, you can configure a Branching based on deal stages. If a deal moves to the “Work acceptance and payment” stage, the system can create a task to issue an invoice to the accounting department and then send a notification to the task creator, so they know the task has been created and the responsible employees can start working on it.
If the deal moves to the “Refinement” stage, the process will follow a different branch and create an activity to document the need for additional work on the deal.
If the deal moves to the “Fail” stage, another scenario is executed—sending a notification to the manager to inform them about the lost deal and allow for a timely response.
In this way, a single Branching action allows you to configure different subsequent actions for different deal stages within a single process.
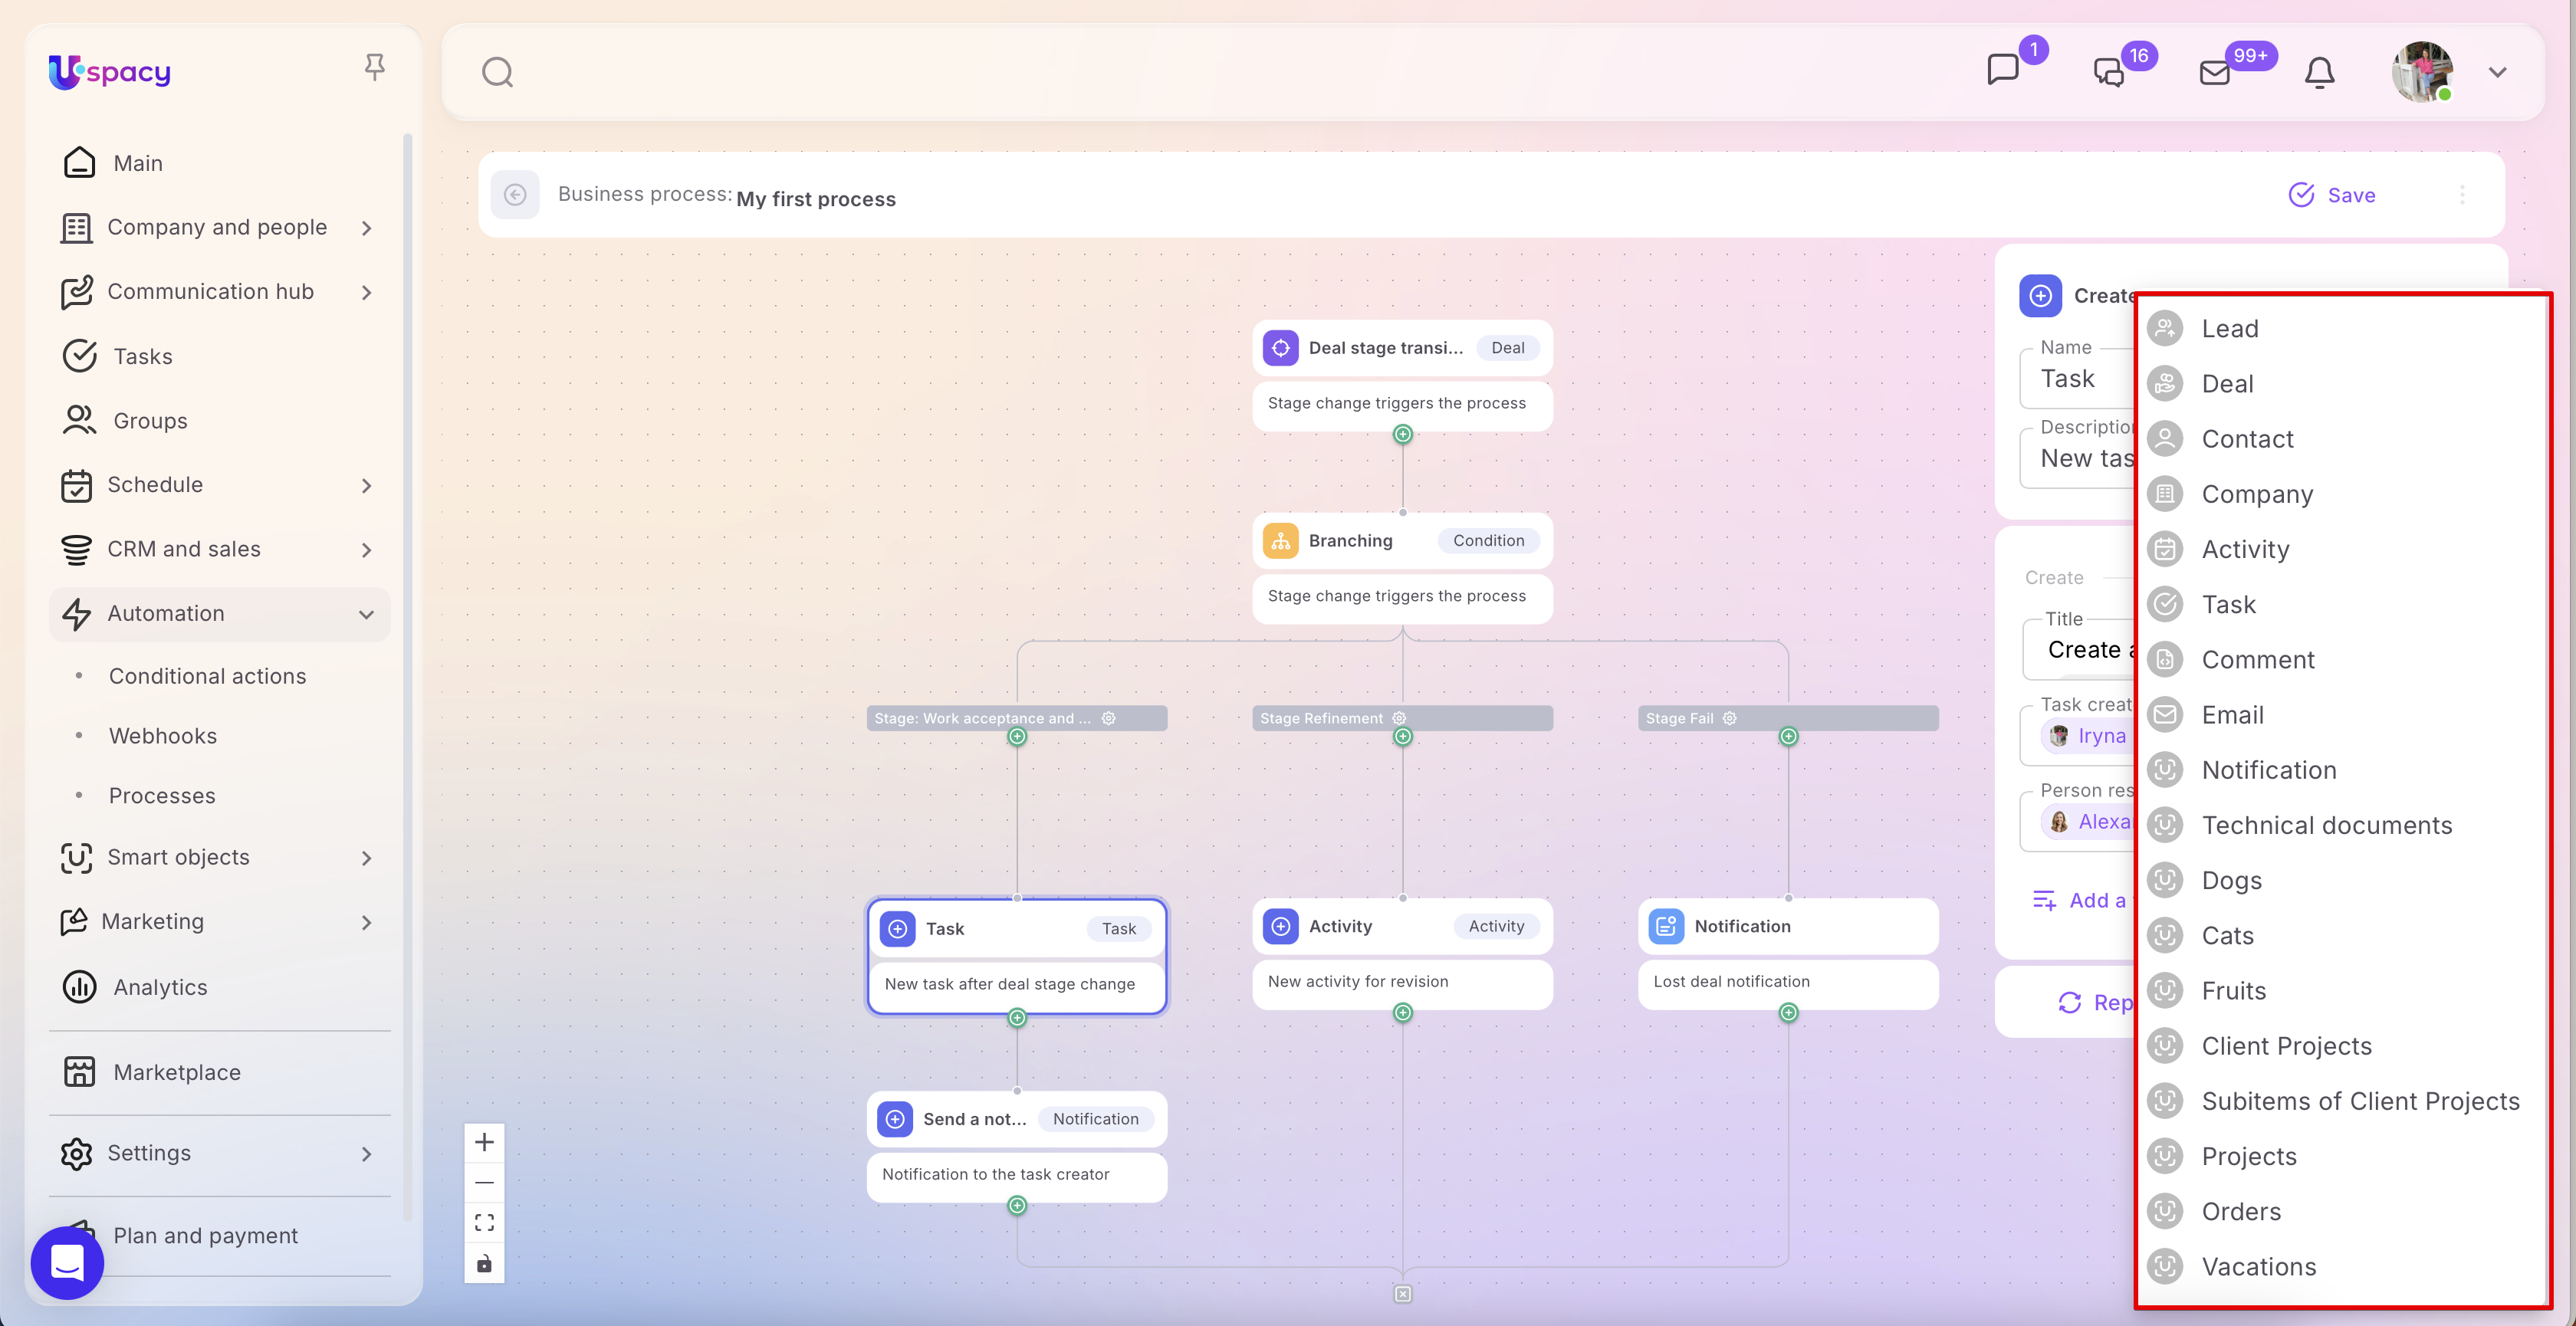
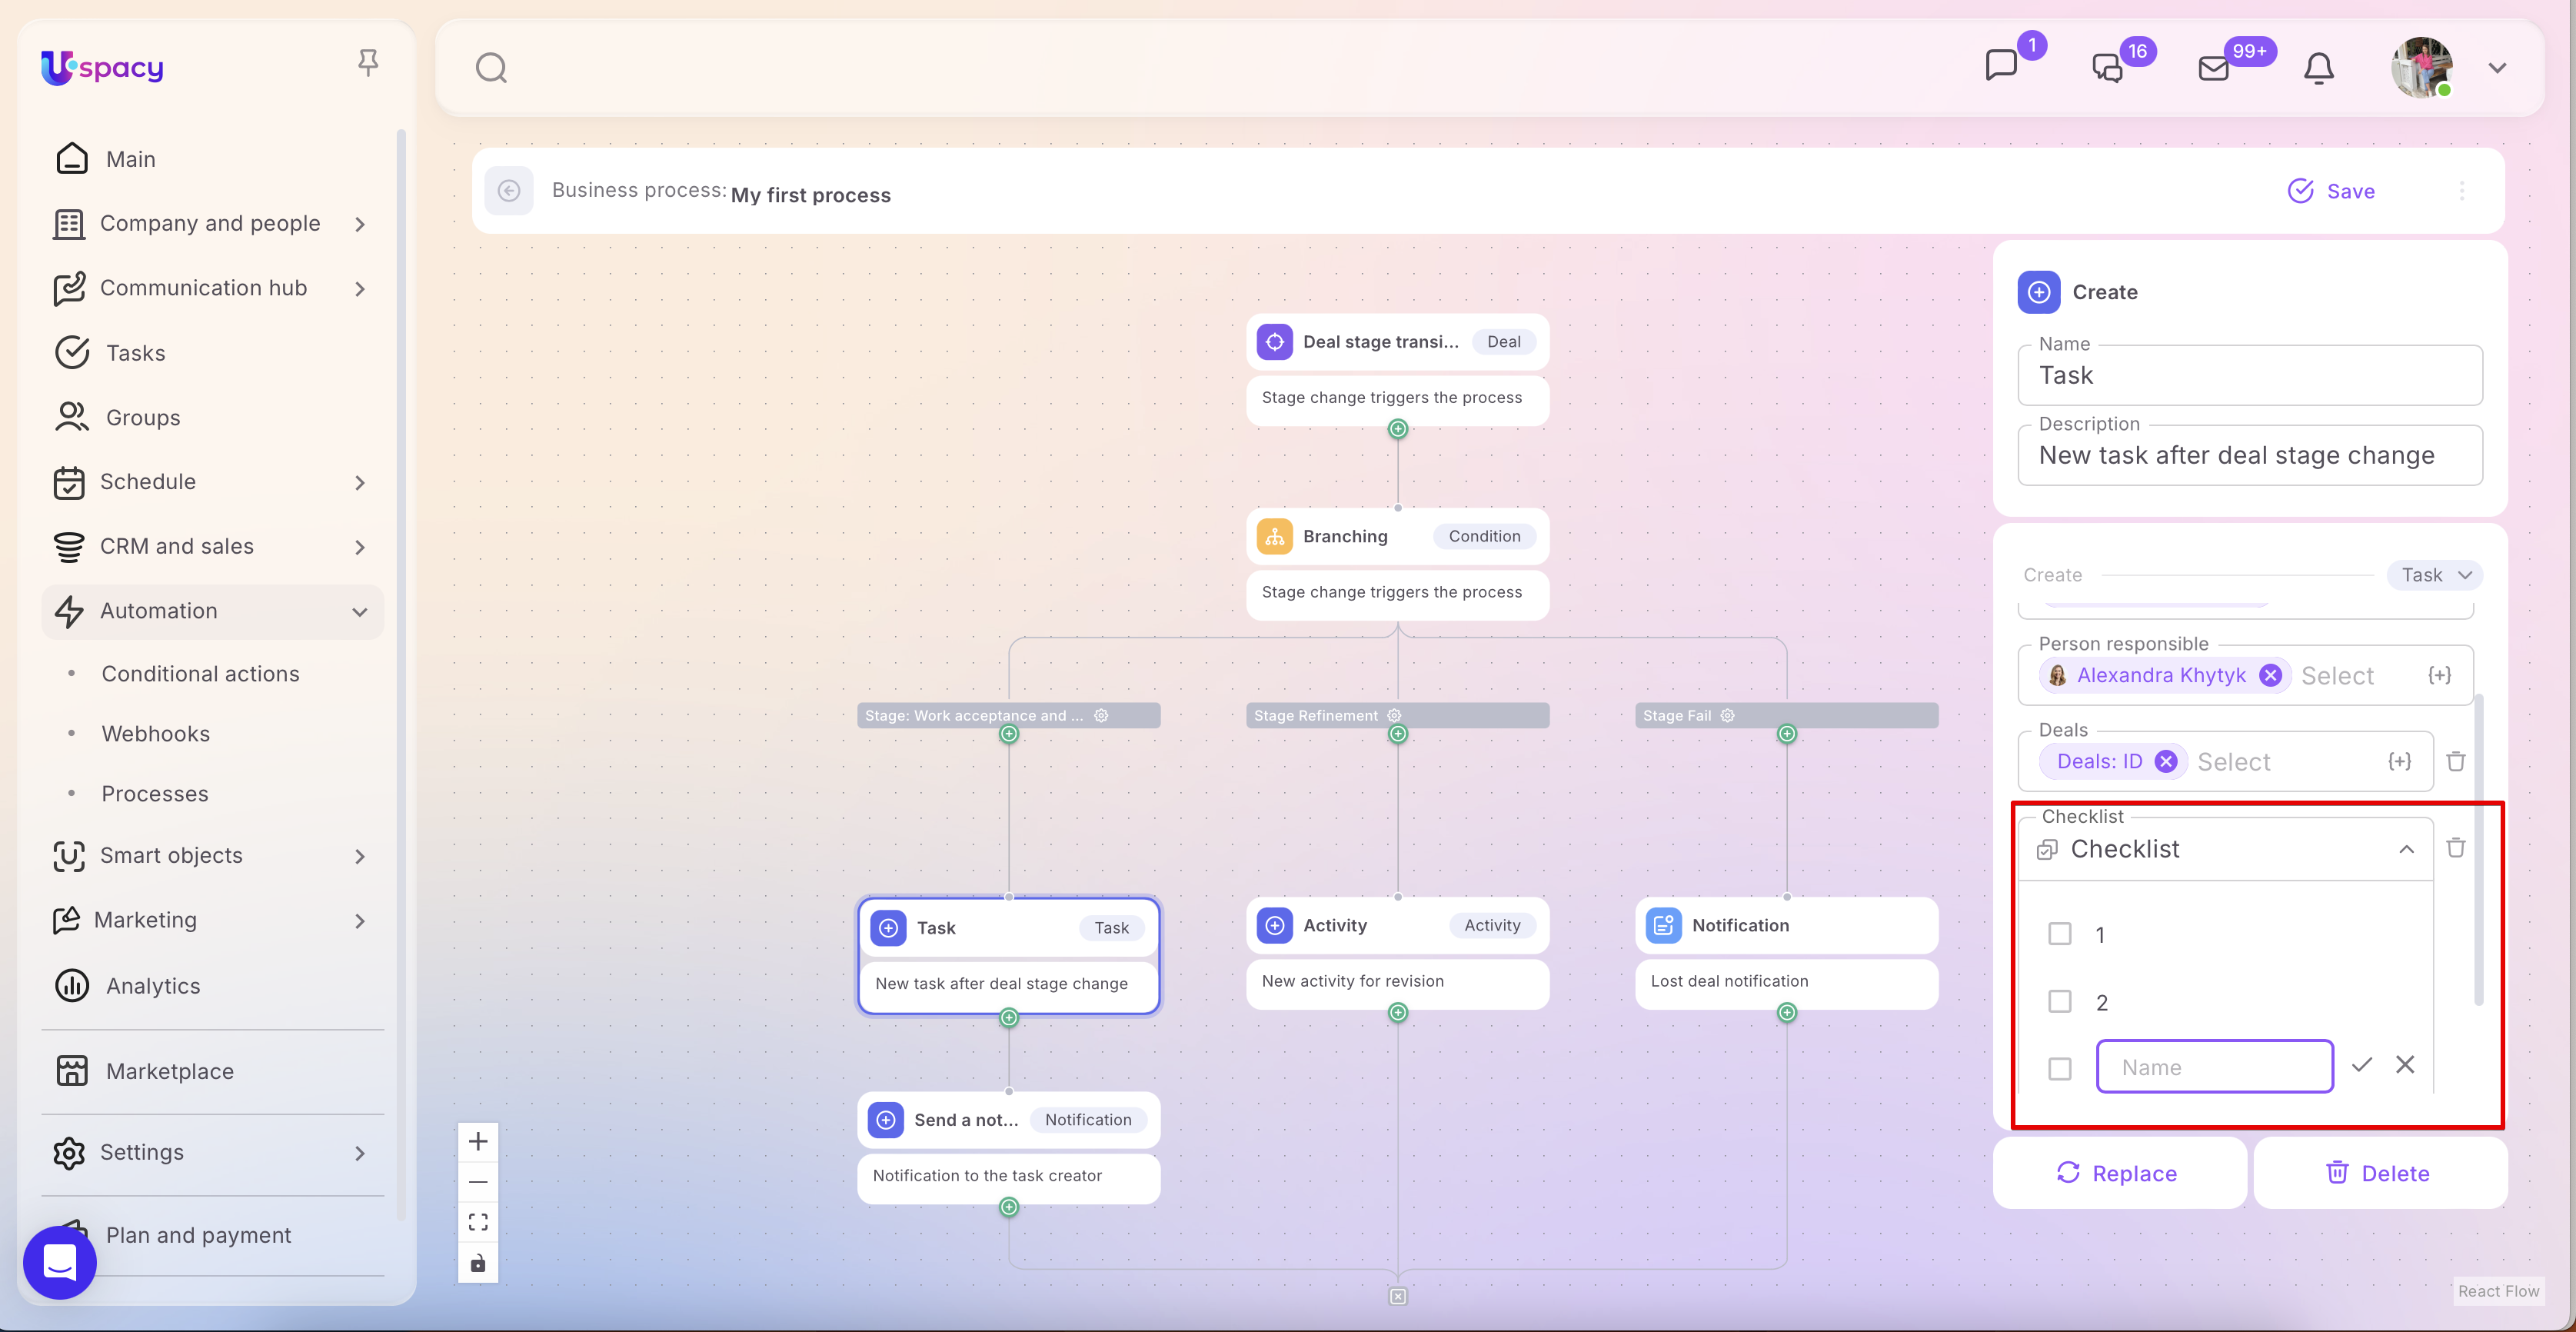
Action: Create
The Create action is used when a process needs to automatically add a new element as a result of its execution. You select the entity (lead, deal, contact, company, activity, task, email, etc.) in your Workspace where the new element will be created as part of the automation.
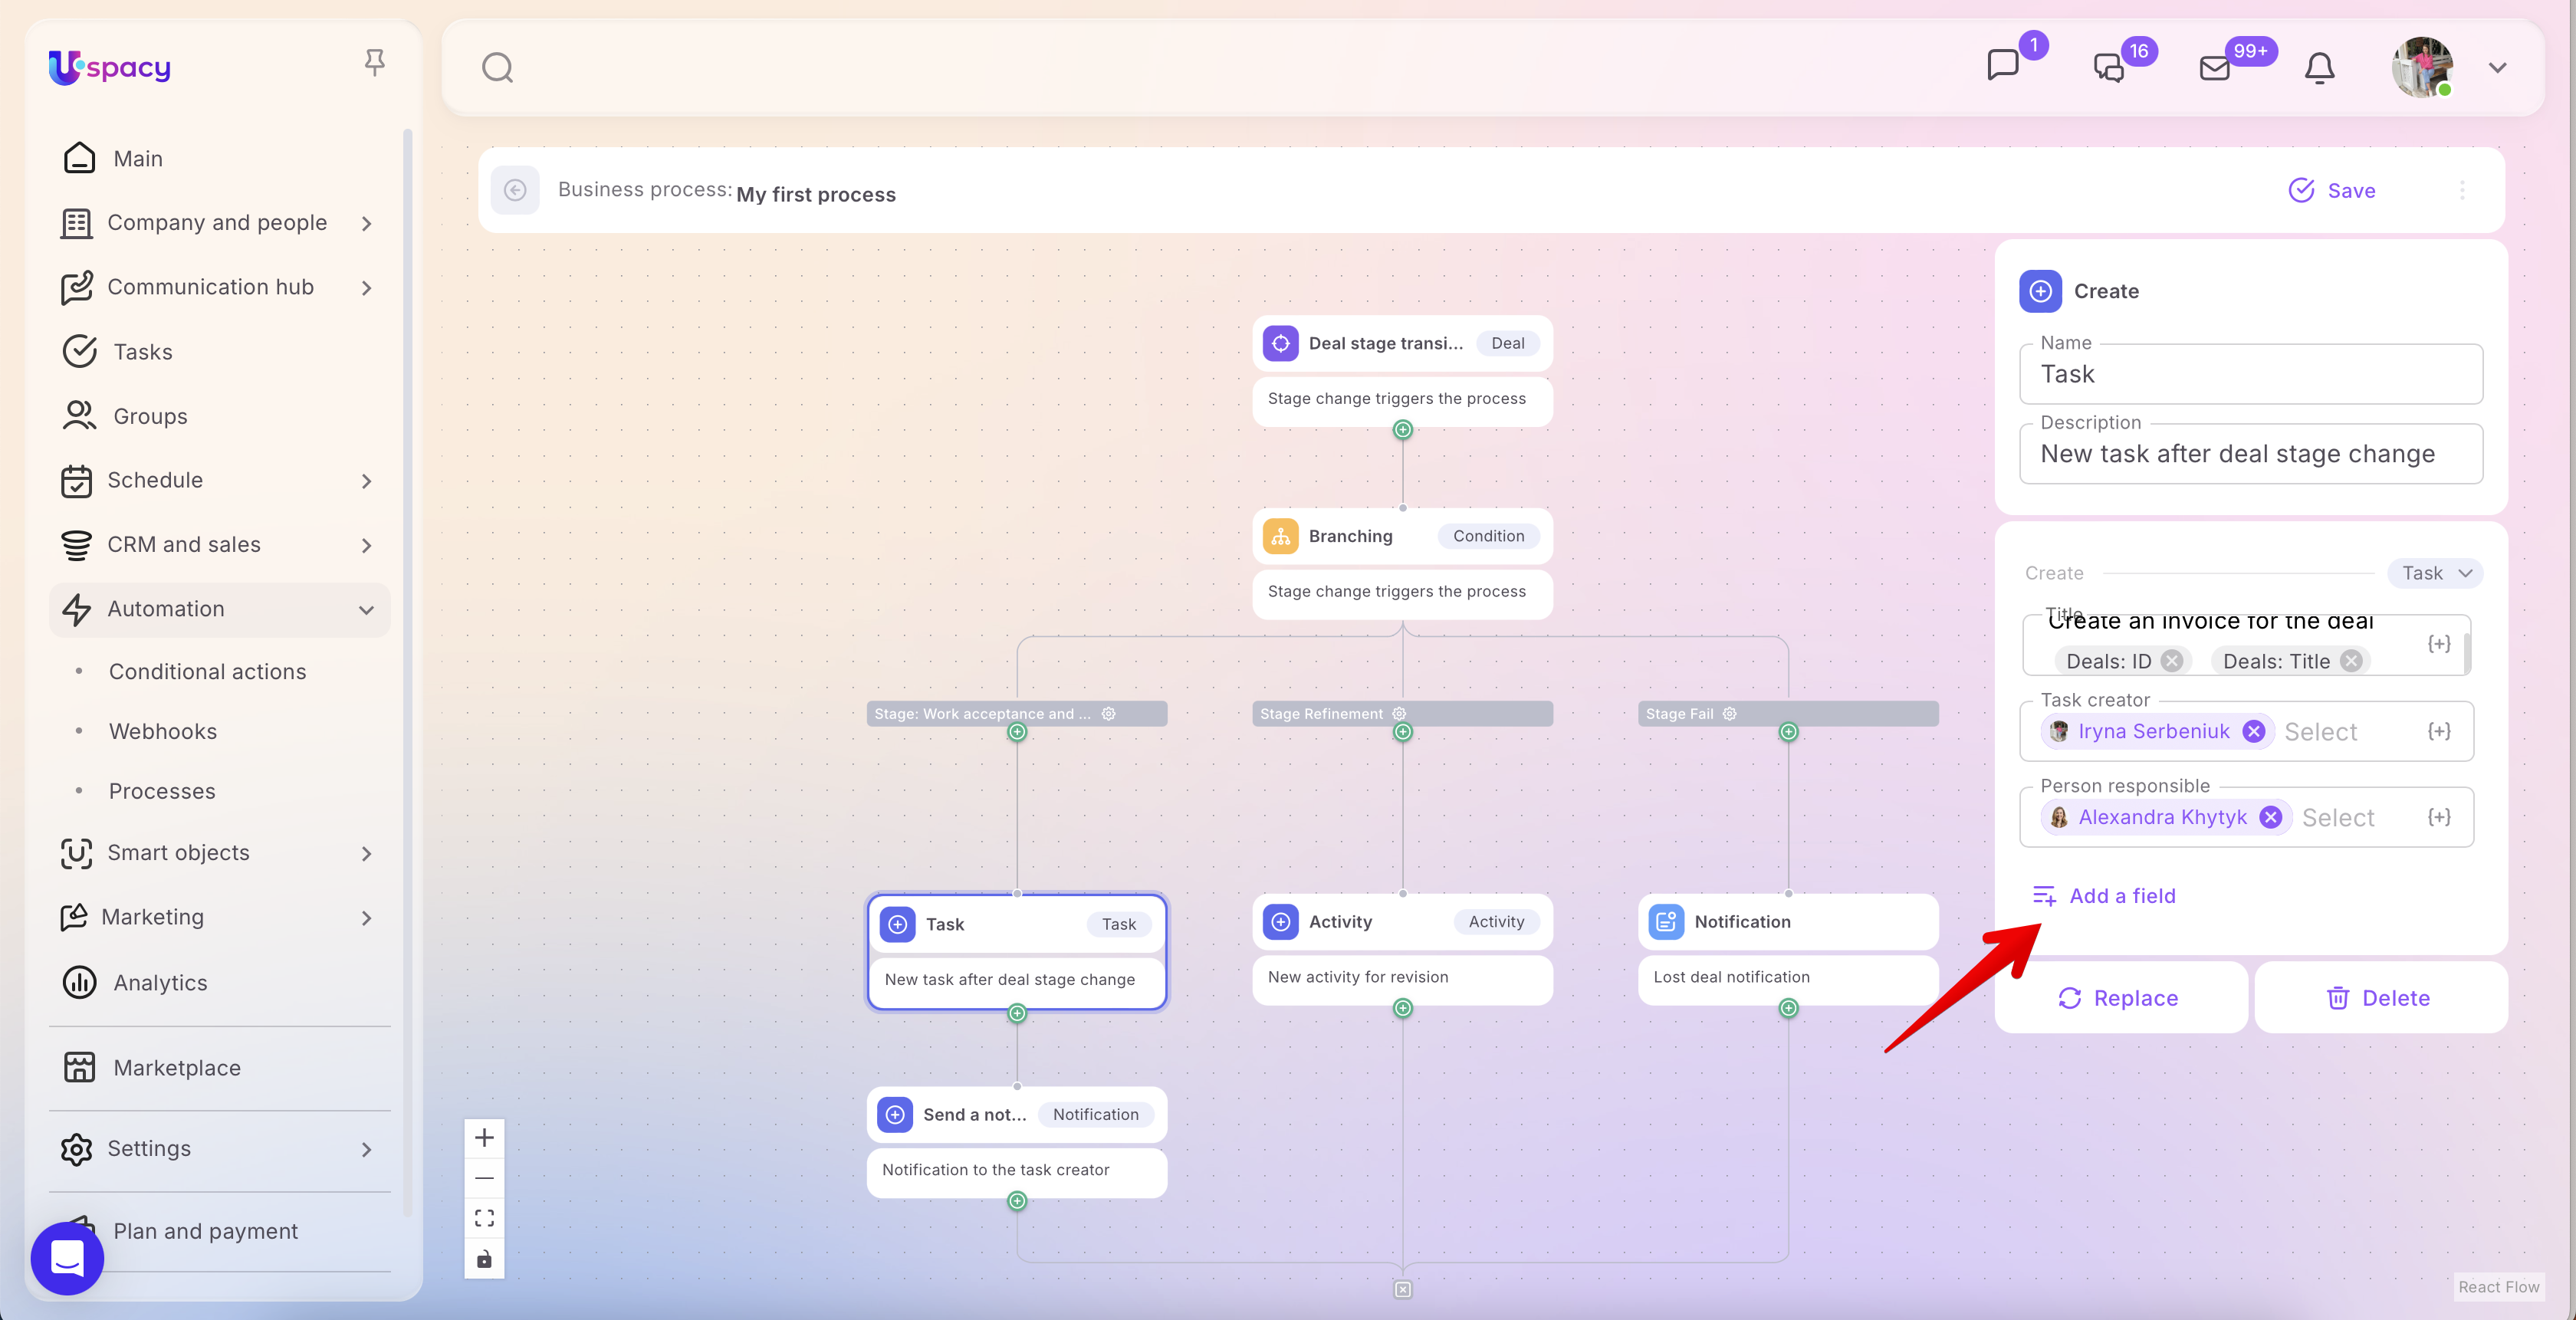
After selecting the entity, you need to fill out the fields in the block. The available fields depend on the type of element you are creating.
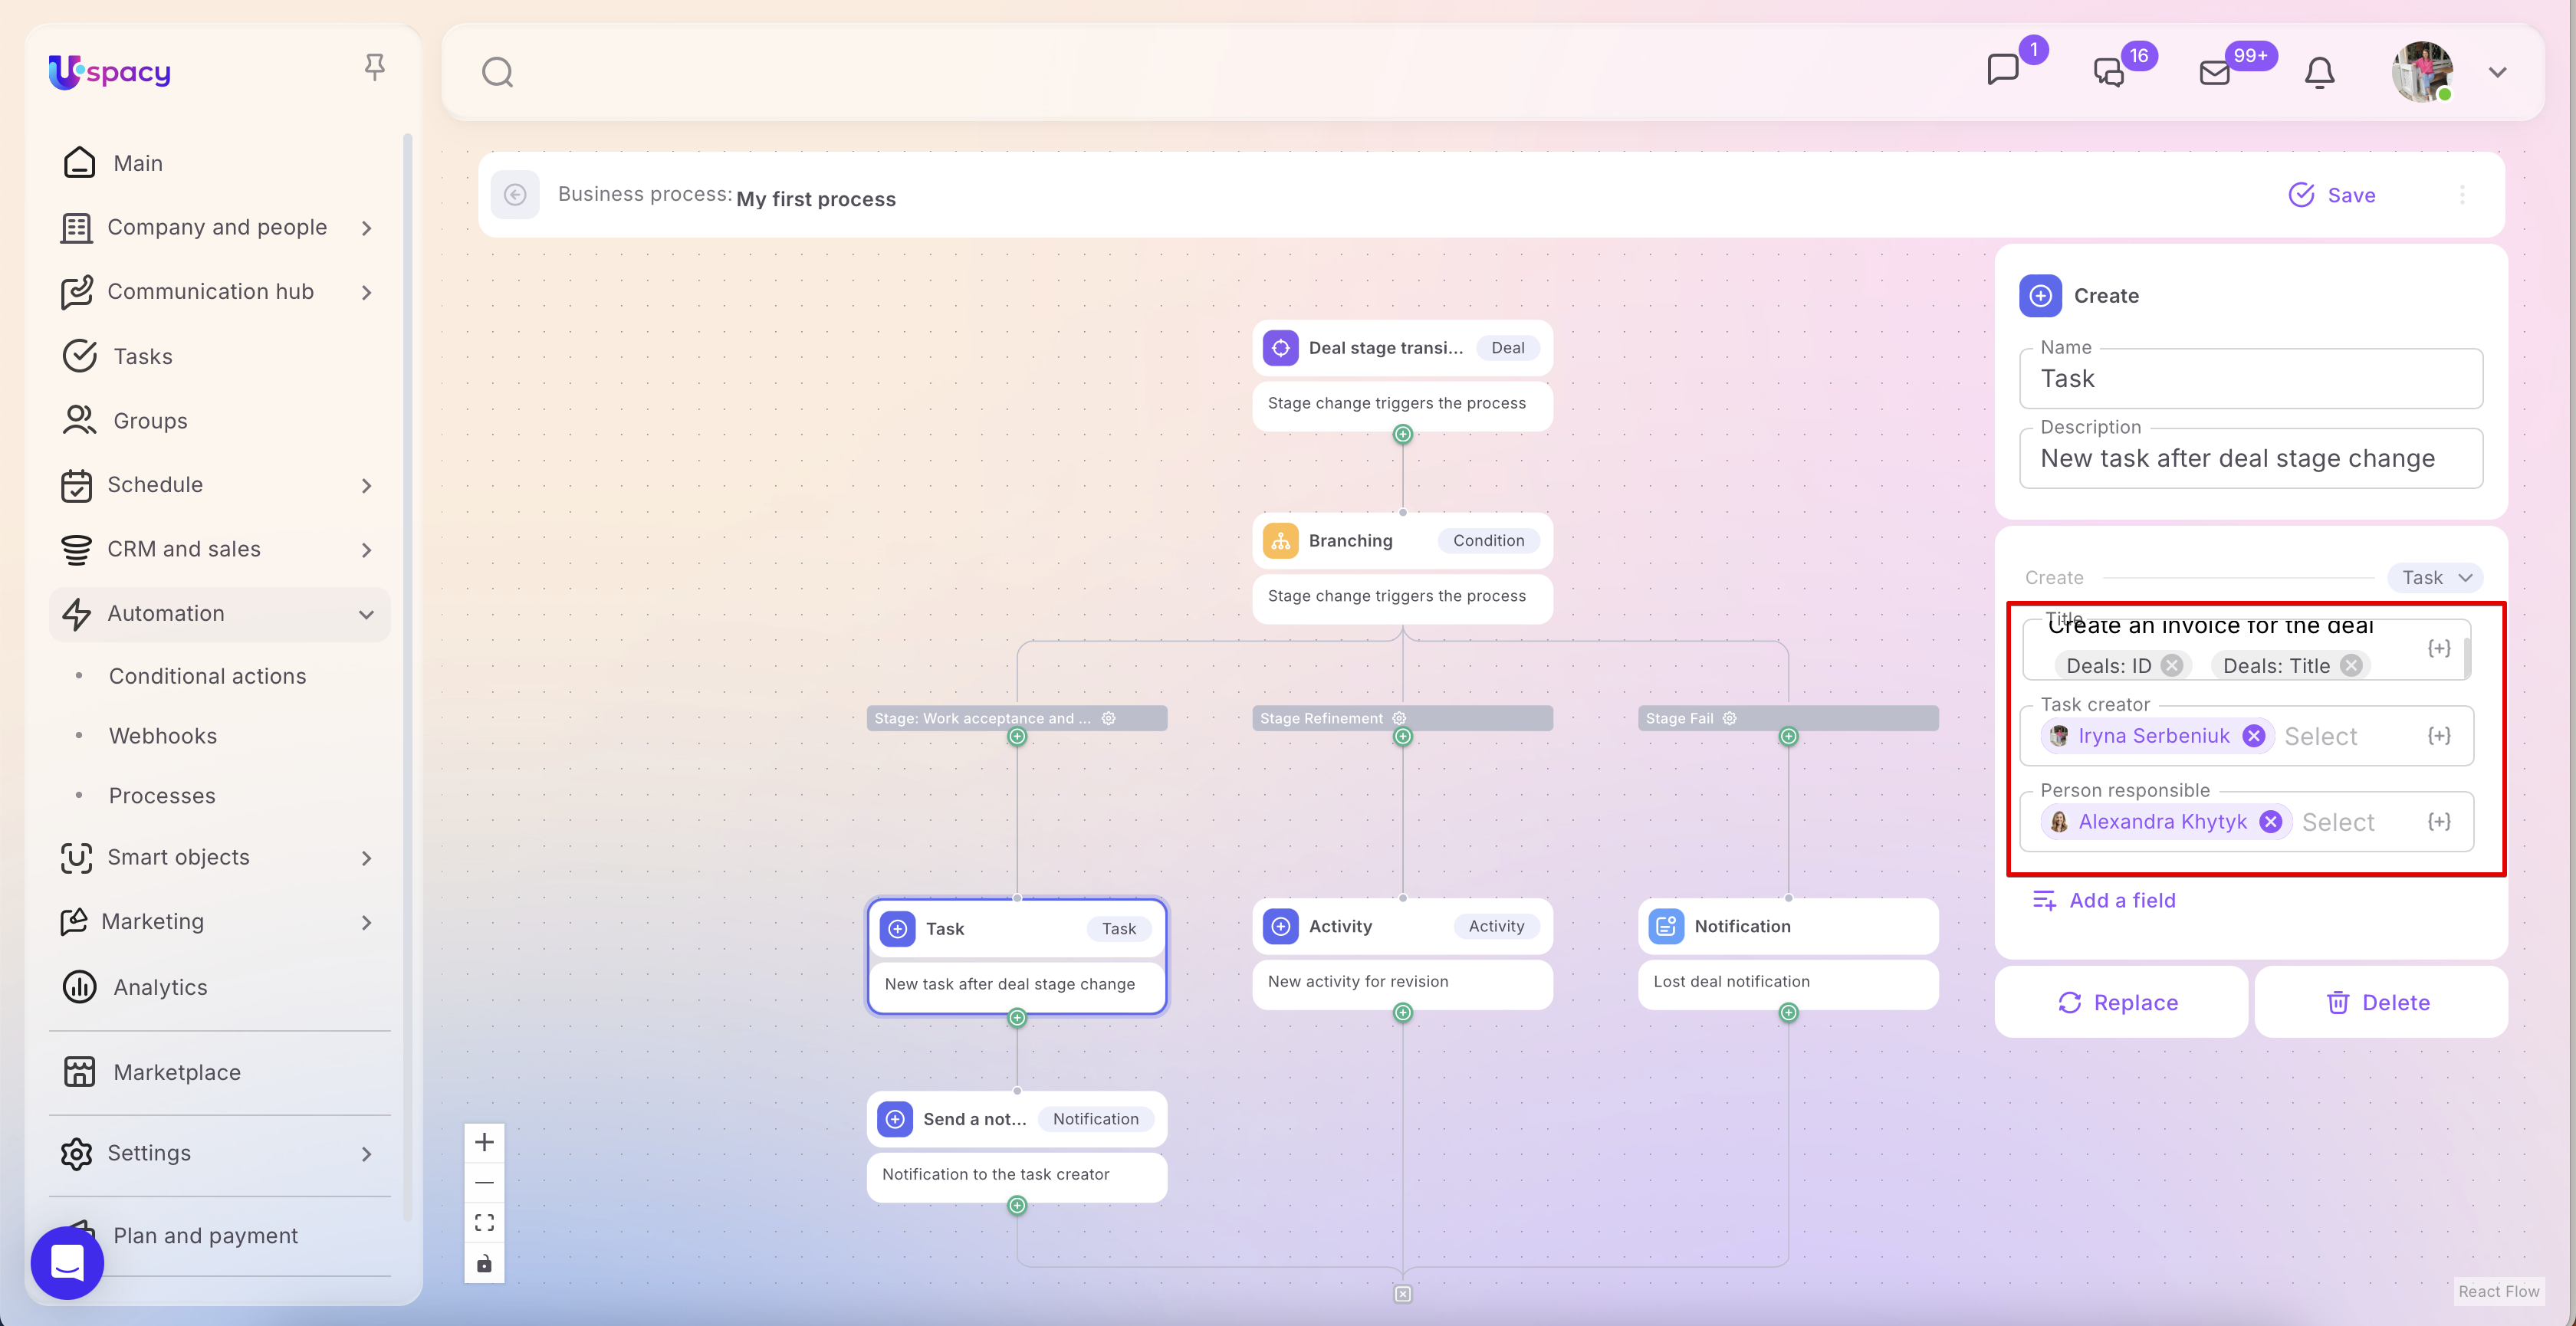
You decide which fields to include and what values they should be populated with during the execution of the process.
Some features
1. If you select Email as the event object, meaning you need to create a new email, note the following:
🟣 You can use this option only if the mailbox is connected to your Workspace, or if you have been granted shared access by the owner.
🔍 Learn more about connecting mailboxes to the Workspace in this article.
🟣 Important for administrators: If you did not personally connect a mailbox and do not have shared access to it, you will not be able to send emails from it—even as an administrator.
🟣 If the CRM connections option is not enabled in the mailbox settings, sent emails will not appear in the cards of the related elements.
🔍 Learn more about Email and CRM links in this article.
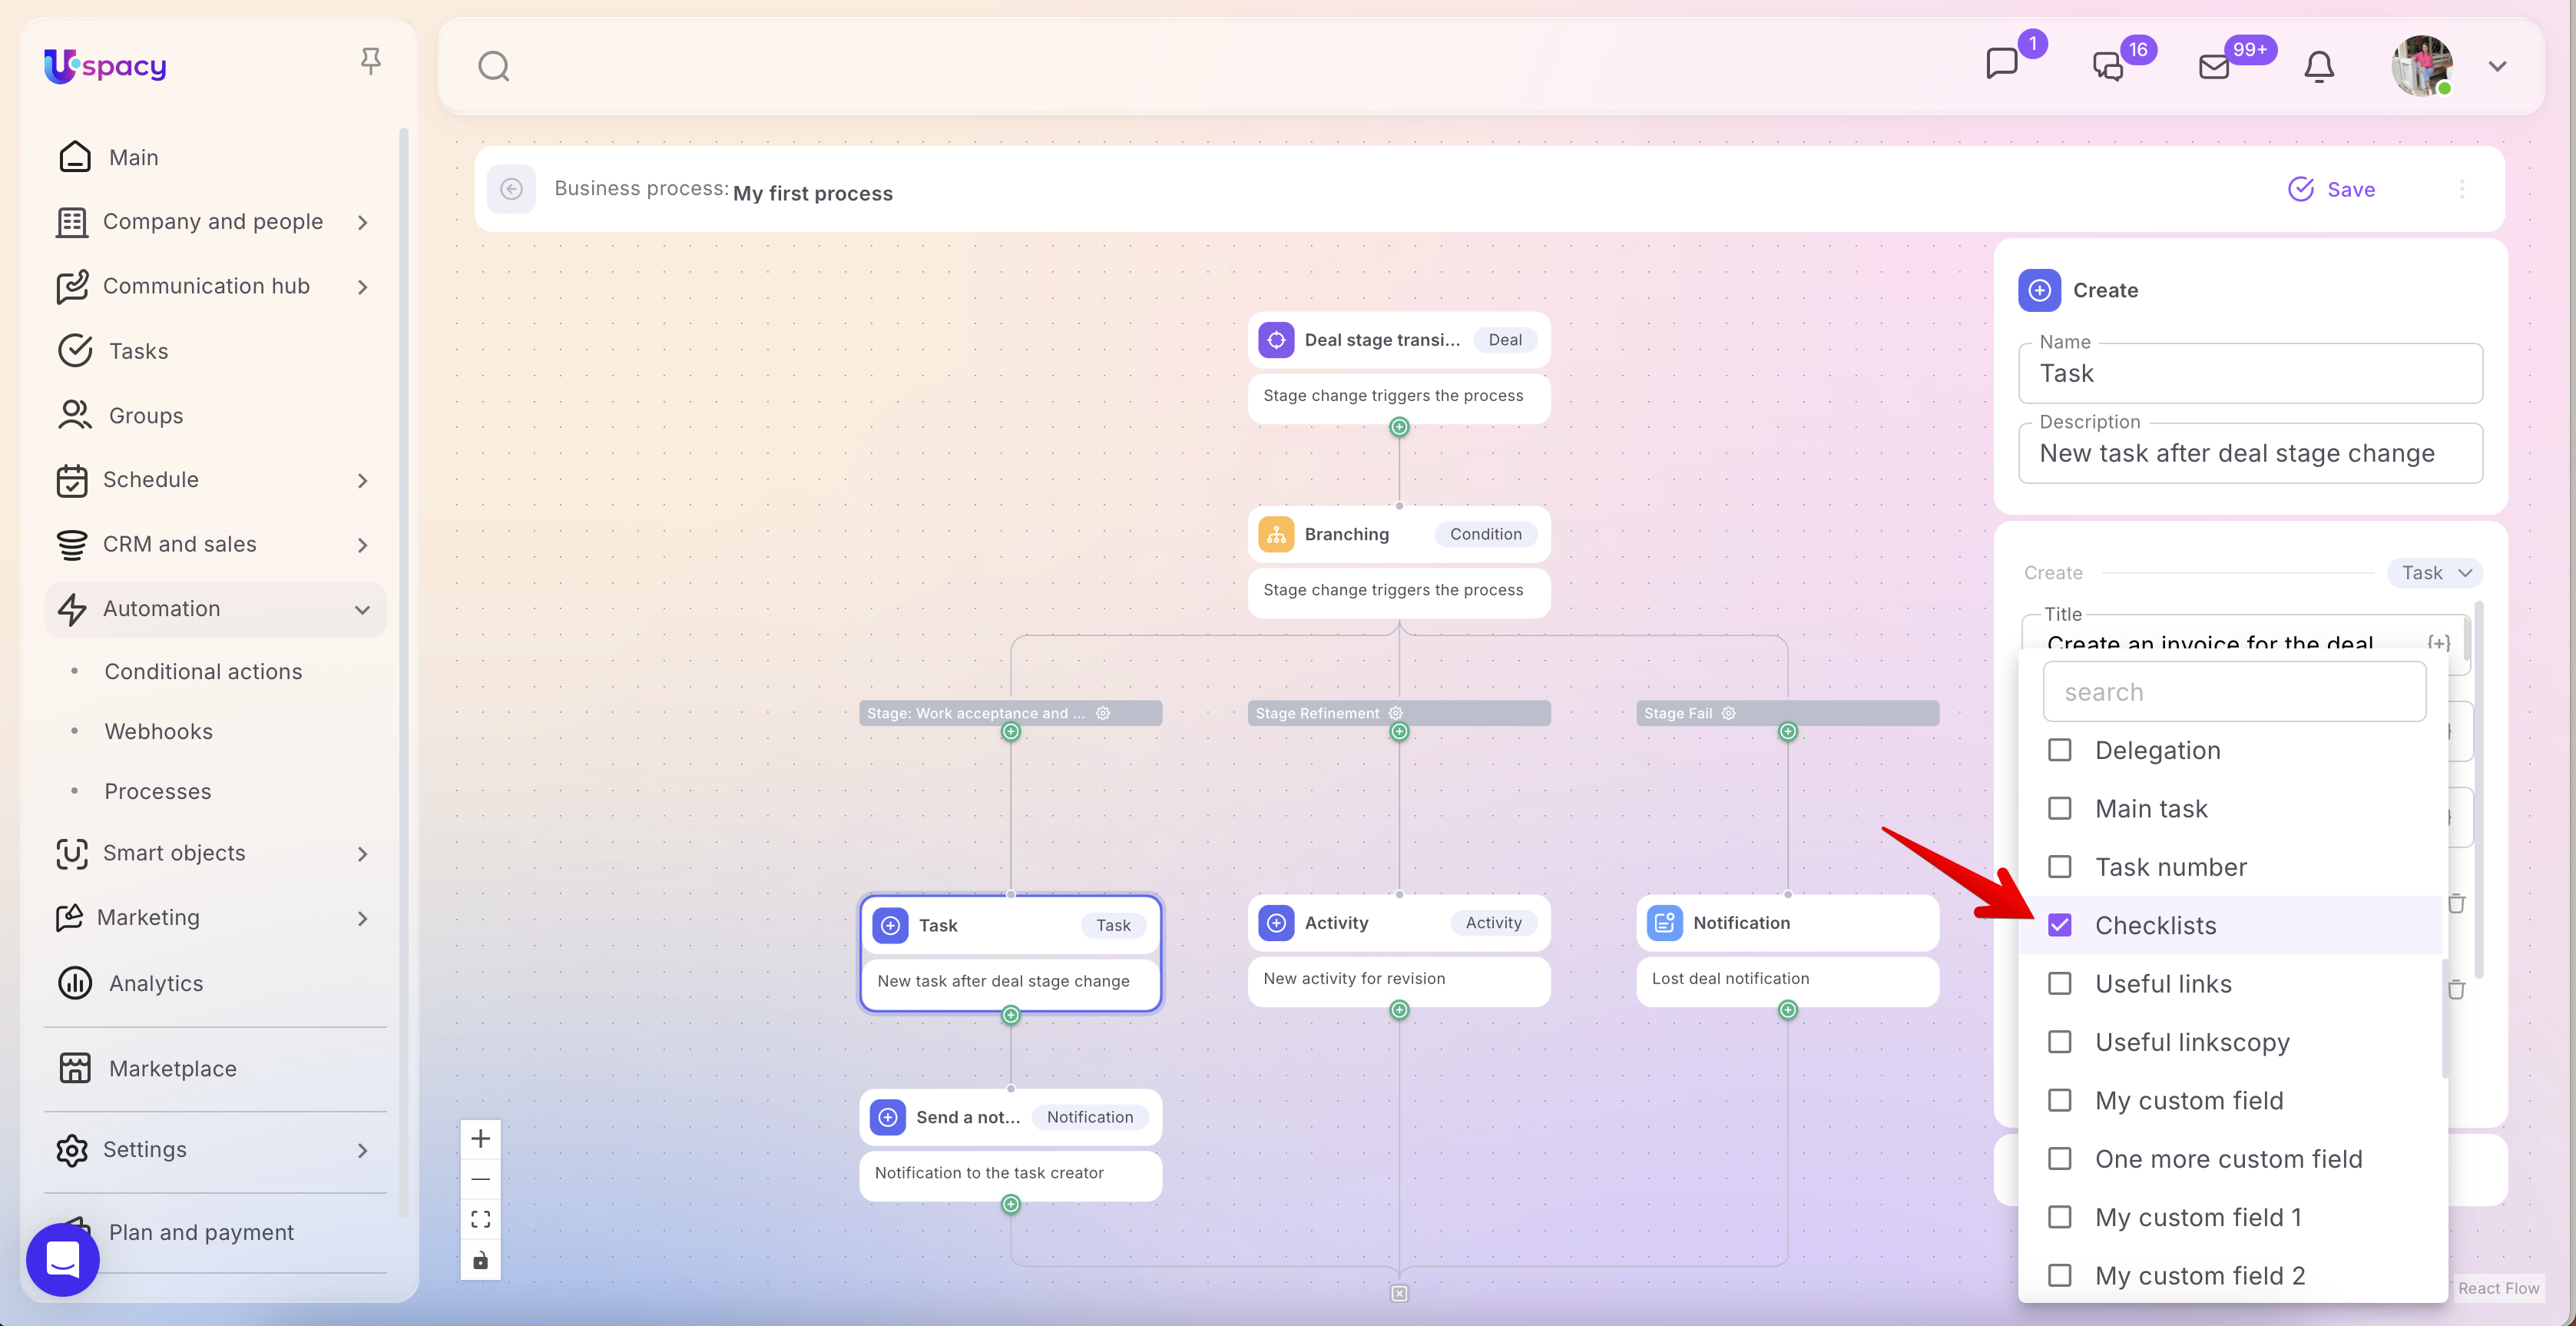
If you need to create a task with a checklist, select the Checklist field and add the required items.
Action: Change fields
After a process passes the condition checks, it is often necessary not to create a new element but to update data in an existing one. This is exactly what the Change fields action is for. It allows you to automatically change the values of specific fields in an element’s card—either in the same entity that triggered the process or in a related one.
To configure this action, first select the entity where the data will be updated.

Next, specify the element’s identifier so the system knows exactly which card to modify.After that, add the fields you want to change and set the values that should be applied.

After that, add the fields you want to change and set the values that should be applied.
➢ Example: The trigger in a process could be the creation of a task. If the Person responsible field is set to Irene Serbeniuk, the process can automatically activate the Time tracking, Control after completion, and Delegation options for this task. This approach ensures that the necessary parameters are applied immediately without additional manual setup.

💡 Important: The Change fields action does not change the Stage field or any related fields. For that, Uspacy provides a separate Change stage action, as the Stage is a key field in the sales funnel.
Action: Change stage
The Change stage action is used when a process needs to automatically move an element to another stage in the funnel. Functionally, it is similar to the Change fields action, as it also updates values in the element’s card. However, in Uspacy it is provided as a separate action because Stage is a key funnel field and is frequently used in automations.

Specify the ID of the required element.

Next, set the stage value to which the system should move the element.

💡 Note: If the stage represents a lost lead or deal, you can also specify the reason for the loss.

In scenarios involving tasks within a group, the Group and Stage fields are also taken into account.

Action: Delete
The Delete action is used when a process needs to automatically remove an element of a specific entity from the Workspace after an event occurs that meets the specified conditions. This action does not modify the element’s data or move it to another stage—it simply removes it from further processing within the configured scenario.
To configure this action: 1. First, select the entity type whose elements should be deleted.

2. Next, specify the element’s identifier (ID) so the system knows exactly which record to remove.

💡 This can be either the element that triggered the process or another element, if its ID is stored in a separate field and selected from the list of available values.
This action is useful in scenarios where, after condition checks or completion of previous steps, an element is no longer needed in the workflow. Using this action, a process can not only create, change, or move elements but also automatically remove unnecessary records according to the defined logic.
Action: Execute a Webhook
The Execute a Webhook action is used when you need to automatically send information about an event from Uspacy to an external service. In other words, the system “signals” an external tool that a specific action has occurred in the Workspace, and that service can then process the received data according to its own logic.
This is essentially a way to exchange data between systems in real time.
To configure this action, you need to specify the endpoint URL—that is, the external address to which Uspacy will send the data.

On the external service or application side, there must be code configured at this address to handle incoming requests.
The endpoint must be valid and publicly accessible.
This action is useful in scenarios where, after a certain event occurs, you need not only to update data within Uspacy but also to send a signal externally—for example, to a messaging service, integration platform, or another external system.
☝🏻 Please note that working with webhooks requires some technical knowledge and skills, so their setup is best handled by developers or technical specialists.
➢ Example: If the trigger is the creation of a new task, you can use the Execute a Webhook action to send data about this event to Telegram. In our knowledge base, we have such a scenario: a prepared request is inserted into the endpoint URL field, and then variables are added to pass the necessary information about the element that triggered the process.
This scenario is described for conditional actions, but it can be implemented in the same way using processes.
Action: Waiting
The Waiting action is used when you need to introduce a time interval between two or more steps in a process. It allows you to delay the next step instead of executing it immediately—either for a specific period of time or until a defined date. This is useful in scenarios where actions should not occur simultaneously but require a pause between them.
Waiting is a separate block where you can define time parameters. You can set either a numeric value with a time unit or specify an exact date when the next action should be executed.
➢ Example: If a deal moves to the “Work acceptance and payment” stage, the process can first create a task to issue an invoice and then—after a certain period—send a notification to the appropriate employee. In this case, the Waiting action helps separate these steps over time and makes the workflow more flexible.

💡 Important: Unlike the Waiting action in Conditional Actions, in Processes you can do more than just proceed to the next step after a delay—you can also continue the logic flow. After the Waiting period, the process can retrieve updated data about the element and then use a Filter or Branching action to determine what to do based on its current state. This allows you to build scenarios where it’s important not only to wait but also to check what has changed during that time.
For example, a process can be triggered when a lead is created, then pause for 30 days, and afterward retrieve the latest data about that lead to check its current stage or status. If the lead has not been successfully closed during that time, the process can send a notification or create a task for a manager. If the lead has already reached a final status, the process can simply end without any further actions.
Action: Retrieve
The Retrieve action is used when a process needs to “pull” field values from a specific element within a selected entity and pass them to subsequent steps in the automation. The retrieved data then becomes available as variables that can be used in other actions within the process.
This action works with items from entities such as Leads, Deals, Contacts, Companies, Tasks, and Smart Objects. This means you can retrieve data not only from the element that triggered the process but also from another related element—provided that the correct entity and identifier are specified.
The logic of this action is straightforward: first, the process accesses the required element, then it reads the values of its fields, and finally, those values can be used in subsequent actions. That’s why Retrieve is often used together with actions like Create, Change fields, and Change stage—when you need not just to perform an action, but to pass data between different elements within a single workflow.
To configure this action, select the entity from which the data will be retrieved.

Specify the identifier of the required element.


After that, the system will collect the field values and make them available for the next steps of the process.


➢ The Uspacy Knowledge Base already includes a detailed example of configuring the Retrieve action in the article “Retrieving and using entity element data in Conditional Actions.” This guide can also be used as a reference when setting up Processes that require working with retrieved data.
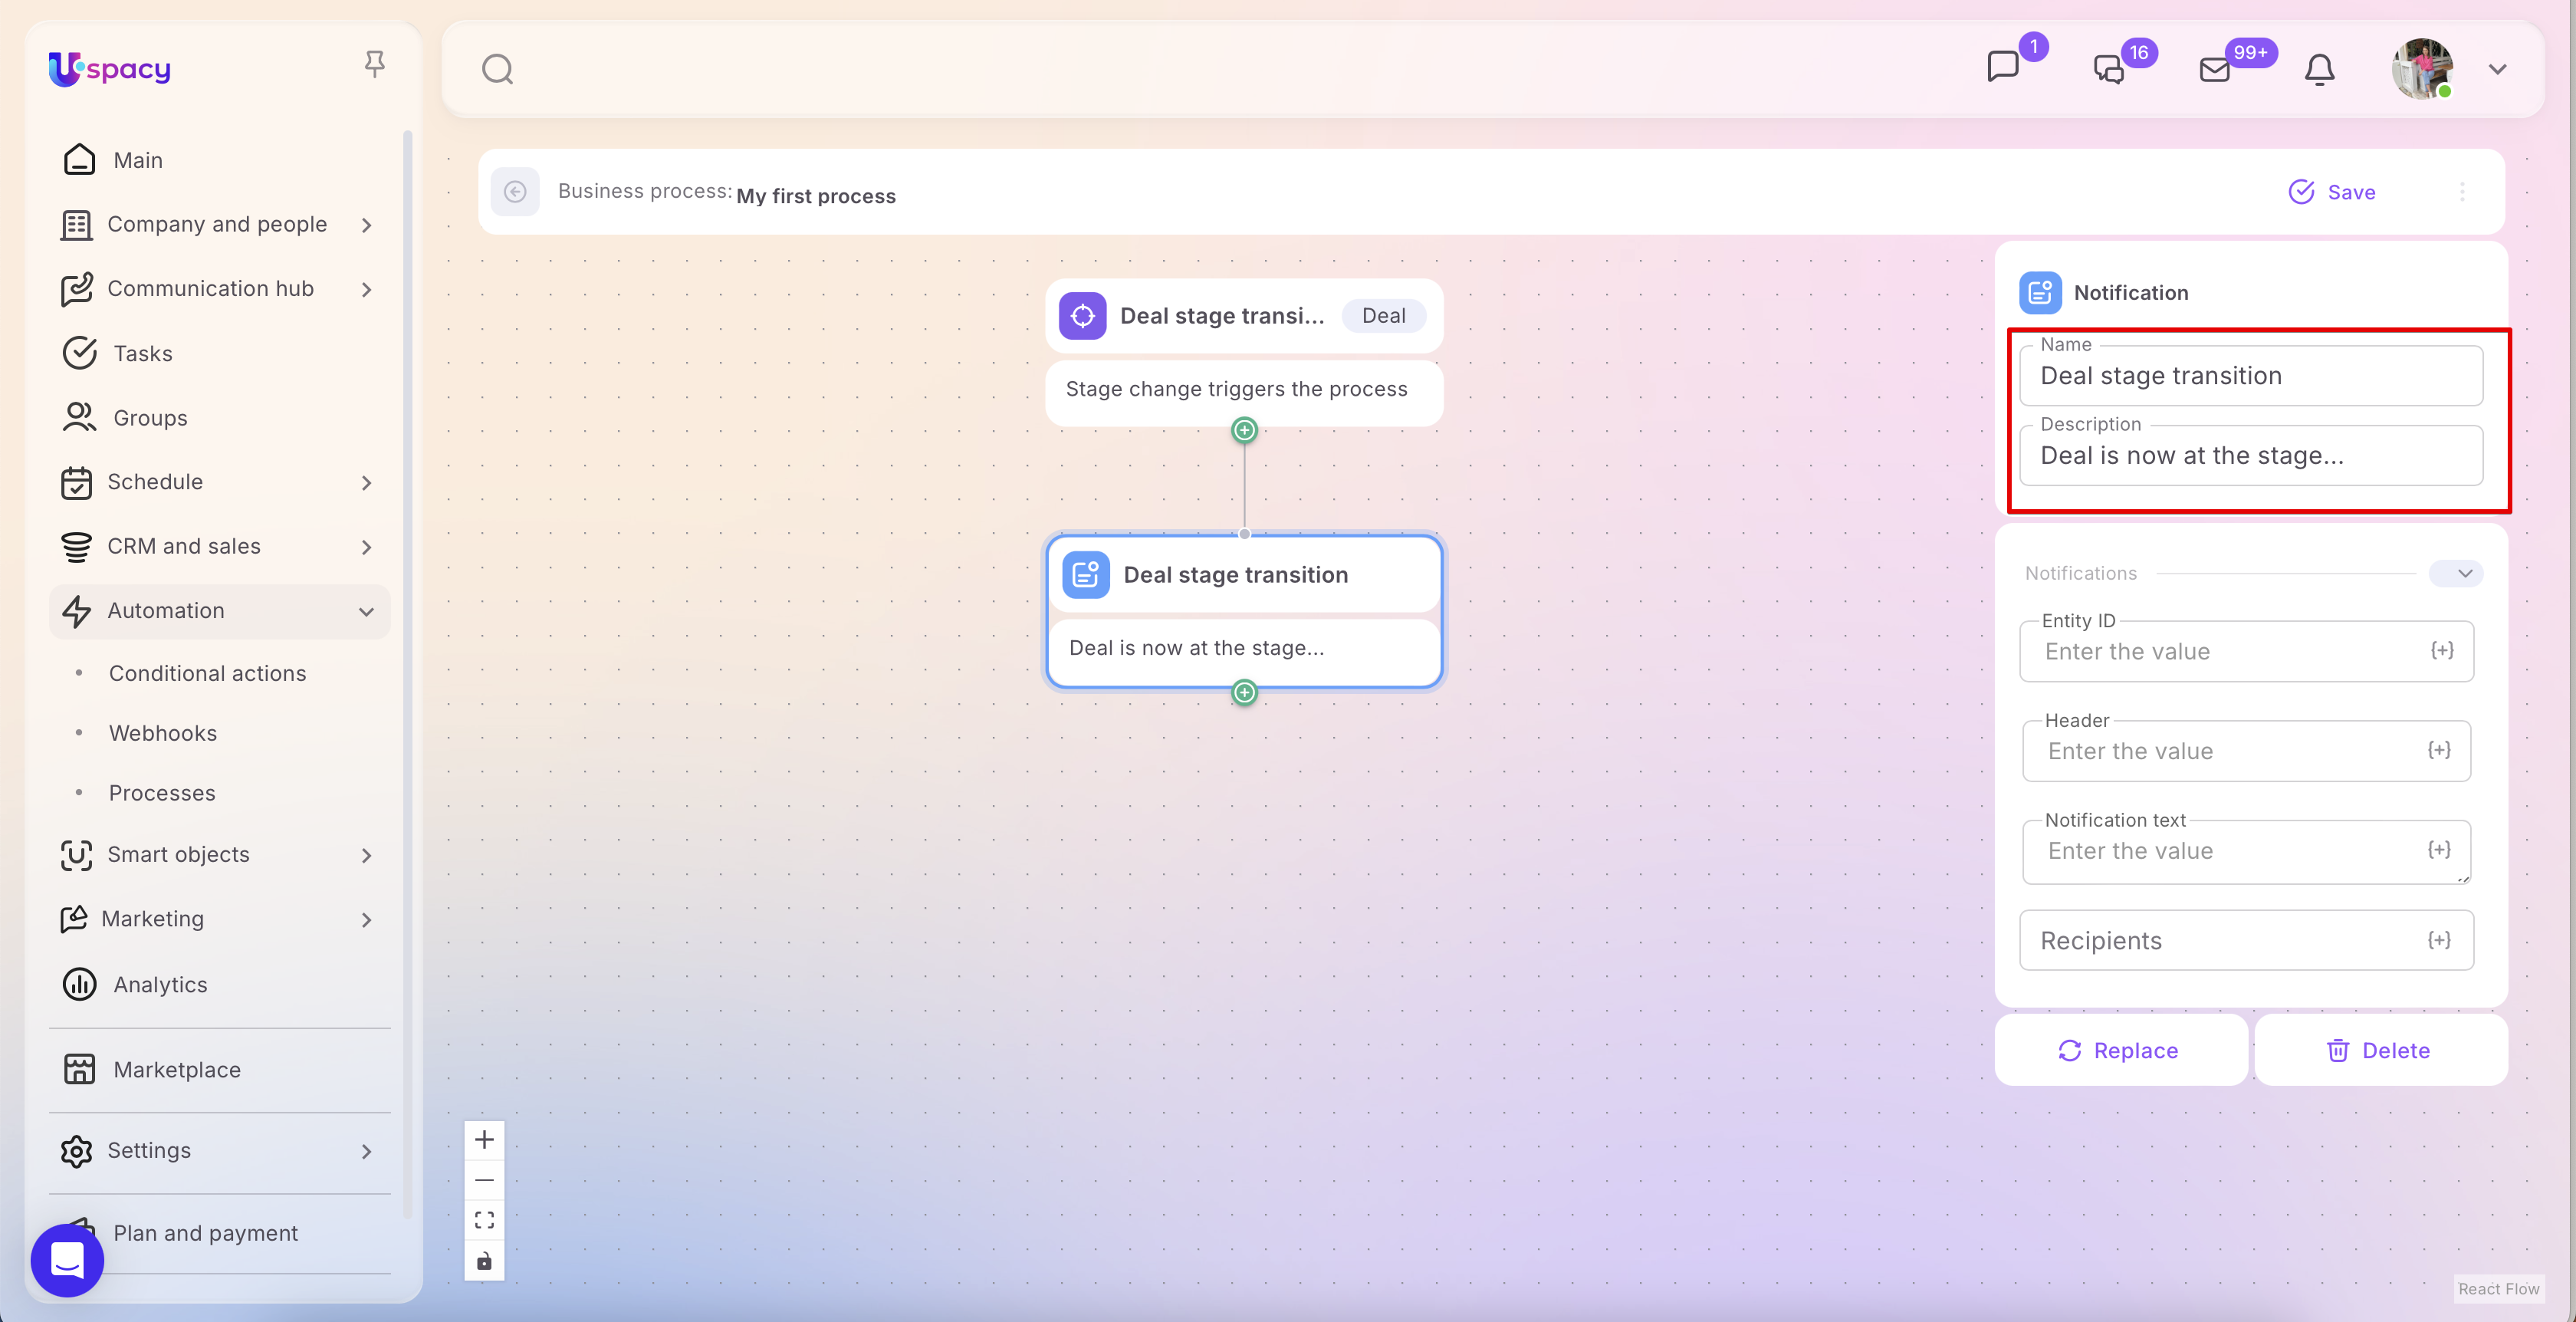
Action: Notification
The Notification action is used when a process needs to automatically inform a specific user about an event in the Space. When this action is triggered, Uspacy generates a notification with the specified text for the selected users and delivers it according to their configured notification preferences.
This action is particularly useful in scenarios where it’s important not only to perform an automated step but also to immediately inform the responsible employee, manager, or another participant in the process about the outcome. For example, notifications can be sent after a task is created, an opportunity stage changes, or another important event occurs in the process. This ensures critical updates are not missed and enables faster response.
To configure the Notification action, you need to fill out several key fields: select the Entity, specify the entity ID so the notification is linked to a specific element, add a Header, write the Notification text, and select the Recipients. Variables (modifiers) from the element card can be inserted into the message text if needed, making the notification more informative.

Modifiers
When configuring actions in Processes, you can also use modifiers. These are additional parameters that adjust how a field’s value is processed. The availability and types of modifiers depend on the field type in the entity or tool.
For example, for certain fields, you can select how to insert the value — not necessarily the full value, but only a specific part or in a particular format.
🔍 Detailed information can be found in the article on Conditional Actions in the section about modifiers.
In Processes, working with modifiers is the same as in Conditional Actions, so you can rely on the same logic you’re already familiar with when setting them up.

How to save and activate a process
After finishing the process setup, click the Save button in the top-right corner of the page.


Next, click the three-dot menu to the right of the save button. From the list of available actions, select Activate.

Once activated, the process will receive the status Active. This means the automation is now enabled and ready to run.

How to deactivate a process
To deactivate a business process, open the context menu and select Deactivate. You can do this either on the process’s own page or from the general list of processes.


After deactivation, the automation will receive the status Paused, which means the process is temporarily turned off.

How to edit a process
In the list of processes, find the business process you want to modify. Click its name to open the process editing page.

Make the necessary changes to the process settings: edit existing blocks, add new actions, or adjust action parameters as needed. Once you’ve finished editing, click Save in the top-right corner of the page. Wait for the “Saved!” notification, which confirms that the updated automation settings have been successfully applied.

💡 If you need to change the type of an existing action, click Edit. A list of available actions will appear, allowing you to replace the current block with a new action. If a block is no longer needed in the process, click Delete to remove it from the workflow.

How to delete a process
To delete a business process, open the action menu and select Delete. This can be done either on the process page itself or from the general list of processes.


💡 Since deleting a process is irreversible, the system will warn you and ask for additional confirmation before proceeding.

In summary, Processes are another type of automation in Uspacy that help build complete workflows with conditions, branches, and sequential steps. This allows teams to spend less time on routine tasks, respond more quickly to changes, and maintain a unified workflow logic across the Space.
Created: March 20, 2026 / Updated: March 22, 2026