
The Uspacy integration with Stripe allows you to manage online payments directly within your Space. Sales managers no longer need to create payments in Stripe separately and then manually copy payment information into the CRM. Instead, they can complete the entire payment workflow while working with a Lead, Deal, or Smart Object.
From the related record, you can create a payment based on the added products, generate a payment link, and send it to the client using any preferred communication channel. All payments are stored in a dedicated section where you can review payment amounts, current statuses, and related information.
Once the client completes the payment, Stripe sends the payment result to Uspacy. The system automatically updates the payment status and records all relevant information in the payment record.
Let's go through the process step by step. ⬇️
Connection
Preparation steps
To start accepting payments through Stripe, open the Marketplace, locate the Payments via Stripe app, and click Get.
🌟 Note: Only users on commercial subscription plans can install the app. It is not available on the Free plan.

After the installation is complete, the Get button changes to Configure. Click it to open the integration settings.

Stripe settings
You'll need your Stripe account's Secret API Key to connect the integration. If you don't already have a Stripe account, create one, complete your business profile, and activate your account to accept live payments.

Next, open your Stripe Dashboard and navigate to Developers → API keys. Enable Live mode, locate the Secret key, and click Reveal live key to display its value. Copy the key.
To process real payments, use the live secret key, which begins with sk_live_. The public key (pk_live_) cannot be used to connect the integration, while keys beginning with sk_test_ are intended for testing environments only.
🔍 Learn more about API key types in the official Stripe documentation.
❗️Important: Your secret key provides access to your Stripe account. Never share it with unauthorized parties or expose it publicly.
Uspacy settings
Return to the Stripe payments app settings in Uspacy and paste the copied value into the api_key field. Make sure the key is copied completely and does not contain any extra spaces.

Next, select the entities where users will be able to create Stripe payments. These can be CRM entities or Smart Objects that support Products.

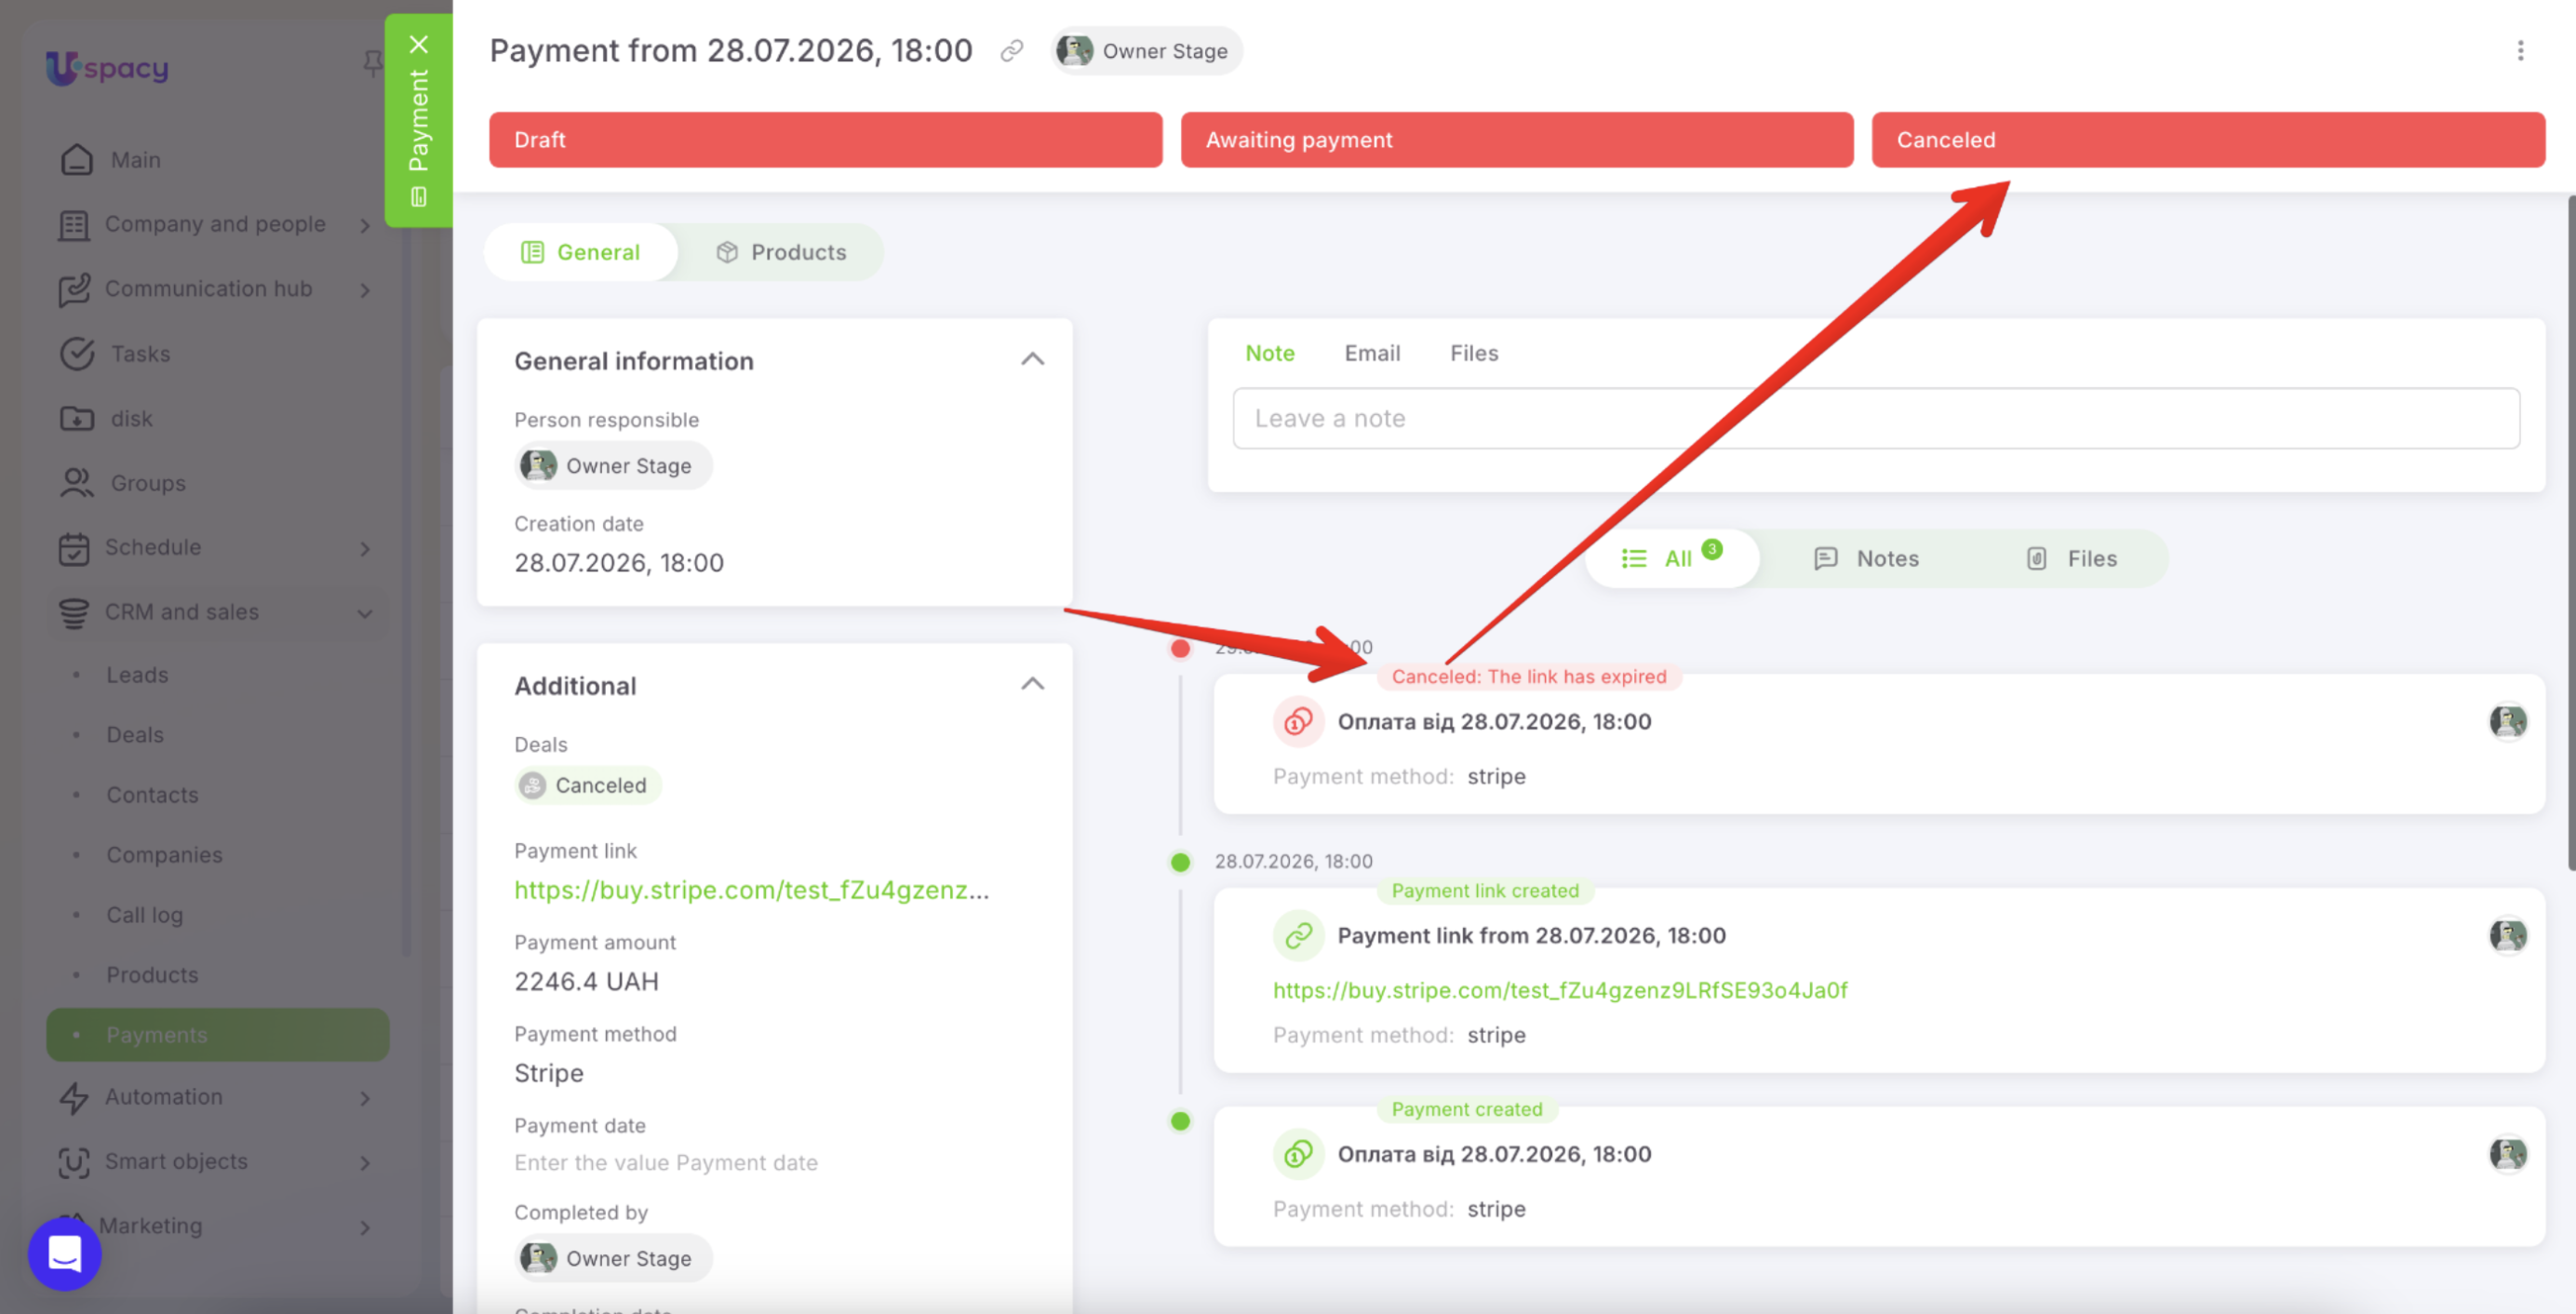
Then specify the Payment link expiration period. During this time, clients can open the link and complete the payment. If the link expires before payment is received, the payment will automatically receive the Canceled status.

After completing all fields, click Save. Stripe payments can now be created from records of the selected entities.

Working with payments
The CRM & sales section includes a Payments page. This page may be available even if the Stripe payments app is not installed. However, creating payments through Stripe requires the integration to be installed and configured first.
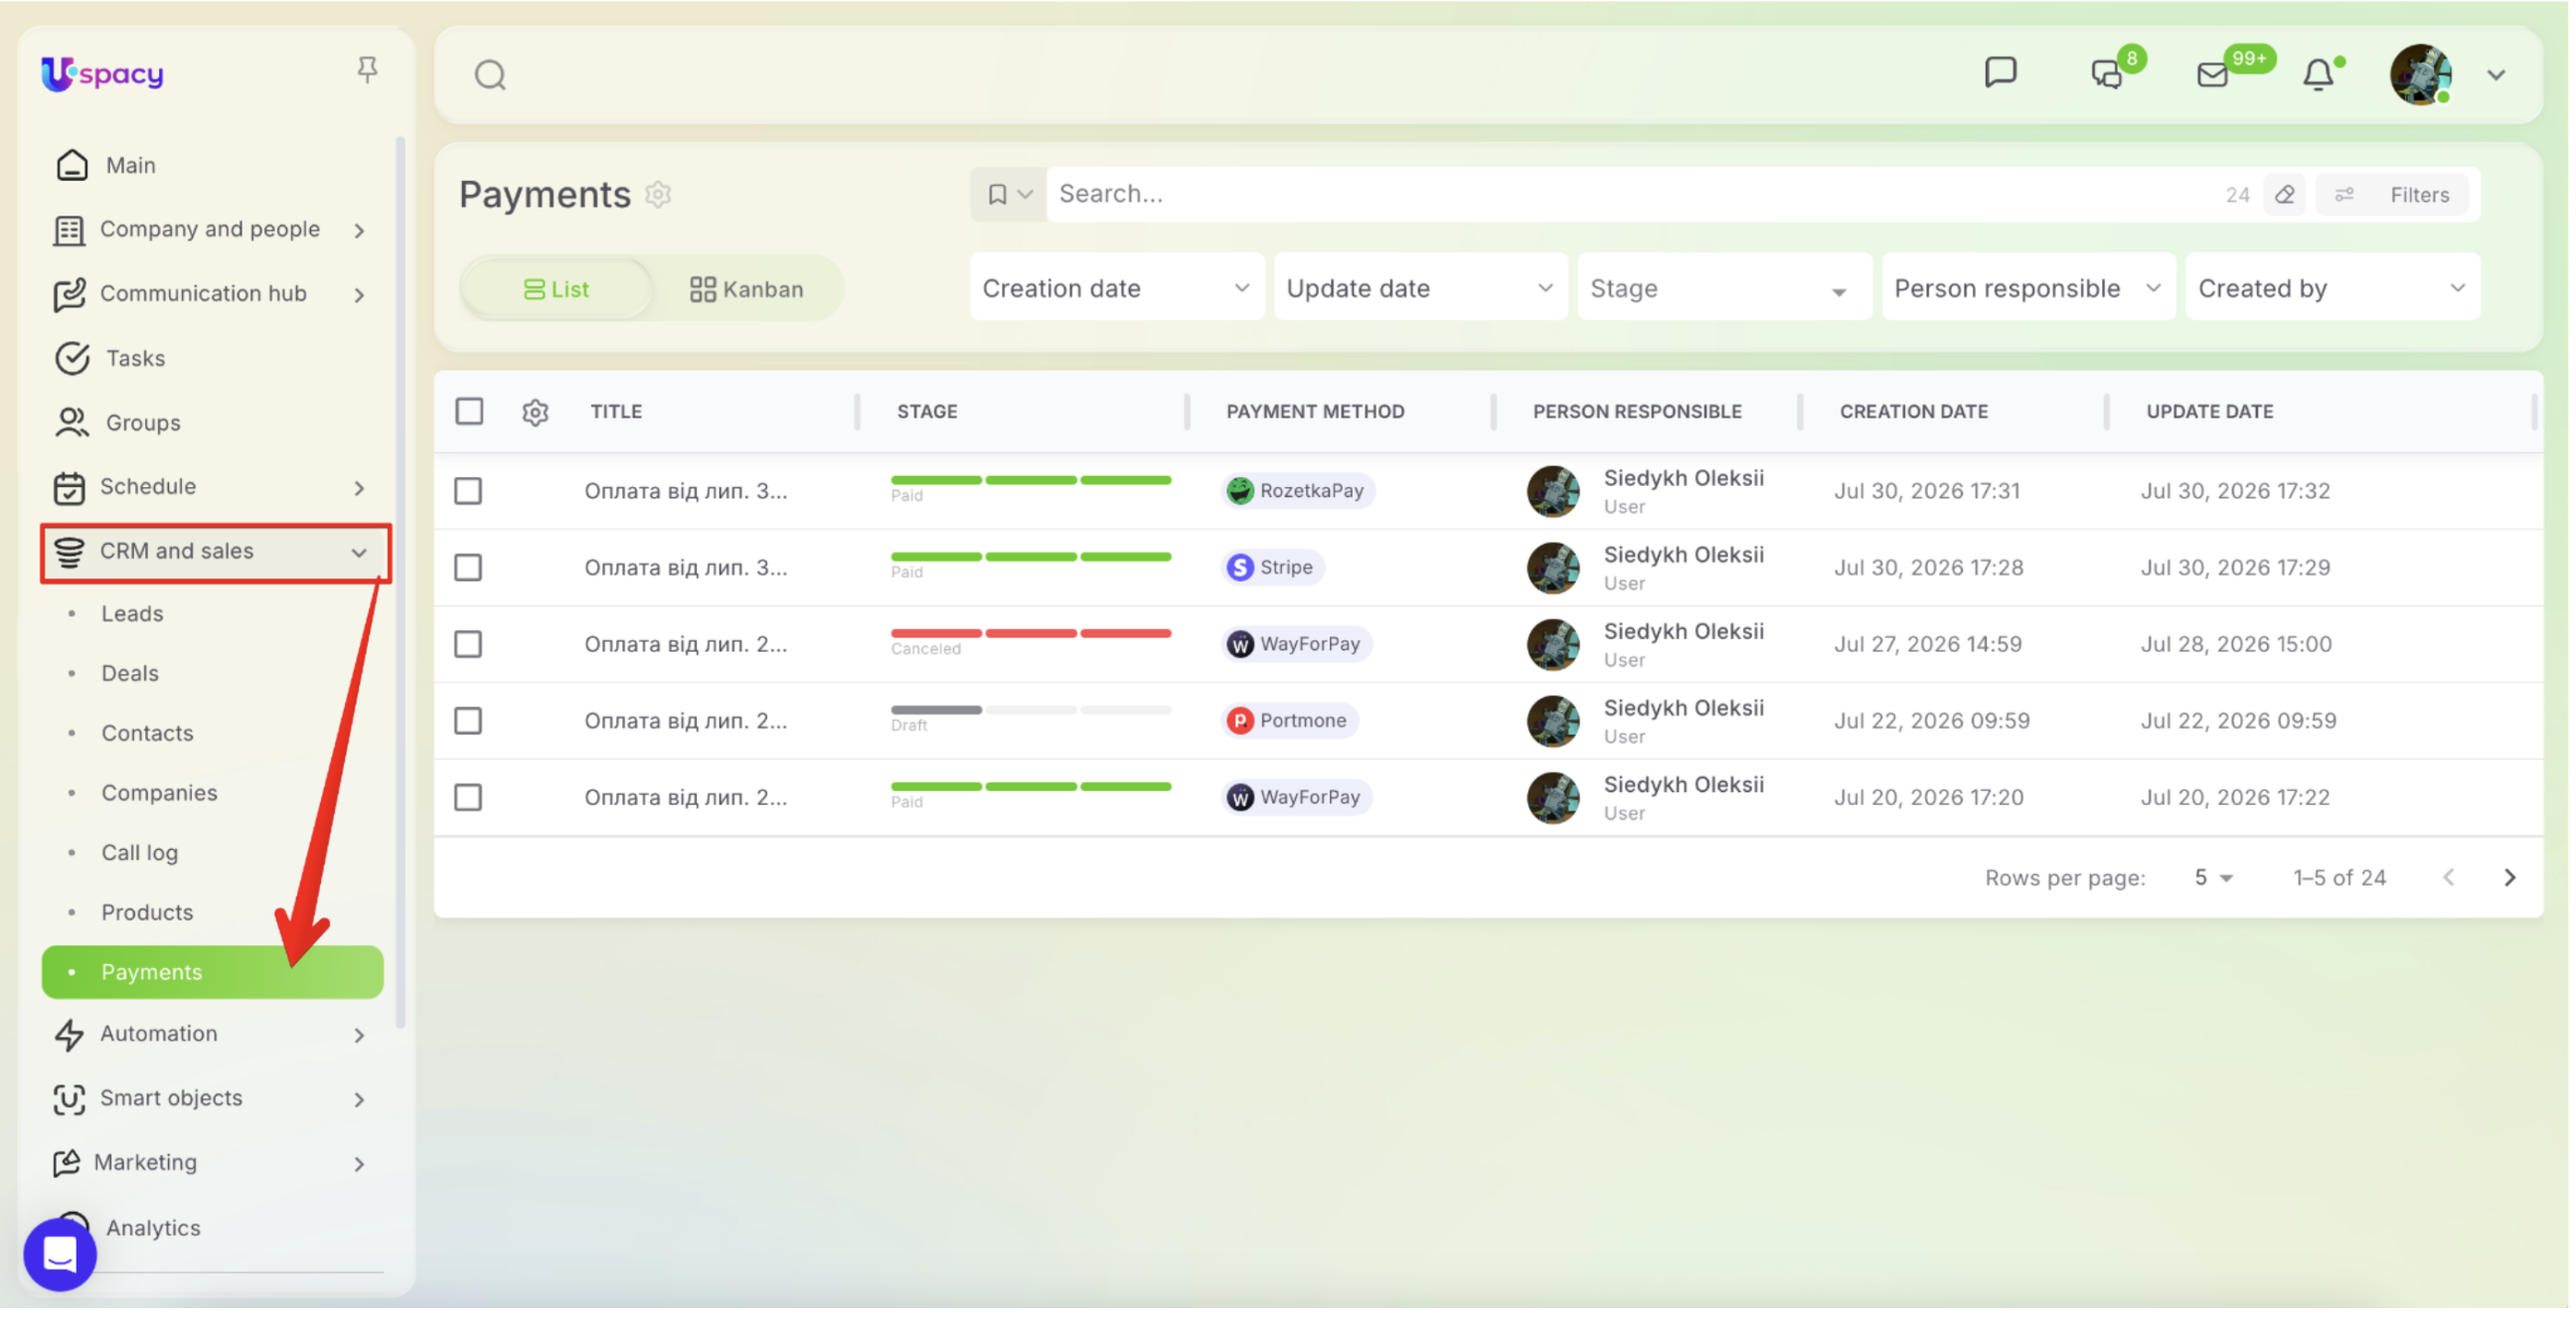
The Payments section stores every payment created in your Space, regardless of the payment provider. To identify payments created through Stripe, check the Payment method column.
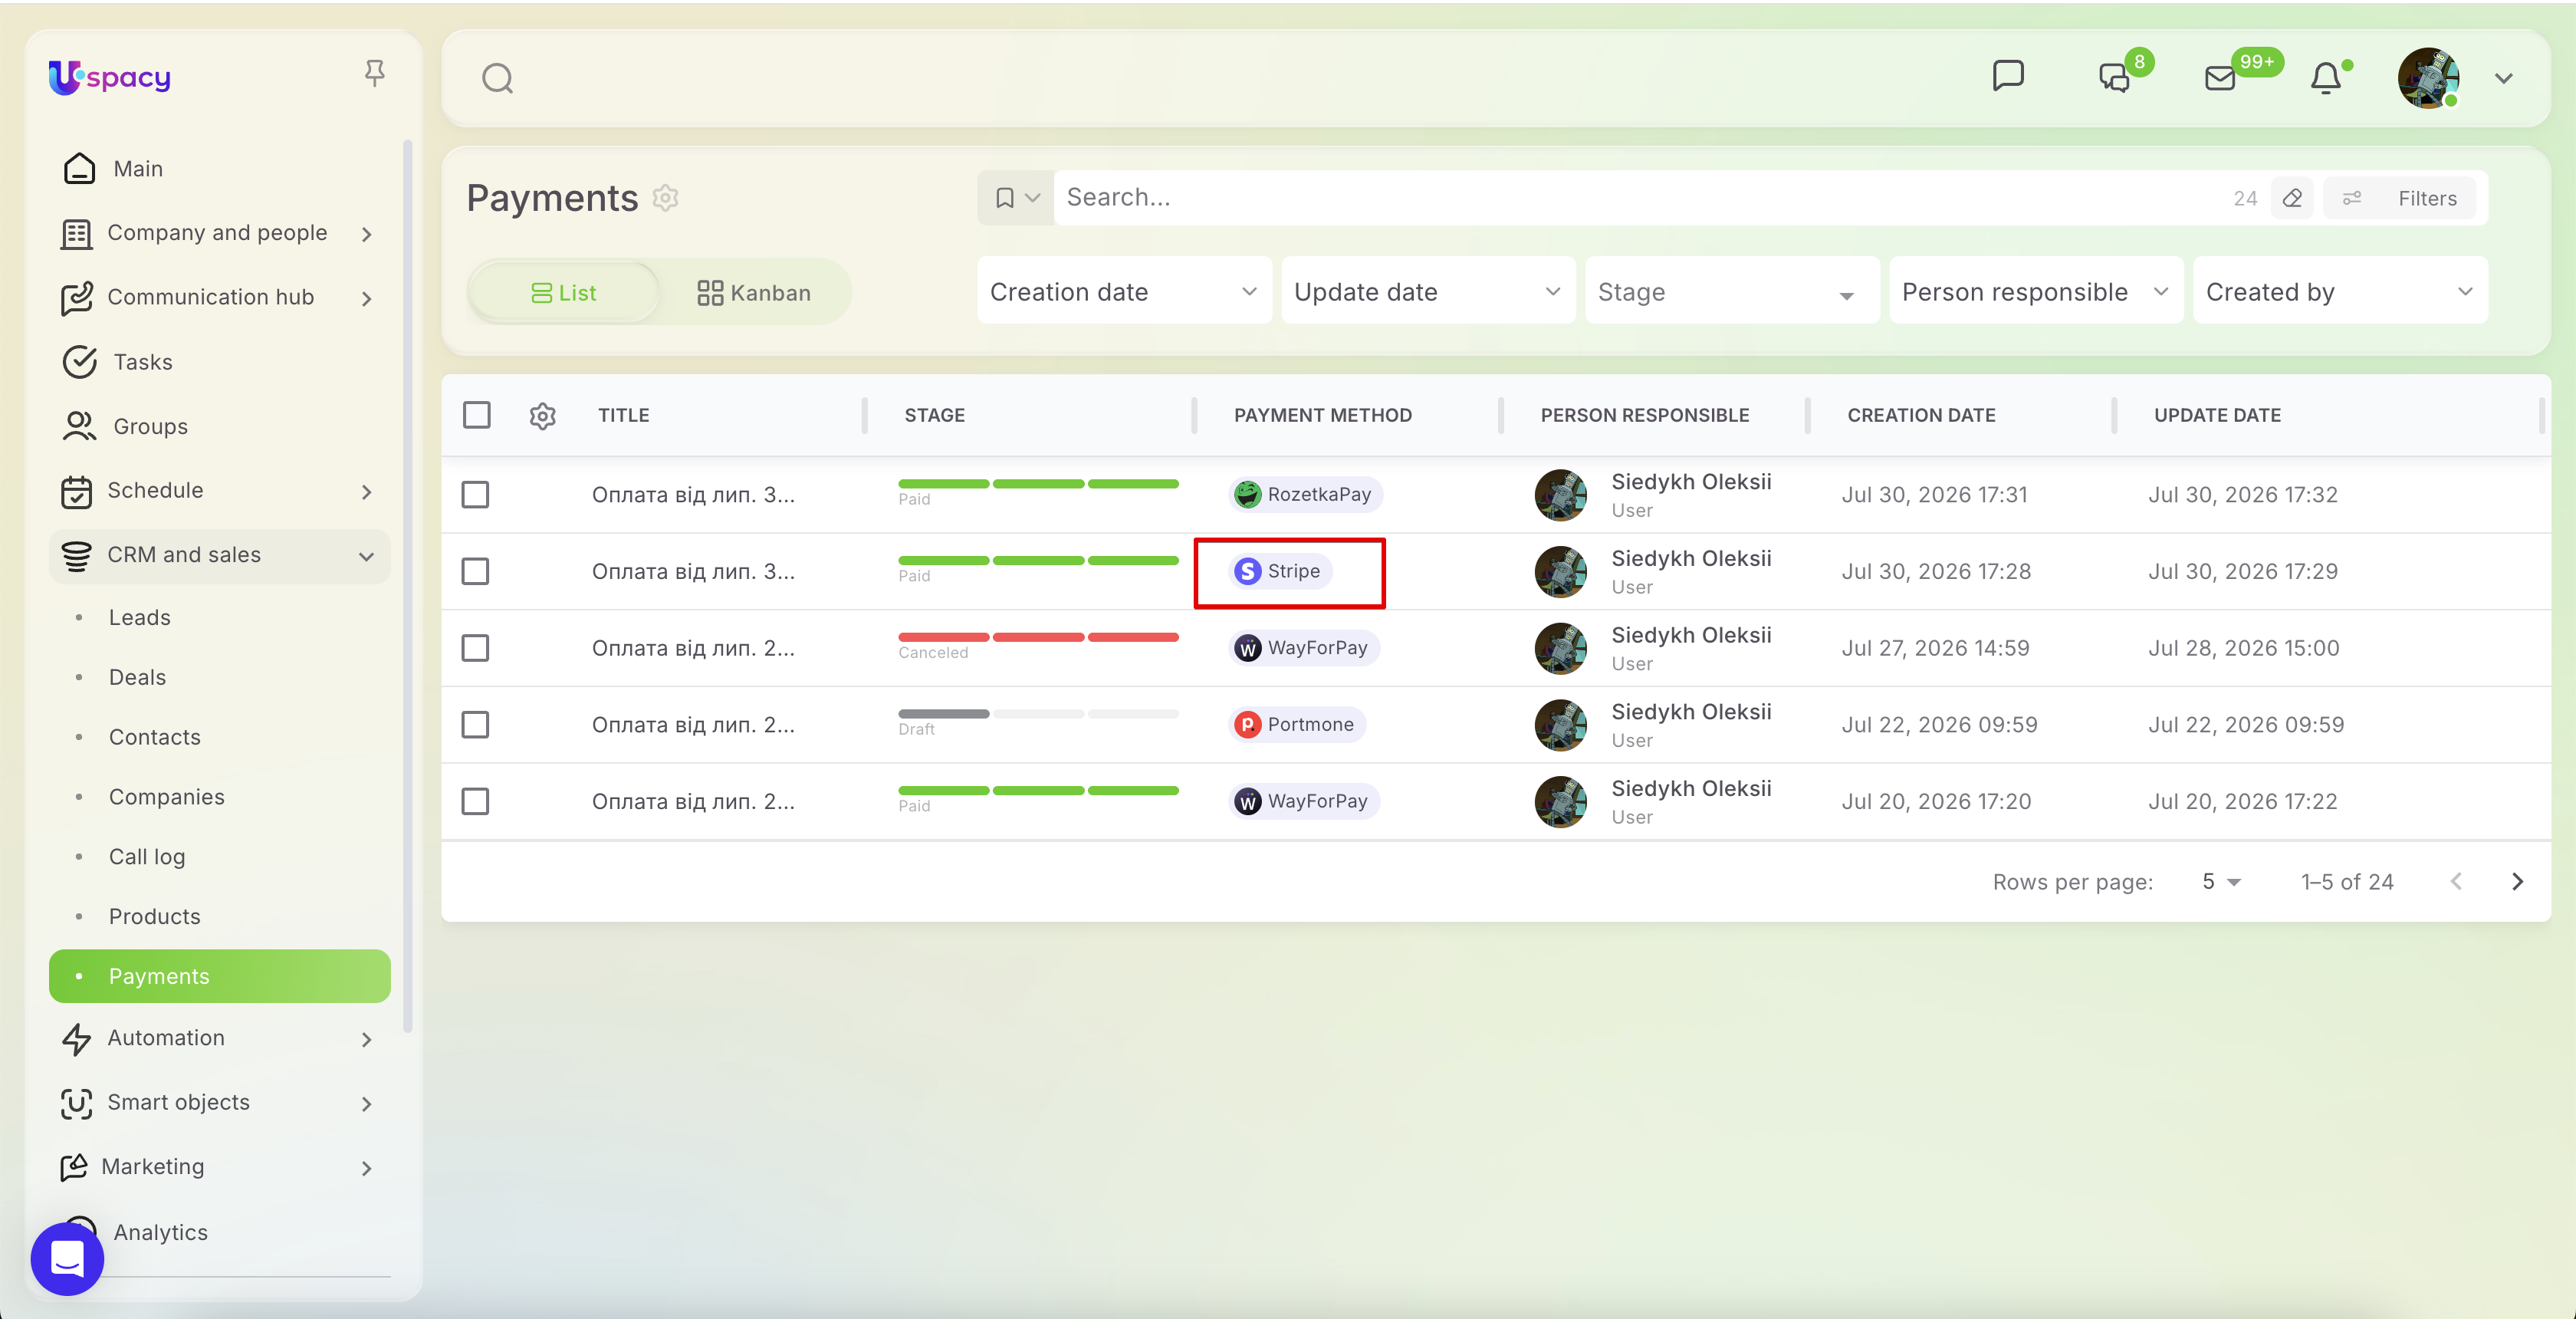
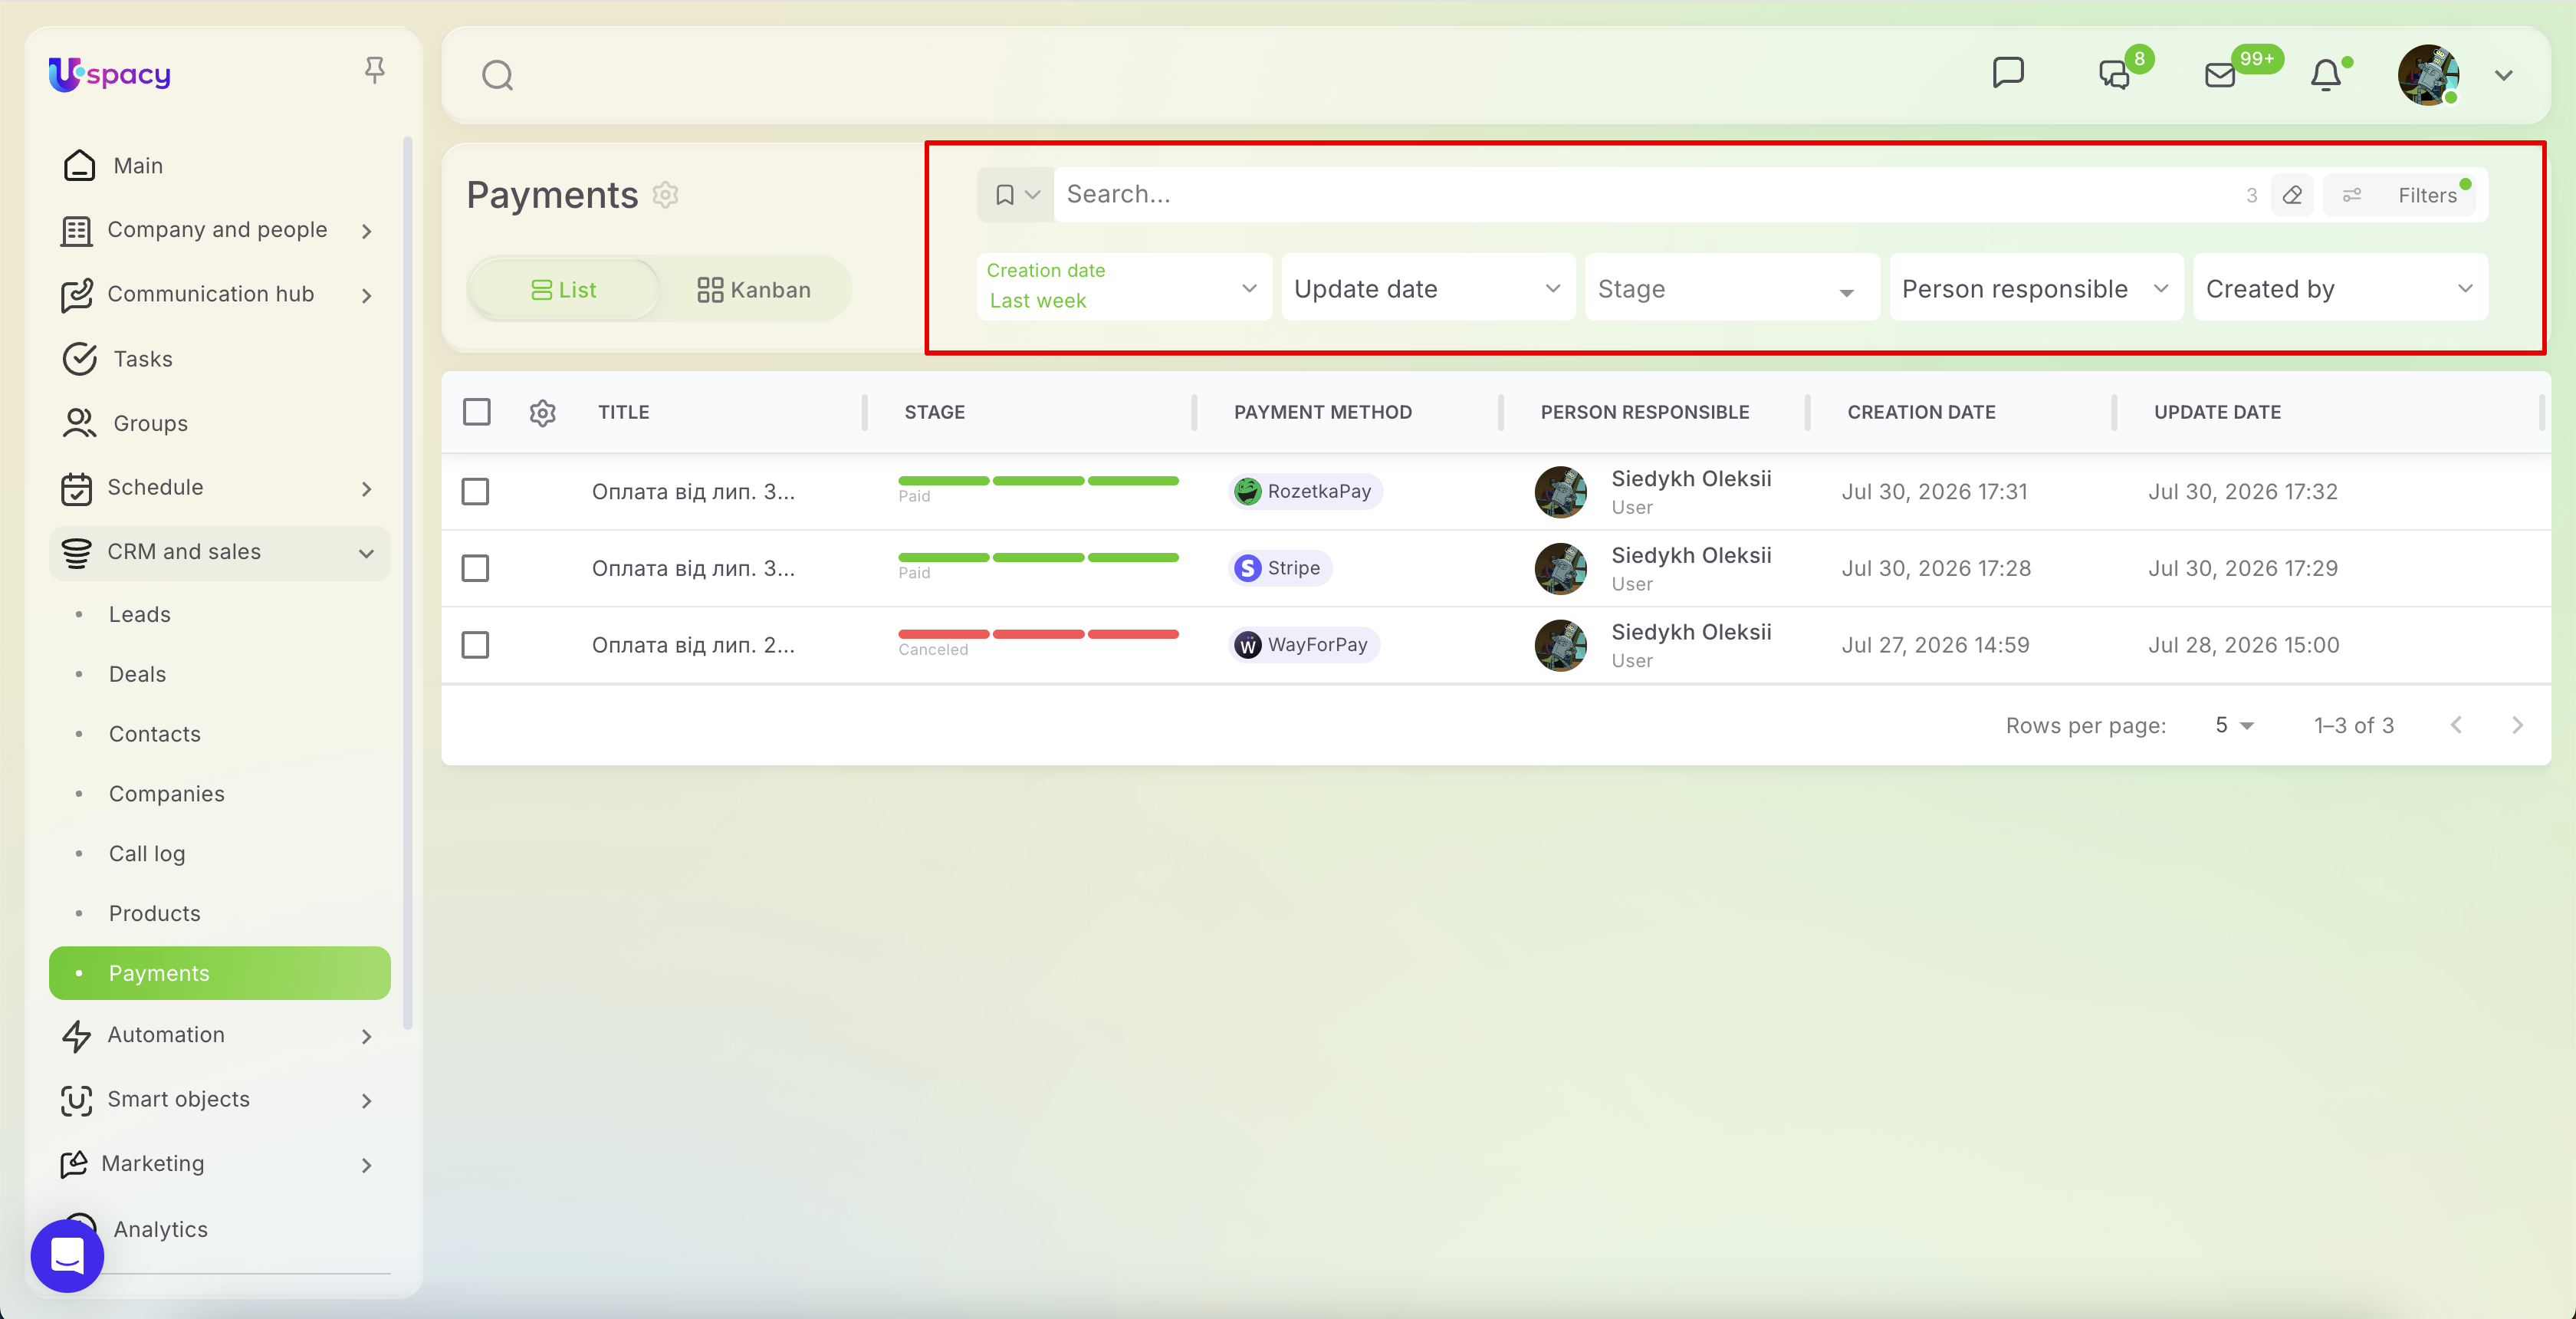
To quickly find a payment, use the search bar, apply quick filters, or create a custom filter based on your preferred criteria.
Payments can be viewed in two layouts:
- List
- Kanban board
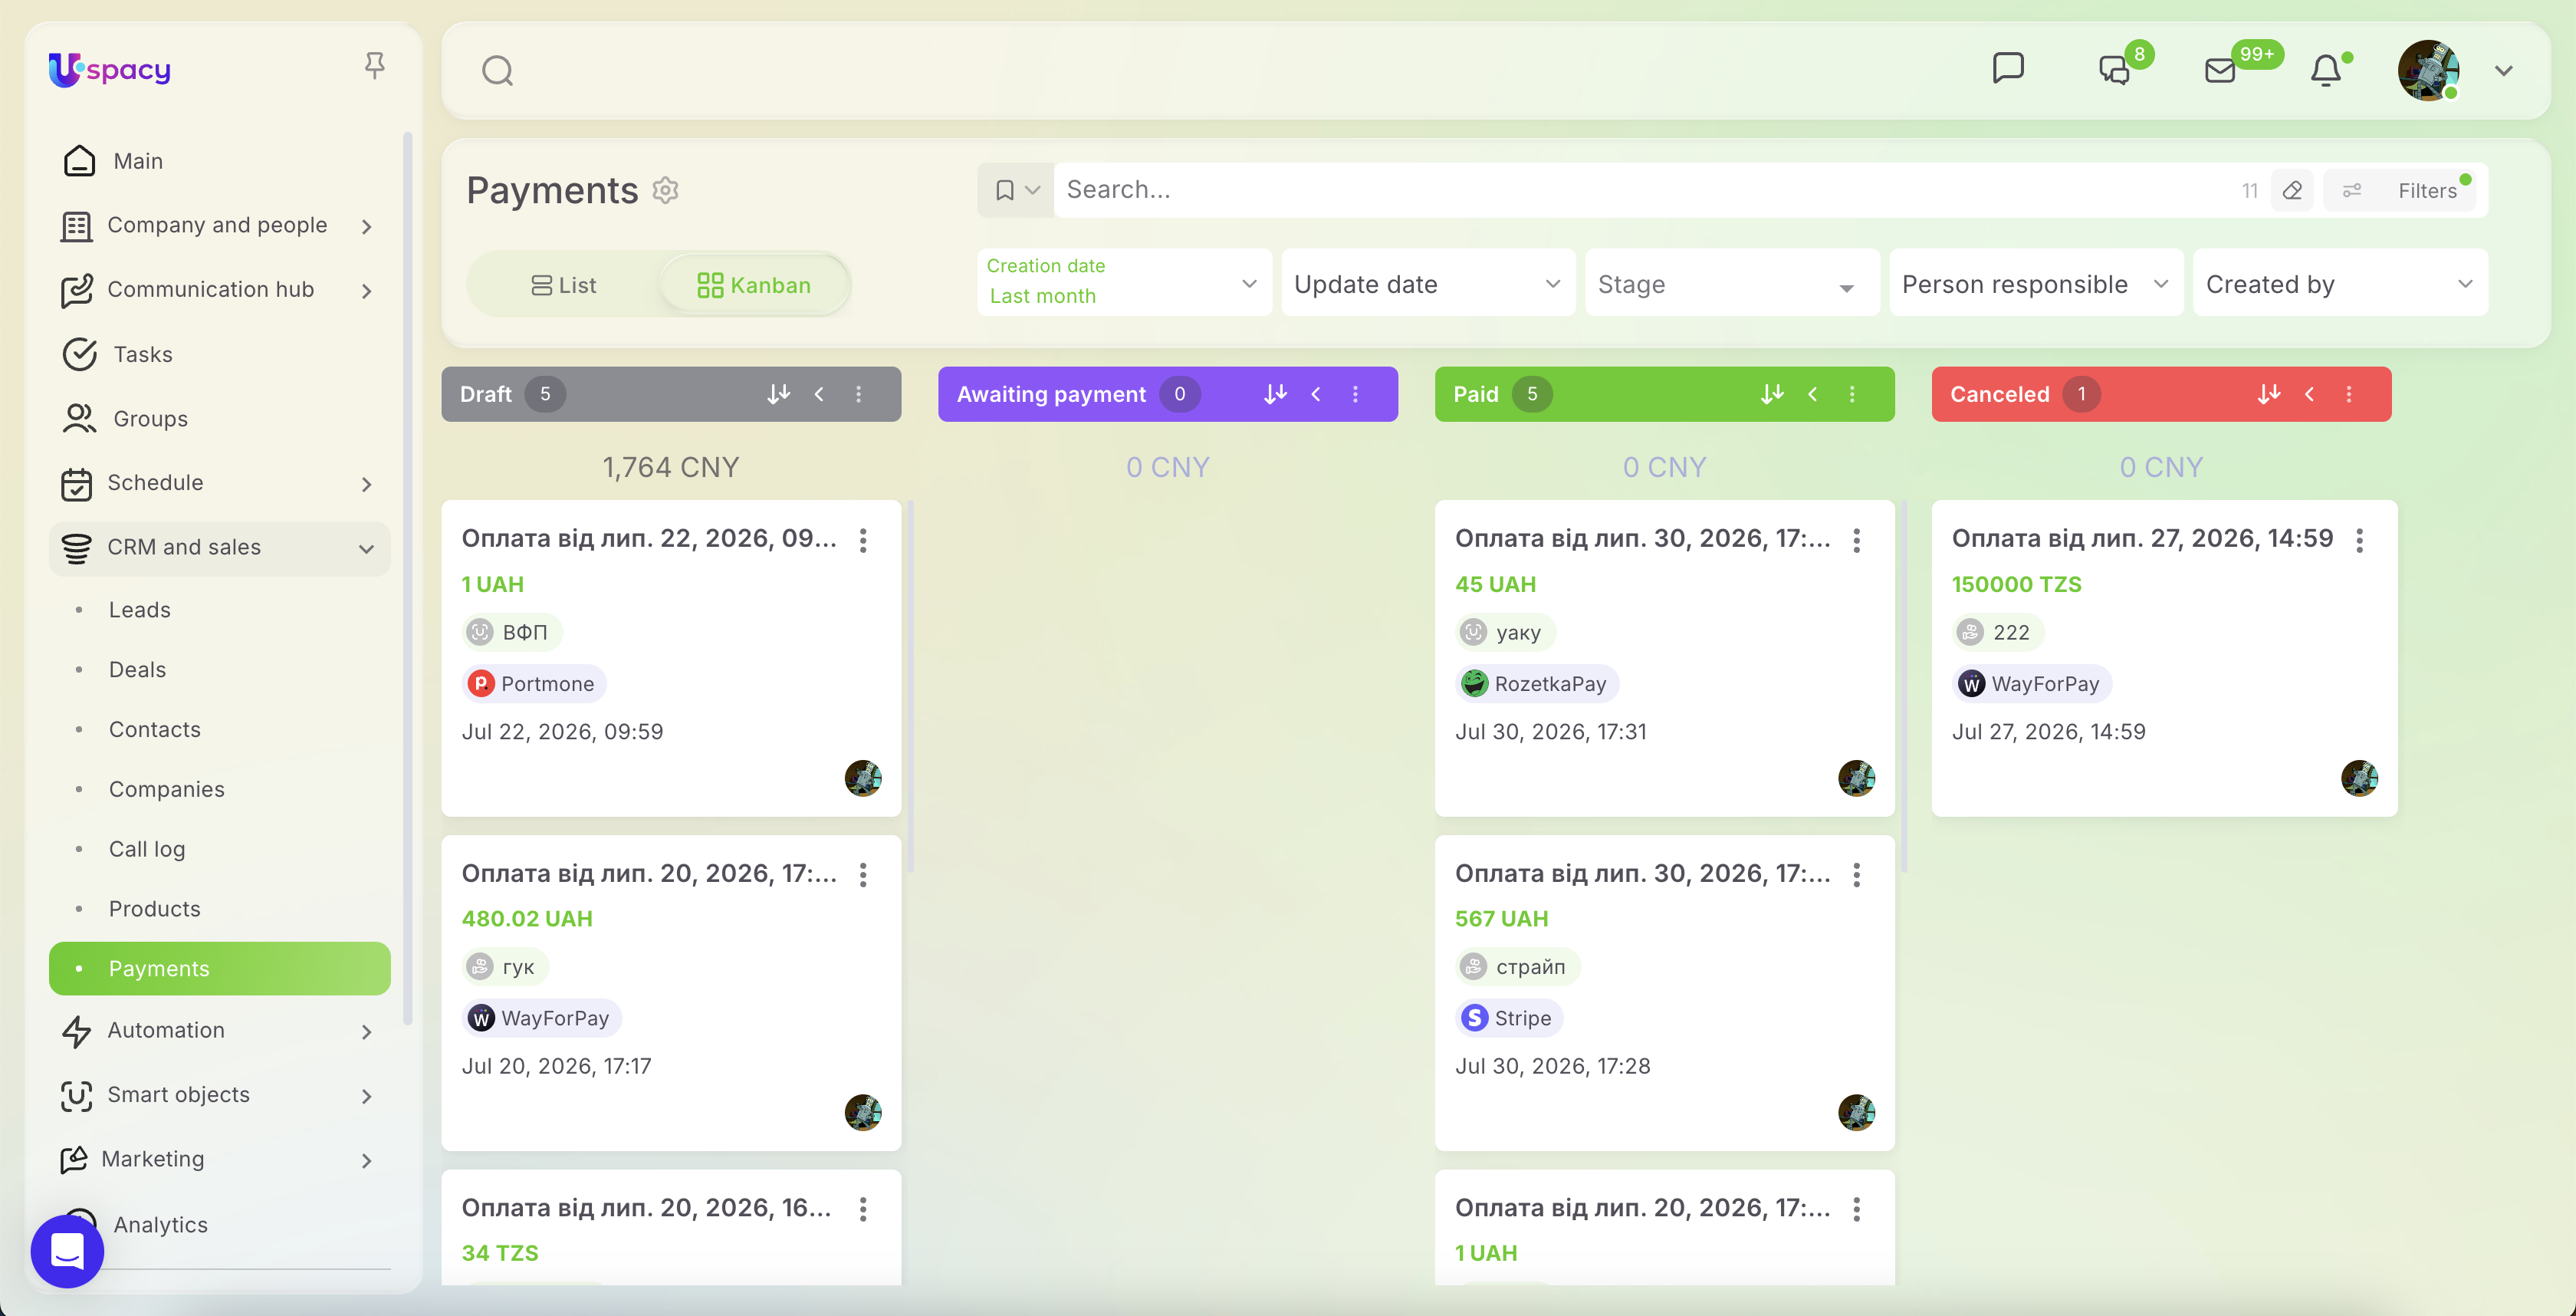
On the Board, payments are grouped into the following system statuses:
- Draft — The payment has been created, but no payment link has been generated or sent.
- Awaiting payment — A payment link has been created and the system is waiting for the client to pay.
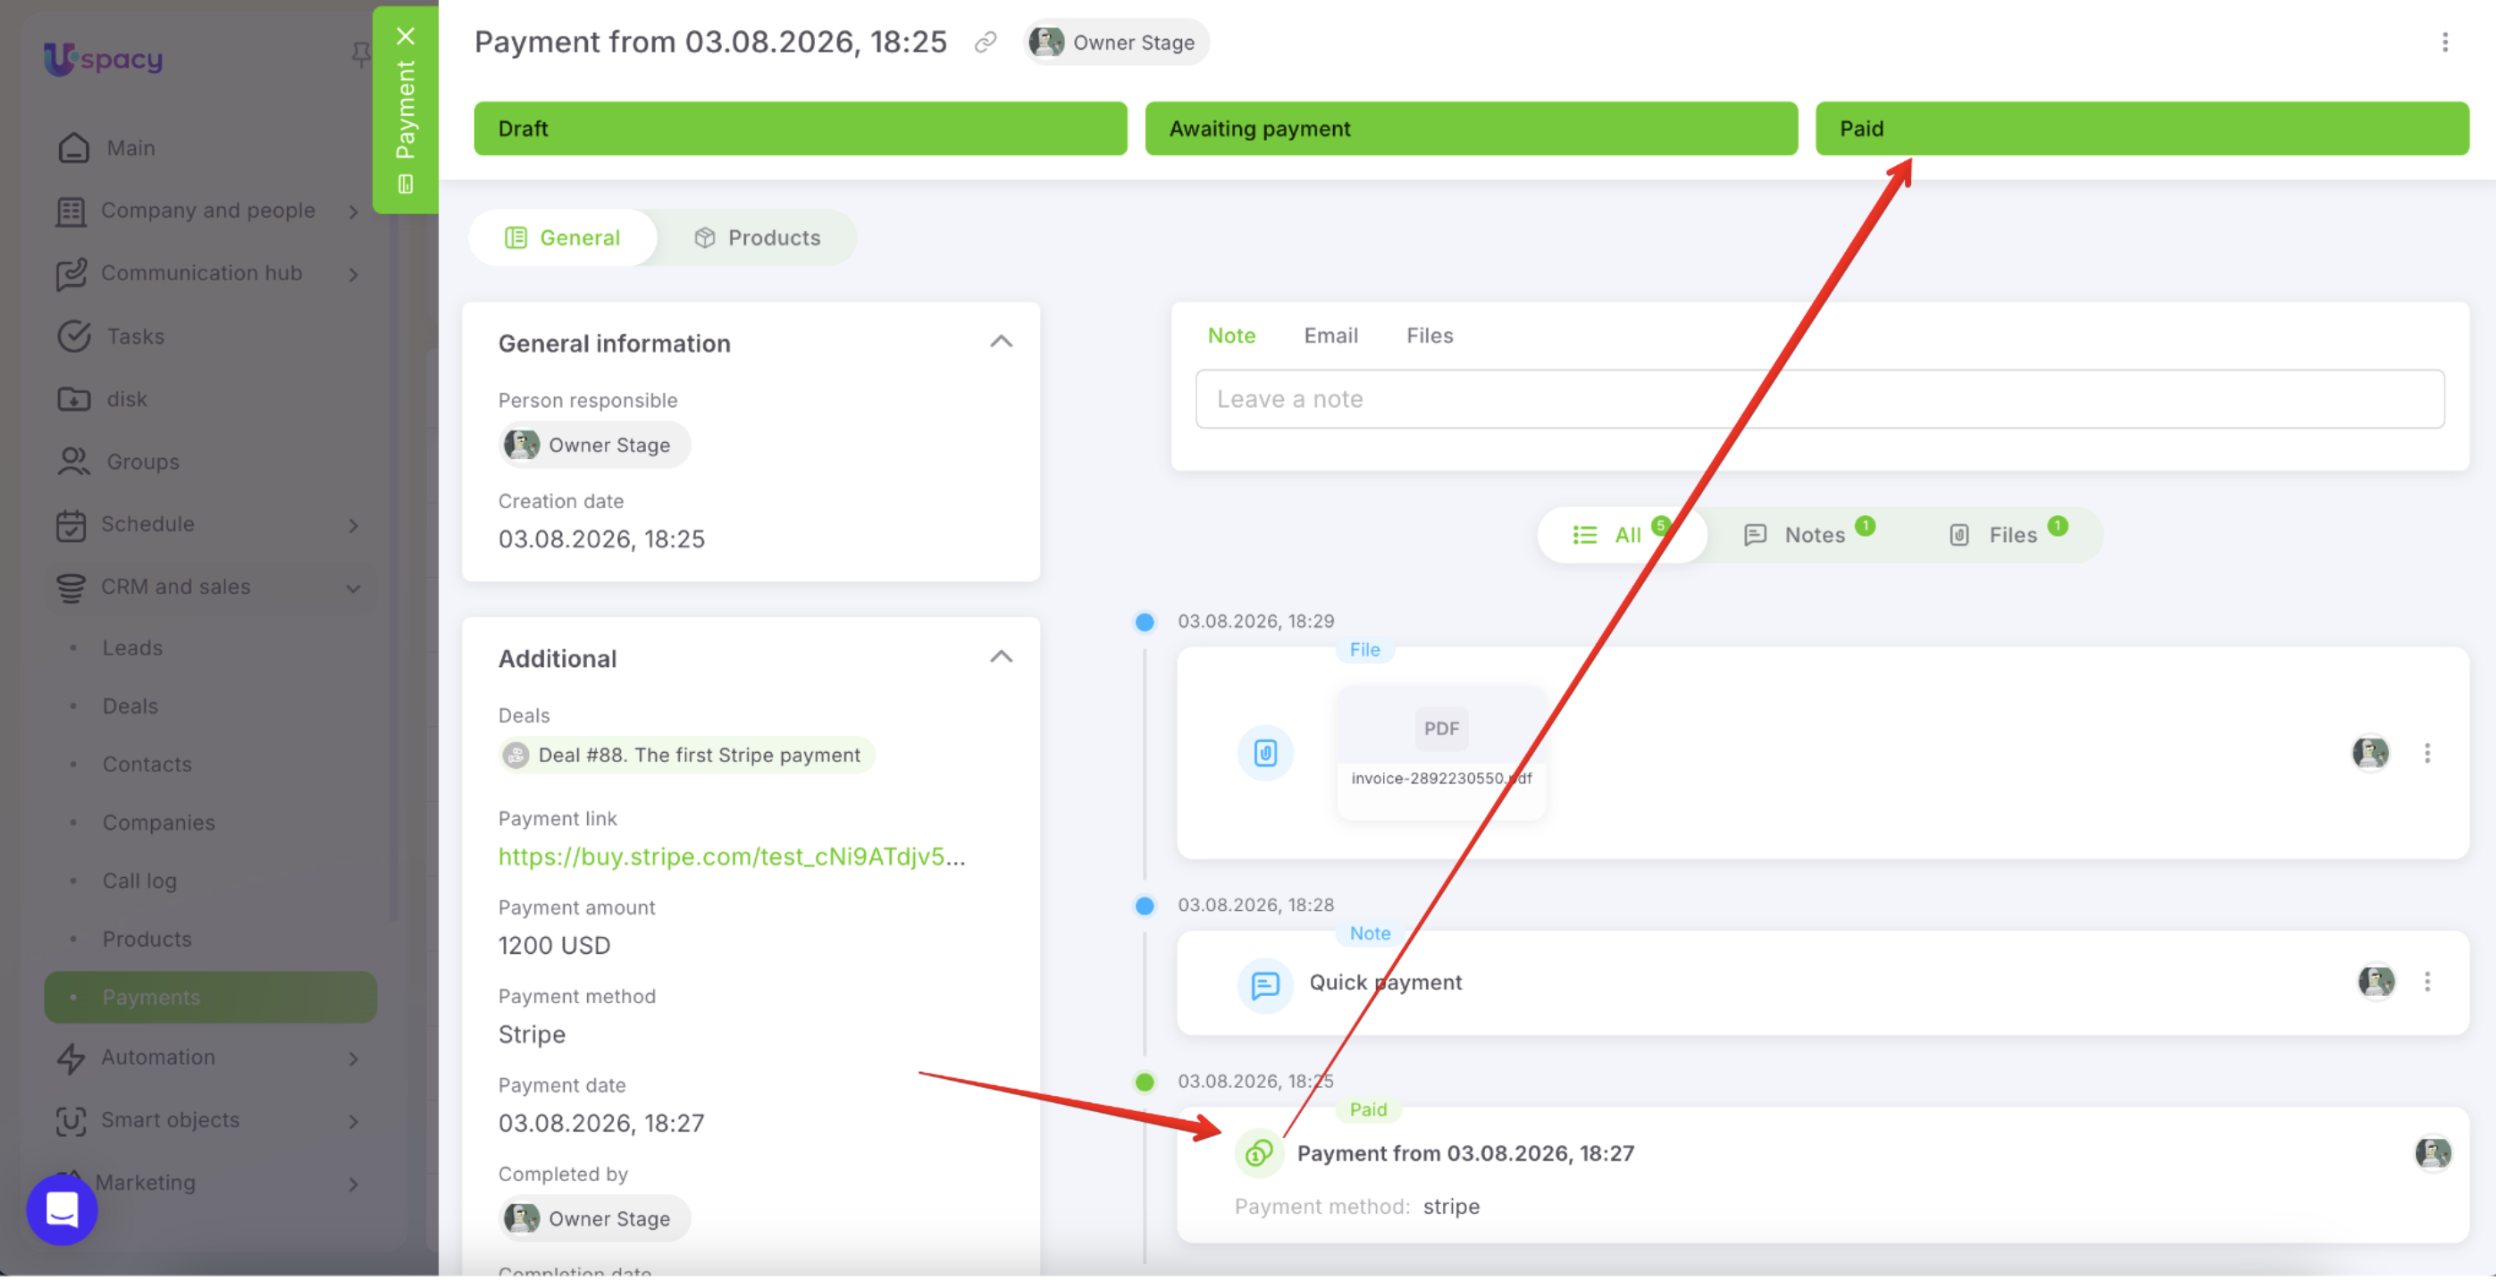
- Paid — The client successfully completed the payment.
- Canceled — The payment link expired before payment was received.
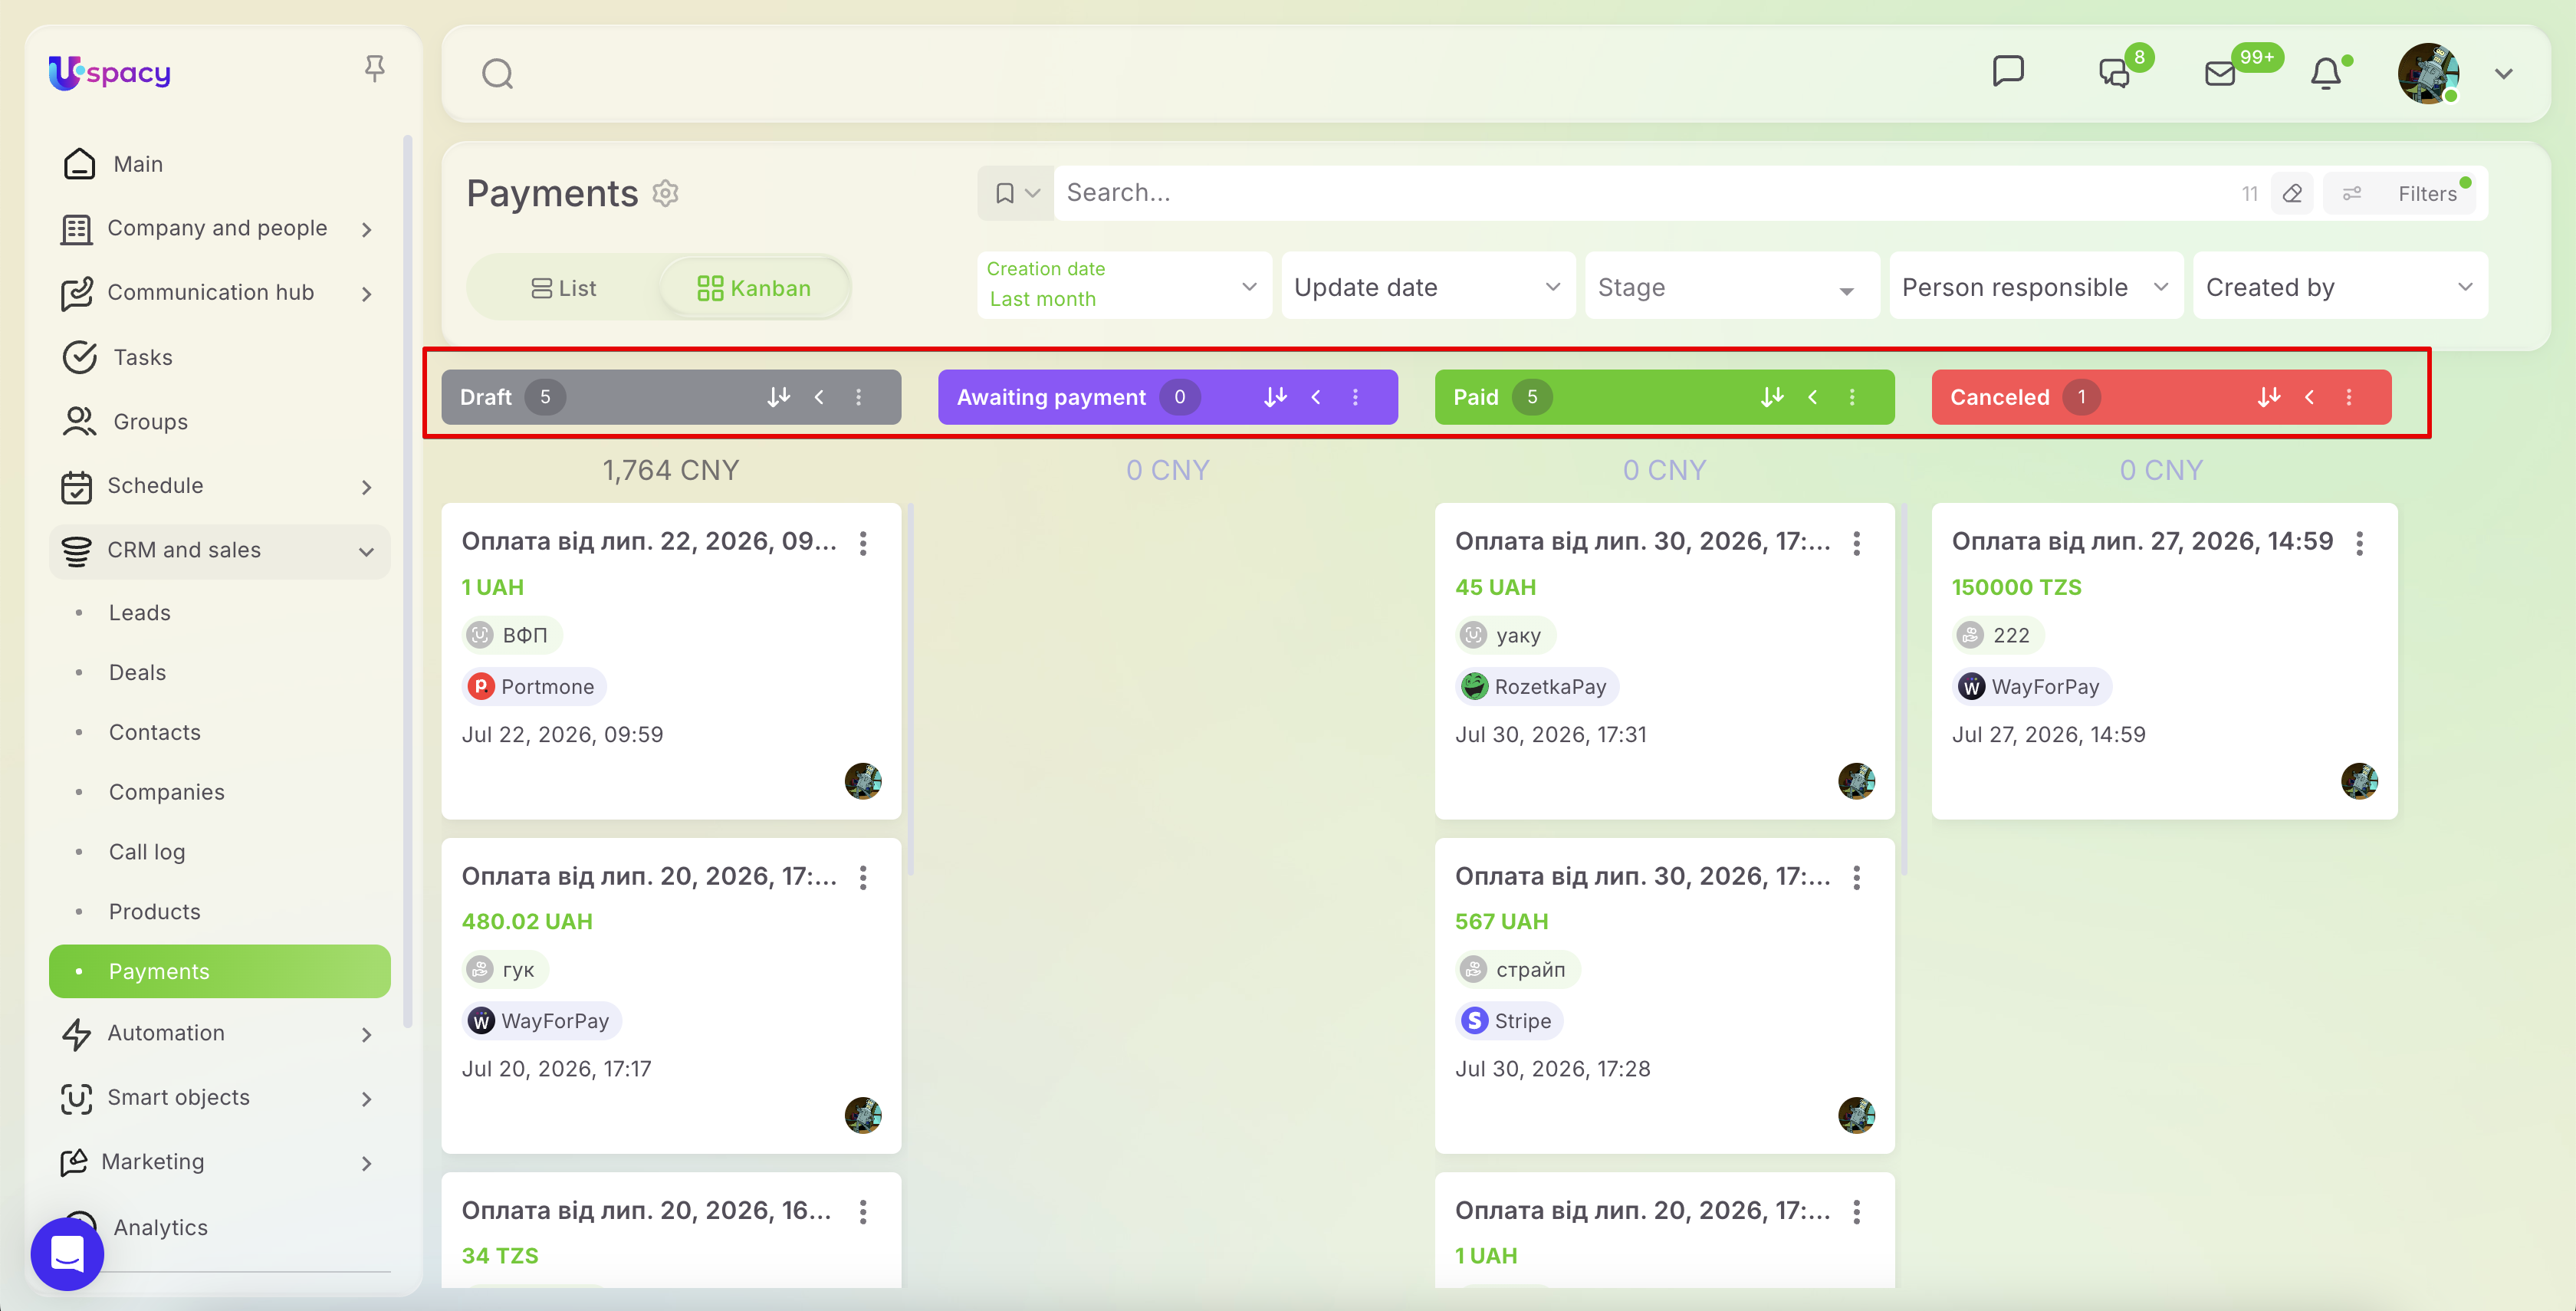
Note: Payment statuses are updated automatically based on the payment lifecycle. For example: Creating a payment link changes the status to Awaiting payment. A successful payment changes the status to Paid. If the payment link expires without payment, the status changes to Canceled.
Payment statuses cannot be changed manually. Likewise, you cannot create custom payment statuses because they are controlled by the payment integration and updated automatically.
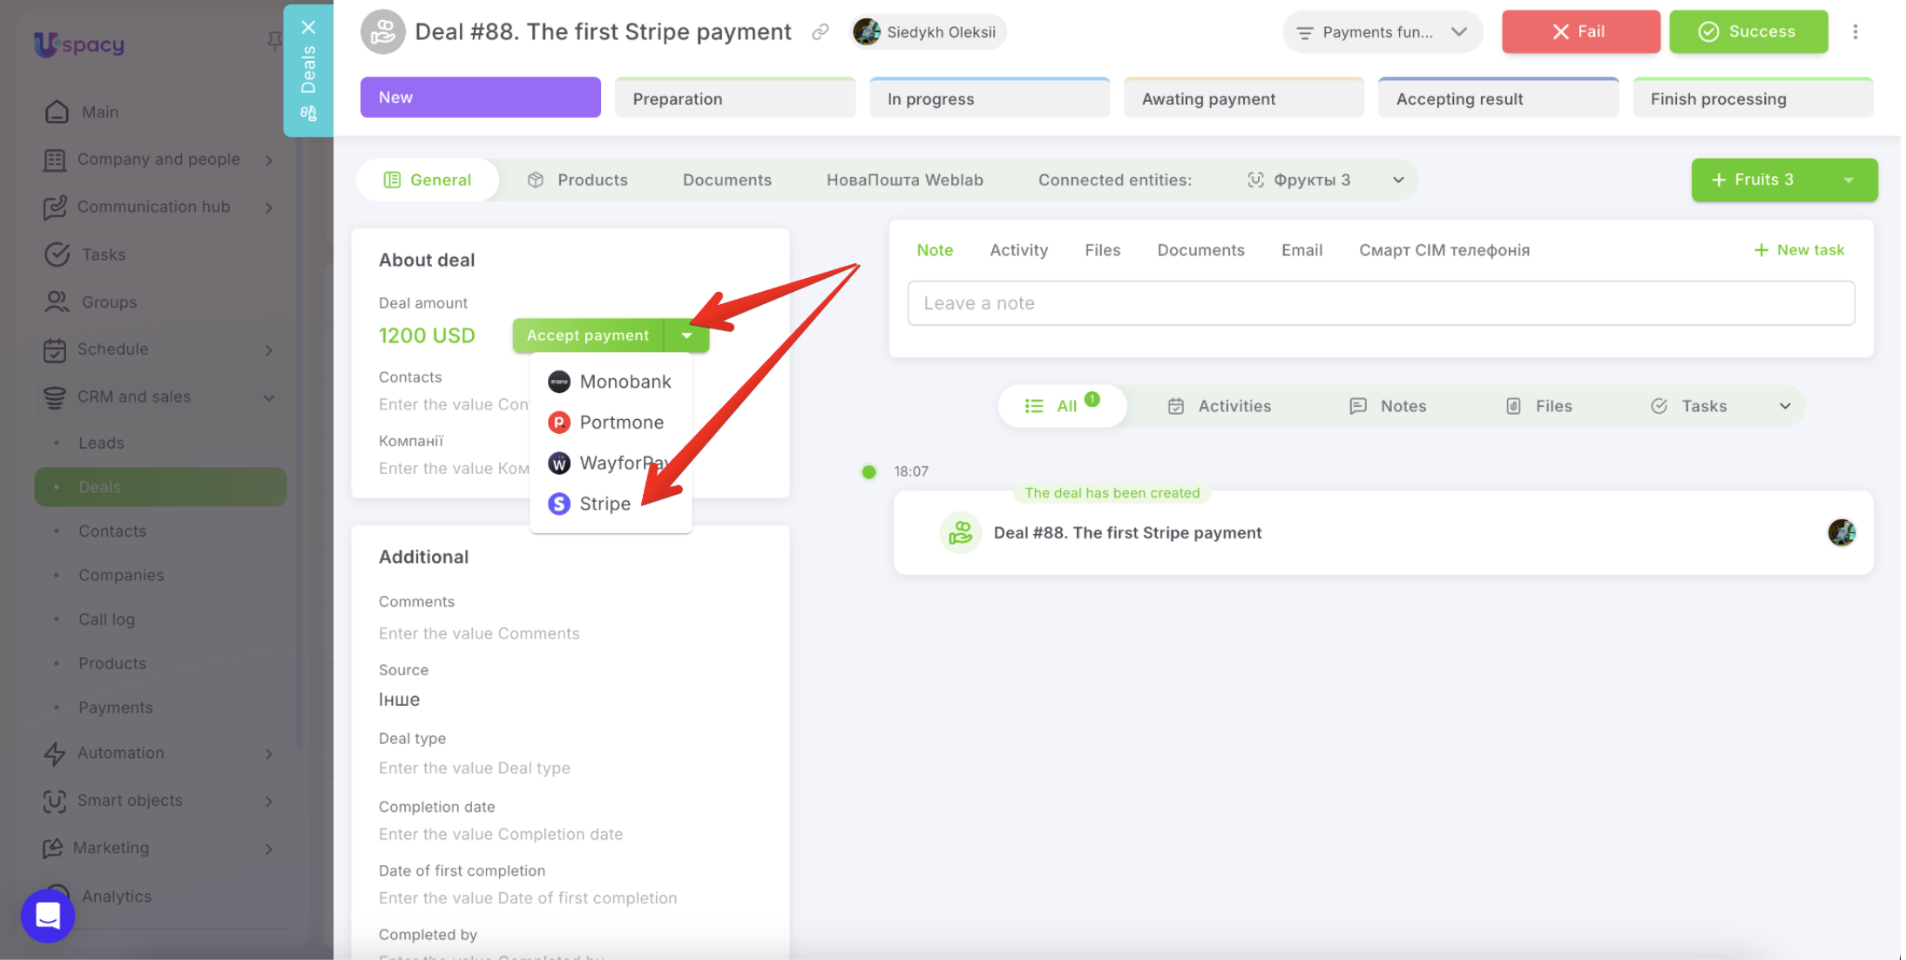
To create a payment, open a record for one of the entities you selected during setup—for example, a Deal. If the Amount field has already been filled in, you'll see the Accept payment button.
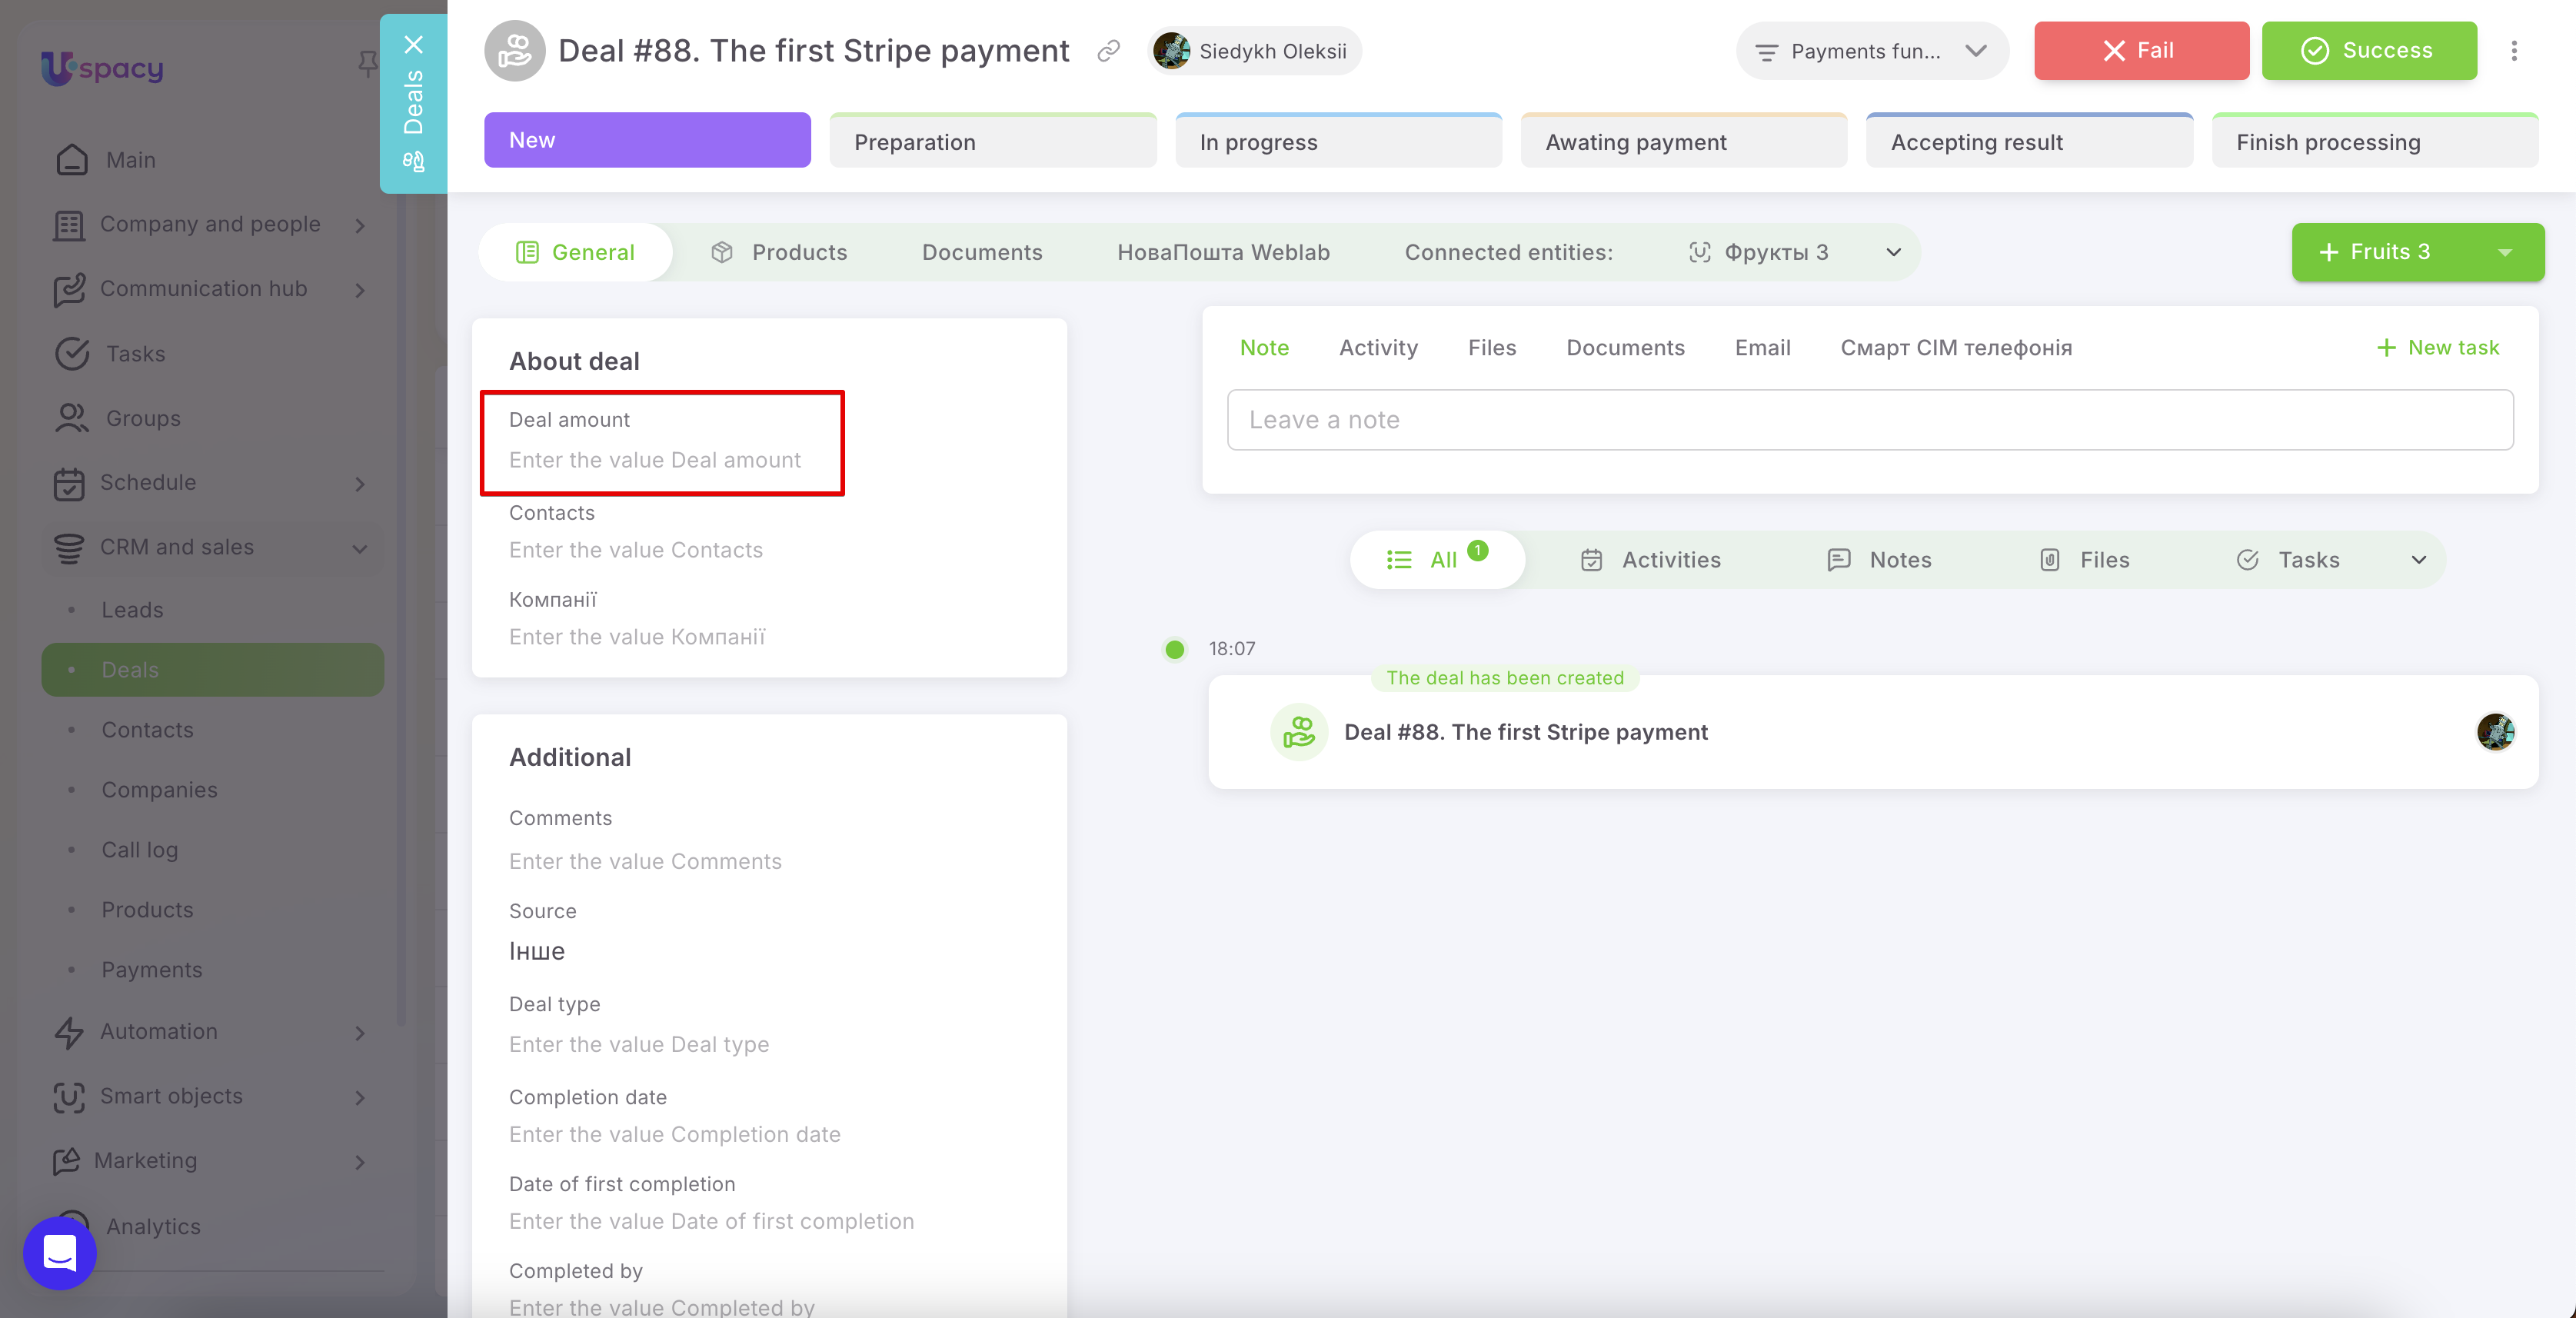
However, the deal amount alone is not enough. Payments are created based on the products added to the record. If no products have been added, the system will notify you that the payment cannot be created.
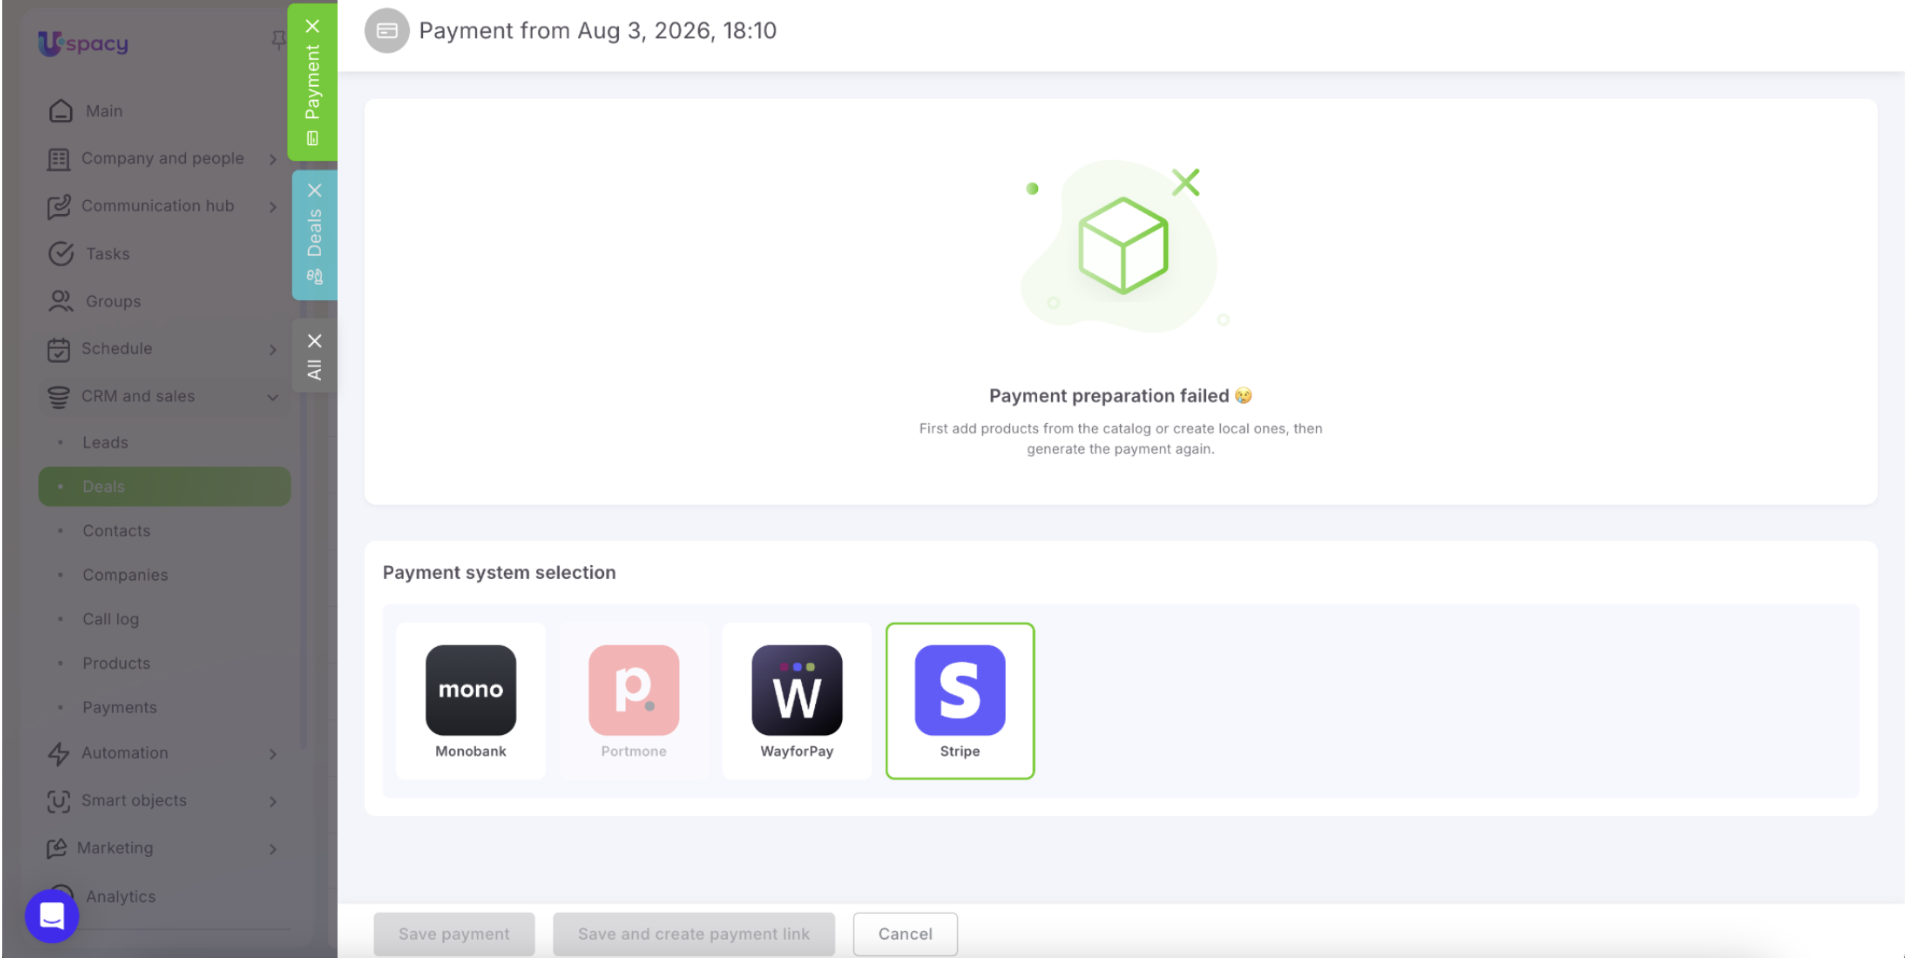
Open the Products tab and either:
- add an existing product from the catalog;
- select multiple products from the catalog; or
- create a local product without adding it to the shared catalog.
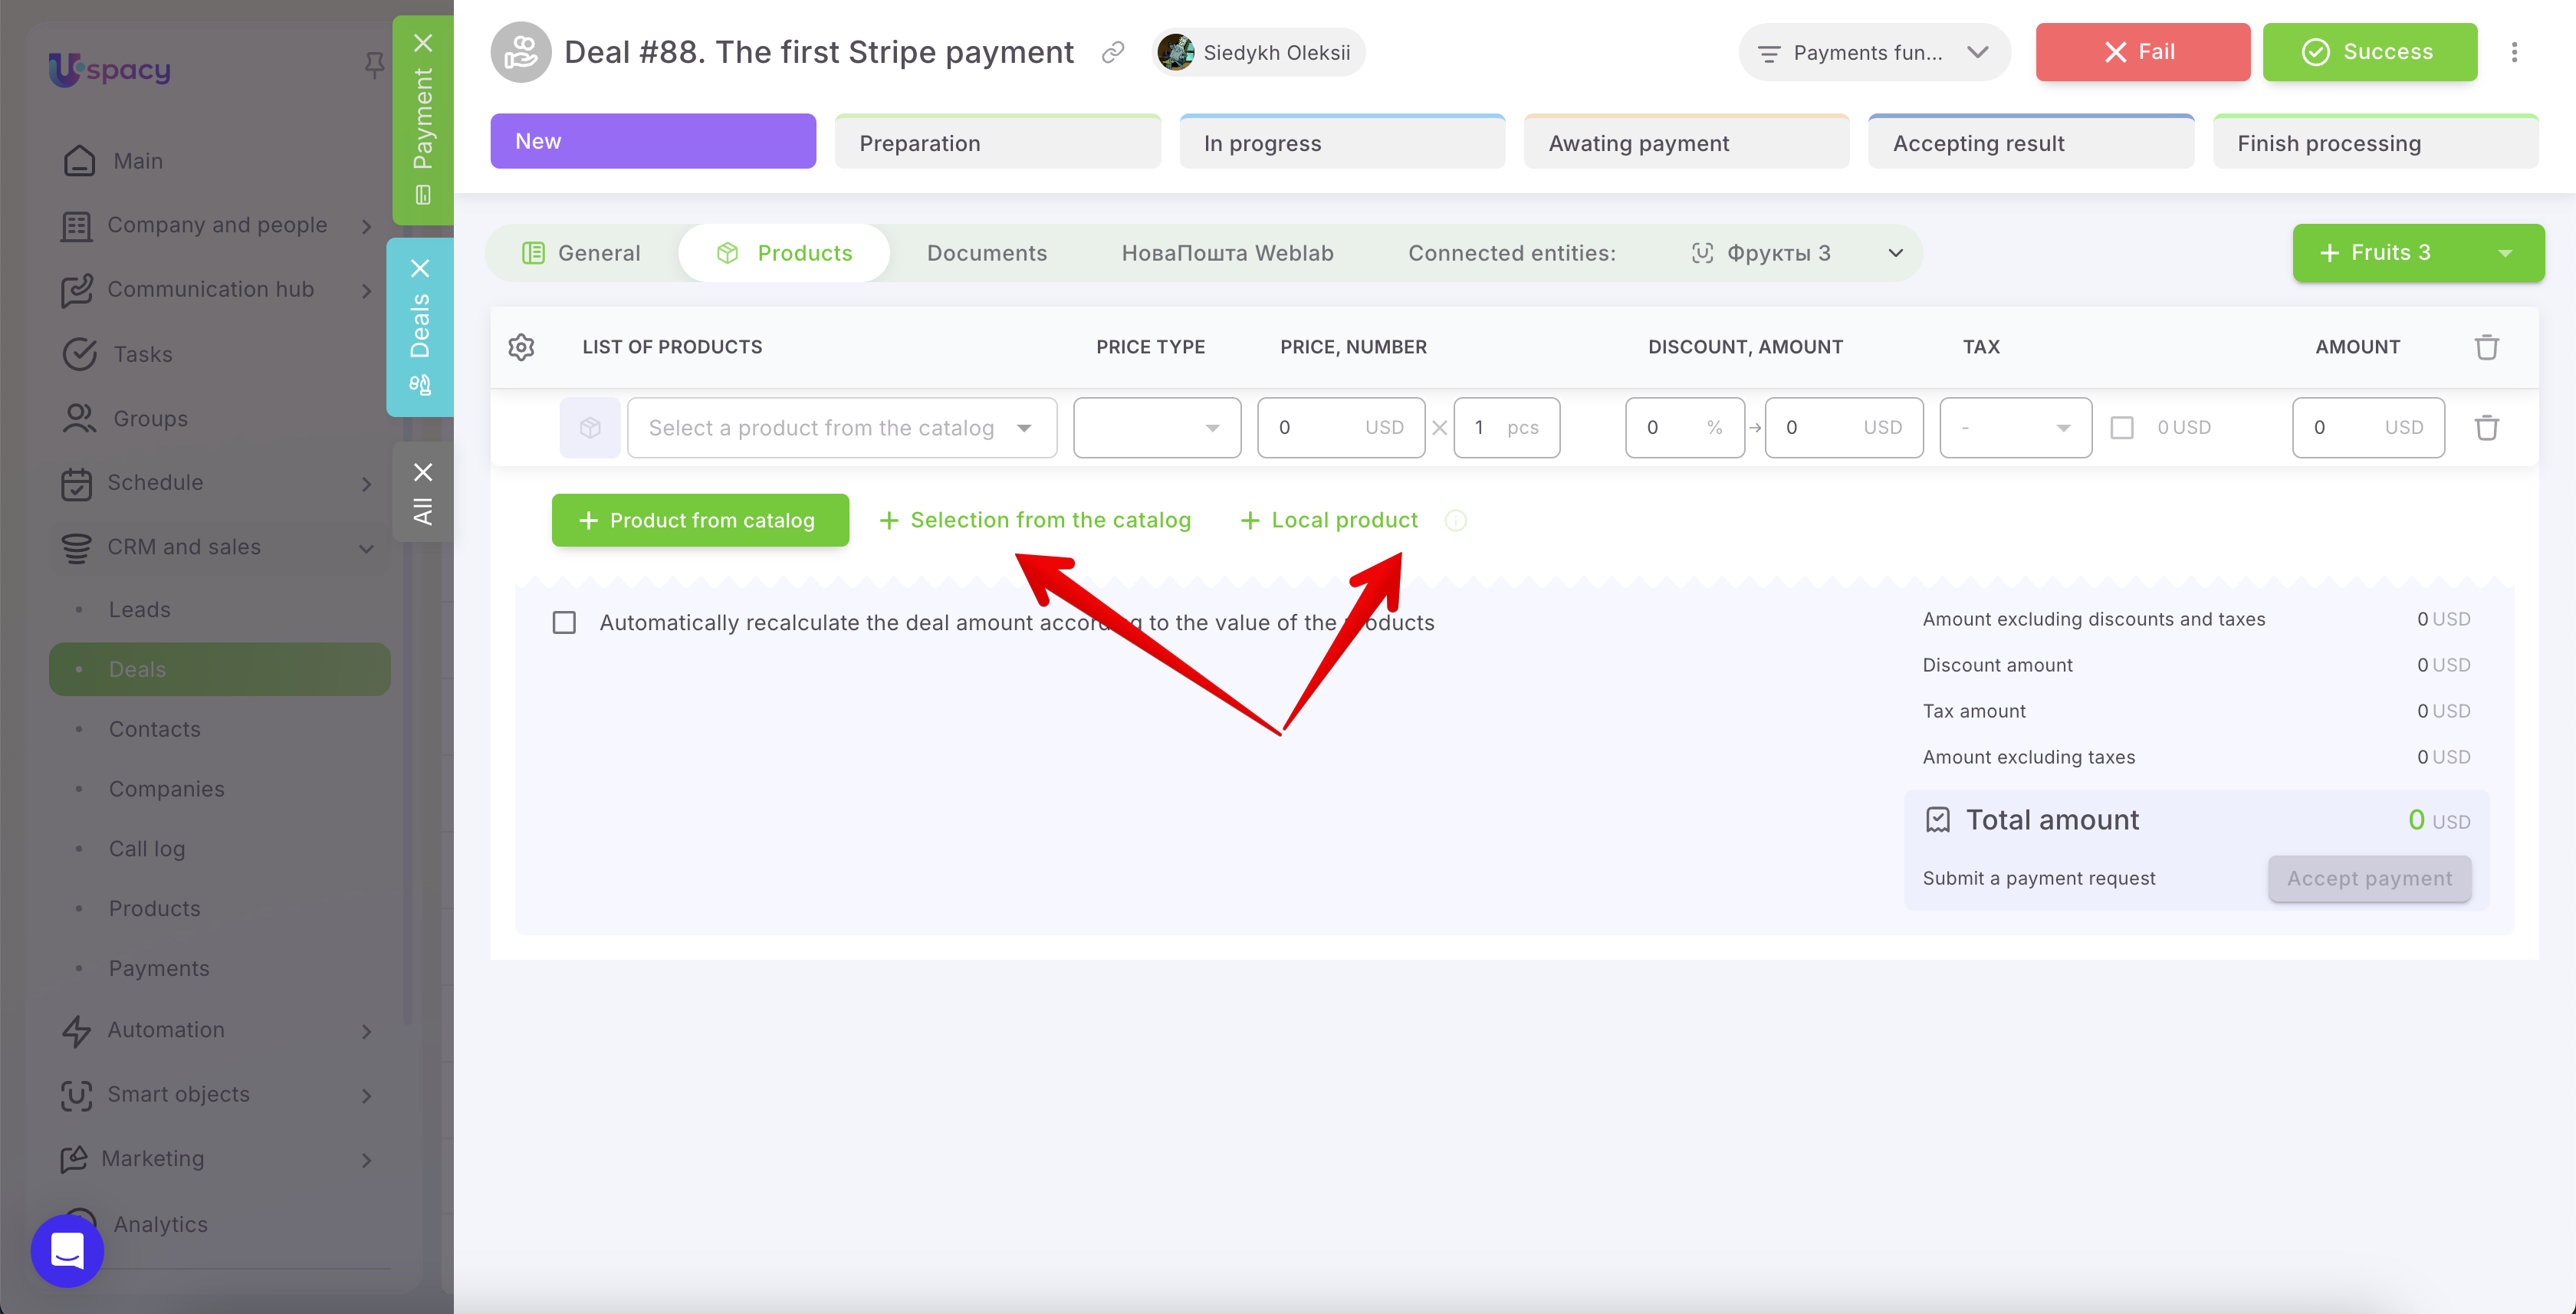
For each product, specify the required details: price type, price, number, discount, and tax. Uspacy automatically calculates the total payment amount. Then click Accept payment. If multiple payment providers are connected, select Stripe from the list.
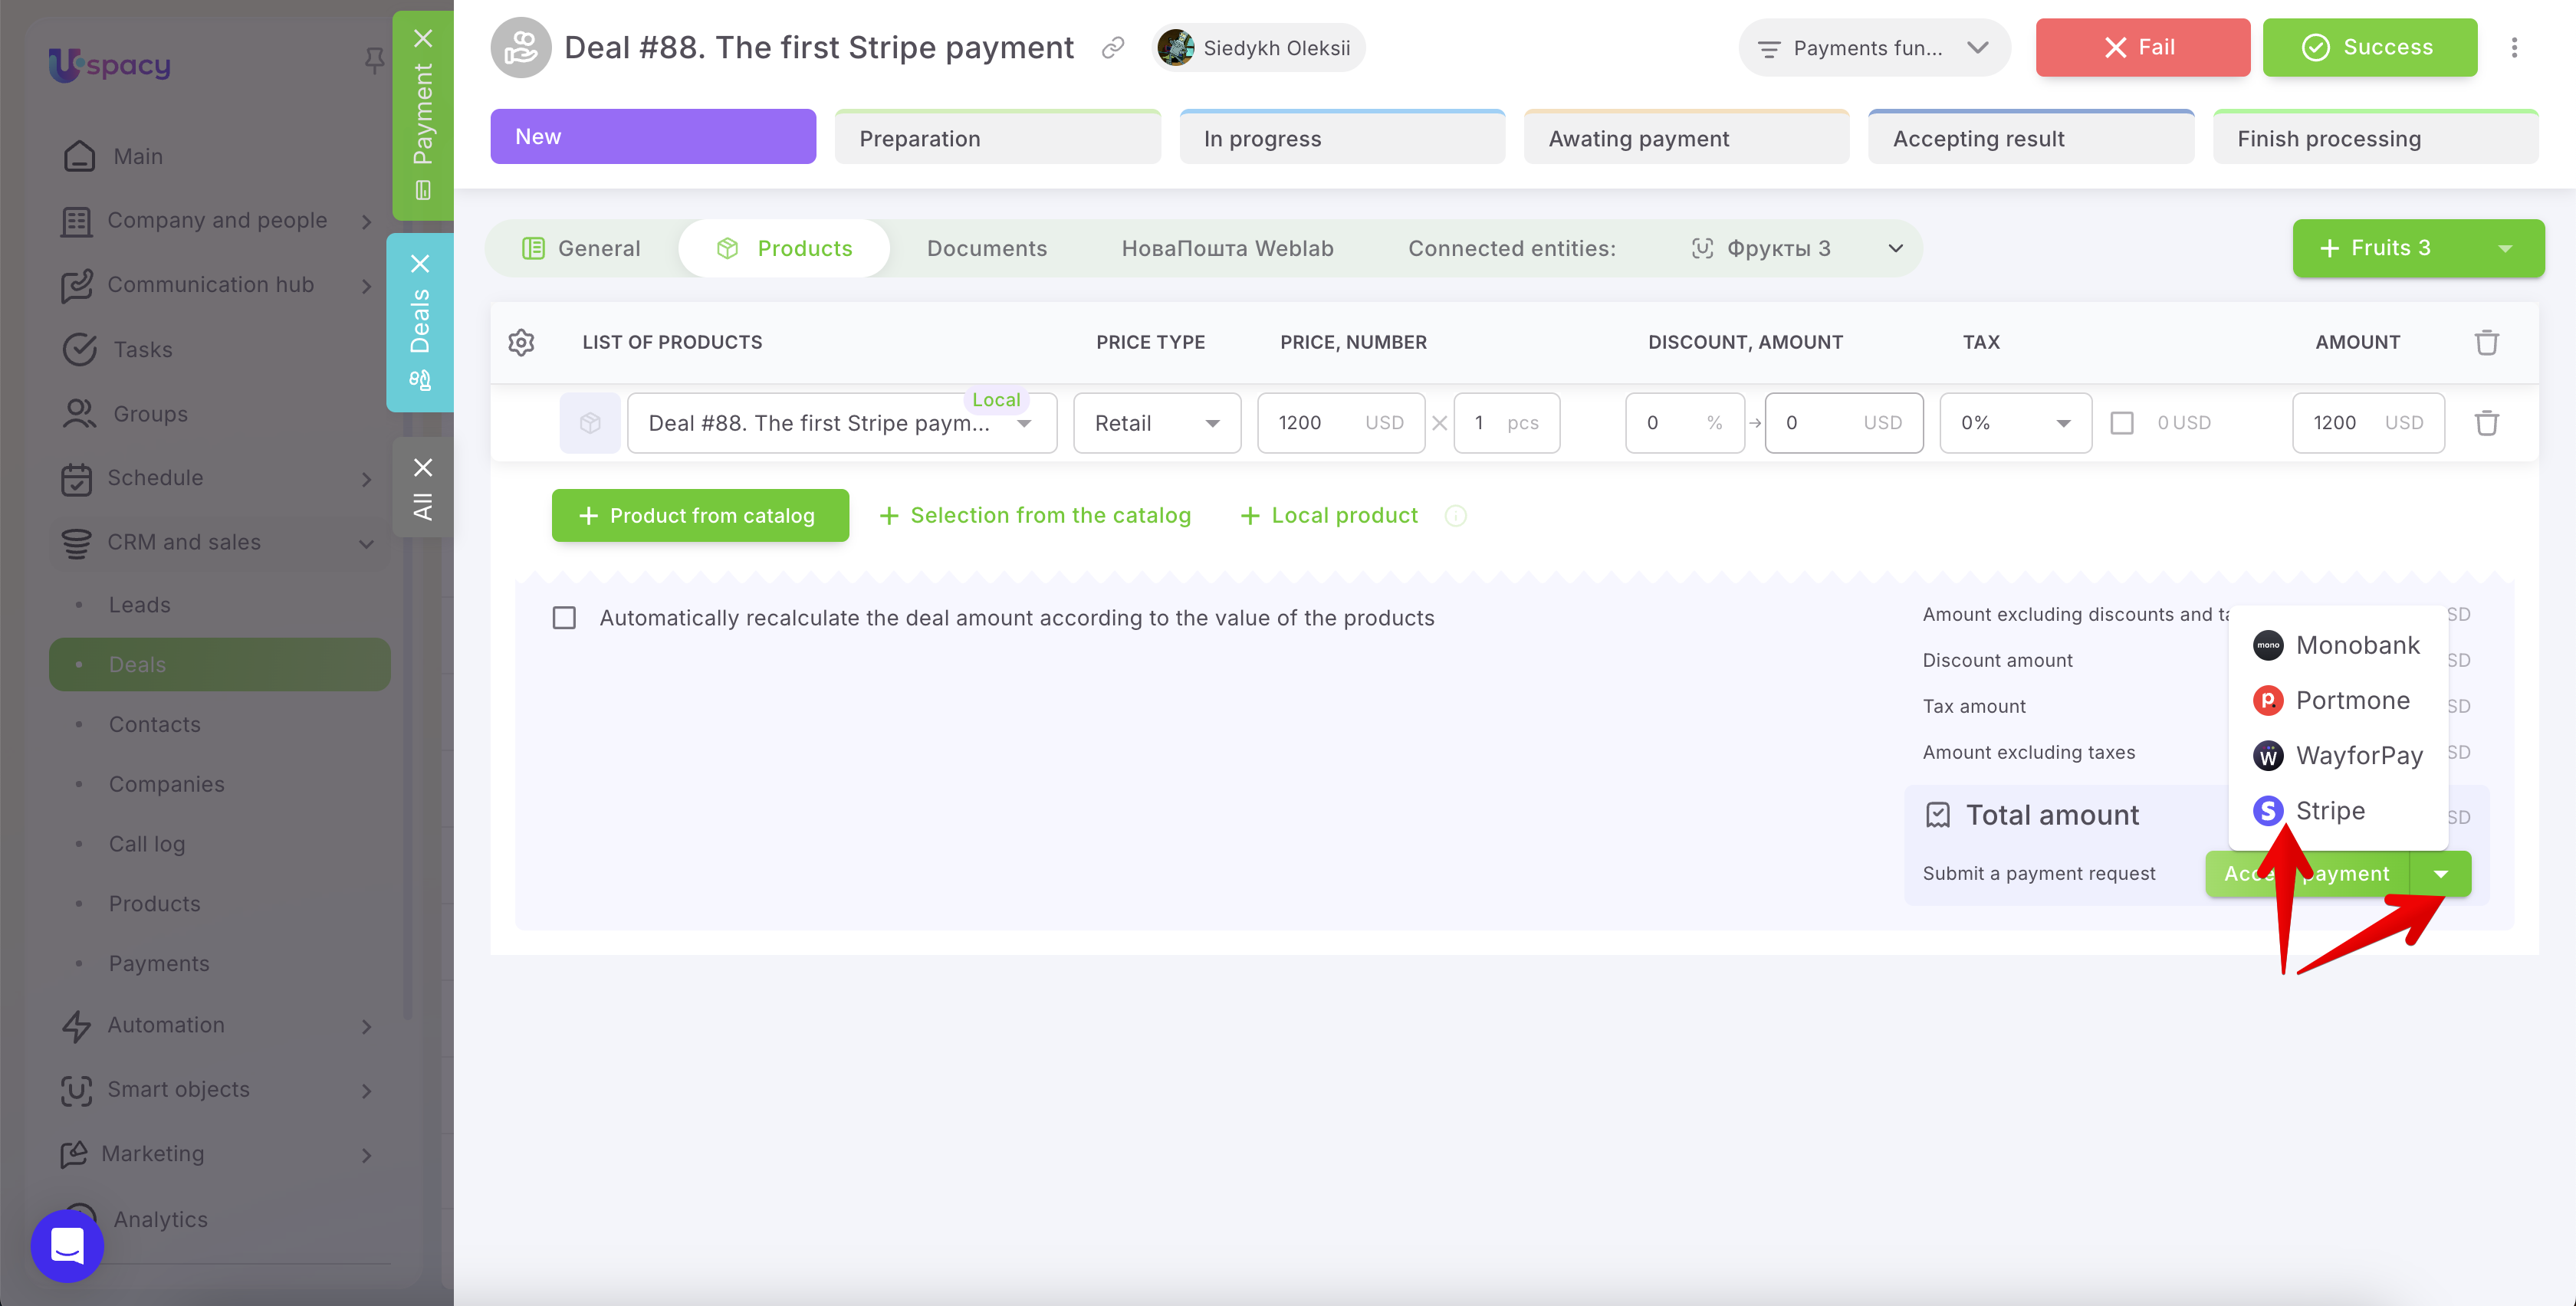
💡Note: Stripe supports many currencies, but availability depends on your Stripe account's country and the selected payment method. If the currency specified in the record isn't supported, Uspacy will display an error message and the payment cannot be created. You can find the list of supported currencies in the Stripe documentation.
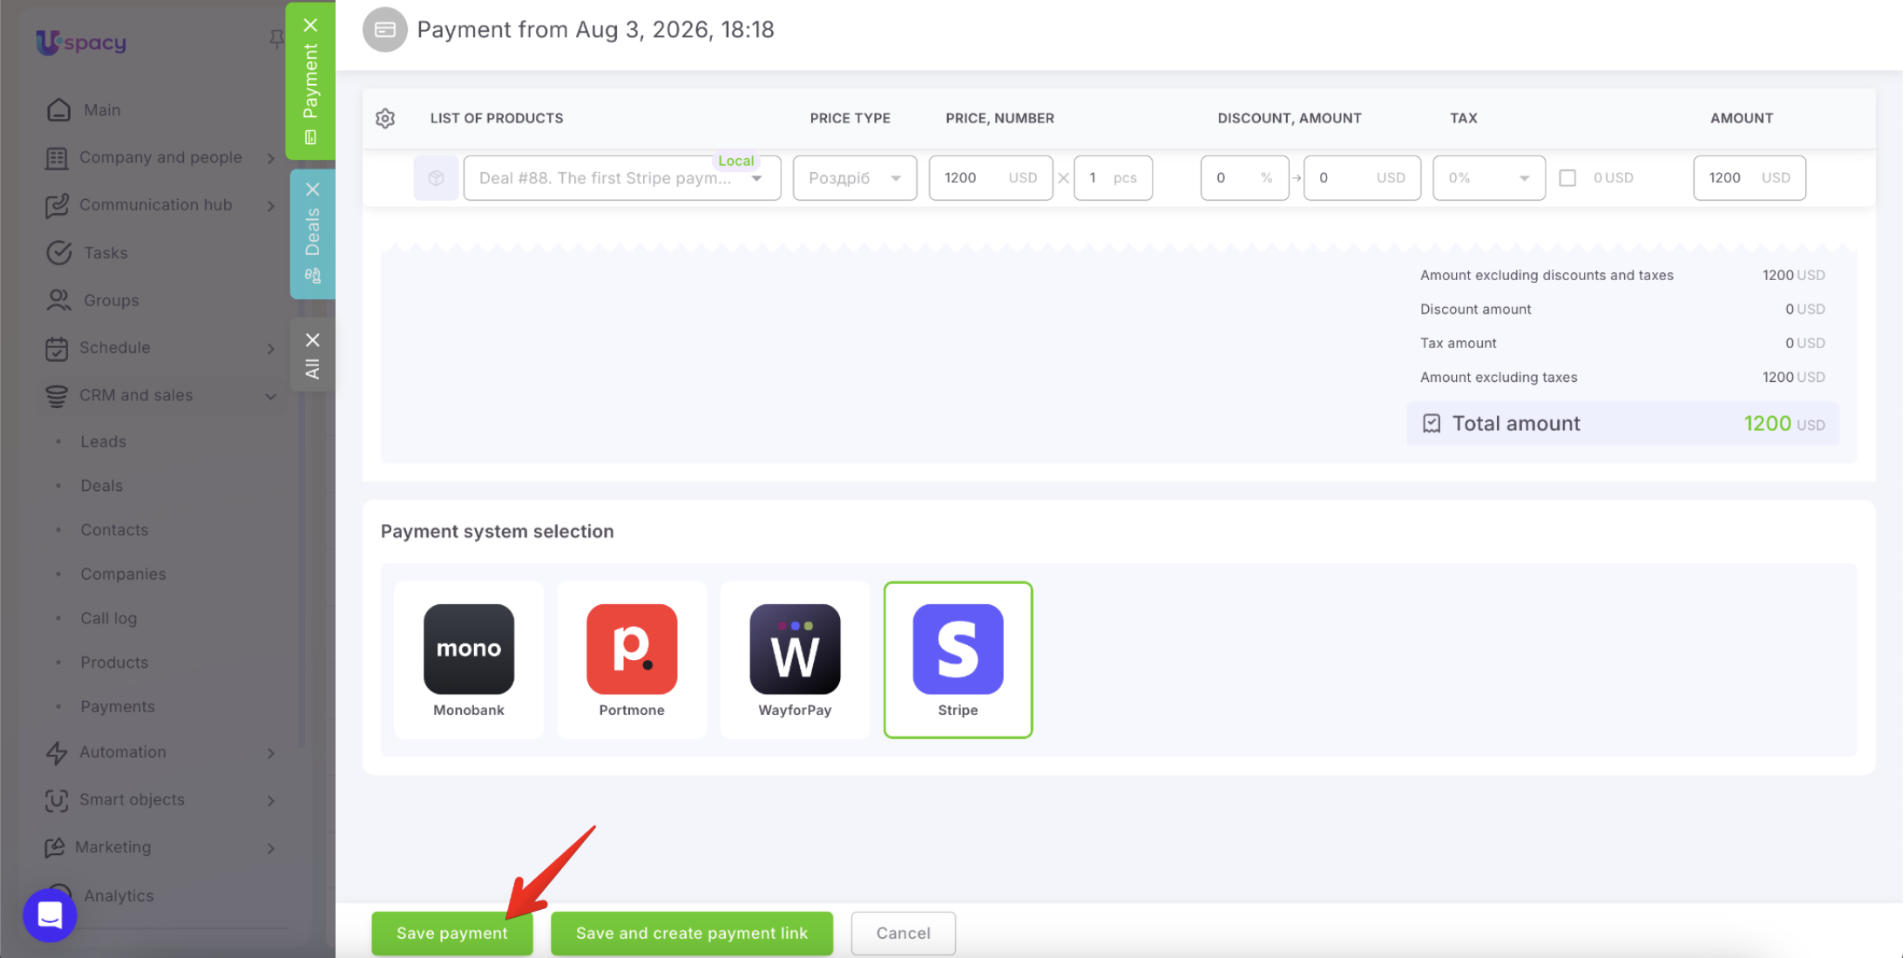
The payment creation page opens. At this stage, you have two options.
🟣 Save payment. Click Save payment to create the payment without generating a payment link. The payment remains in the Draft status.
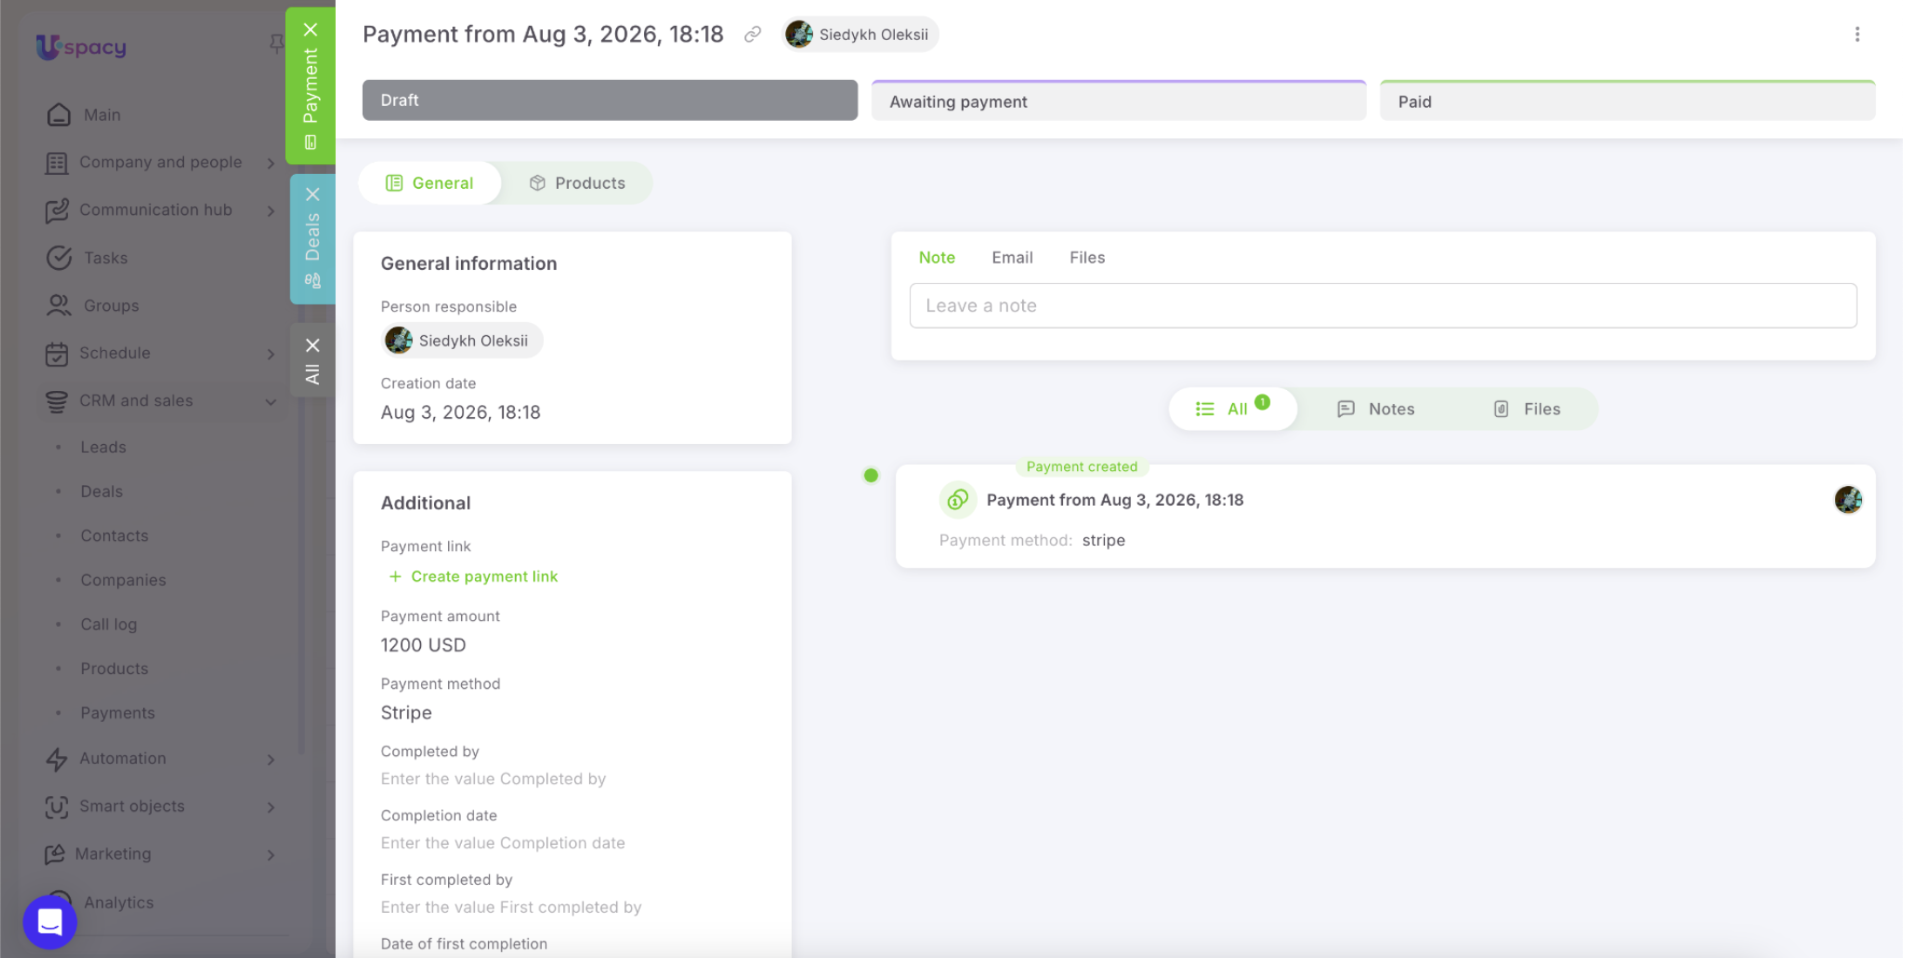
When you're ready to send the payment to the client, click Create payment link.
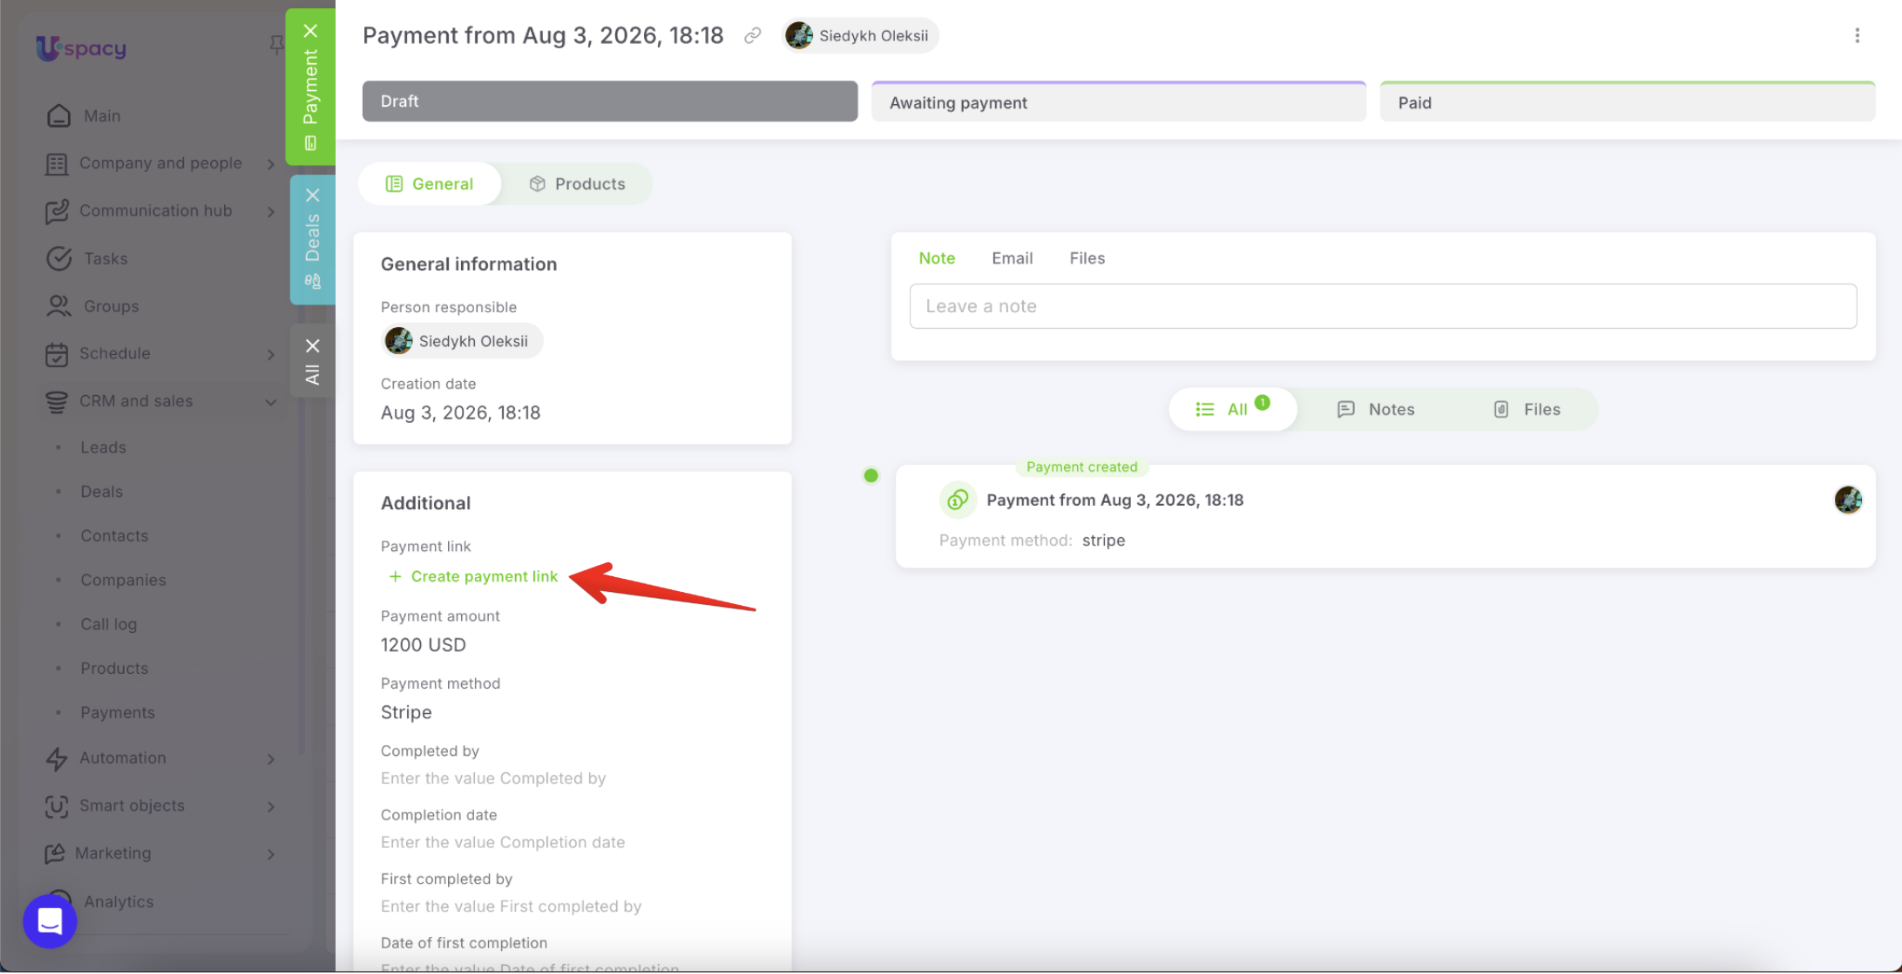
Uspacy generates the payment link through Stripe and automatically changes the payment status to Awaiting payment. The payment link expiration countdown begins at this point.
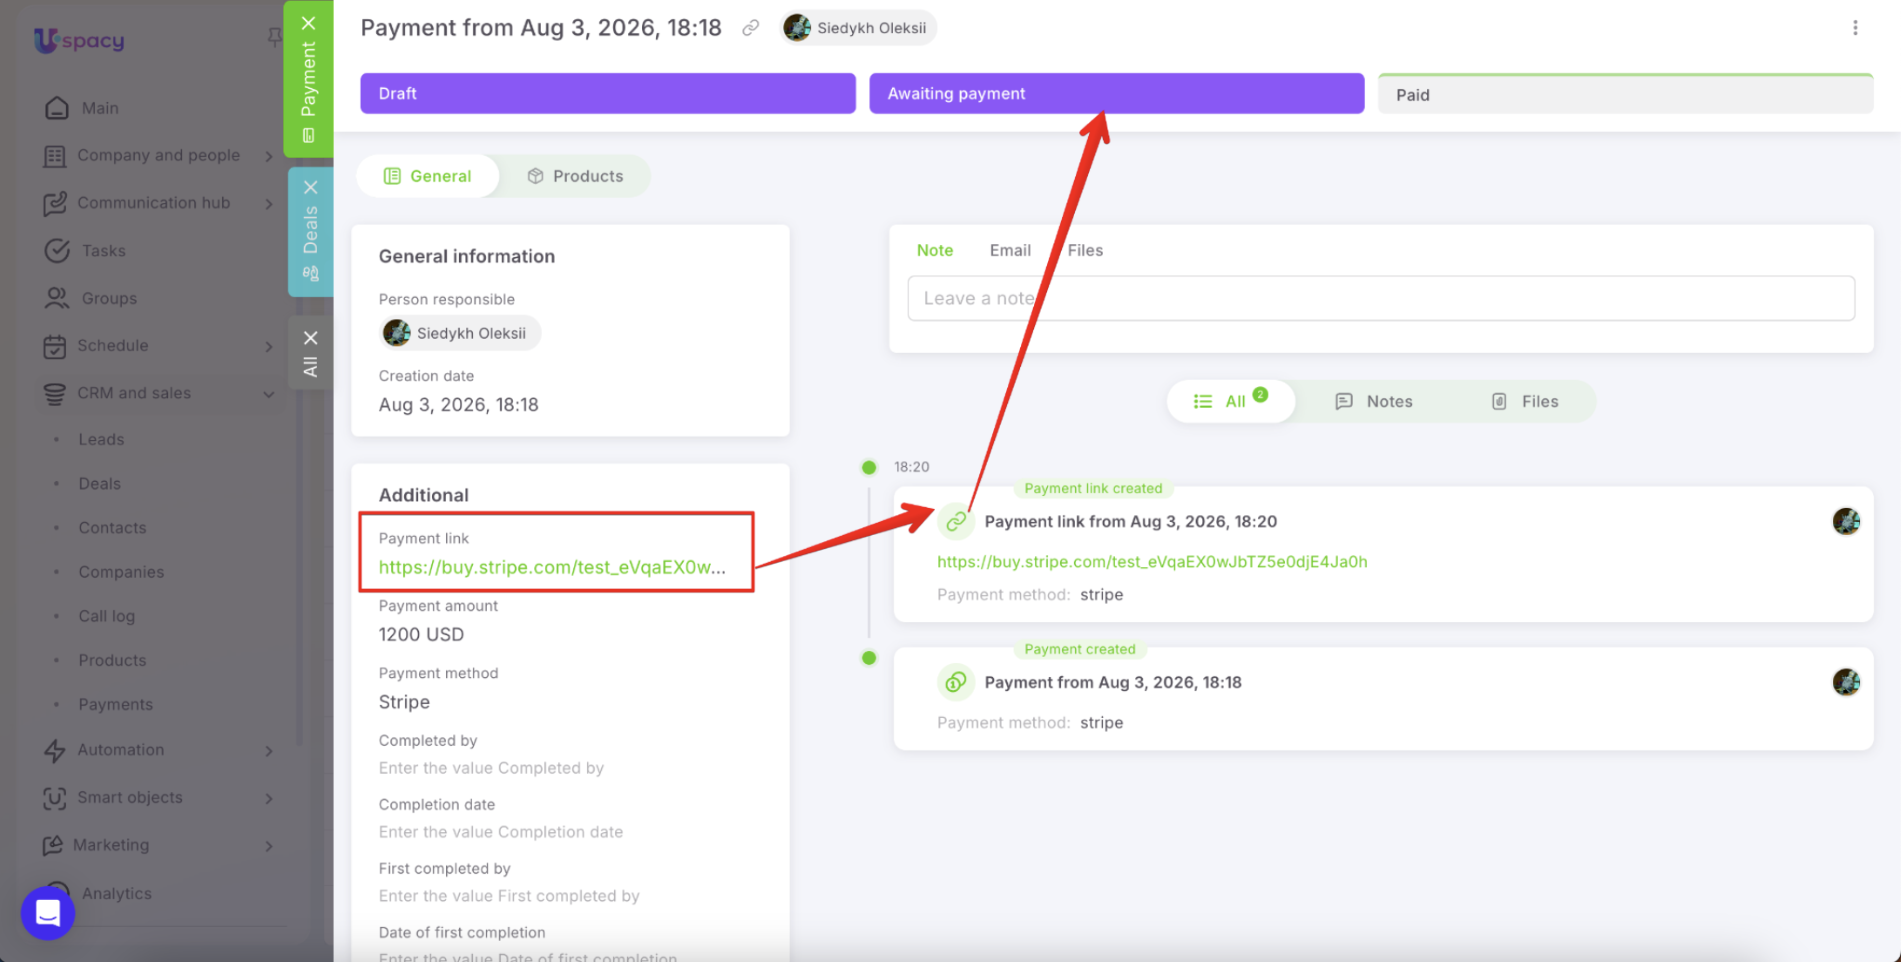
Copy the generated link and send it to the client using any communication channel.
At the same time, if all information has already been verified and the payment should be sent to the client immediately, you can streamline the process by creating the payment link during the save action. This is exactly what the second option is designed for.
🟣 Save and create payment link – The system will save the payment, generate a Stripe payment link, and move the record to the Awaiting payment stage. Copy the payment link and send it to the client using your preferred communication channel.
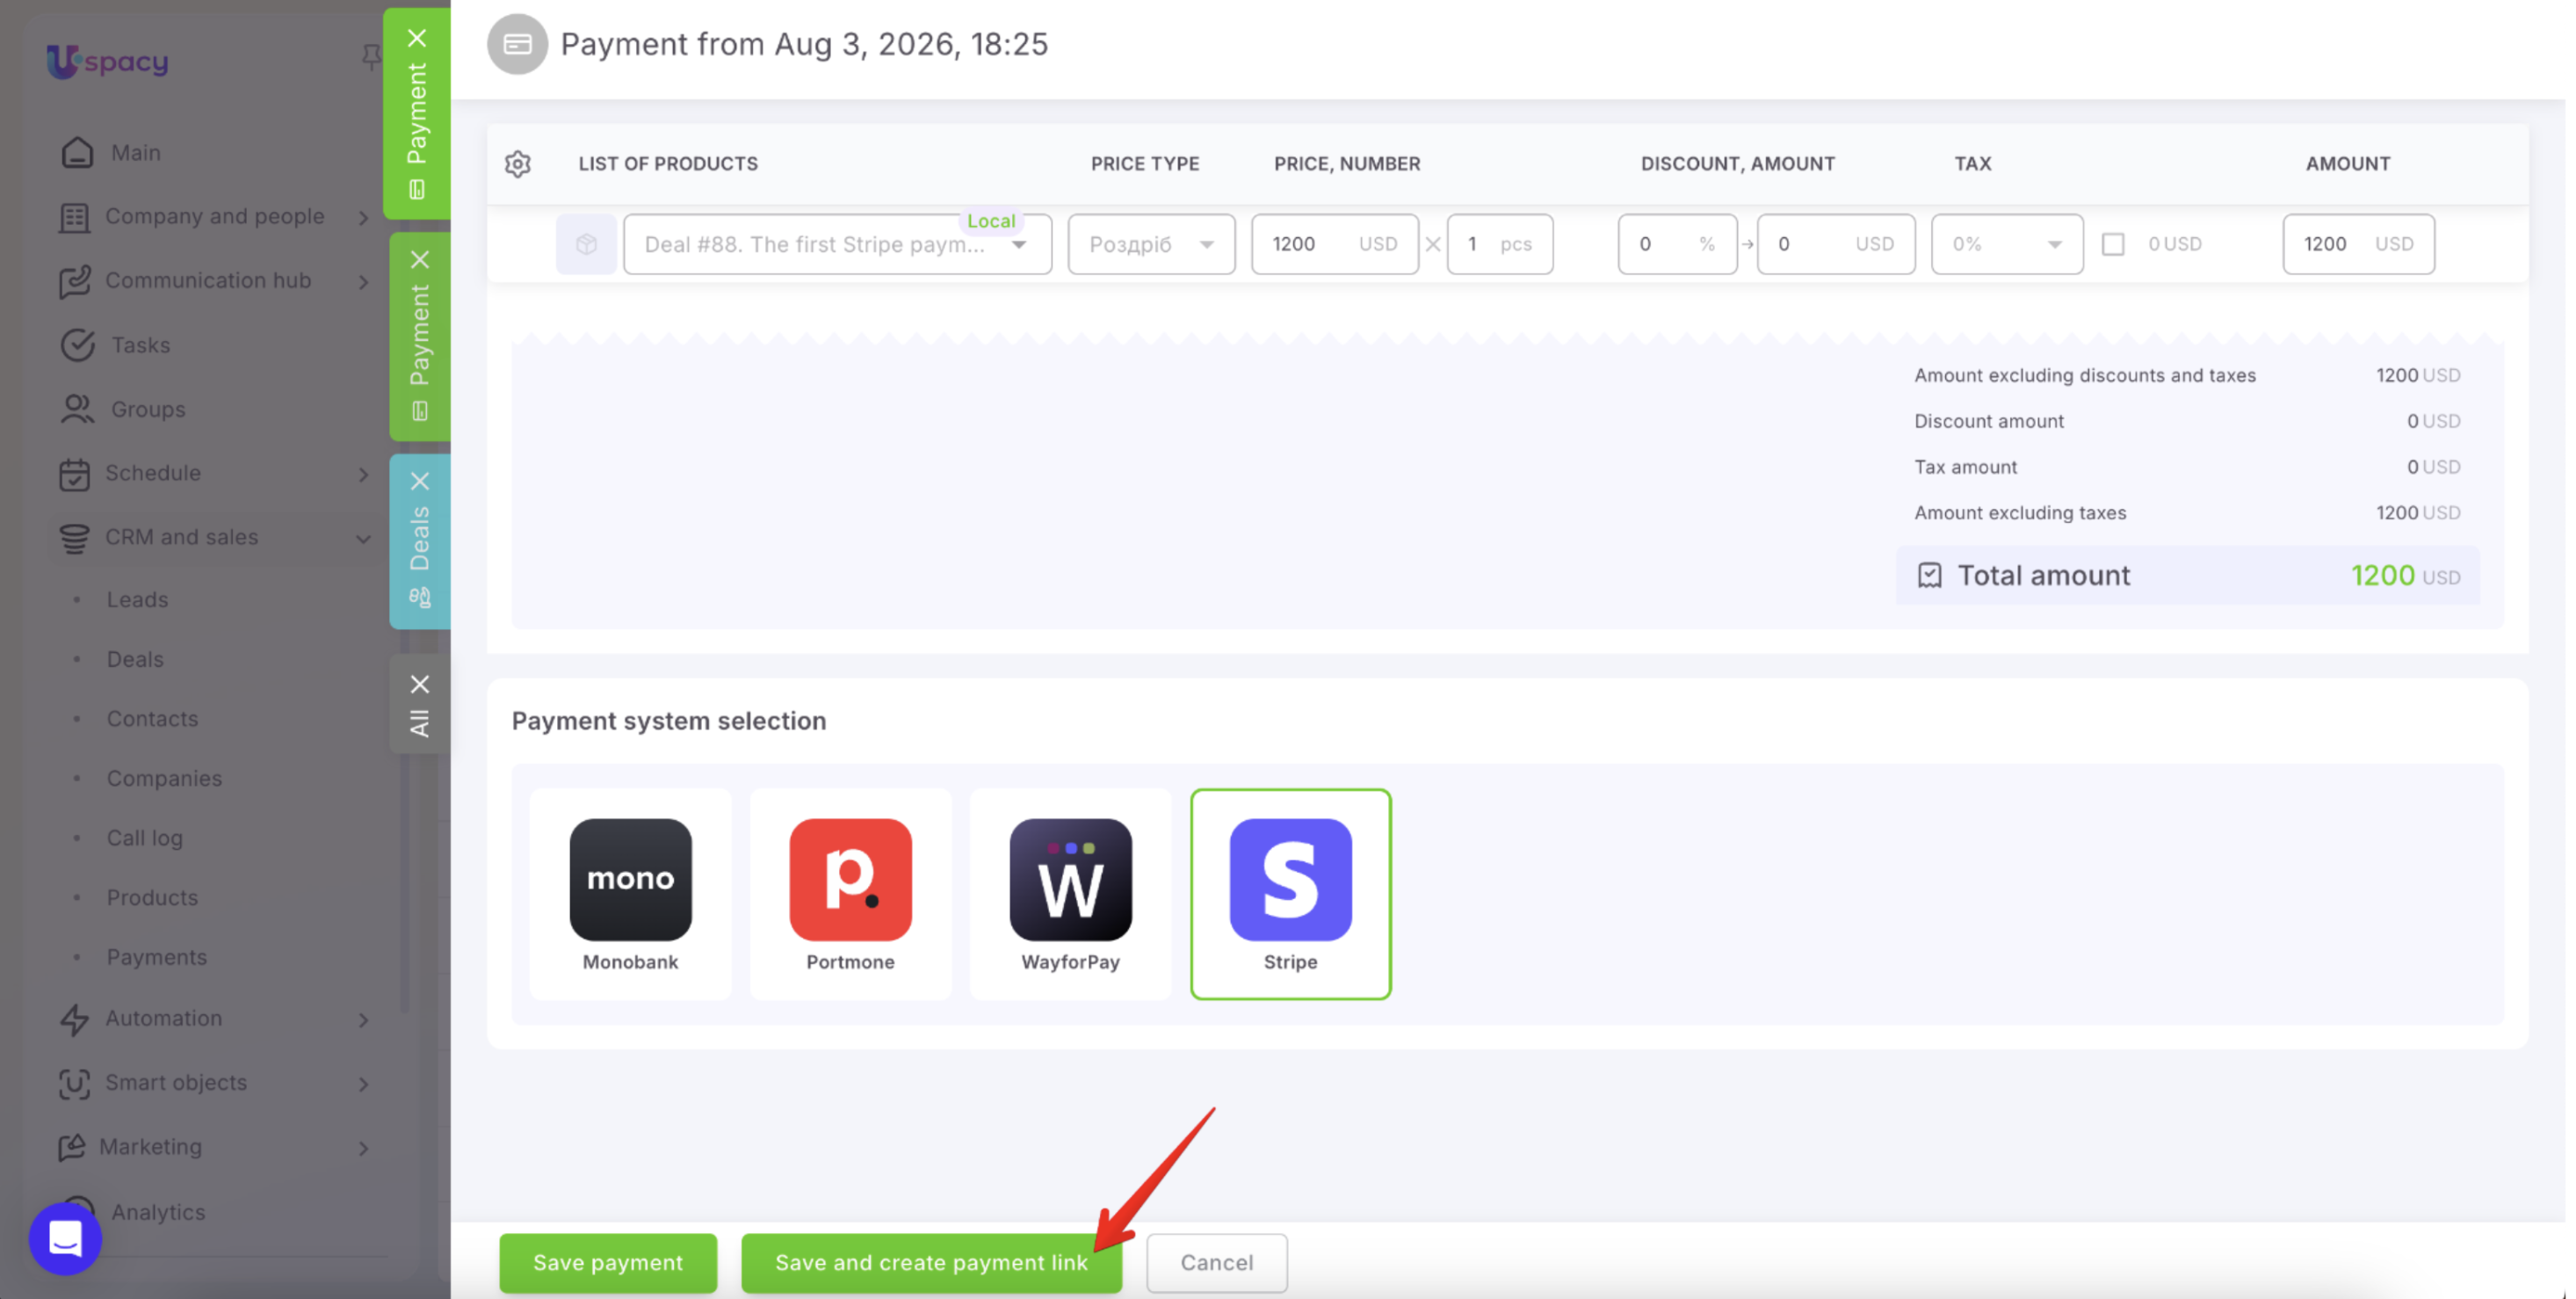
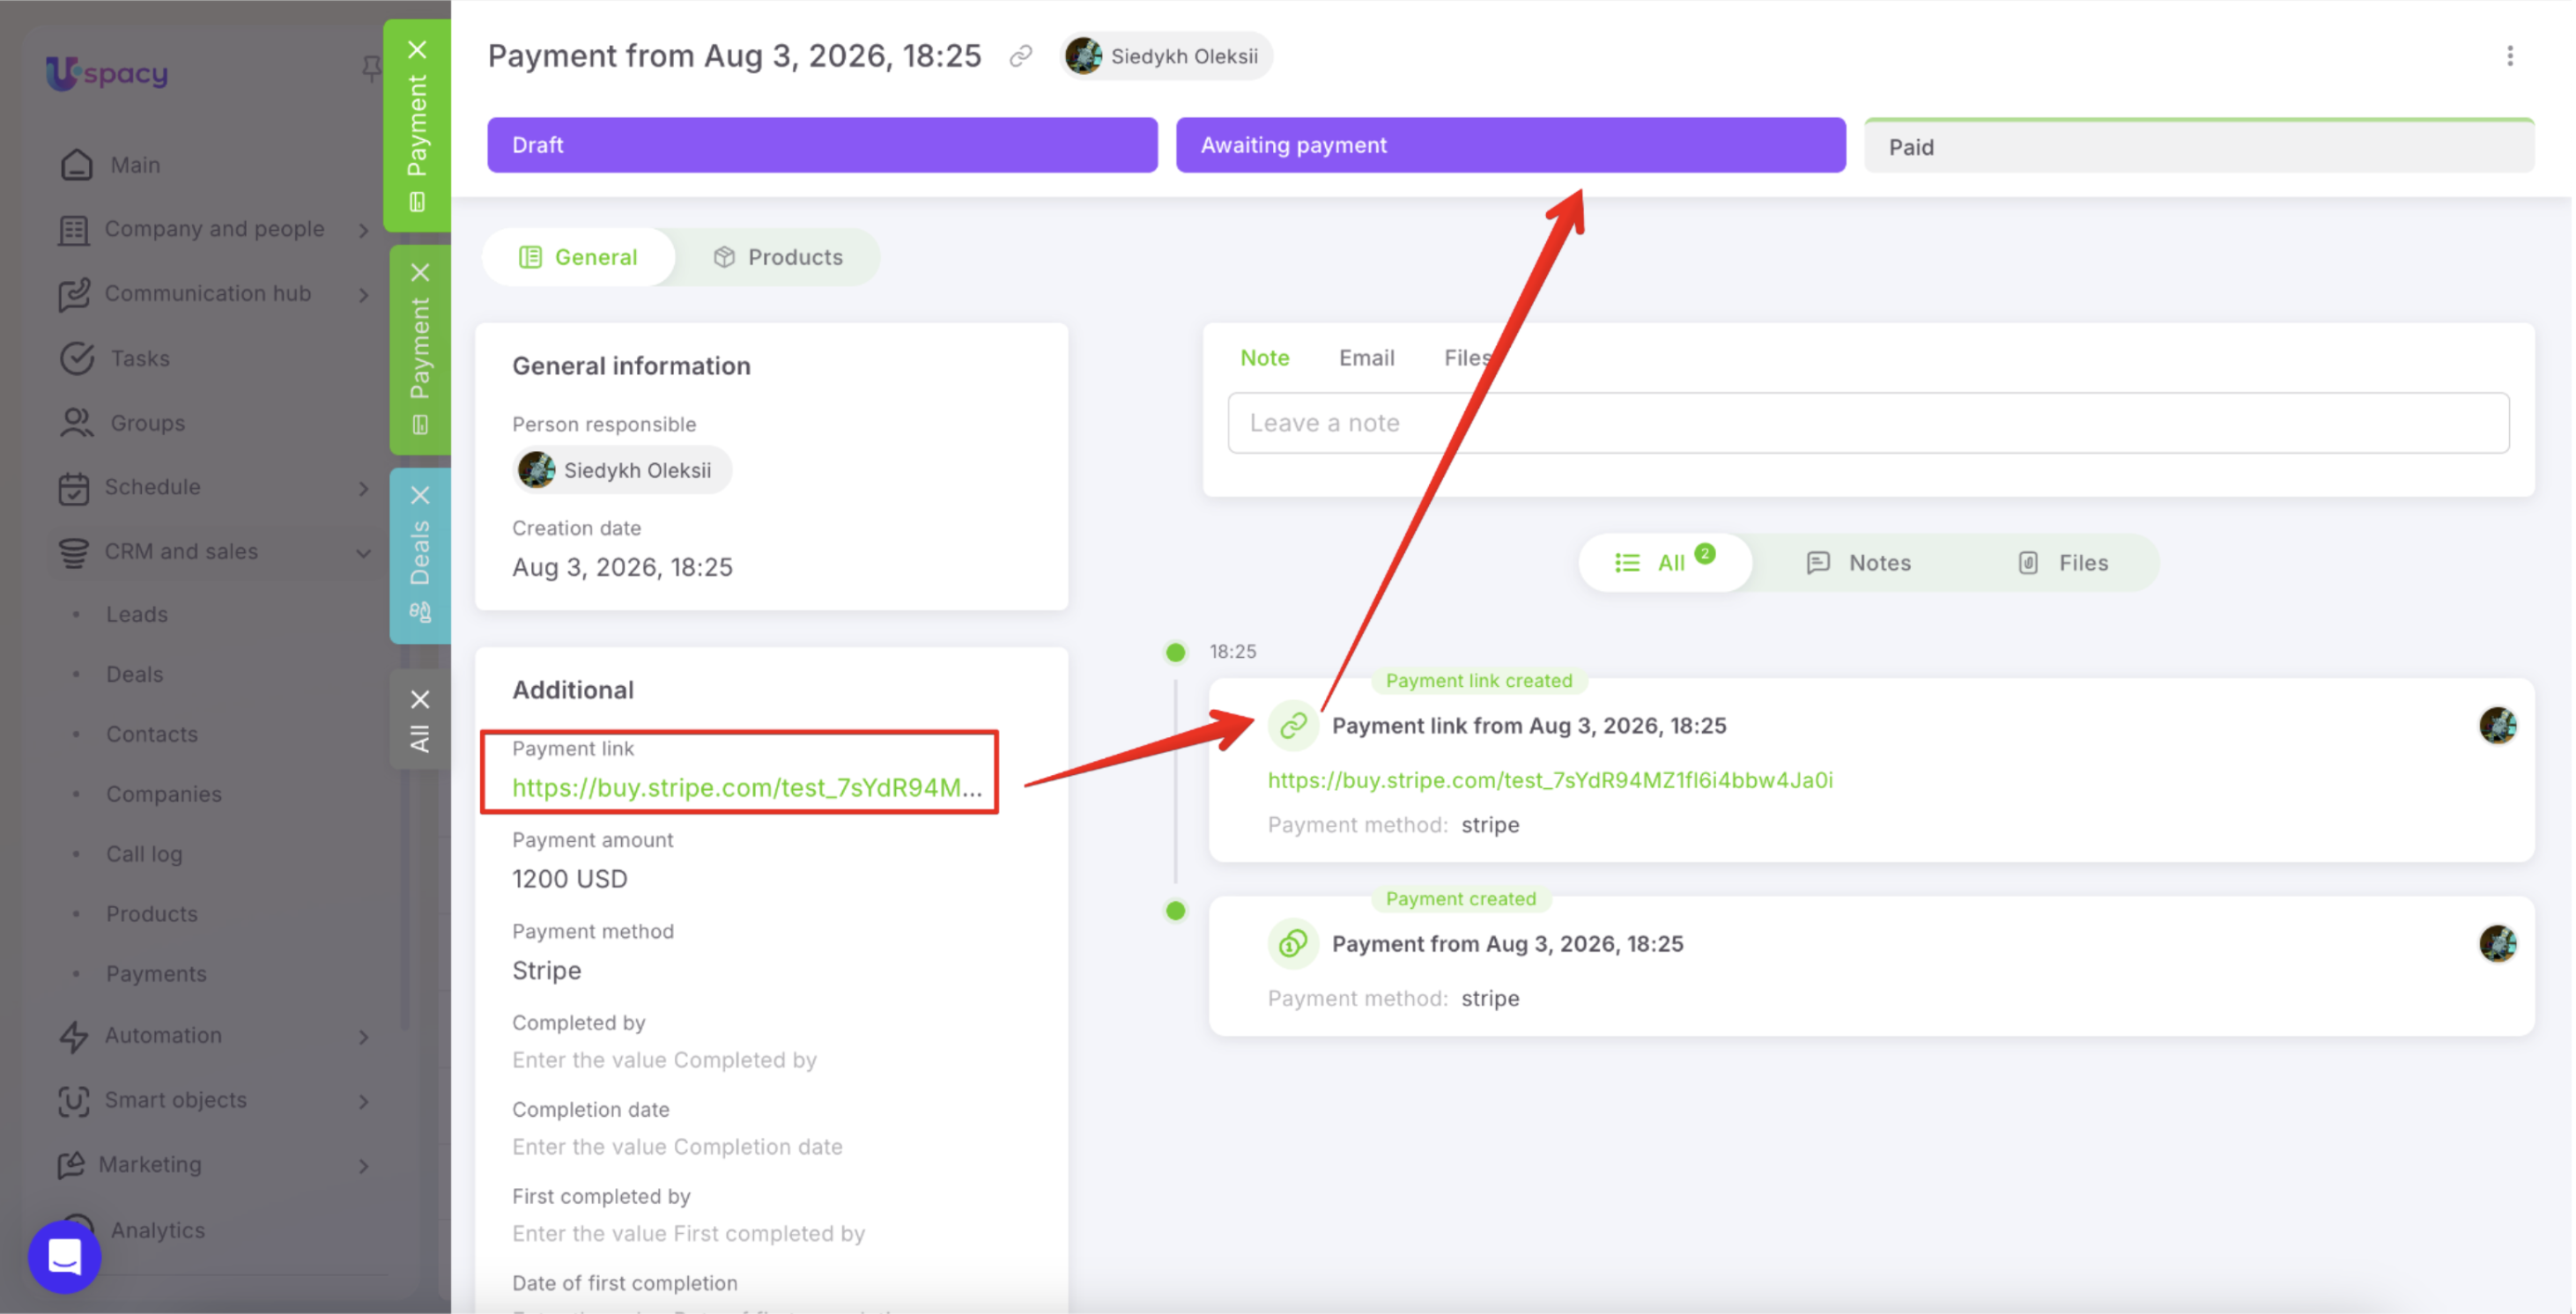
Uspacy saves the payment, generates the Stripe payment link, changes the status to Awaiting payment, and displays the link. Copy it and send it to the client.
Once the client successfully completes the payment, Stripe sends the payment result back to Uspacy. The payment status automatically changes to Paid. The payment record displays the payment date, and a corresponding system event is added to the activity timeline.
If the payment link expires before payment is received, the payment automatically changes to Canceled.
☝🏻Important: You can delete a payment only while it is in the Draft status and before a payment link has been created. Once a payment link has been generated, the payment moves to Awaiting payment, and deletion is no longer available. Payments in the Paid and Canceled statuses also cannot be deleted because they already contain finalized payment information.
Besides viewing payment details and history, you can also add related information to the payment record.
Above the activity timeline, you'll find the following tabs:
- Note
- Files
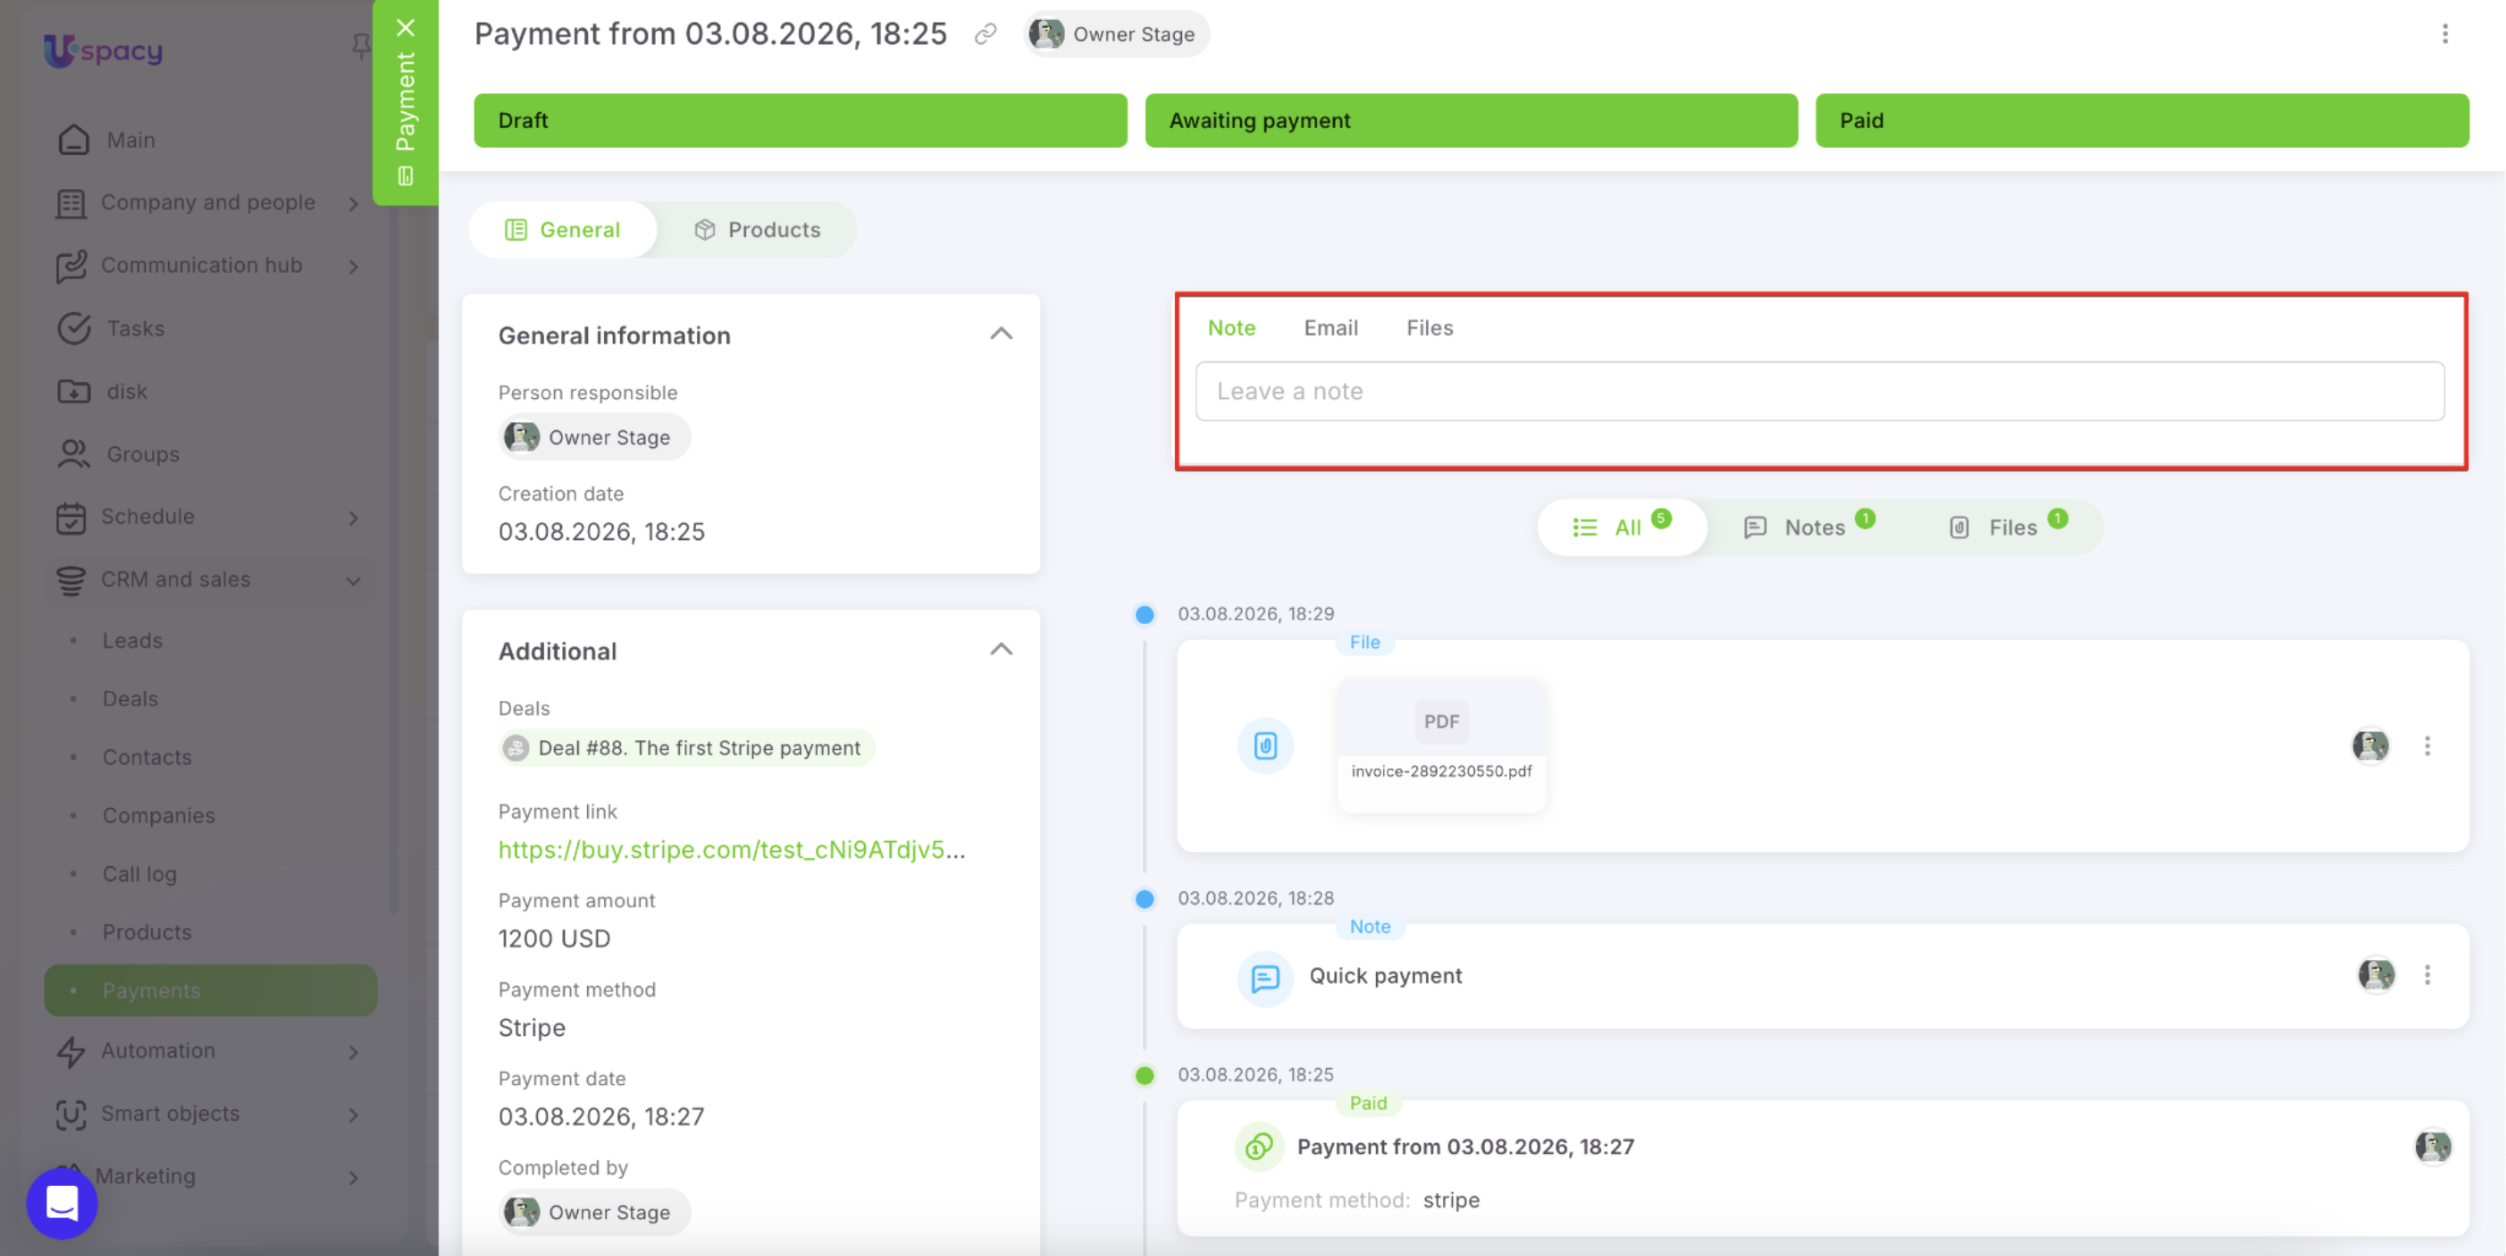
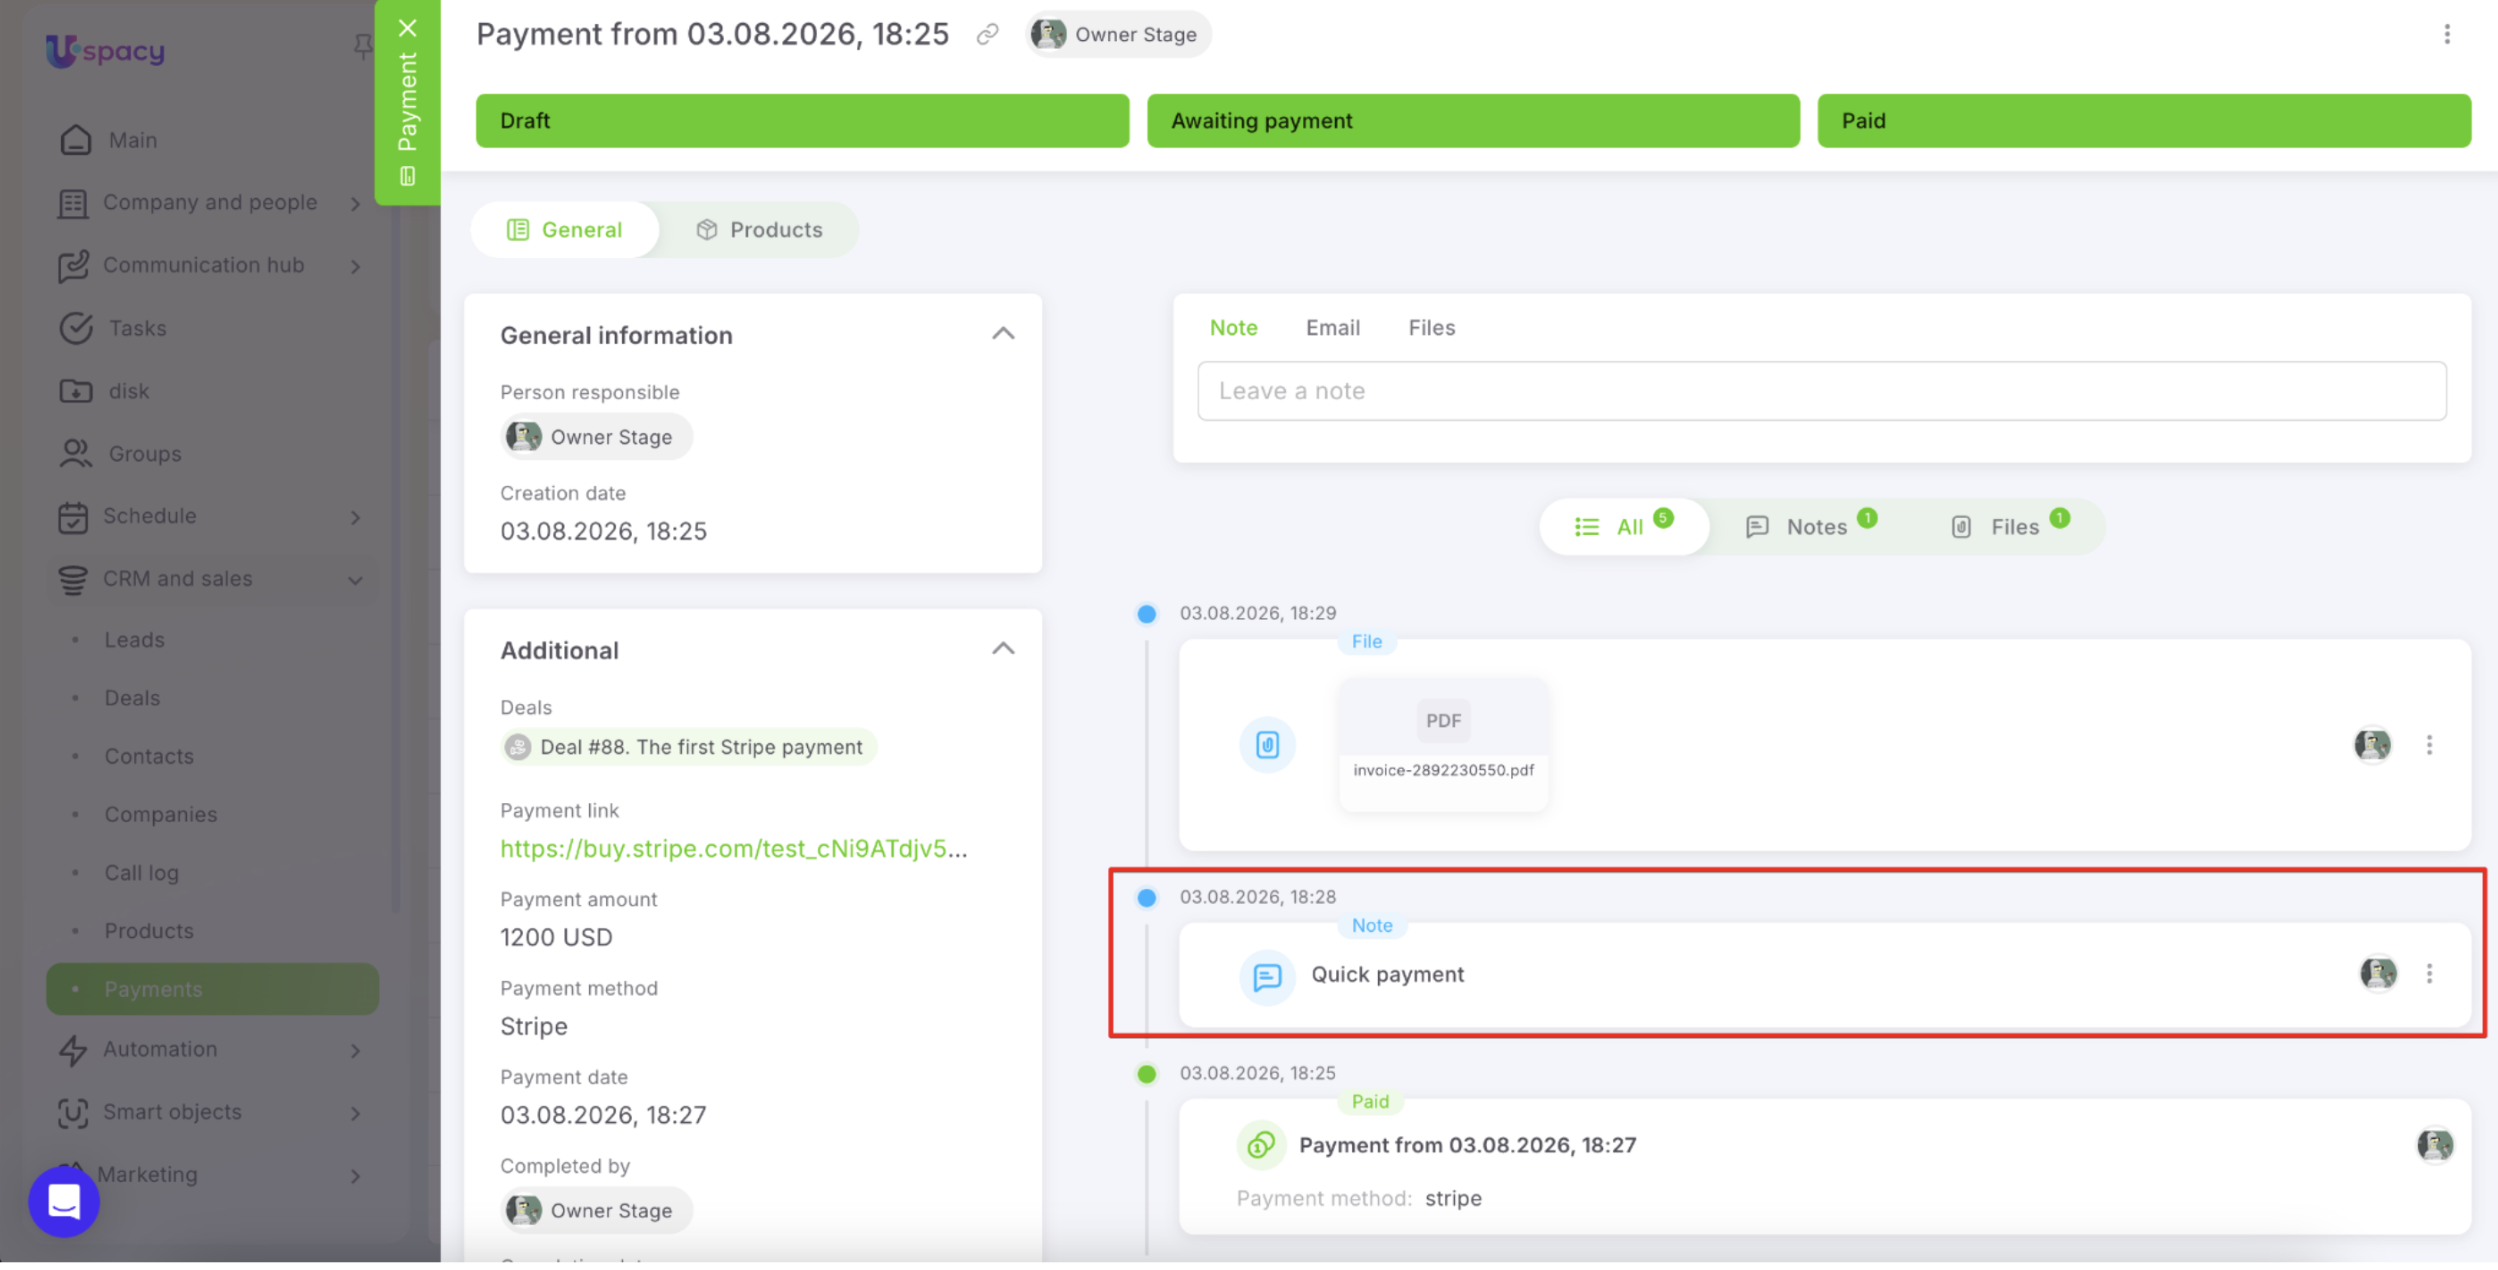
To leave a note for yourself or your teammates, open the Note tab, enter your text, and save it. The note appears in the activity timeline together with its author and timestamp.
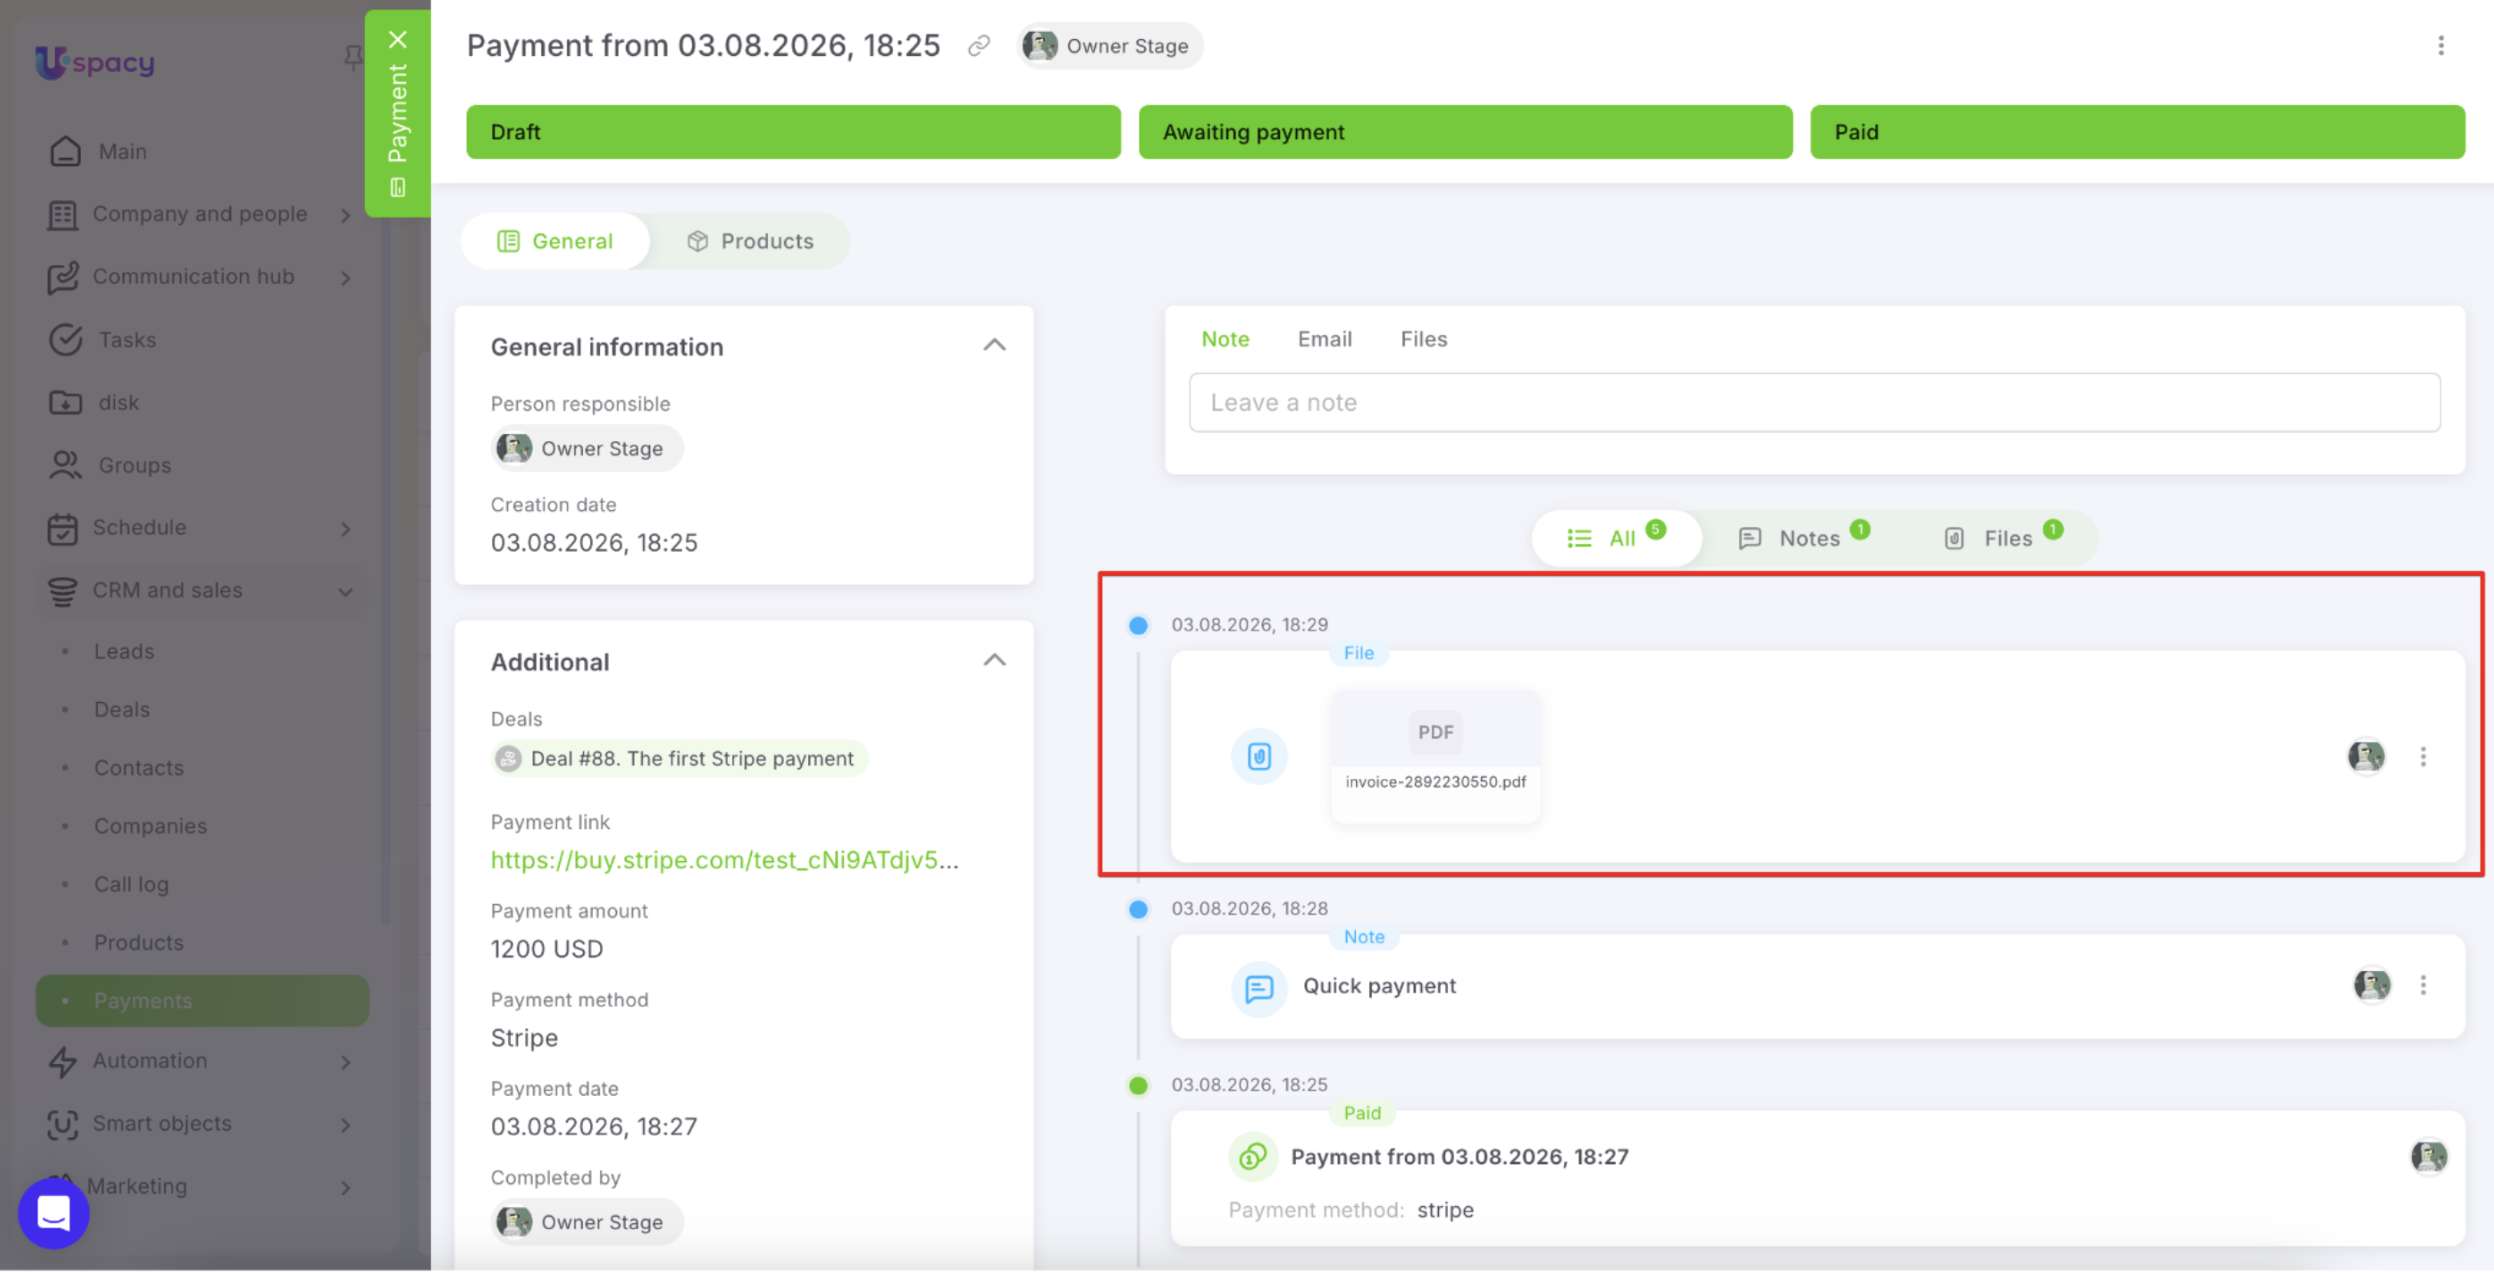
You can also attach receipts, invoices, or any other supporting documents. Open the Files tab, drag and drop a file into the upload area, or select it from your device. After uploading, the file appears in the activity timeline and remains available whenever you work with the payment.
On the Email tab, you can compose and send an email to the client, such as a payment confirmation. Enter the recipient's email address and subject line, write your message, and, if needed, add copy or hidden copy recipients, or attach a file. Then select the connected mailbox you want to send the email from and click Send.
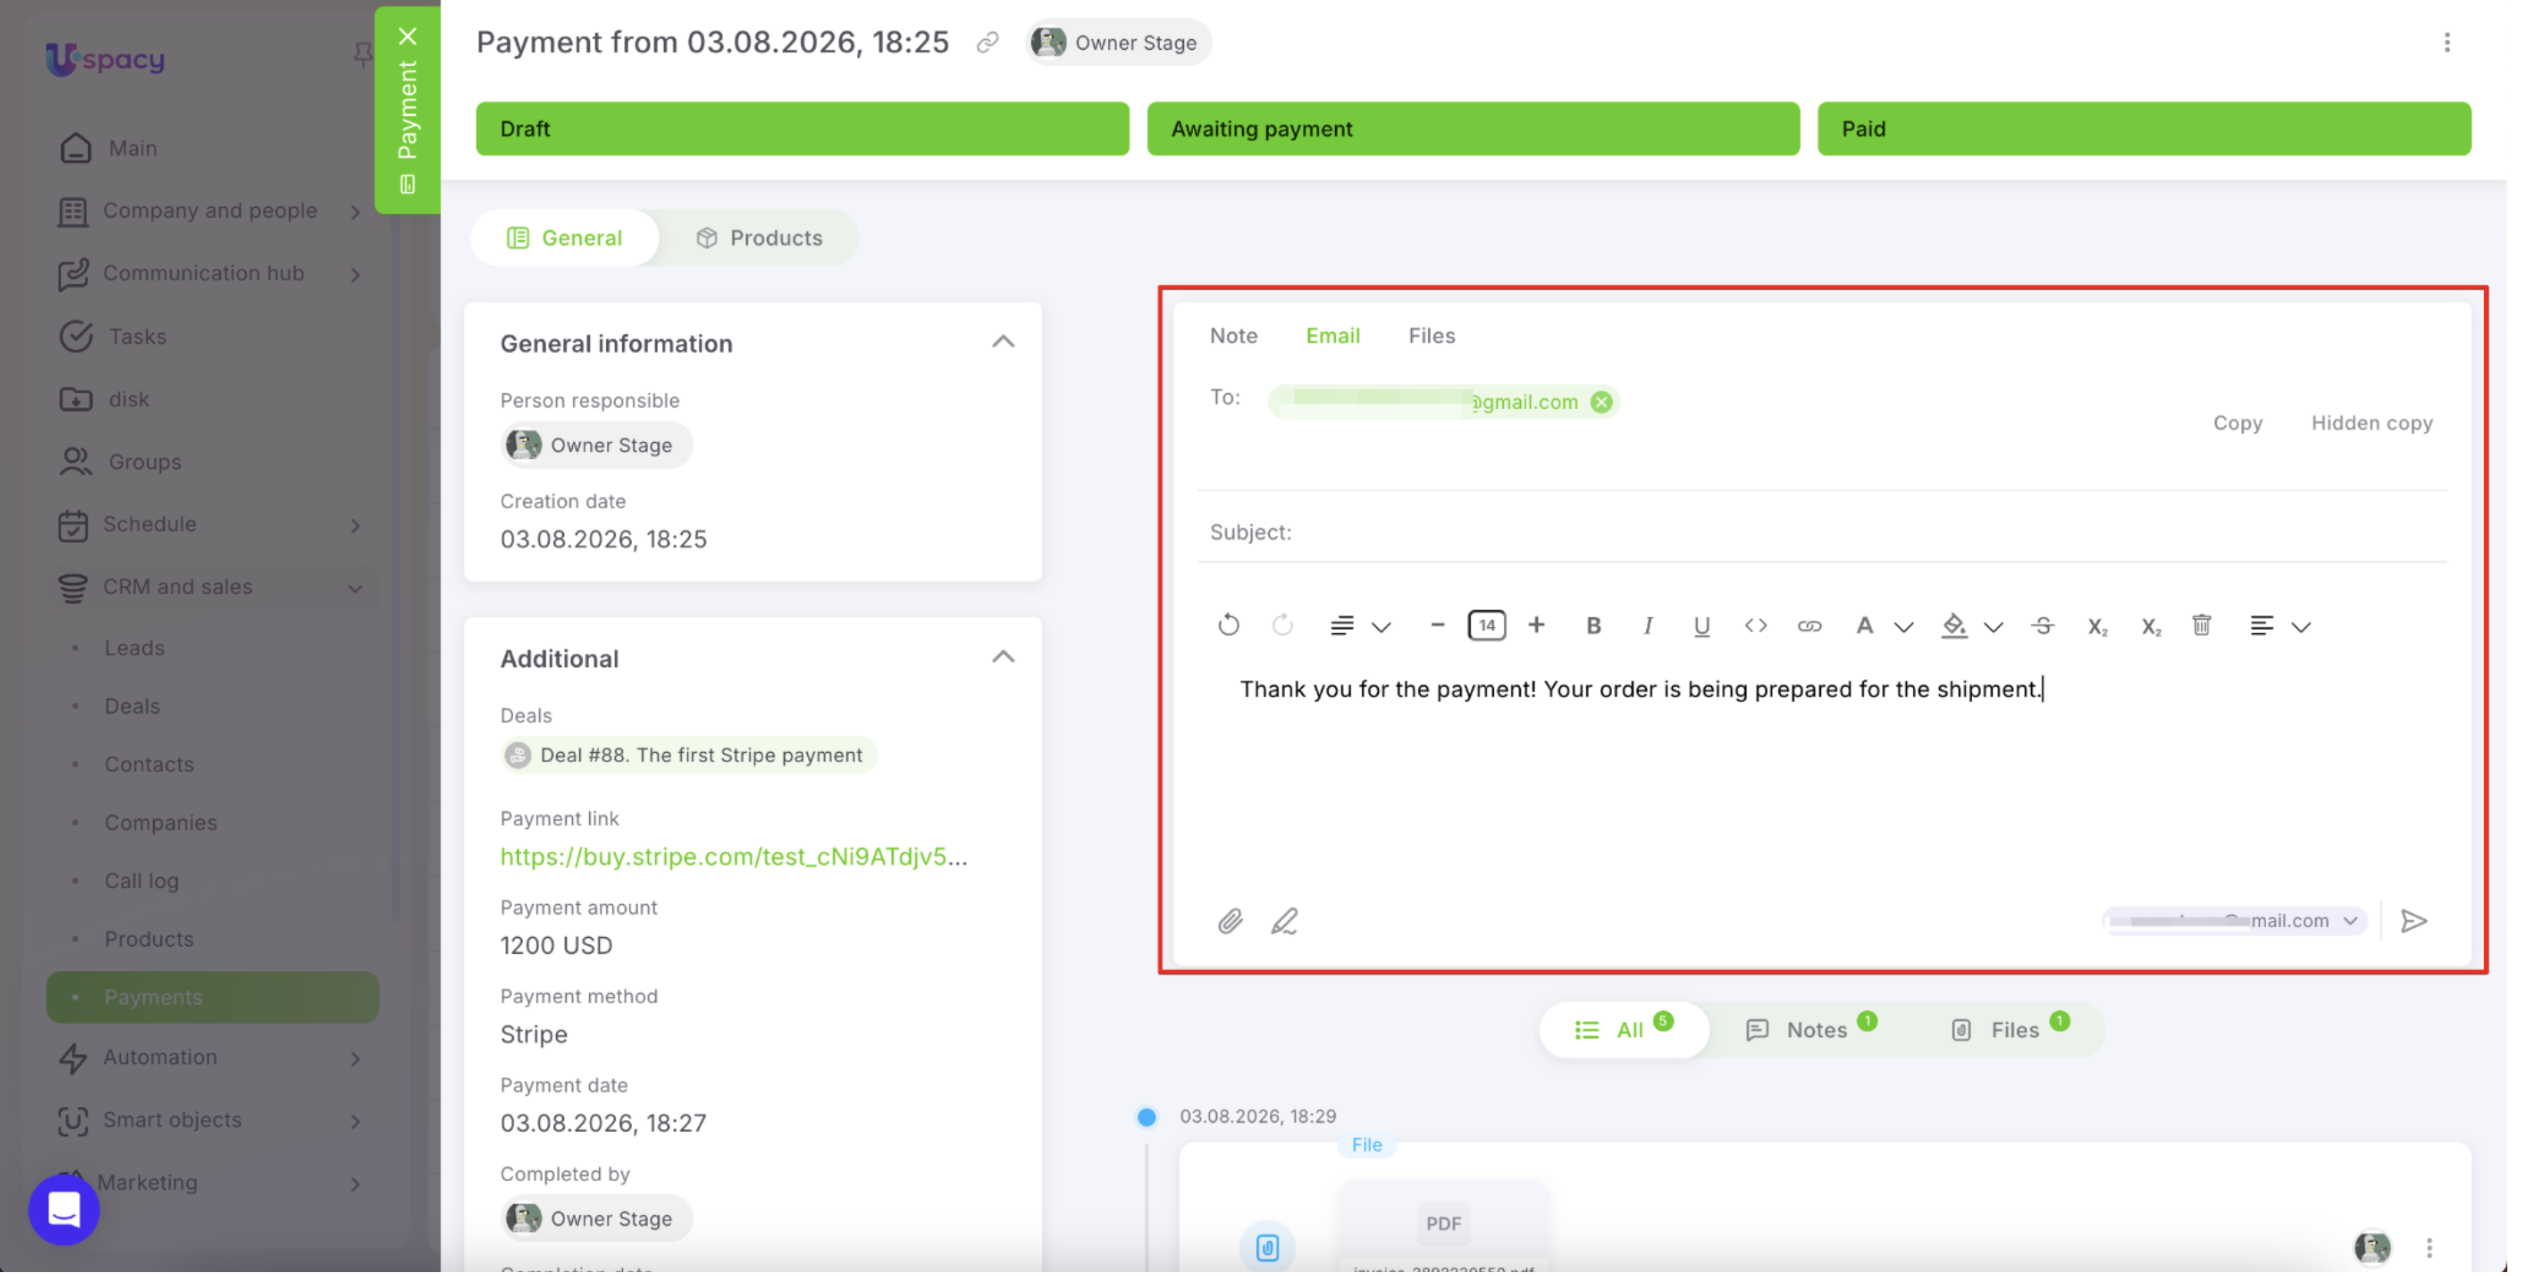
💡Note: The email is not linked directly to the payment. Instead, it appears in the activity history of the record that contains the recipient's email address.
The Uspacy and Stripe integration allows you to manage the entire payment process from a single Workspace—from adding products to a Deal, generating a payment link, and sending it to the client to receive the payment result.
After a payment is completed—or when the payment link expires—the system automatically updates the payment status and records the corresponding event in the payment history. This allows your team to monitor payment activity without continuously checking Stripe manually.
If you have additional questions or you need to contact the support, send a request to this email [email protected]
Created: July 31, 2026 / Updated: August 3, 2026