
Integrating Uspacy with Portmone makes payment management more convenient and reduces the amount of manual work involved in daily client interactions. With this integration, you can create payments directly in Uspacy, generate payment links, and quickly send them to clients for payment.
After a payment is completed, its status is automatically updated in your Workspace. This eliminates the need for your team to manually verify incoming payments or check whether a client has already paid. If a payment link expires before the payment is completed, the system will also record this by assigning the appropriate status.
This solution is useful for teams that want to send payment requests faster, maintain better payment control, and have an up-to-date view of client settlements within a single workspace.
To start working with payments through Portmone, you need to connect the integration and complete the basic configuration.
Let's go through the process step by step. ⬇️
Connection
Preparation steps
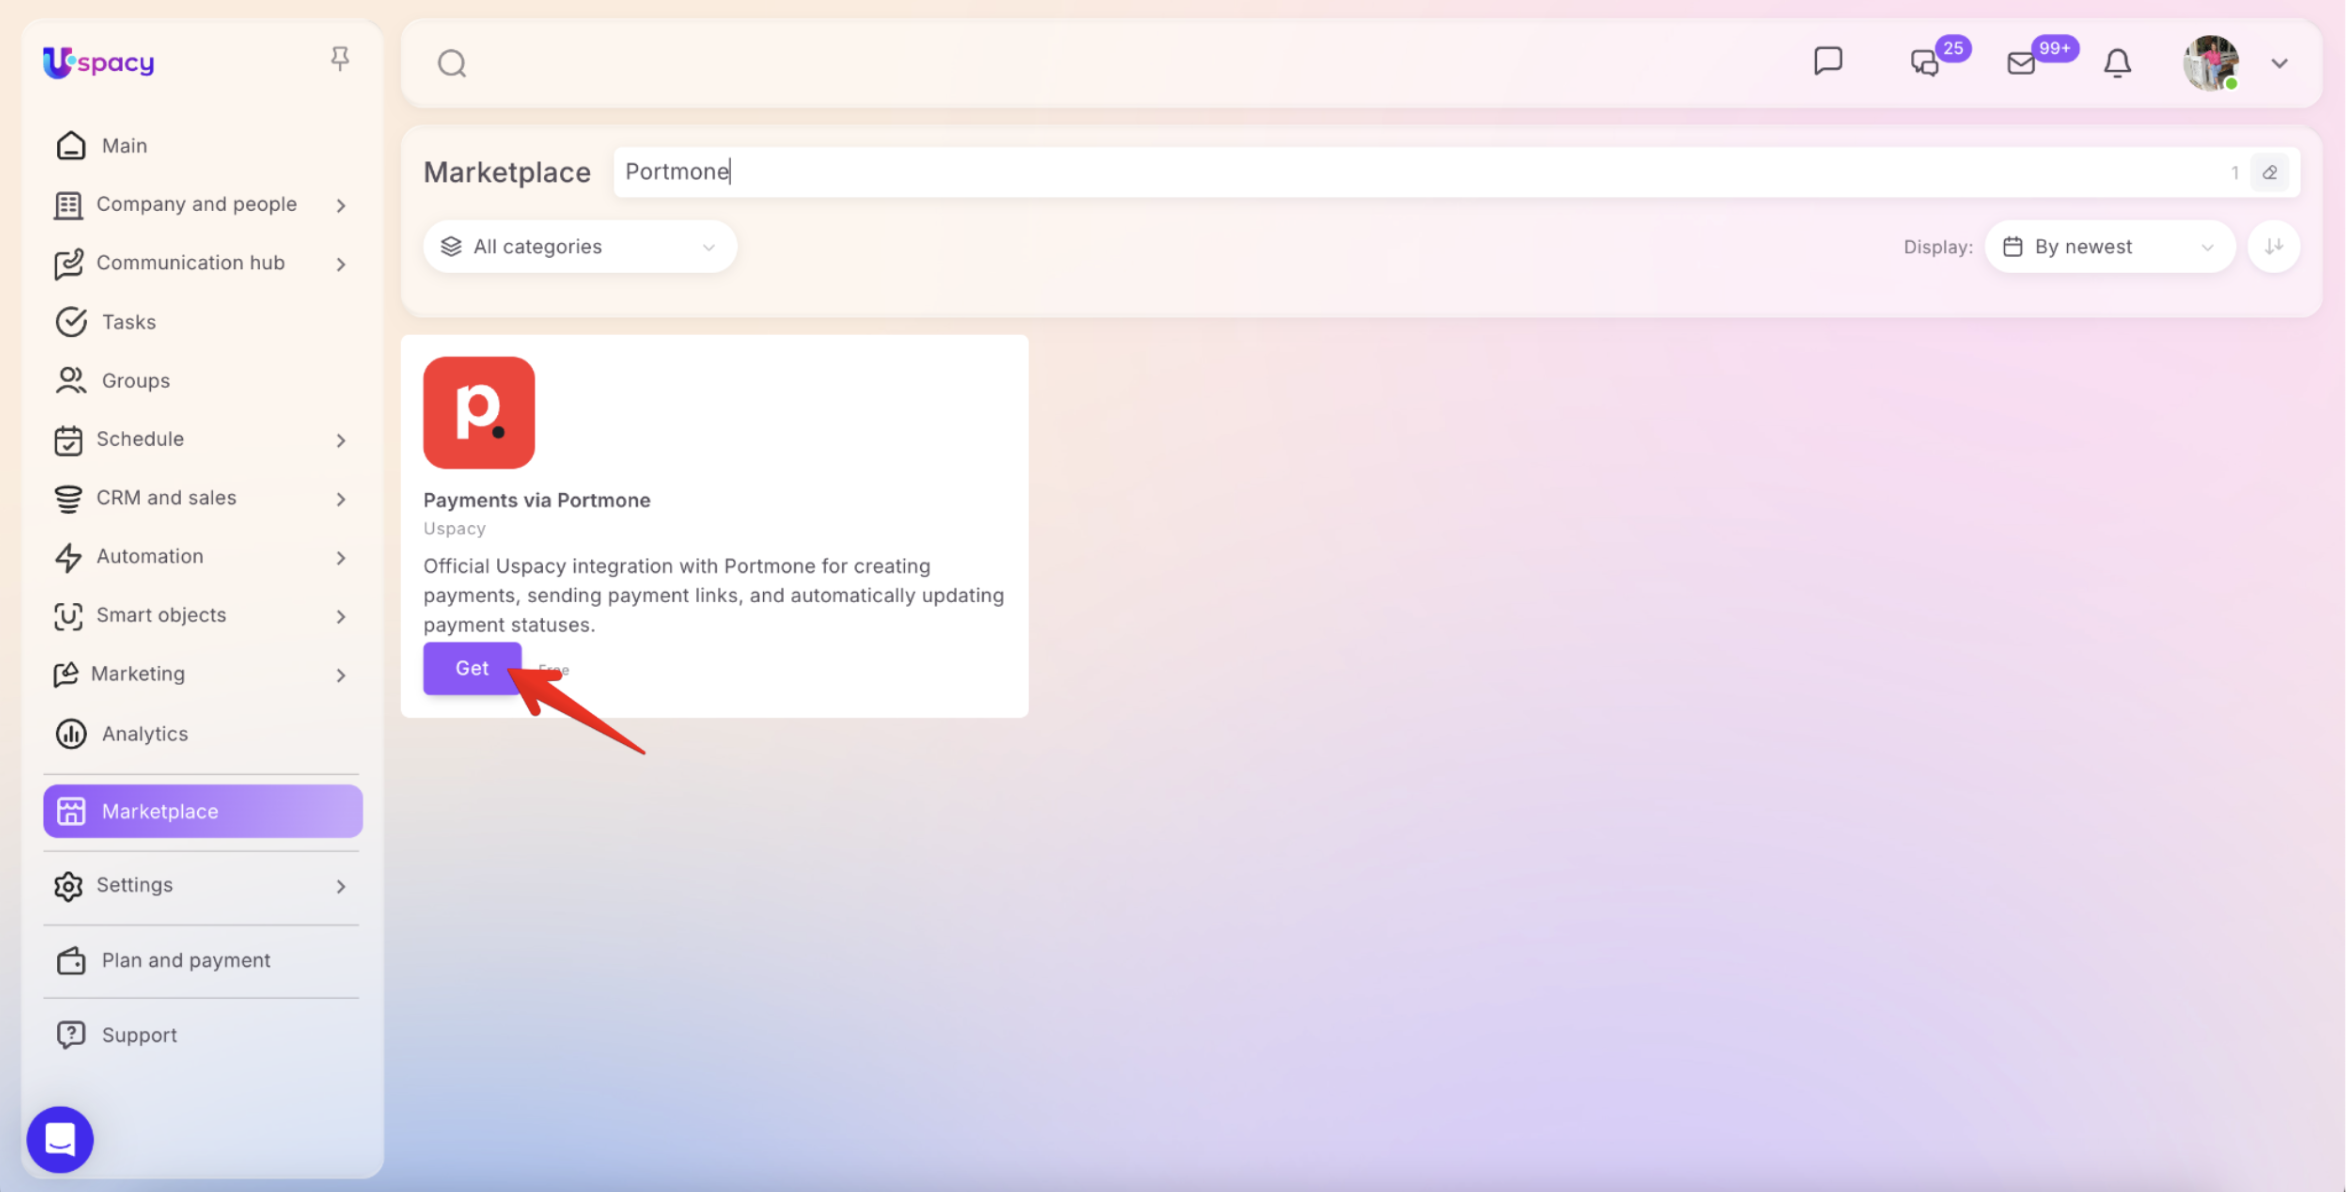
Go to the Marketplace and find the Portmone payments app. Click Get to install the app in your Workspace for free.
🌟 Note: Only users on commercial subscription plans can install apps. This feature is not available on the Free plan.
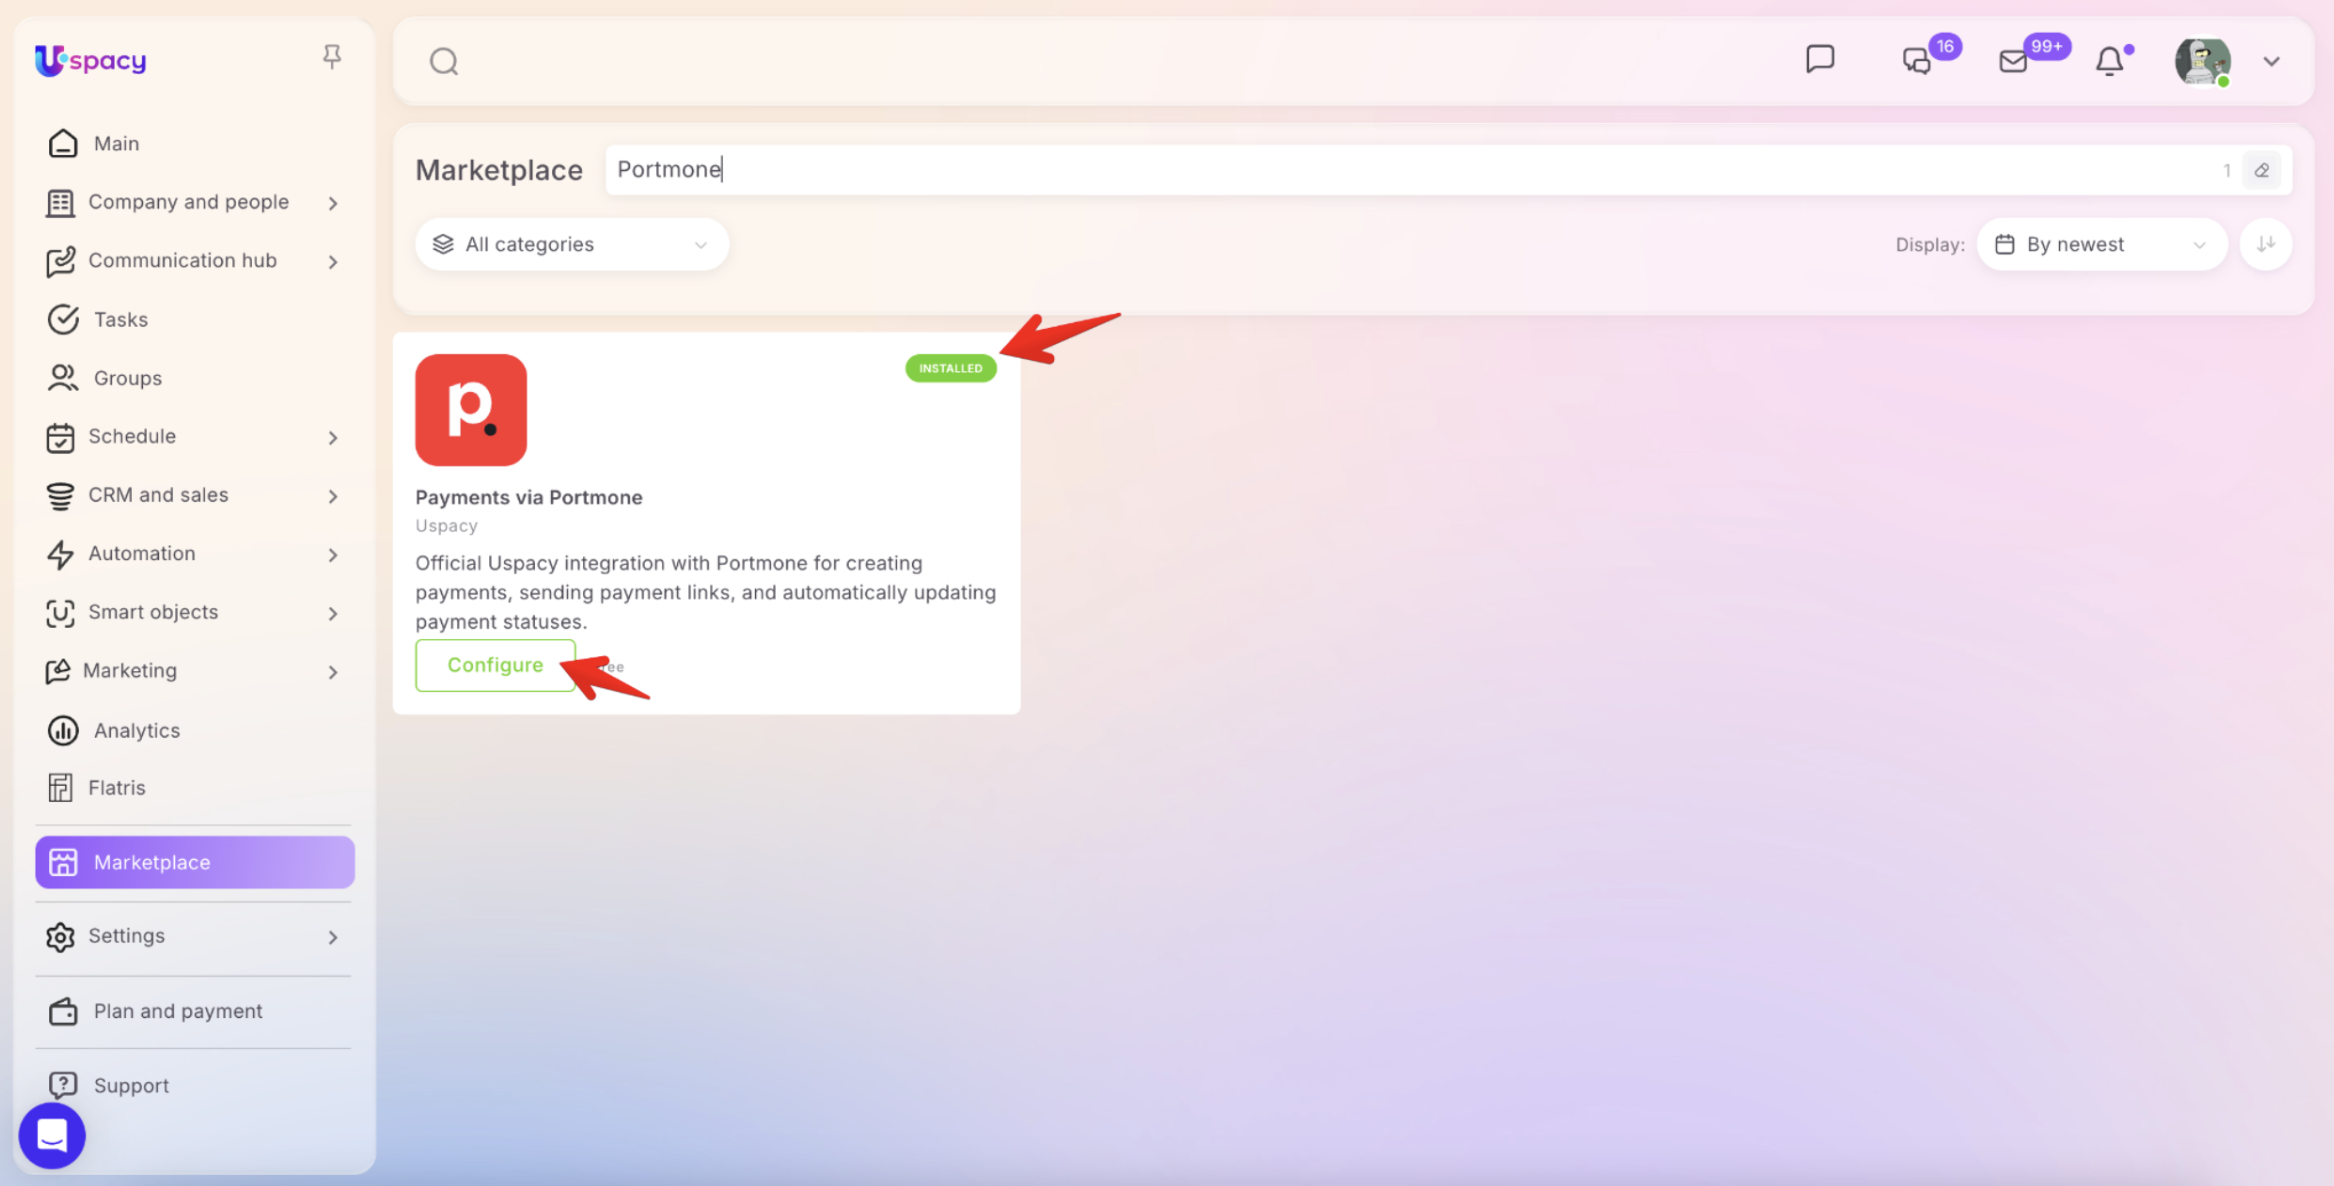
Once the installation is complete, an Installed badge will appear on the app card, and the Get button will change to Configure. Click it to open the integration settings.
Portmone settings
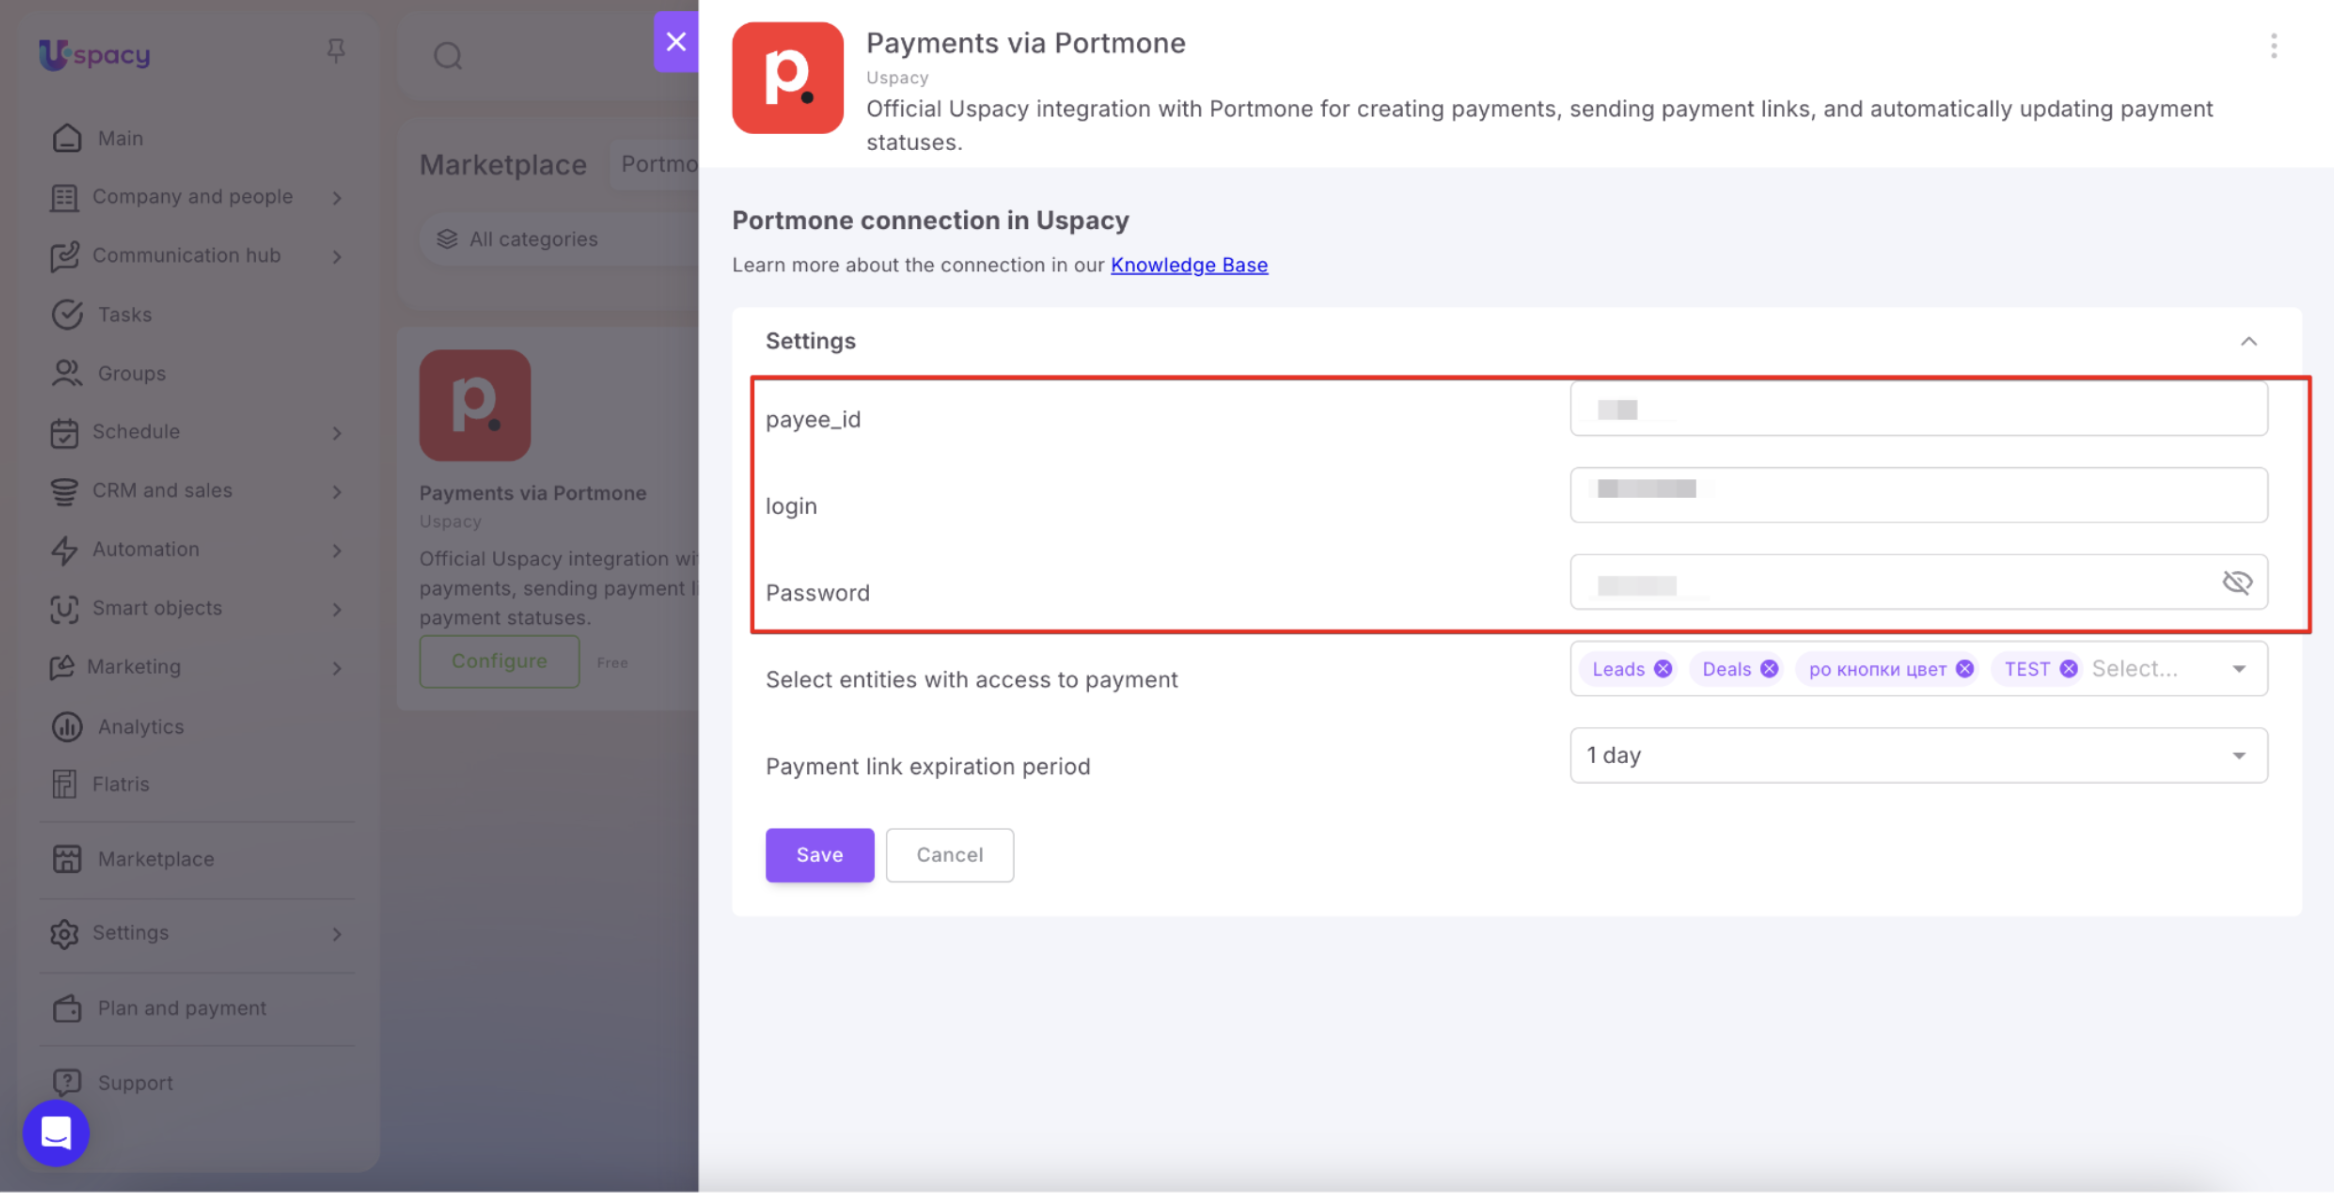
To obtain the credentials required for connecting the integration, you need to have a business account with Portmone and complete the merchant onboarding process. After that, Portmone will provide you with the Payee ID, API Login ID, and Password.
The Payee ID is a unique merchant identifier in the Portmone system, while the API Login ID and Password are used to authenticate API requests. If you have not received your login credentials yet, contact Portmone by phone or email.
These parameters must be entered into the corresponding fields in the integration settings in Uspacy.
🔍 For more information about working with these credentials, refer to the official Portmone documentation.
💡 If you need to test the integration before processing real payments, you can contact Portmone using the email address provided during registration. After the test mode is activated, the service will provide test credentials, including a login, password, and Payee ID.
Uspacy settings
In the app settings, enter the credentials provided by Portmone into the corresponding fields:
- Payee ID
- Login
- Password
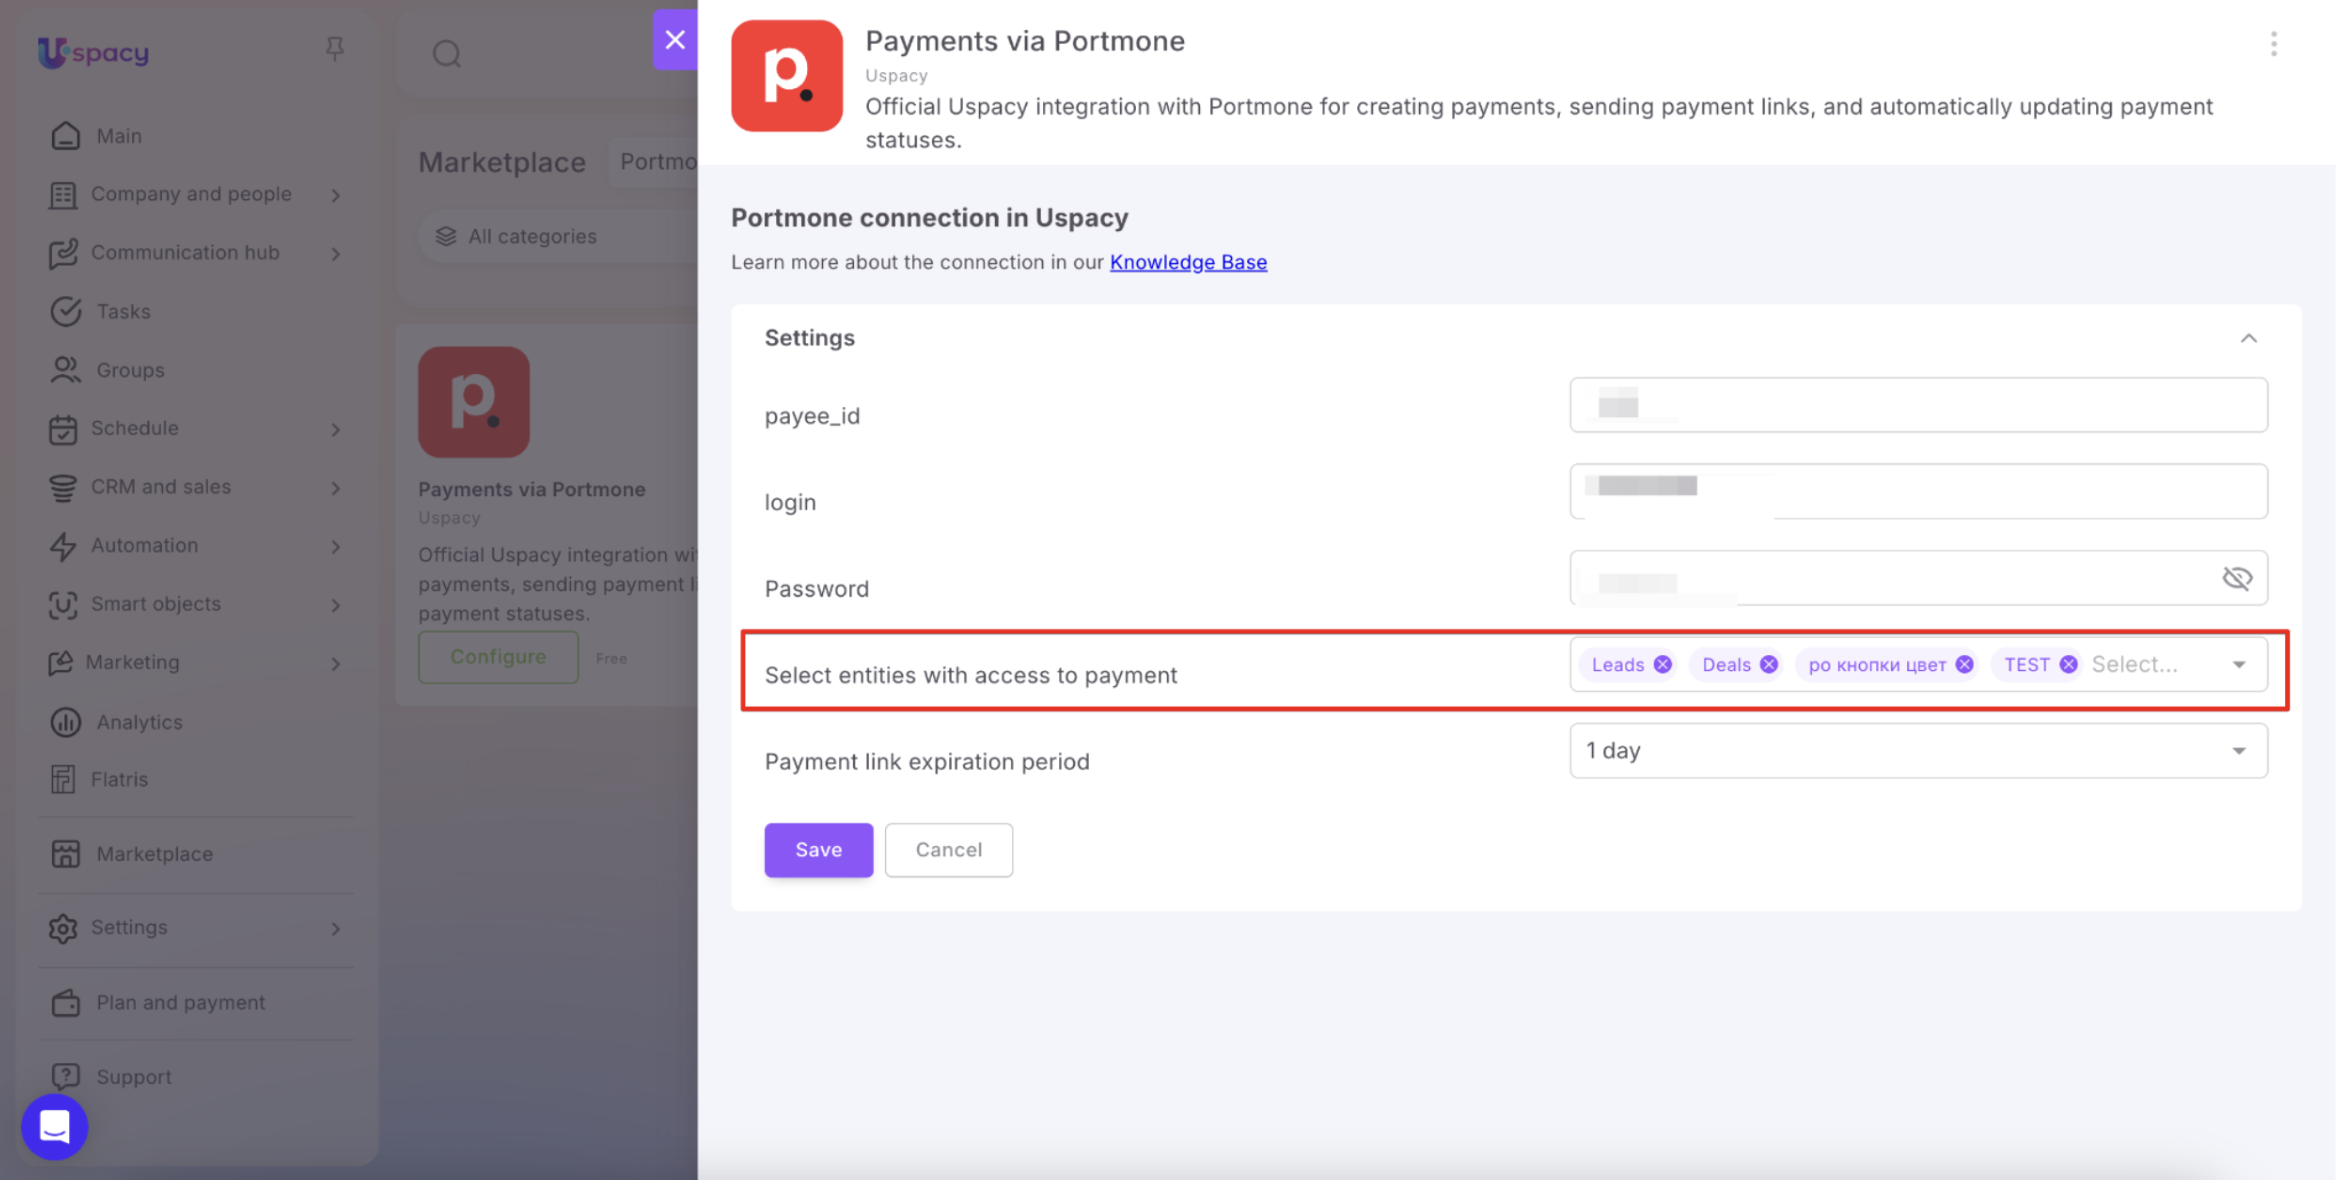
Next, in the Select entities with access to payment field, select which entities will allow users to create payments through Portmone. You can select any CRM entities or Smart Objects that support (or have enabled) product functionality.
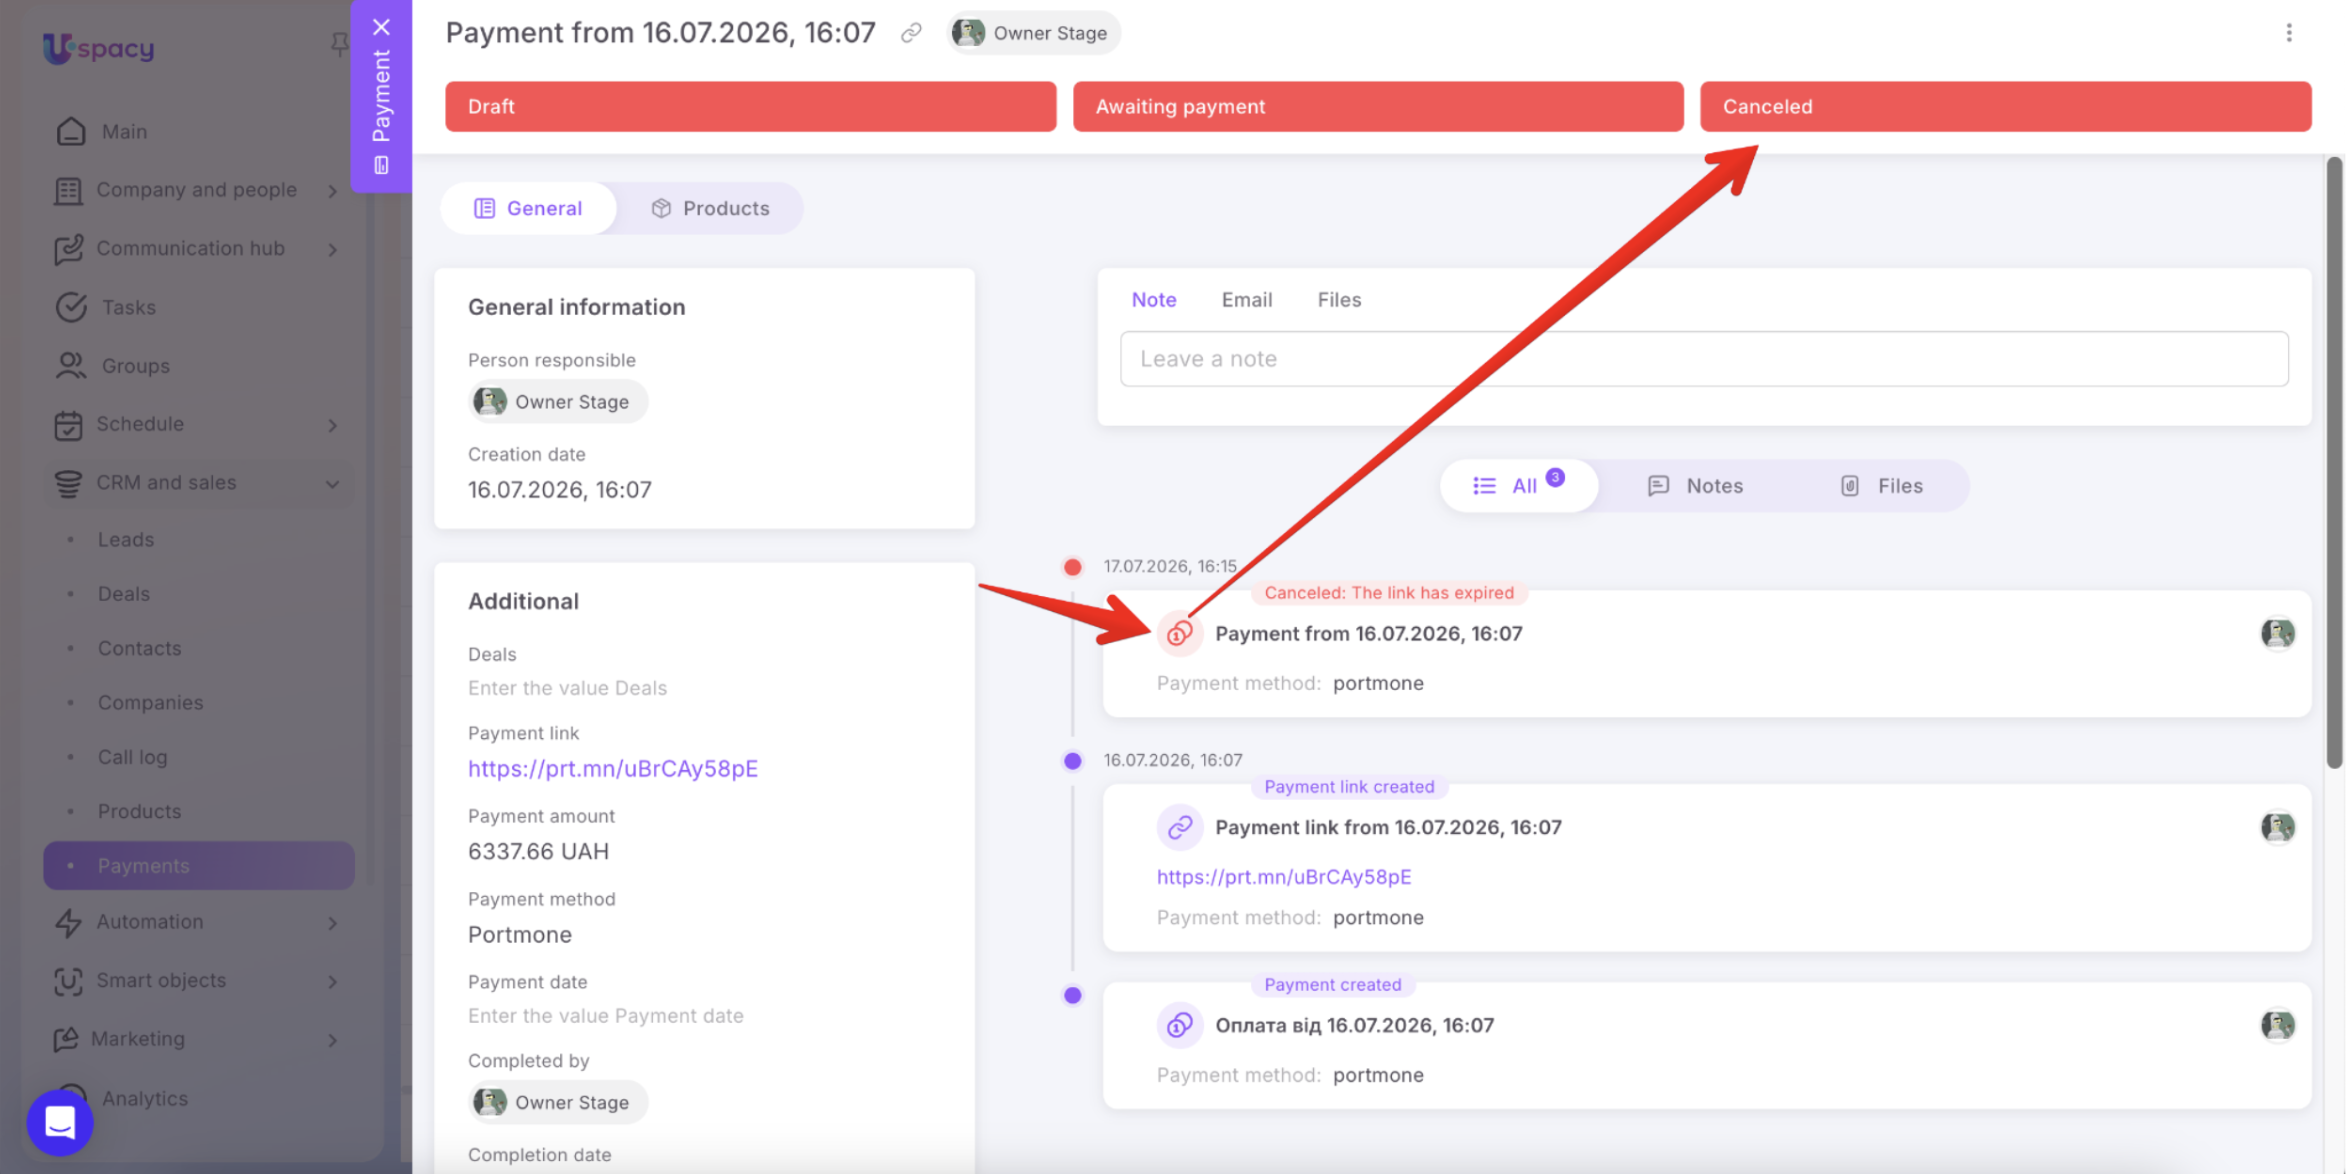
In the Payment link expiration period field, specify how long the generated payment link will remain valid. Once this period expires, the link will no longer be valid. If the client does not complete the payment before the link expires, the payment status in Uspacy will automatically change to Canceled.
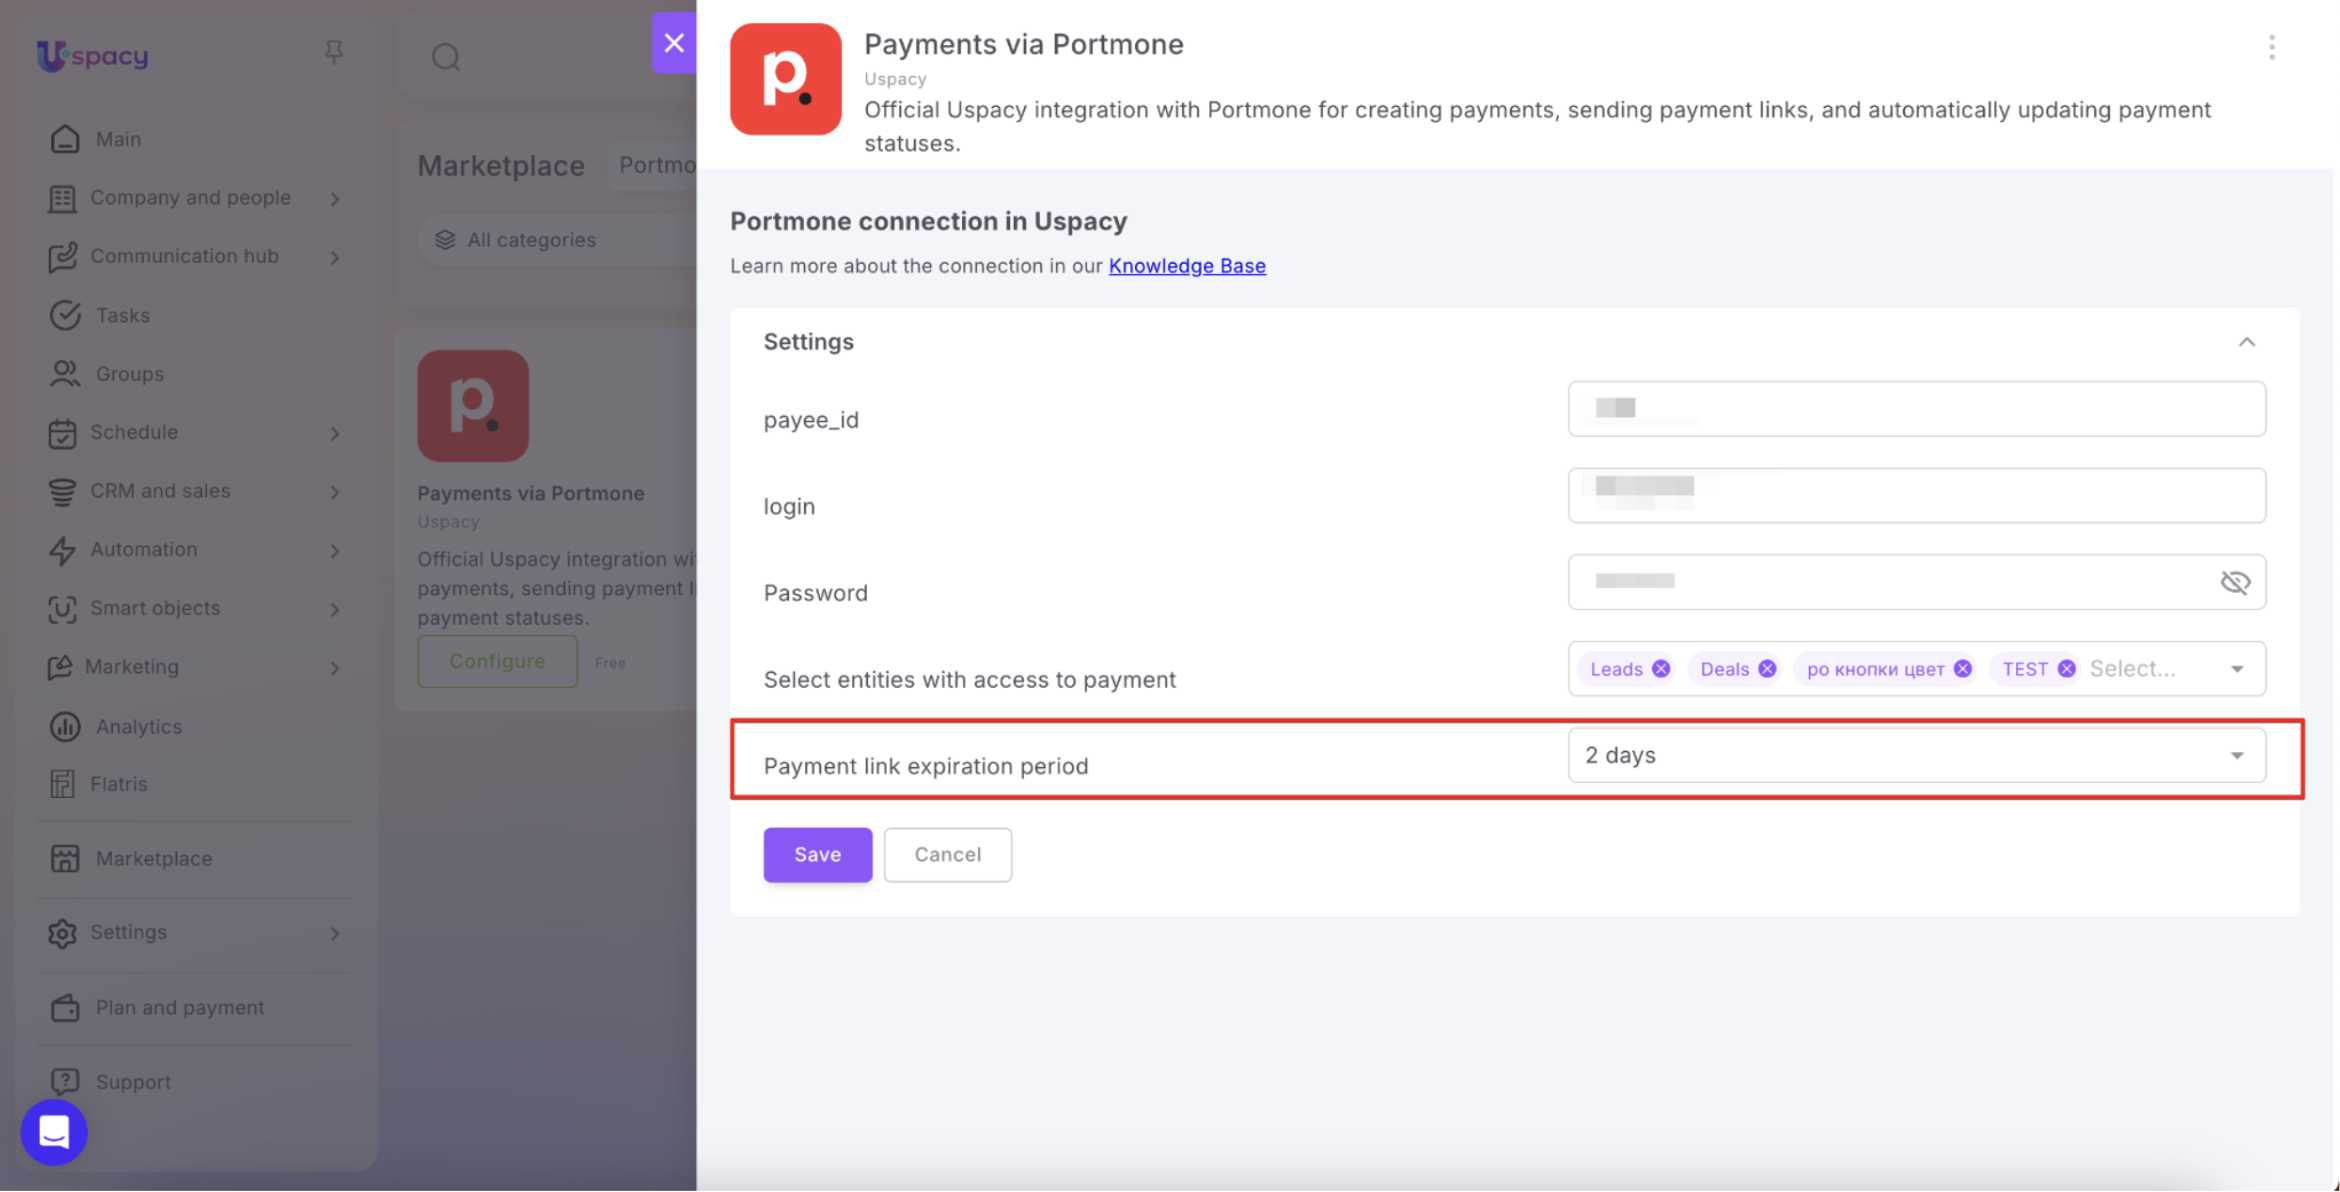
After completing all the required fields, click Save.
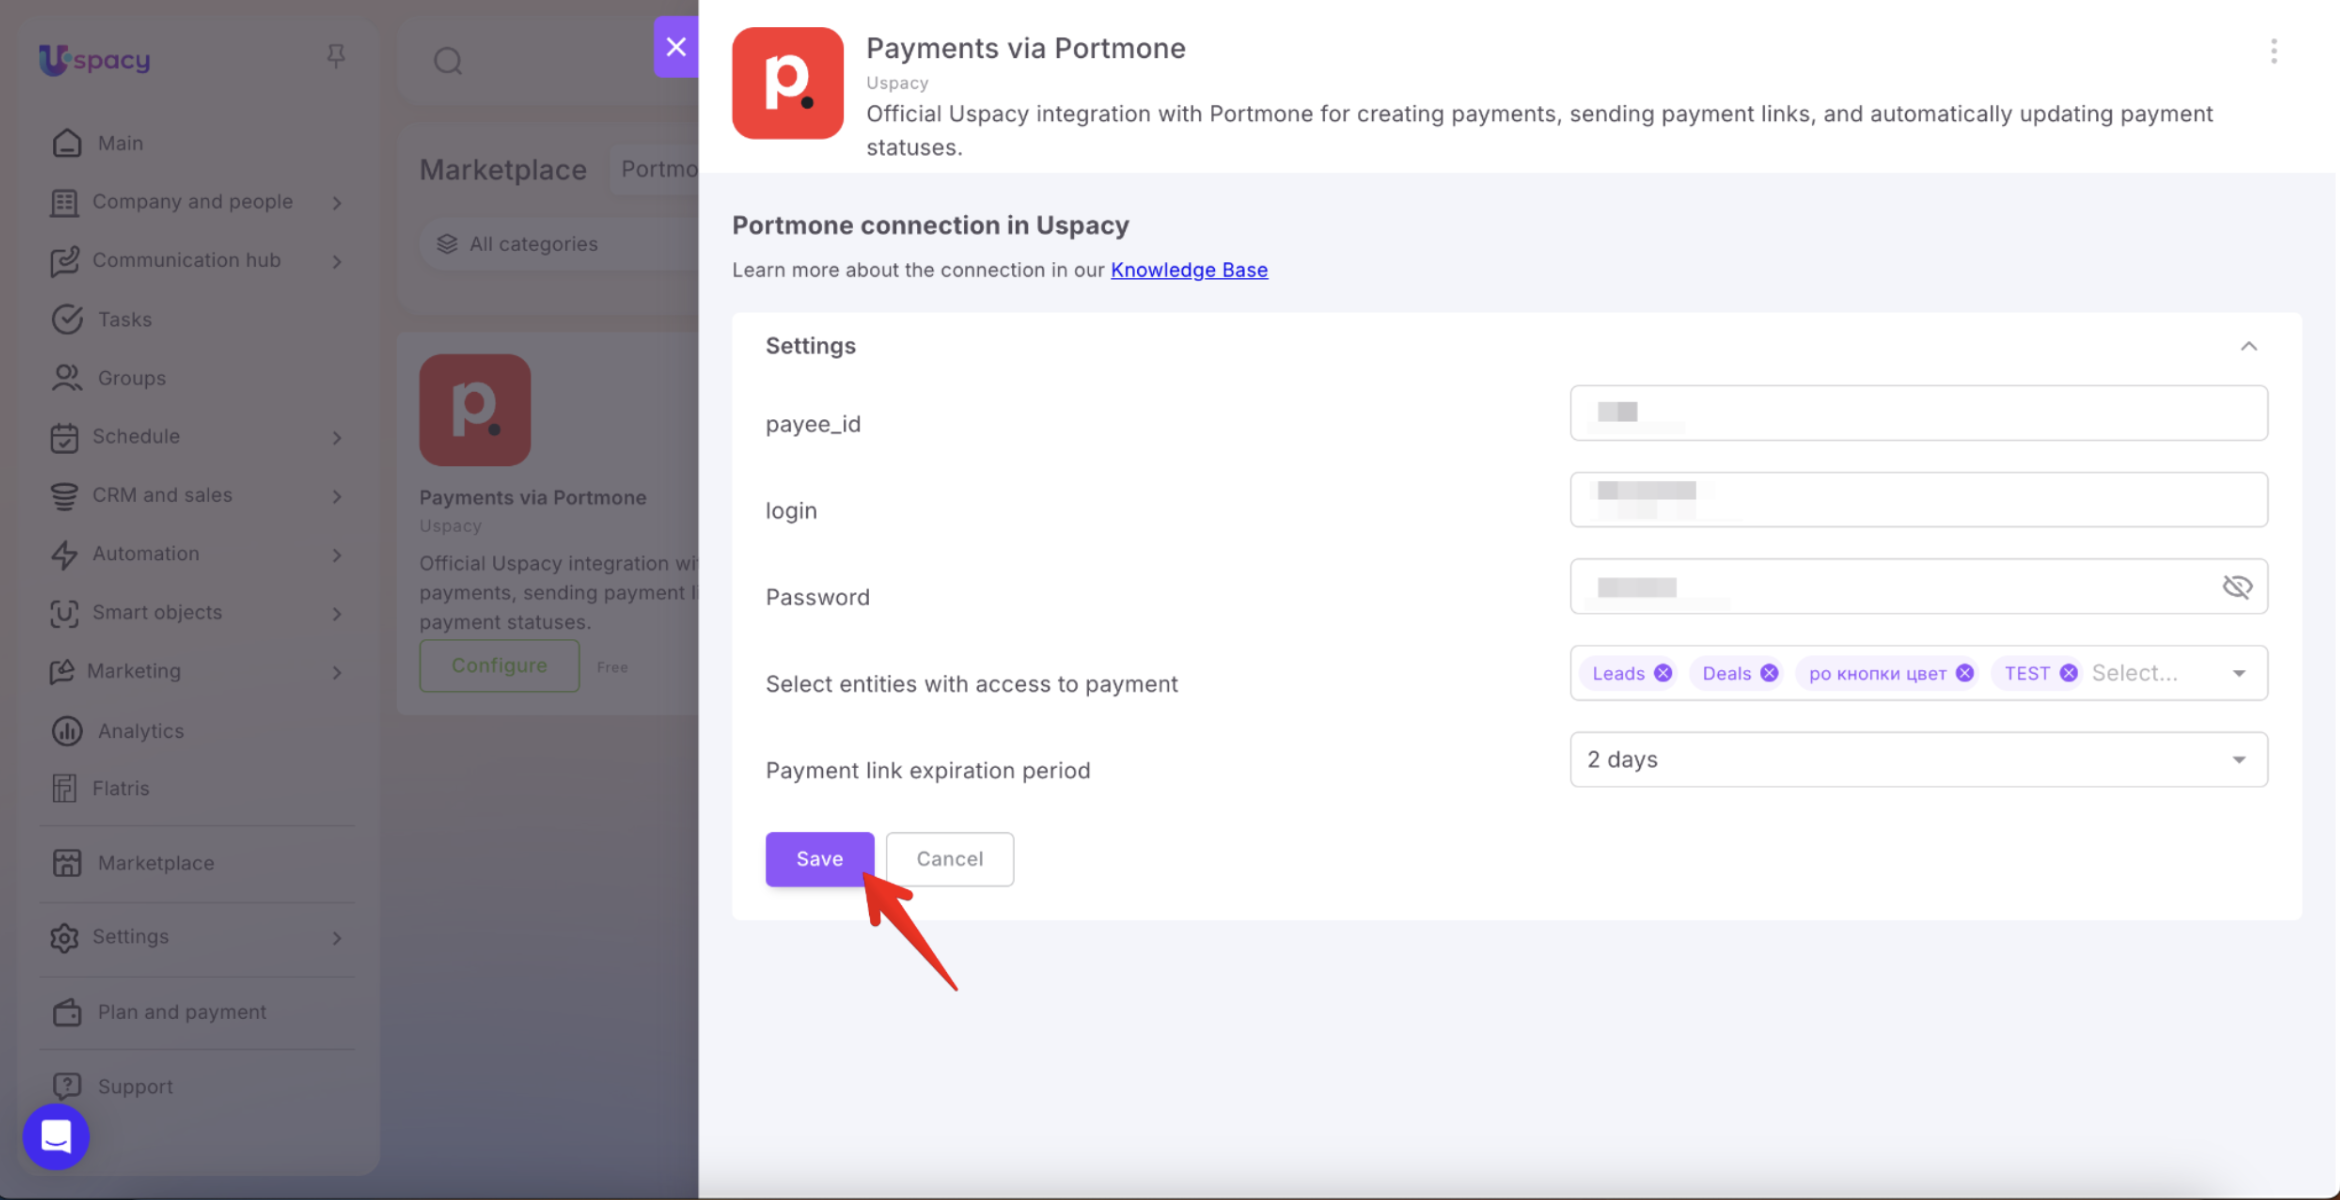
The integration will then be connected, and Portmone will become available as a payment method for the selected entities.
Working with payments
Once the integration is connected, go to CRM & sales → Payments. The Payments section may be available in your Workspace even if no payment app is installed. However, to create payments through Portmone, you must first install and configure the Portmone integration.
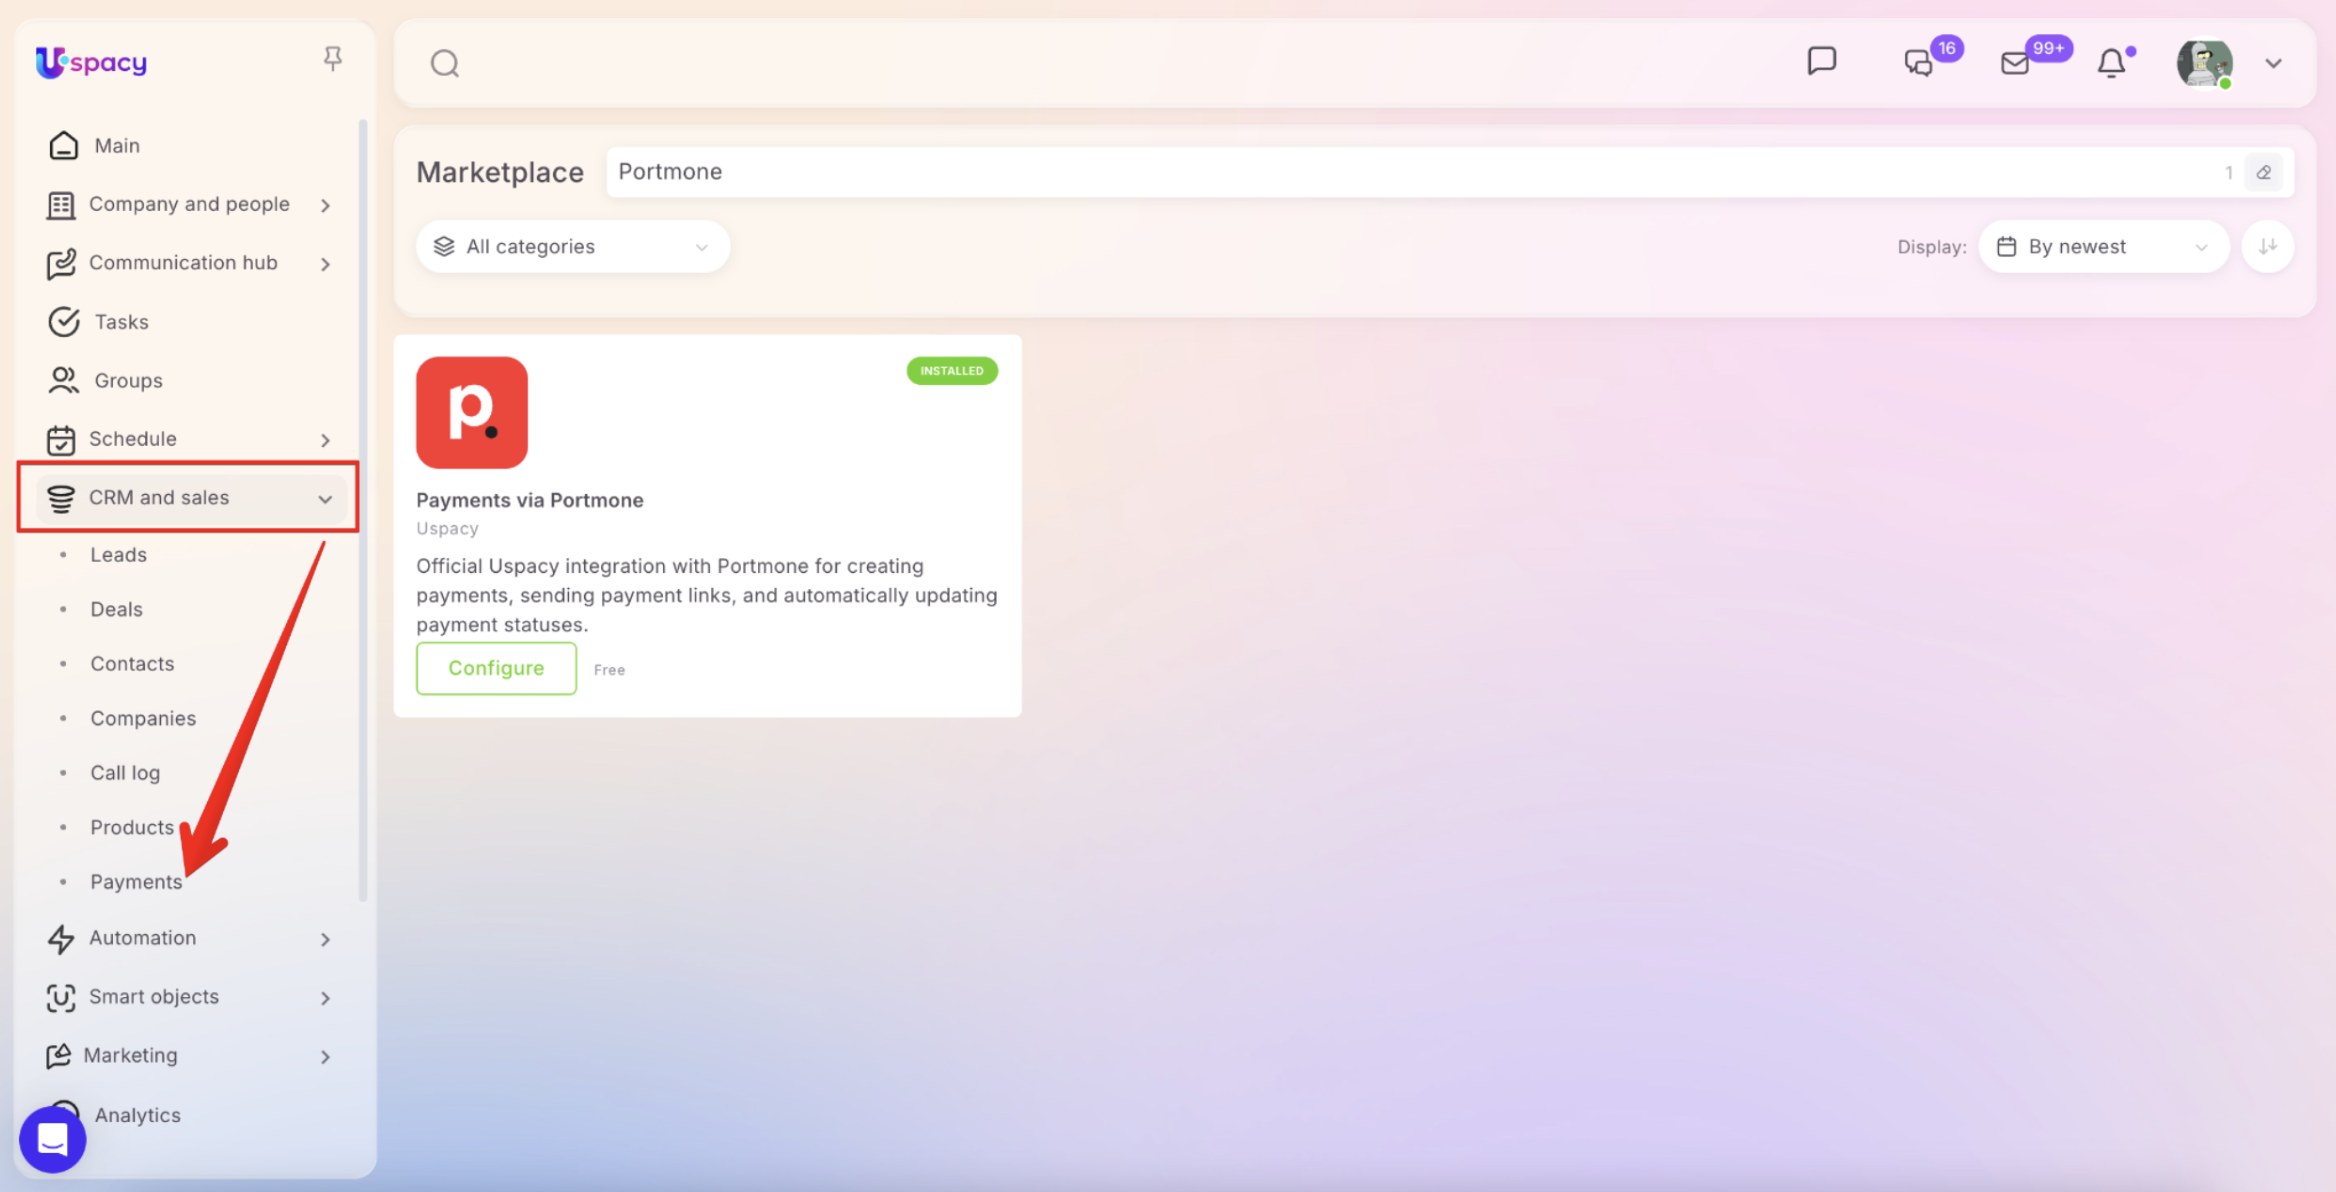
The Payments section contains all payment records, regardless of the payment provider used. The Payment method column indicates which payments were created via Portmone.
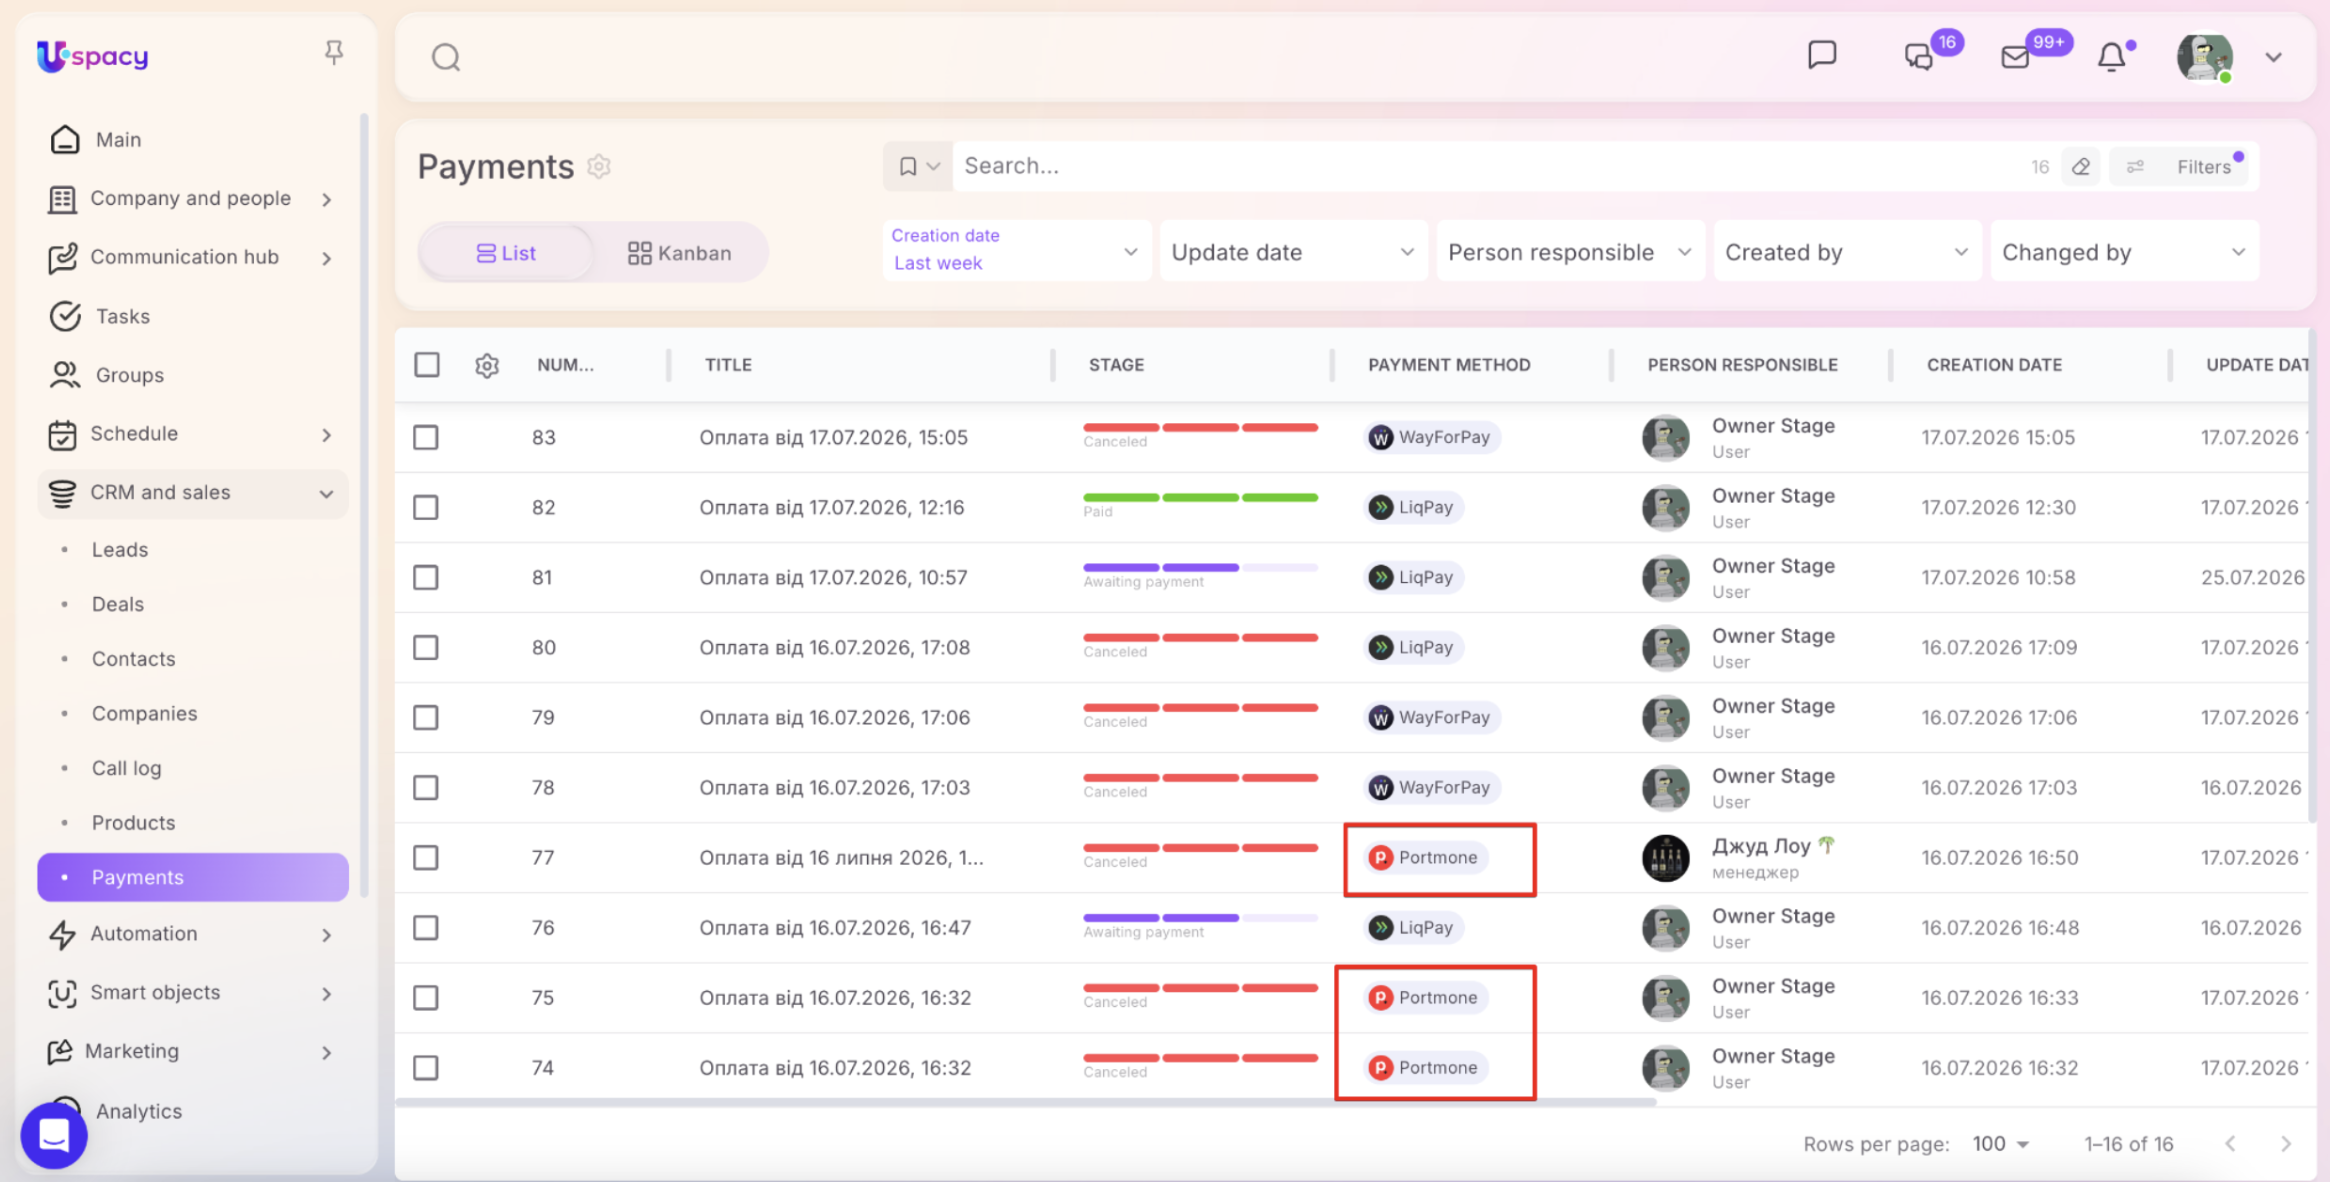
To find specific payment records, use the search bar, apply quick filters, or create custom filters.
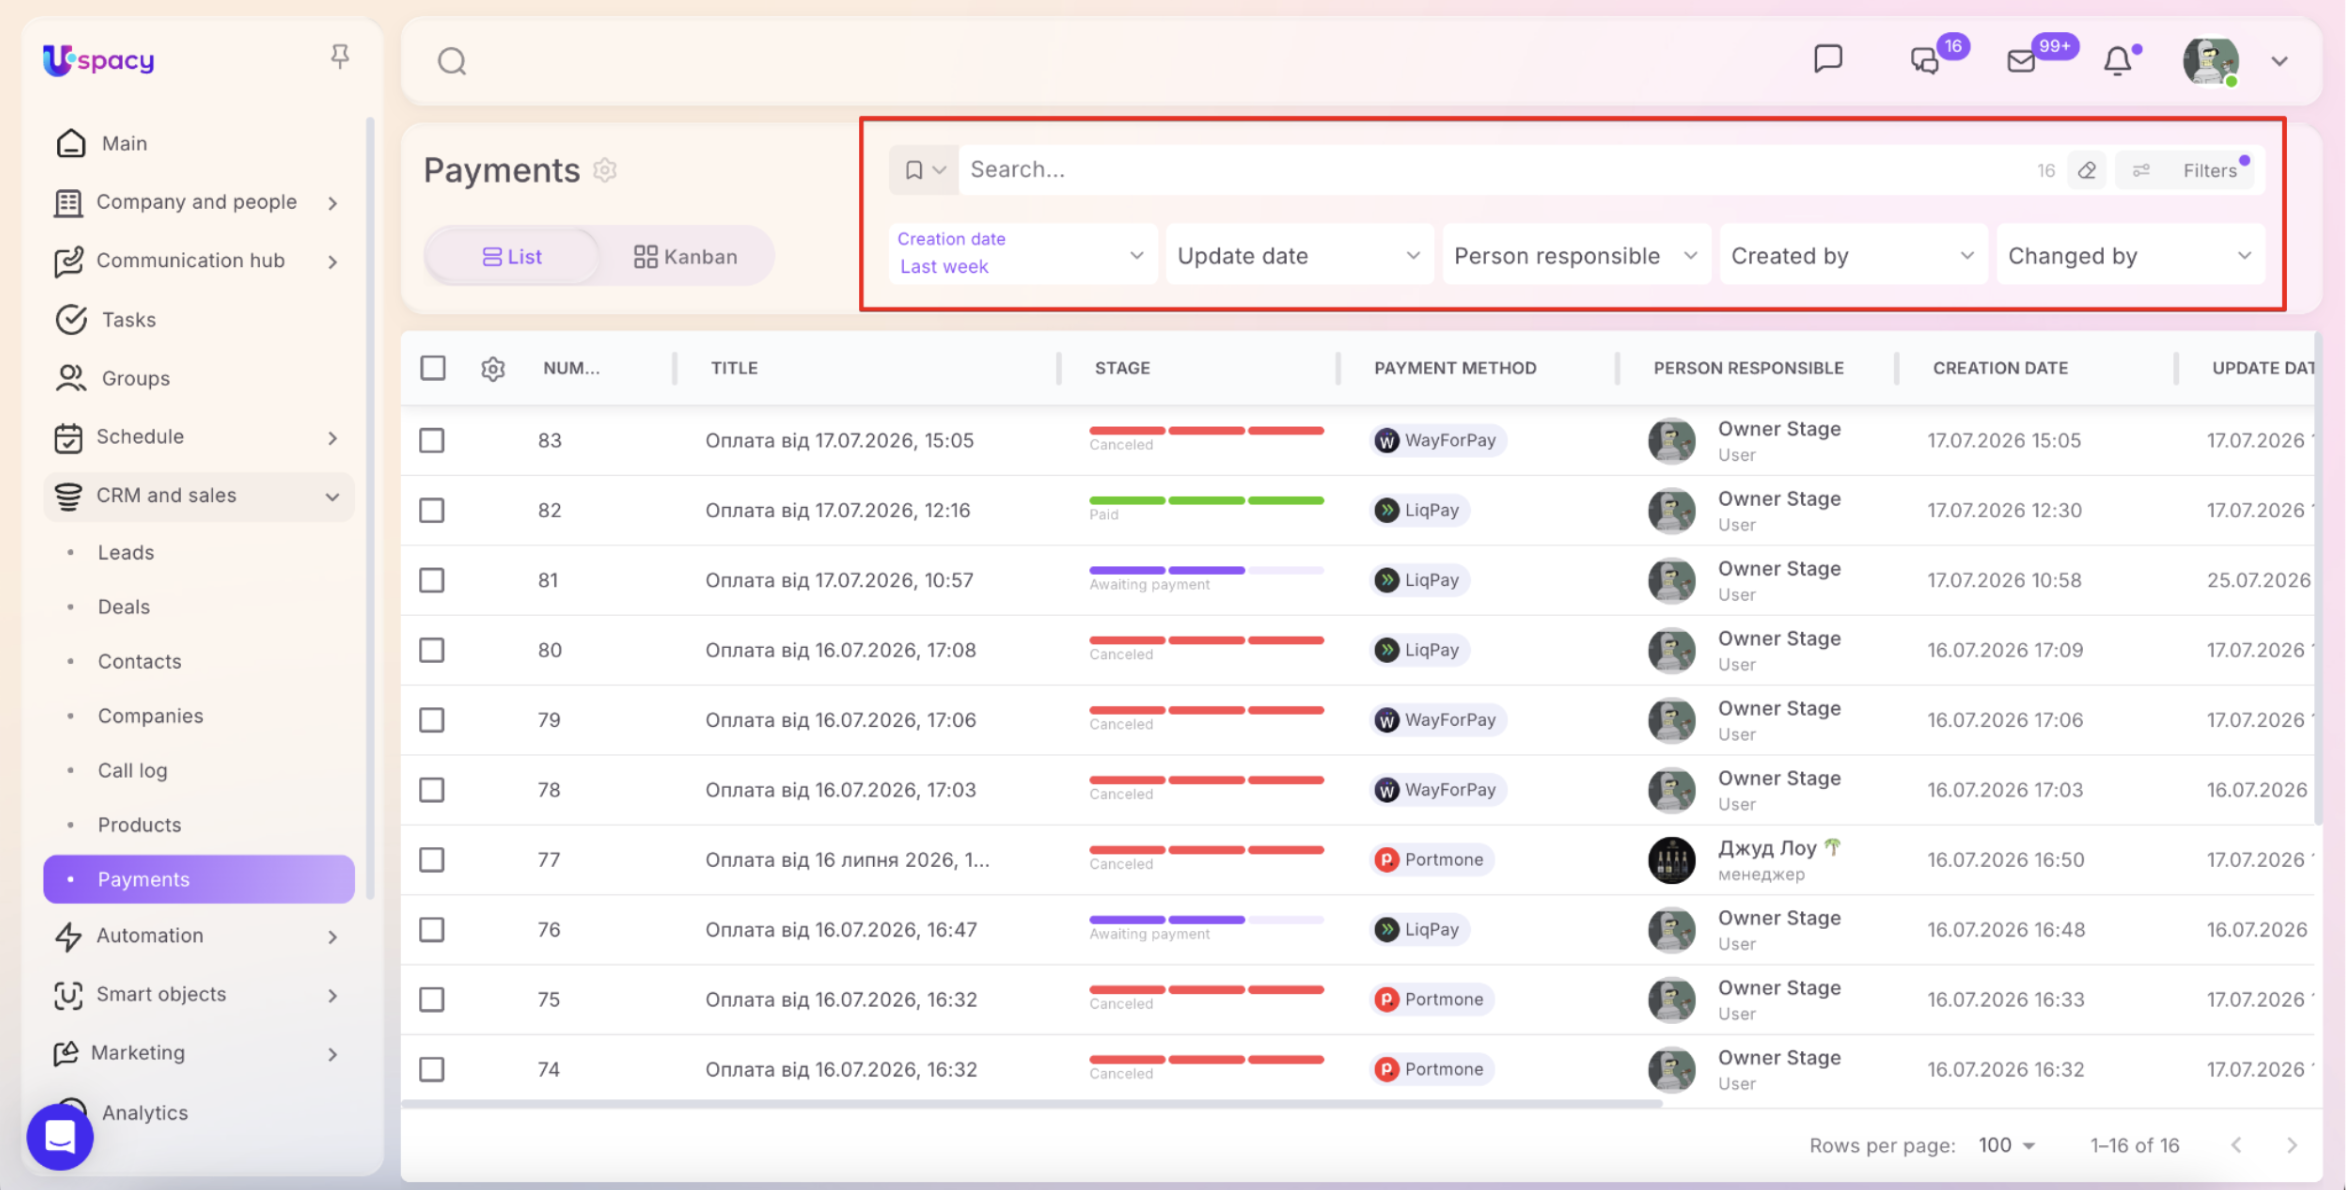
Payments can be viewed in two layouts: List and Kanban.
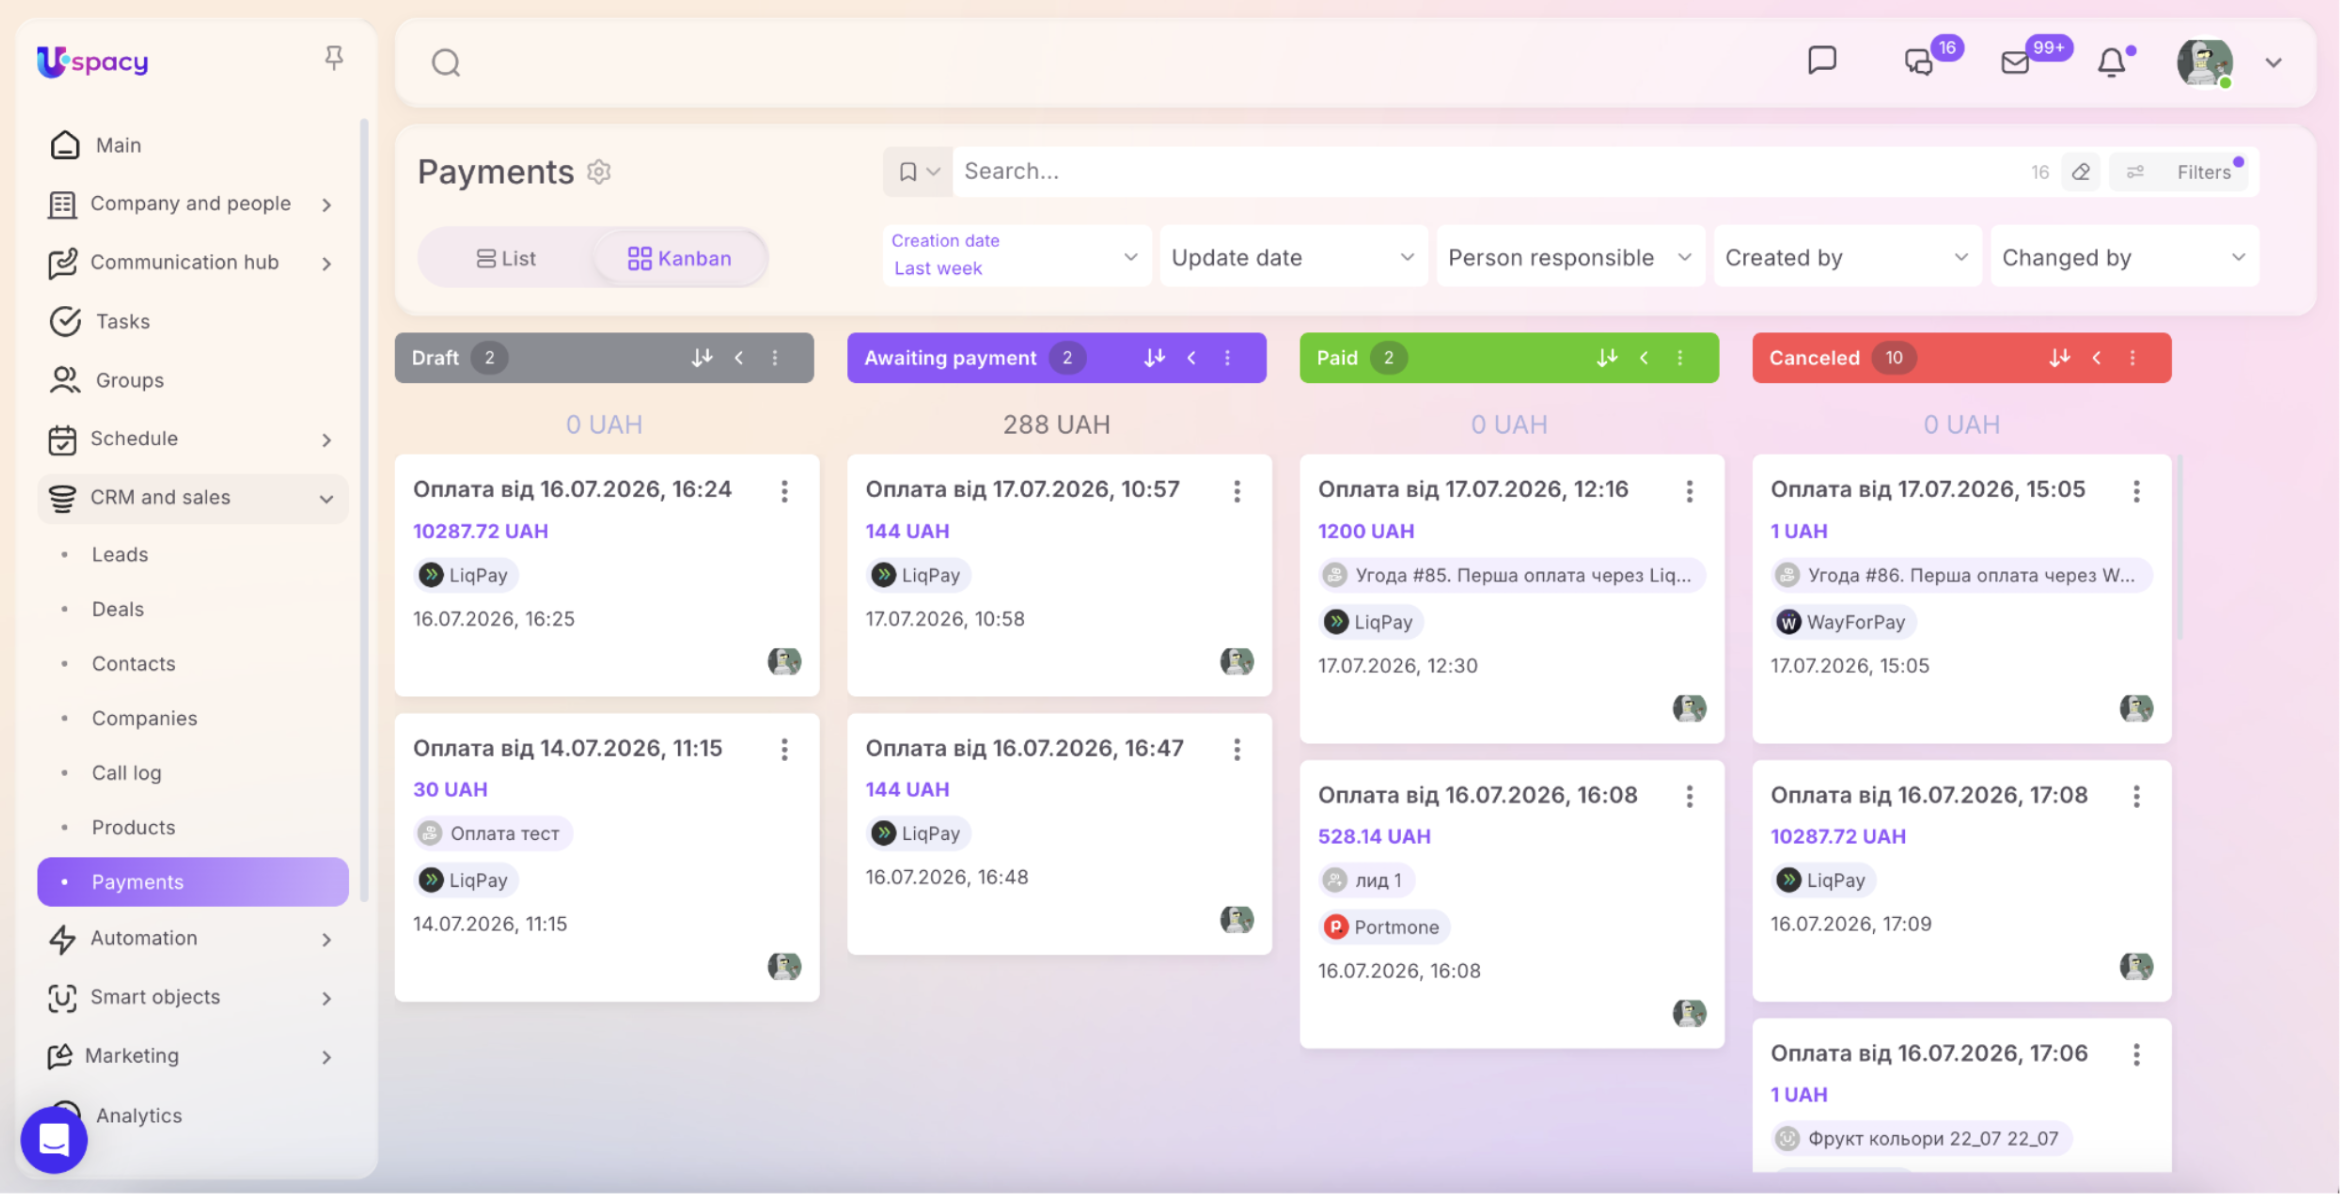
On the Kanban view, payments are organized into the following statuses:
- Draft – The payment has been saved in Uspacy, but a payment link has not yet been created.
- Awaiting payment – A payment link has been generated, and the system is waiting for the client to complete the payment.
- Paid – The client has successfully completed the payment.
- Canceled – The payment link has expired without a successful payment.
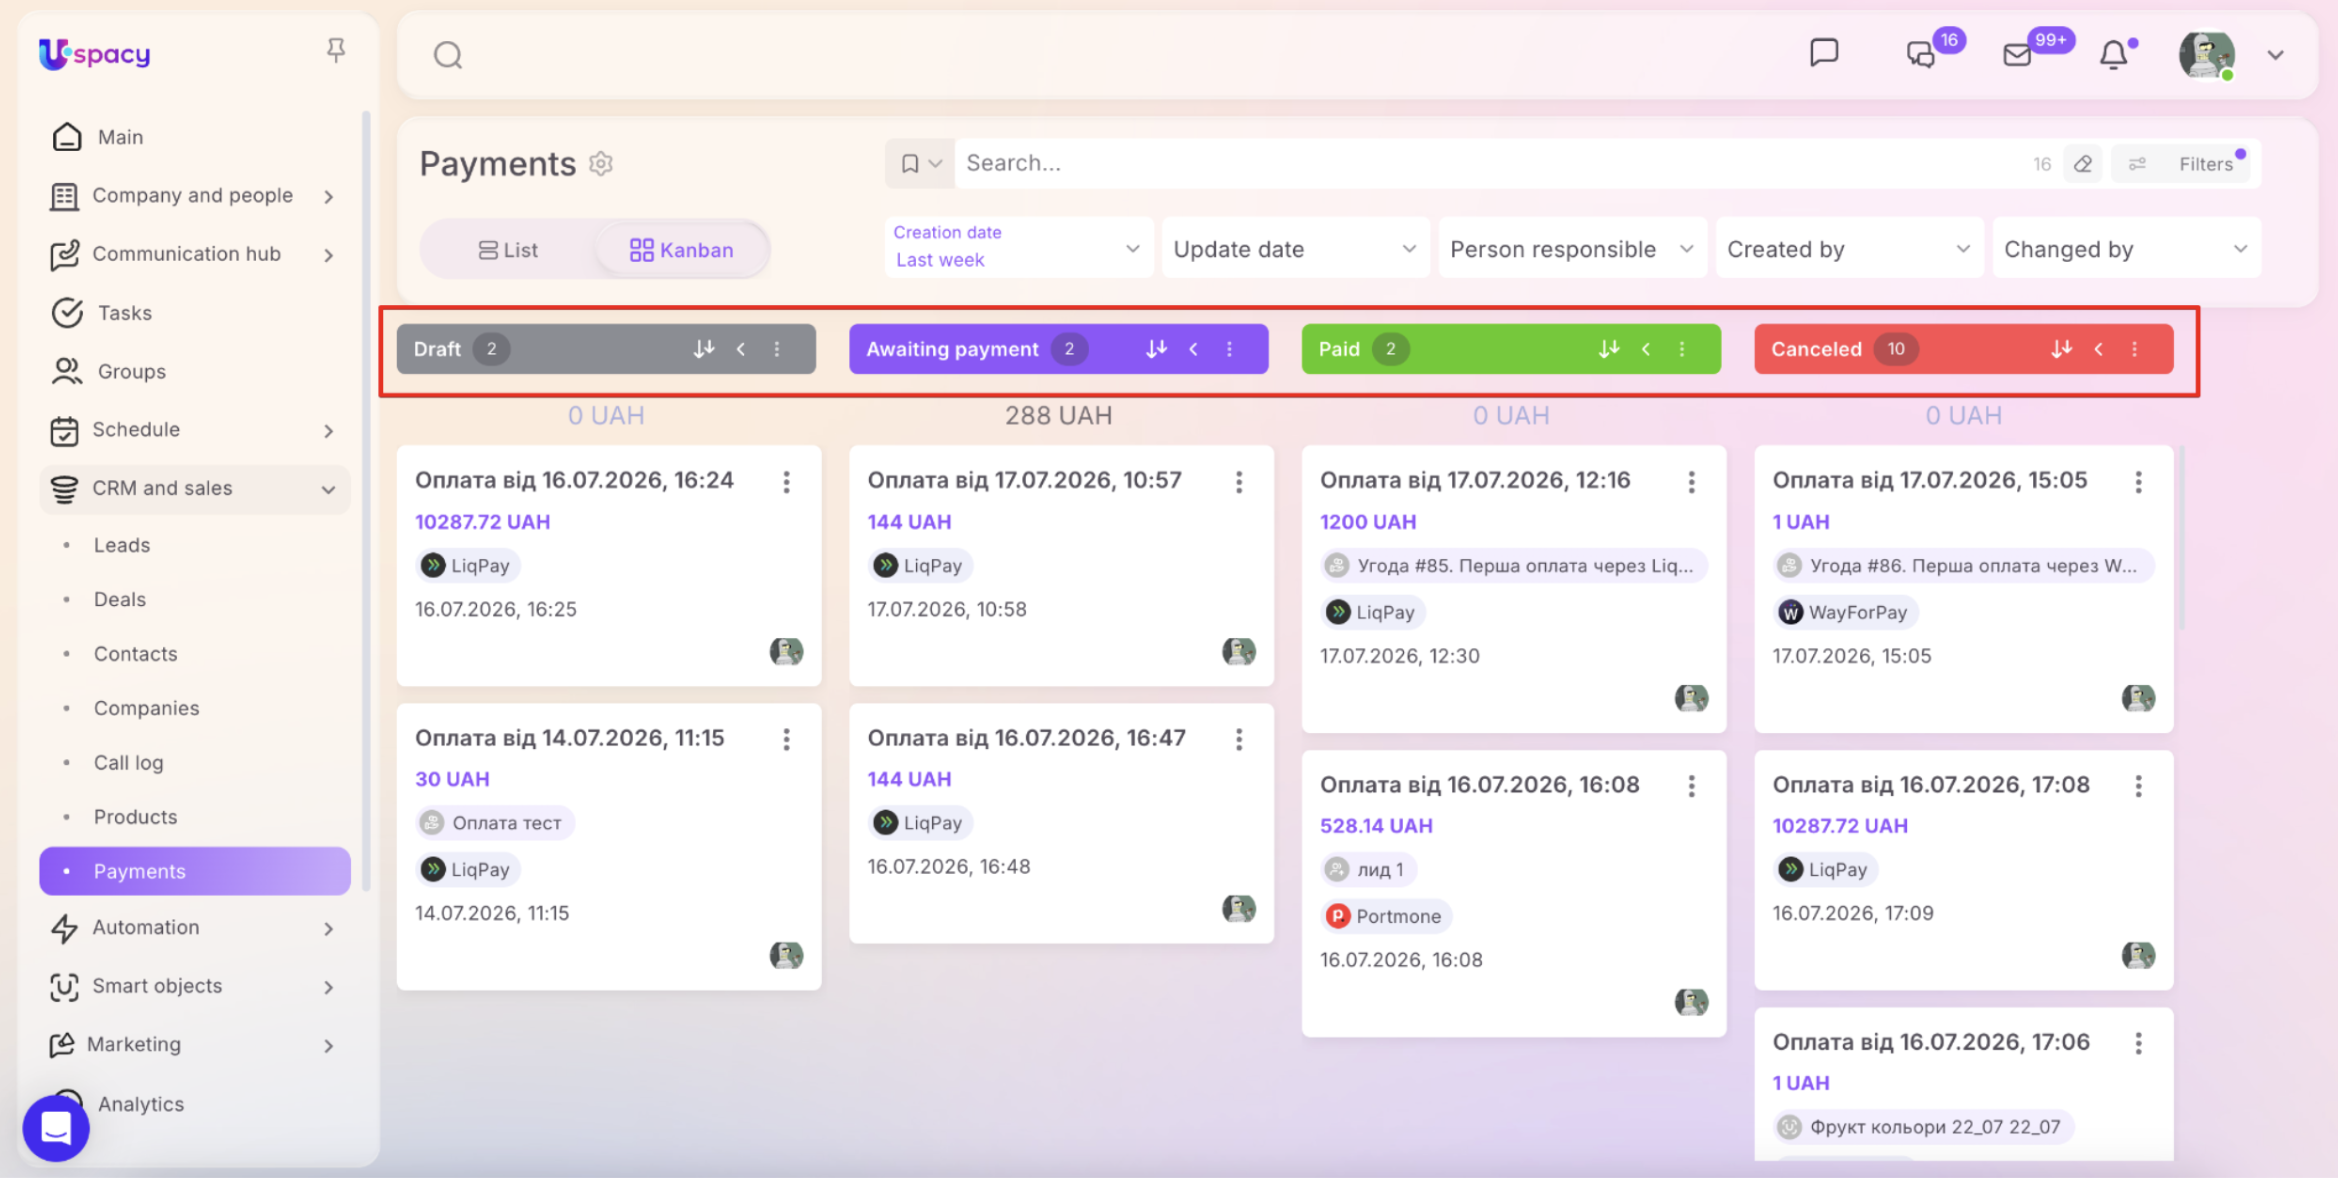
💡 Note: Payments move between statuses automatically based on their current state. For example, once a payment link is generated, the payment changes to Awaiting payment. After a successful transaction, it changes to Paid. If the payment link expires before payment is received, the status changes to Canceled.
Payment statuses cannot be changed manually. Likewise, you cannot create custom statuses in the Payments section, as these statuses are tied to the payment integration workflow and are updated automatically by the system.
Payments can be created from the record of any entity that was granted payment access in the app settings. For example, if you enabled deals, open the desired deal record.
First, enter the deal amount. Once you do, the Accept payment button appears next to the amount. Open the list of payment providers and select Portmone.
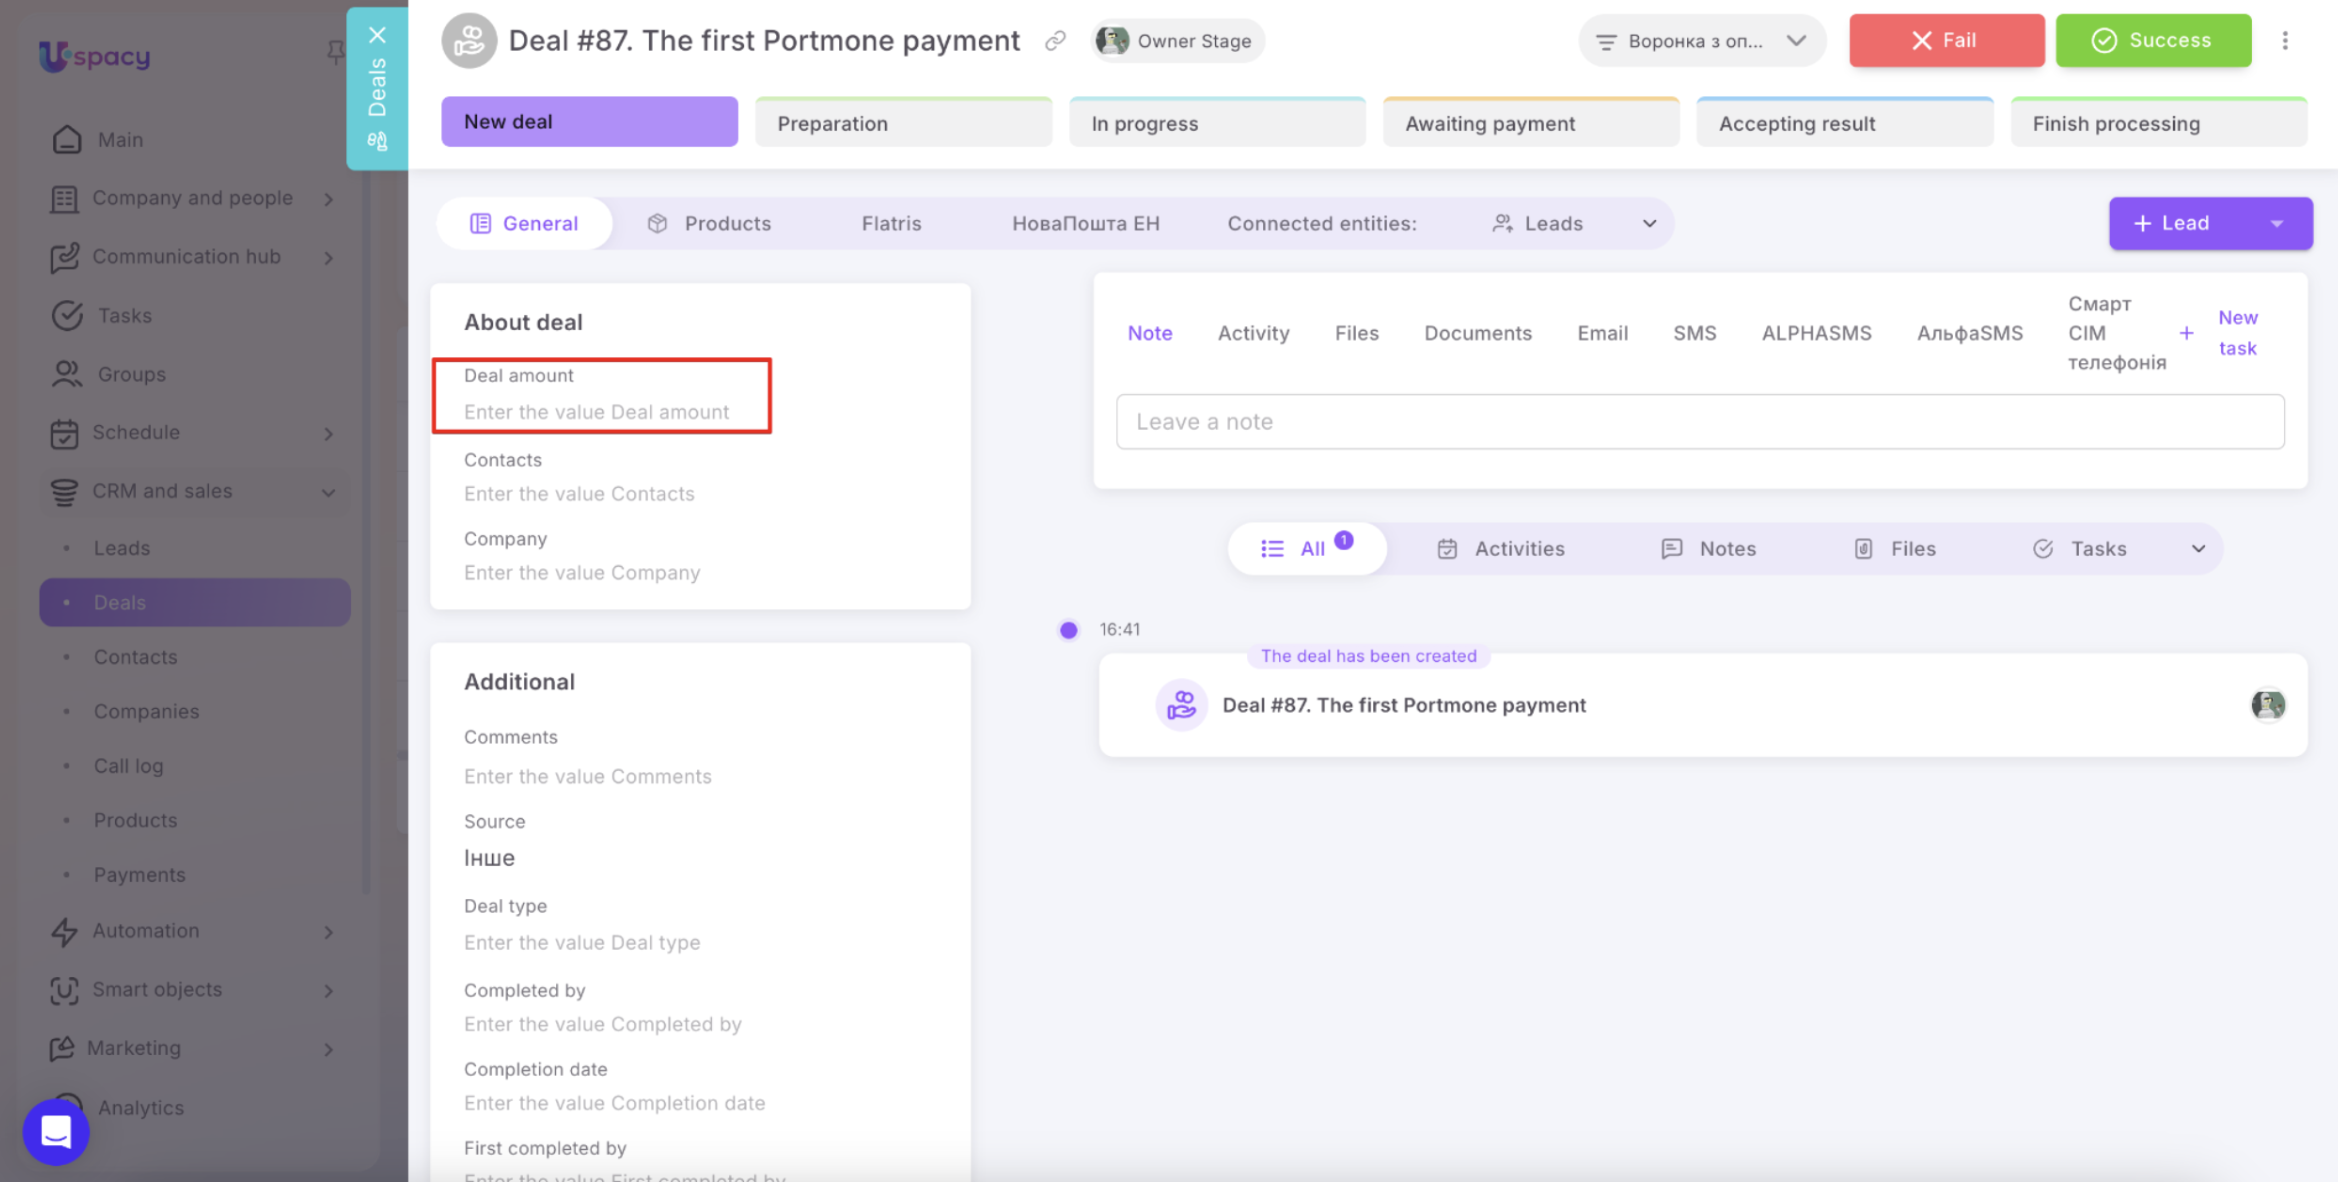
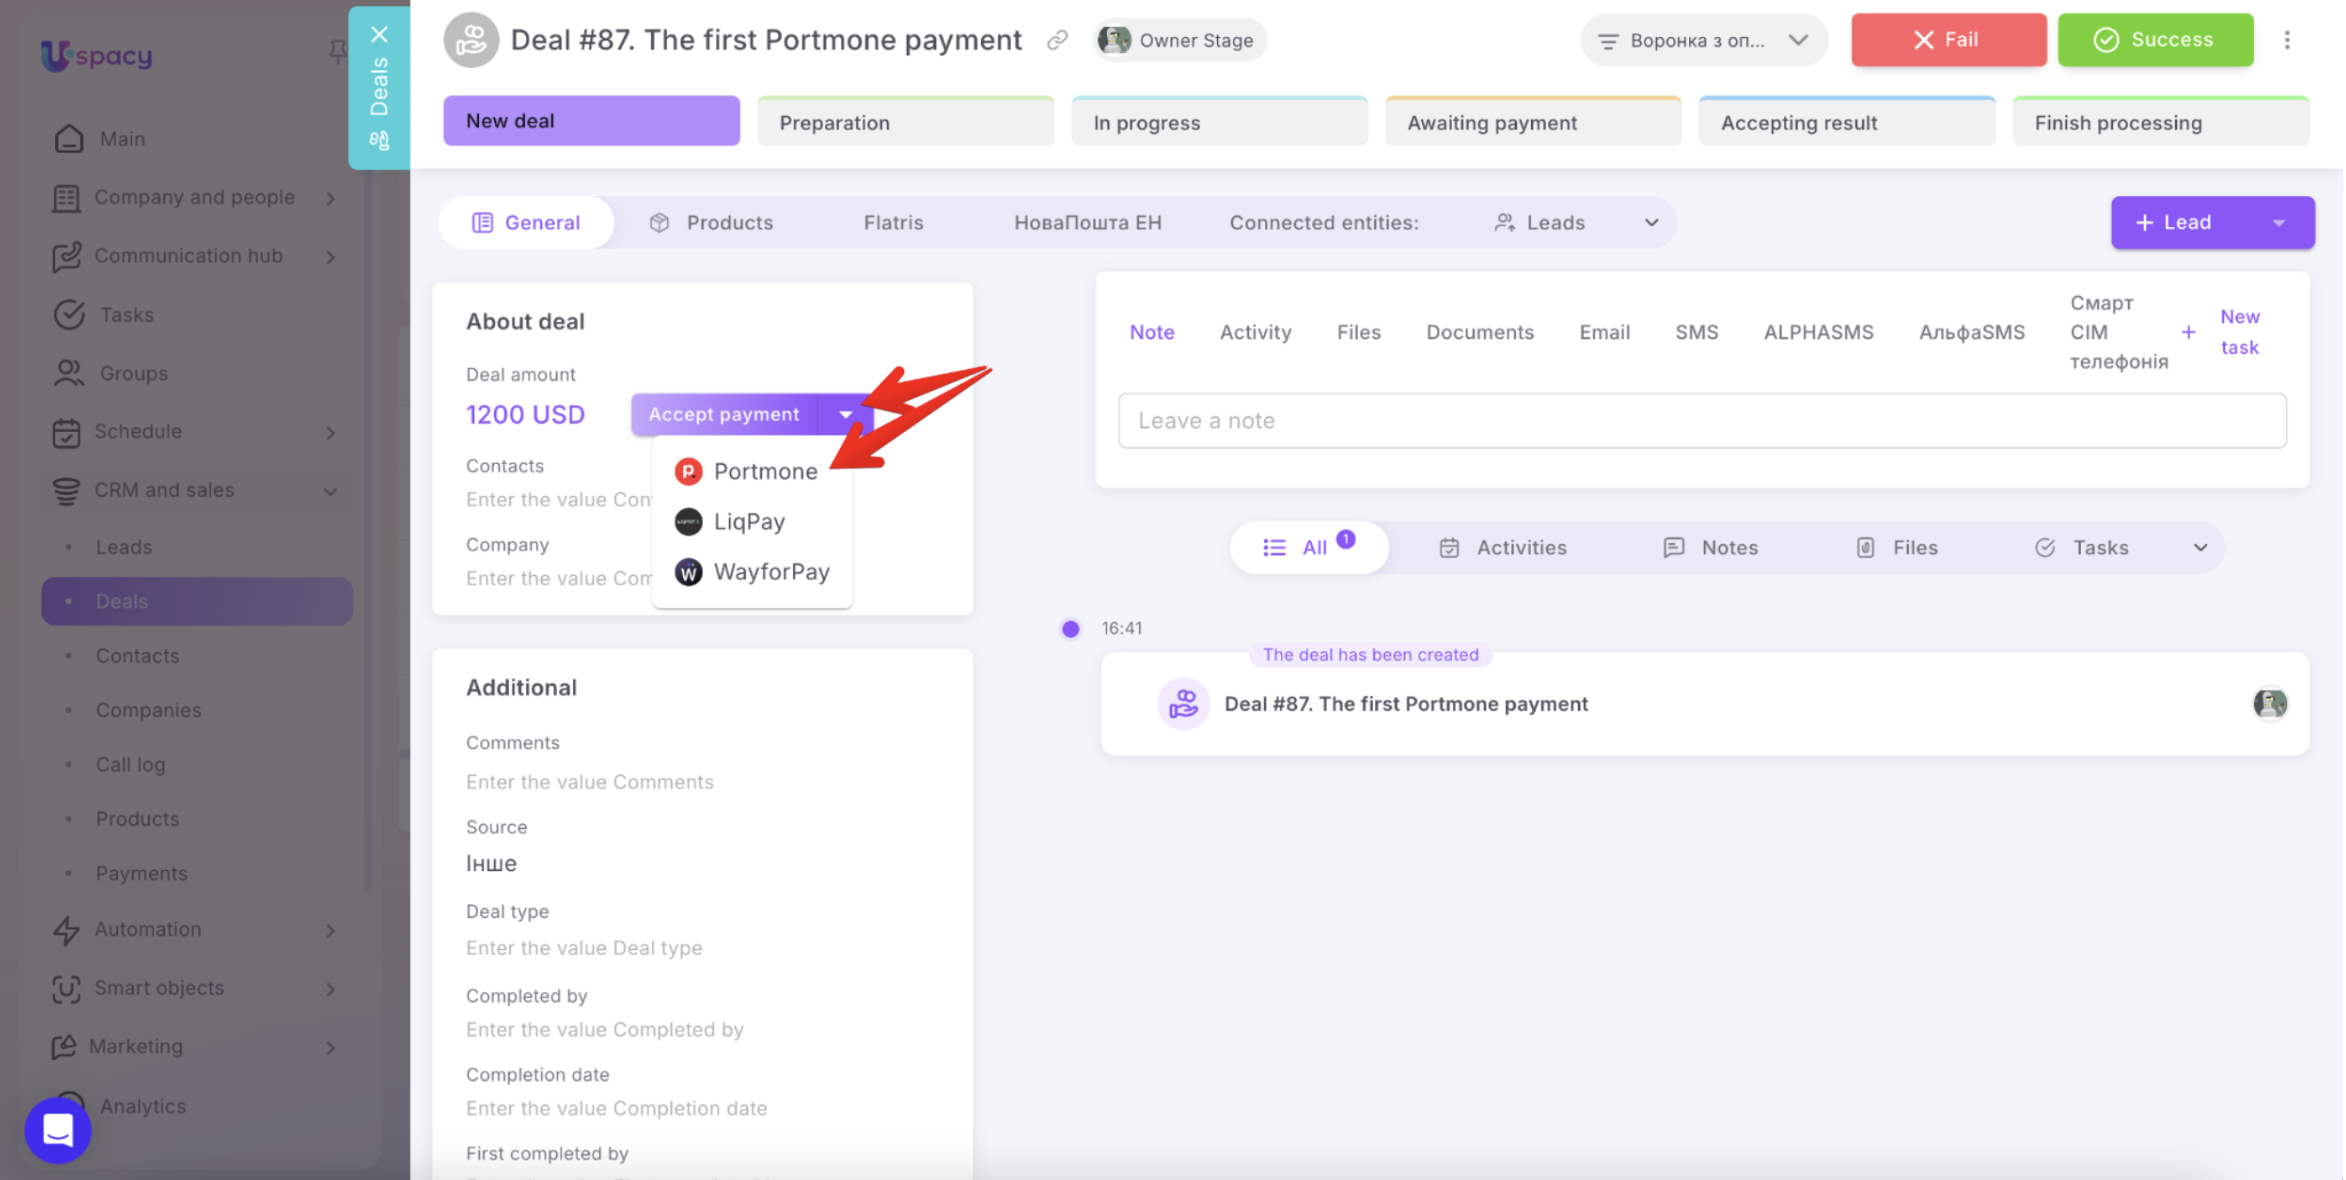
However, the deal amount alone is not enough to create a payment. Payments in Uspacy are generated based on products, so the record must contain at least one product. If no products have been added, Uspacy will notify you that the payment preparation failed.
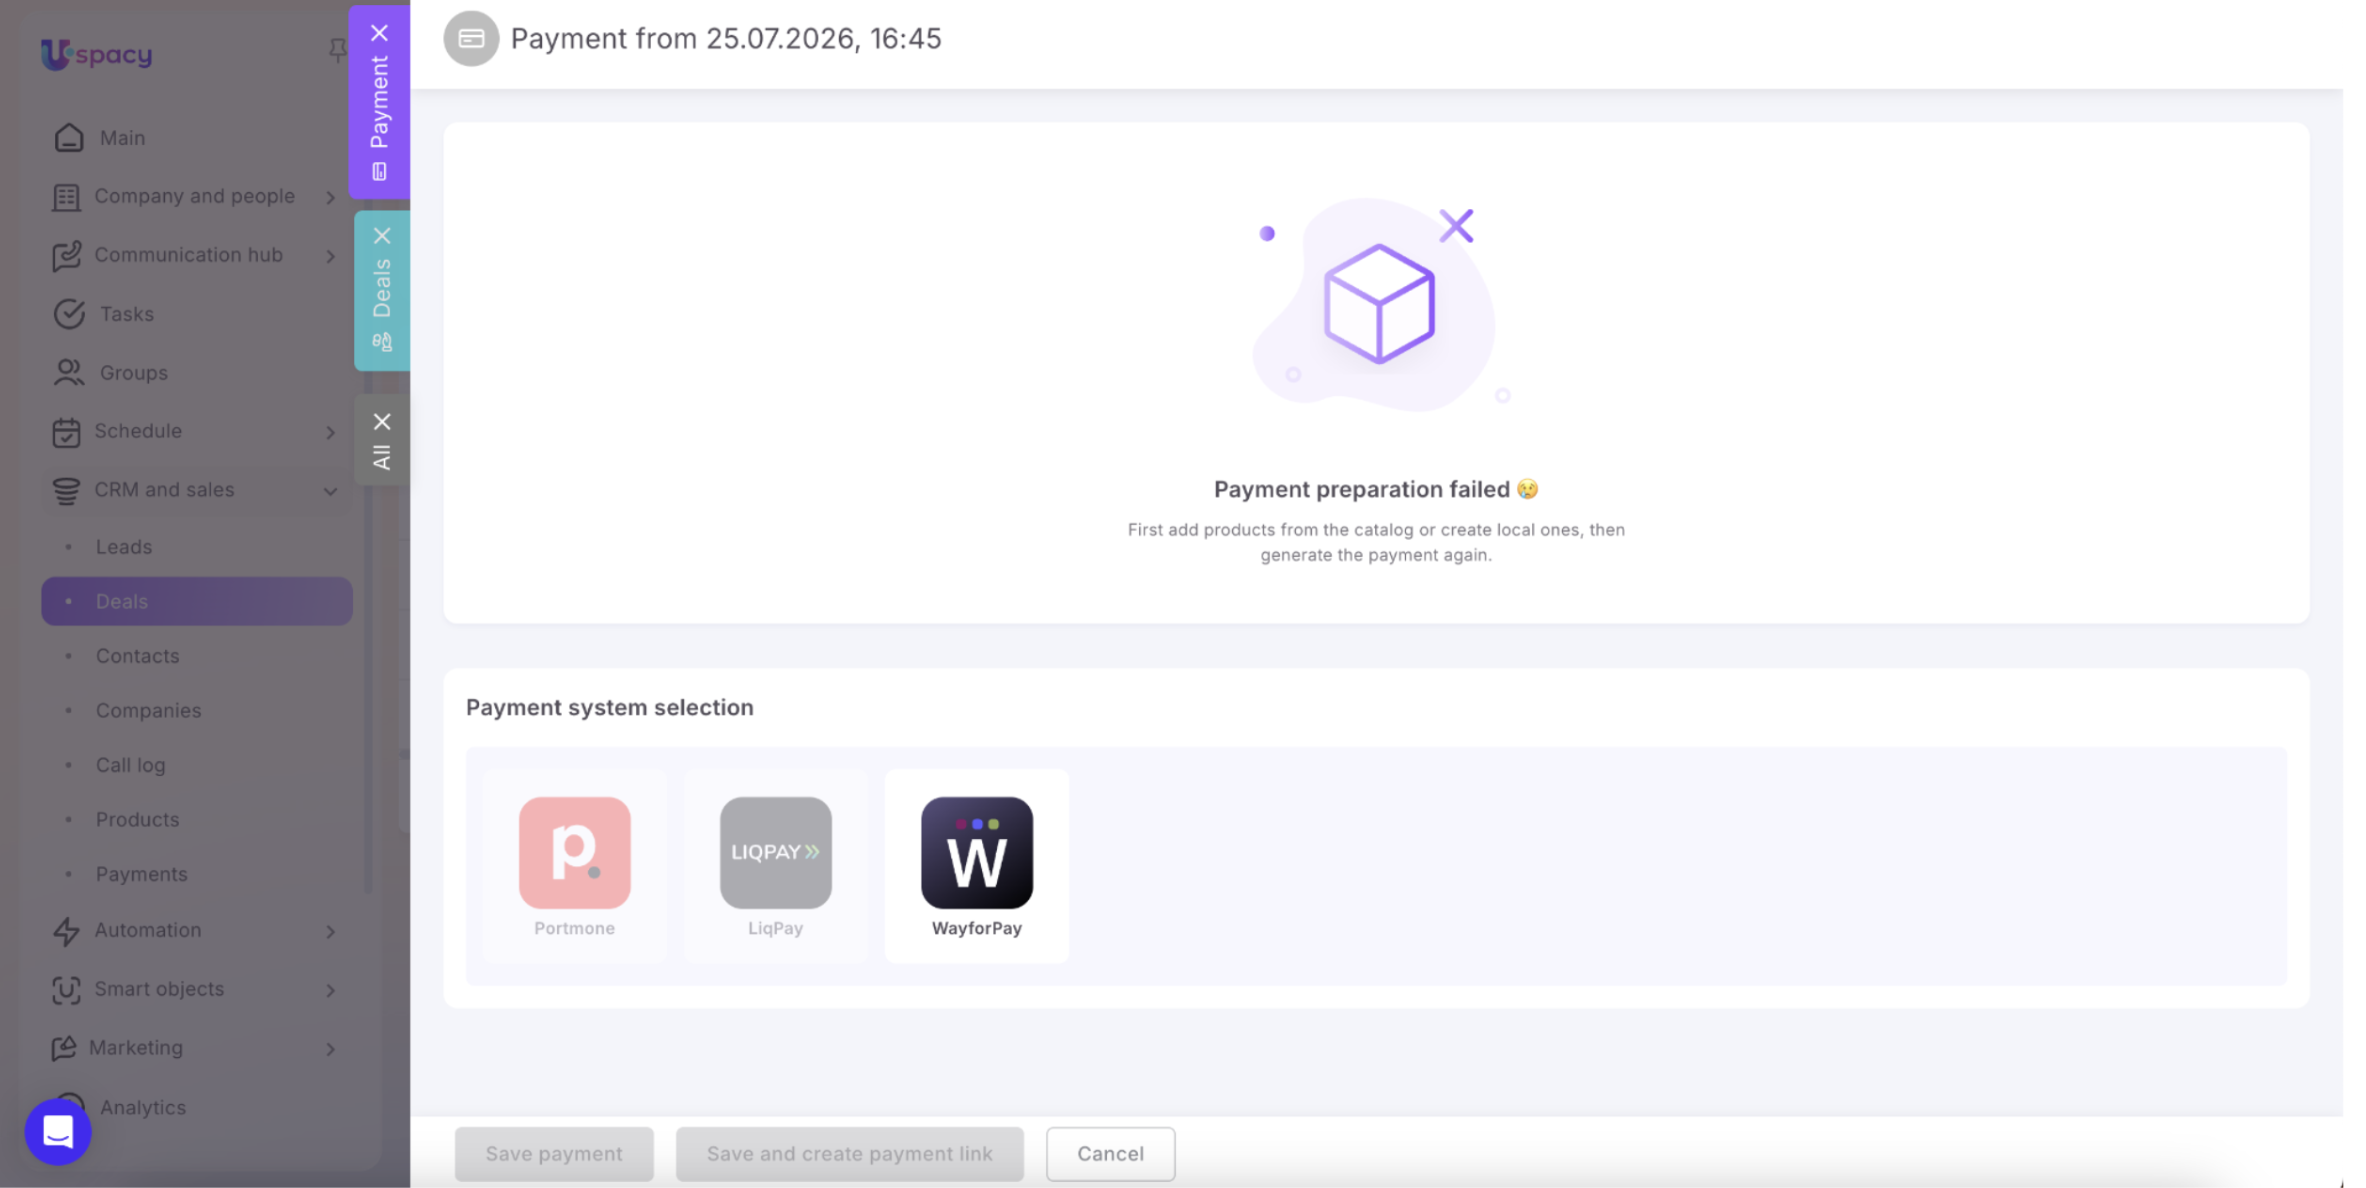
Go to the Products tab and select one of the following options:
- Add an existing product from the catalog.
- Select multiple products from the catalog.
- Create a local product without adding it to the shared catalog.
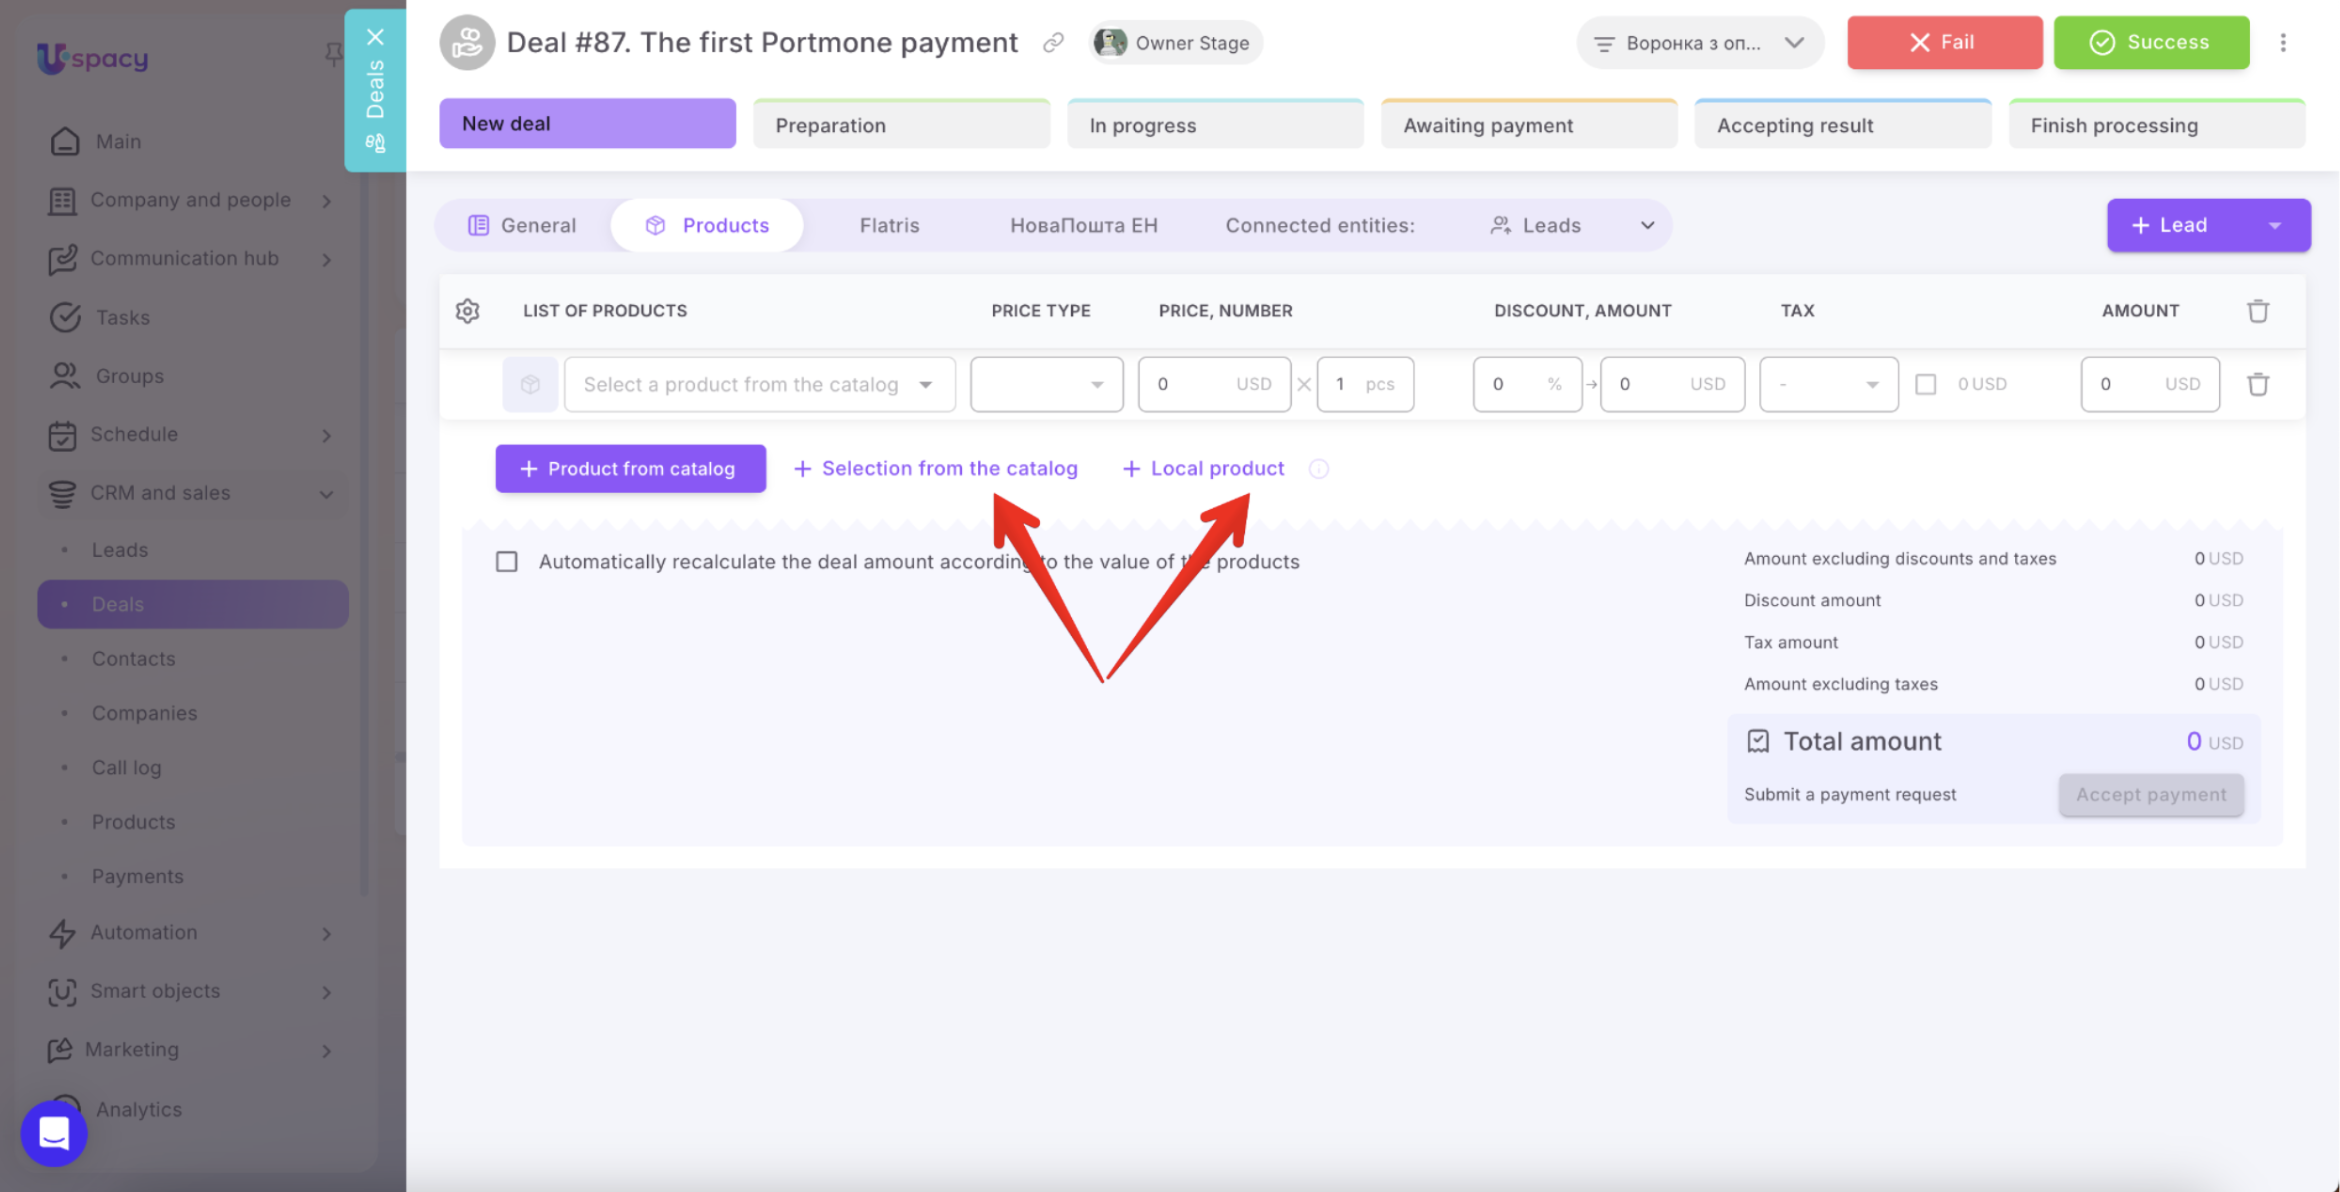
💡 A local product is ideal for one-time goods or services that don't need to be added to the Workspace's shared product catalog.
After adding the products, click Accept payment again and select Portmone.
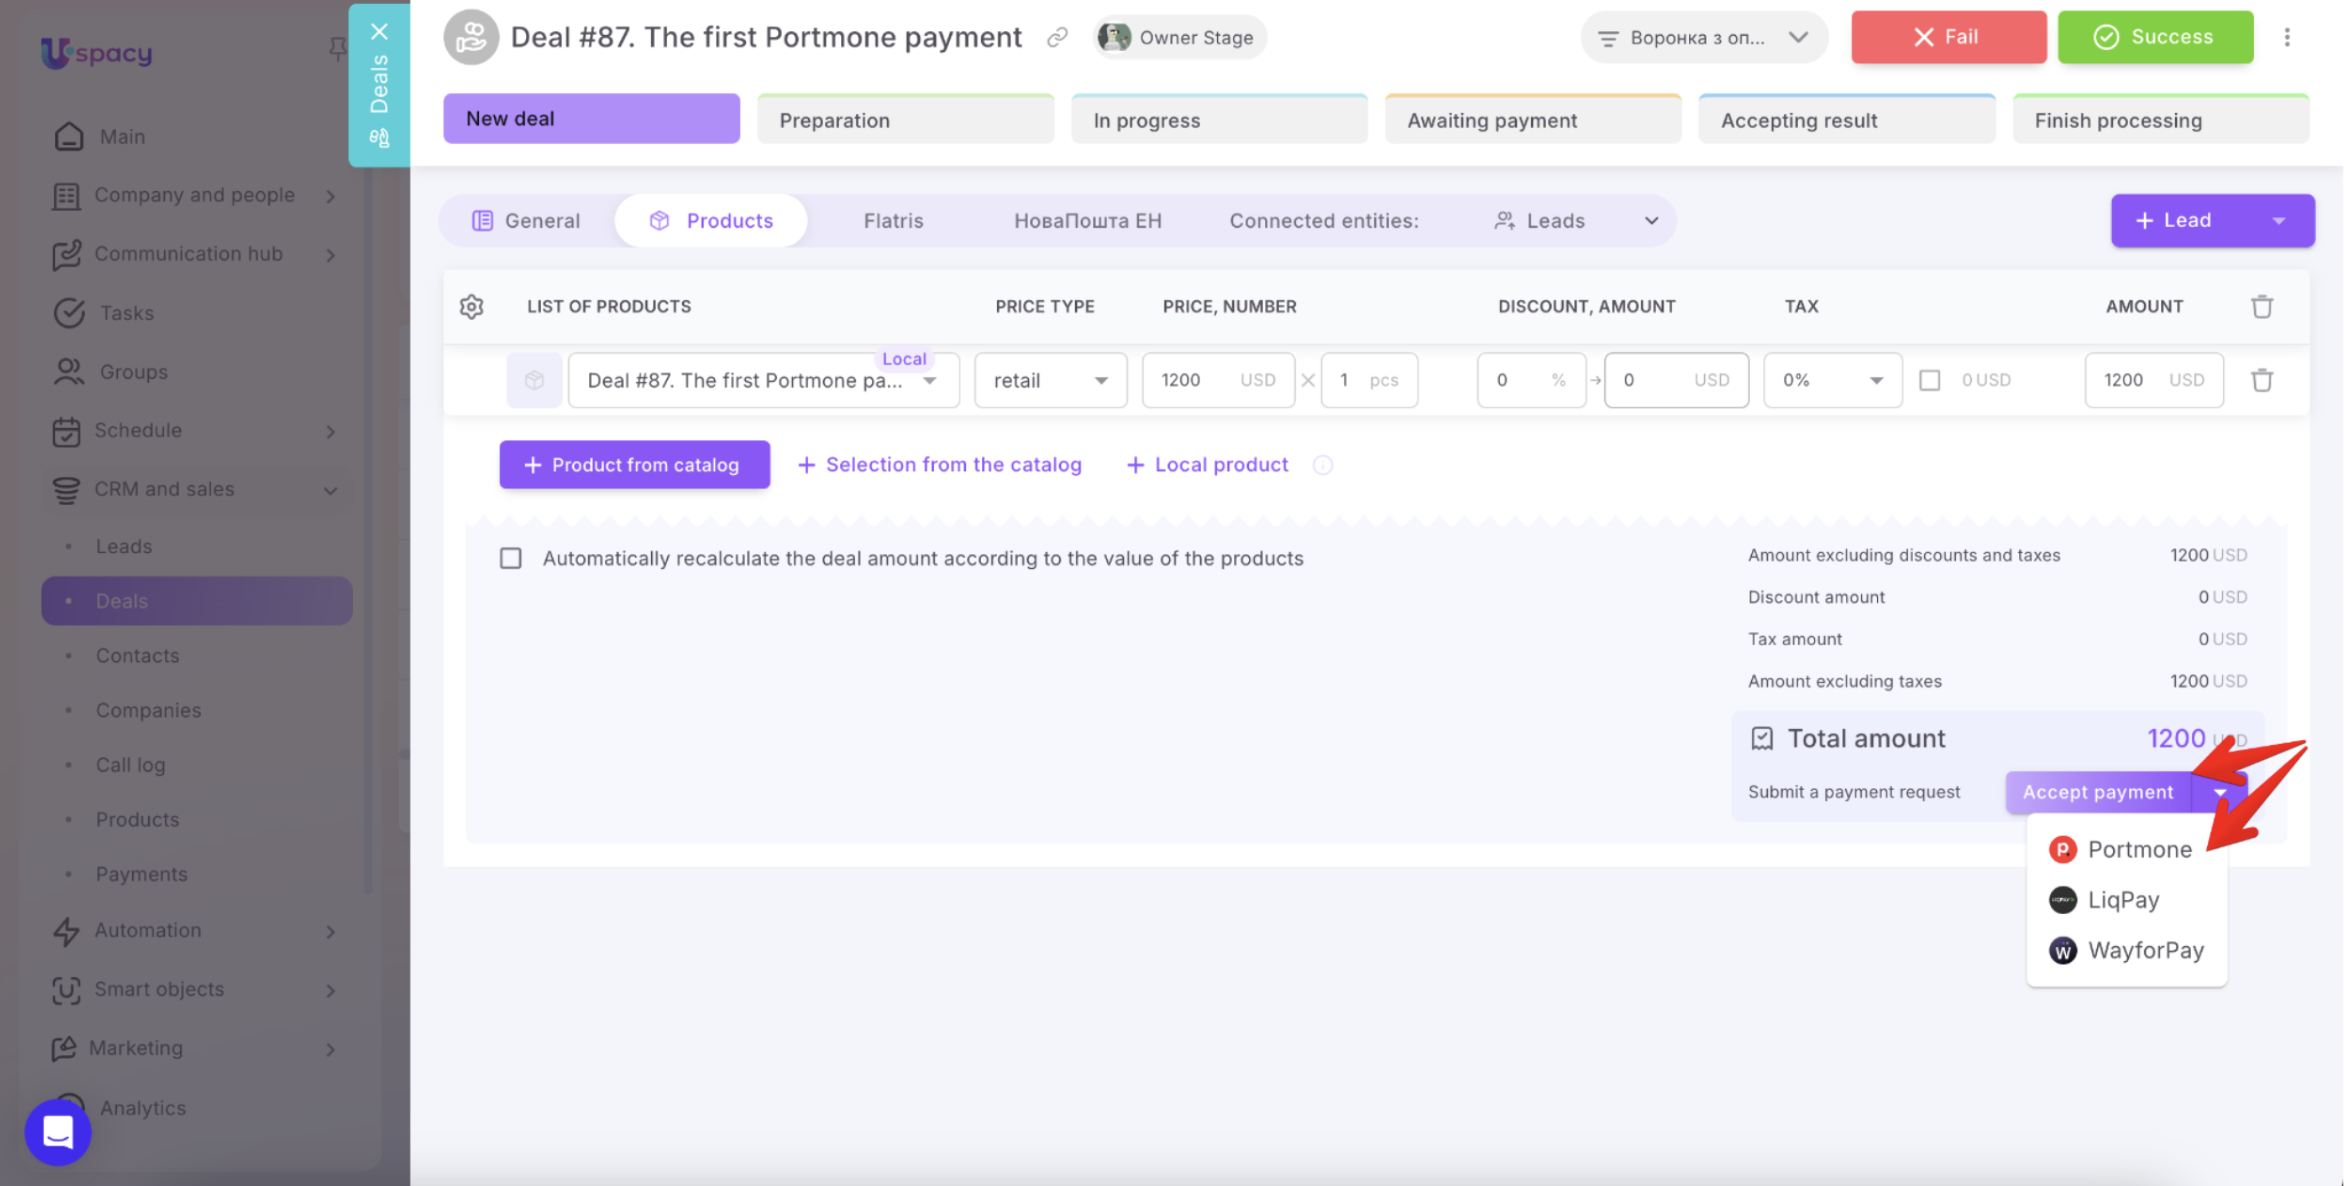
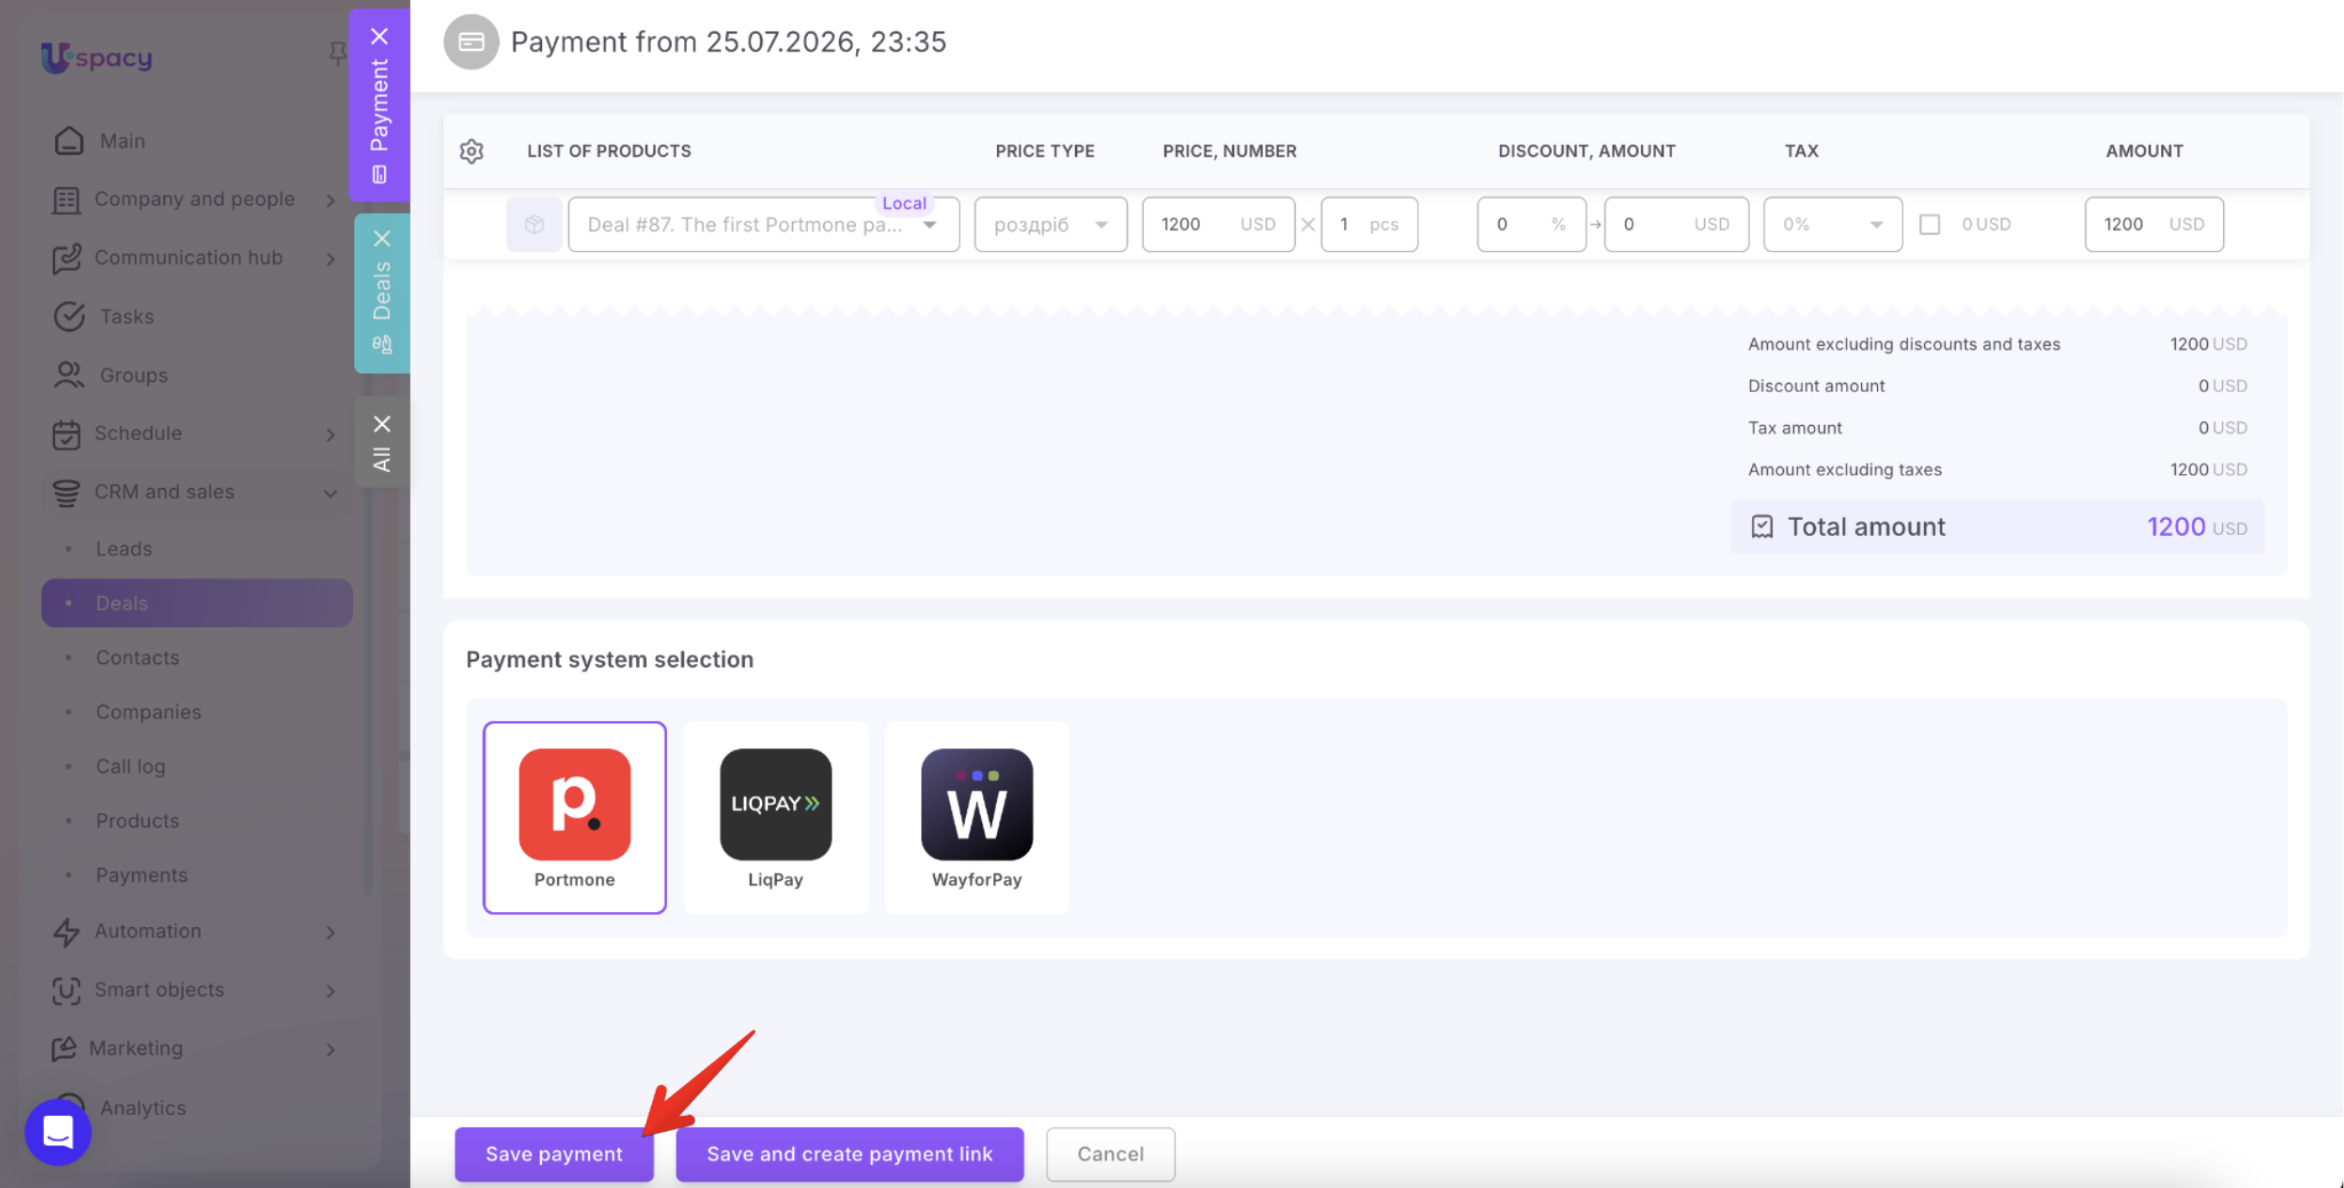
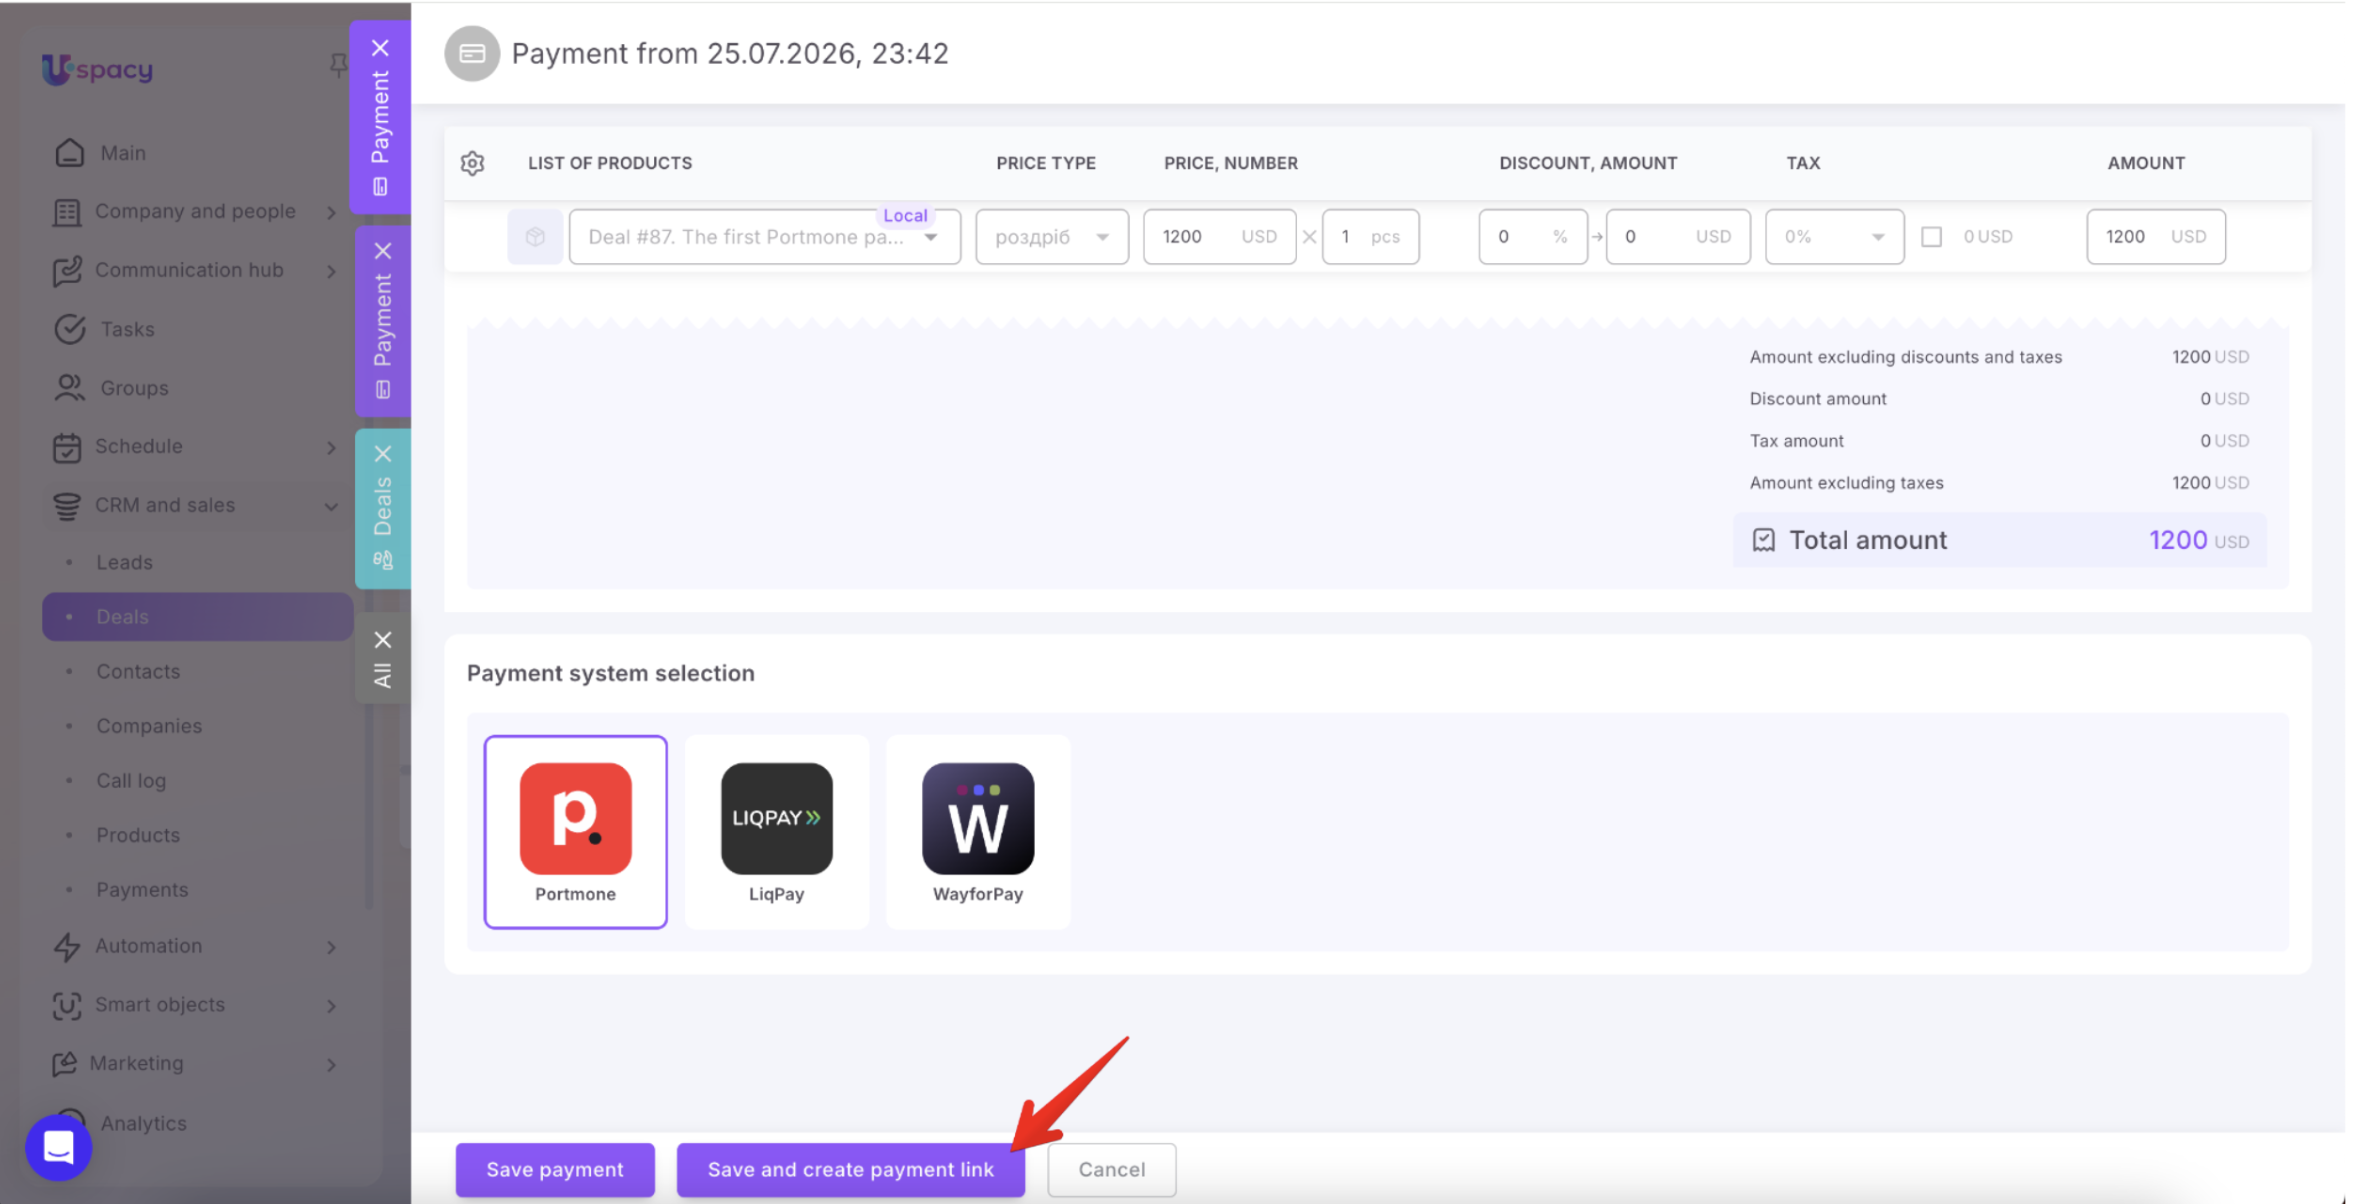
The page for creating a payment will open. At this point, you have two options.
🟣Save payment. The payment is created in Uspacy with the Draft status. A payment link is not generated at this stage, so the client cannot complete the payment yet.
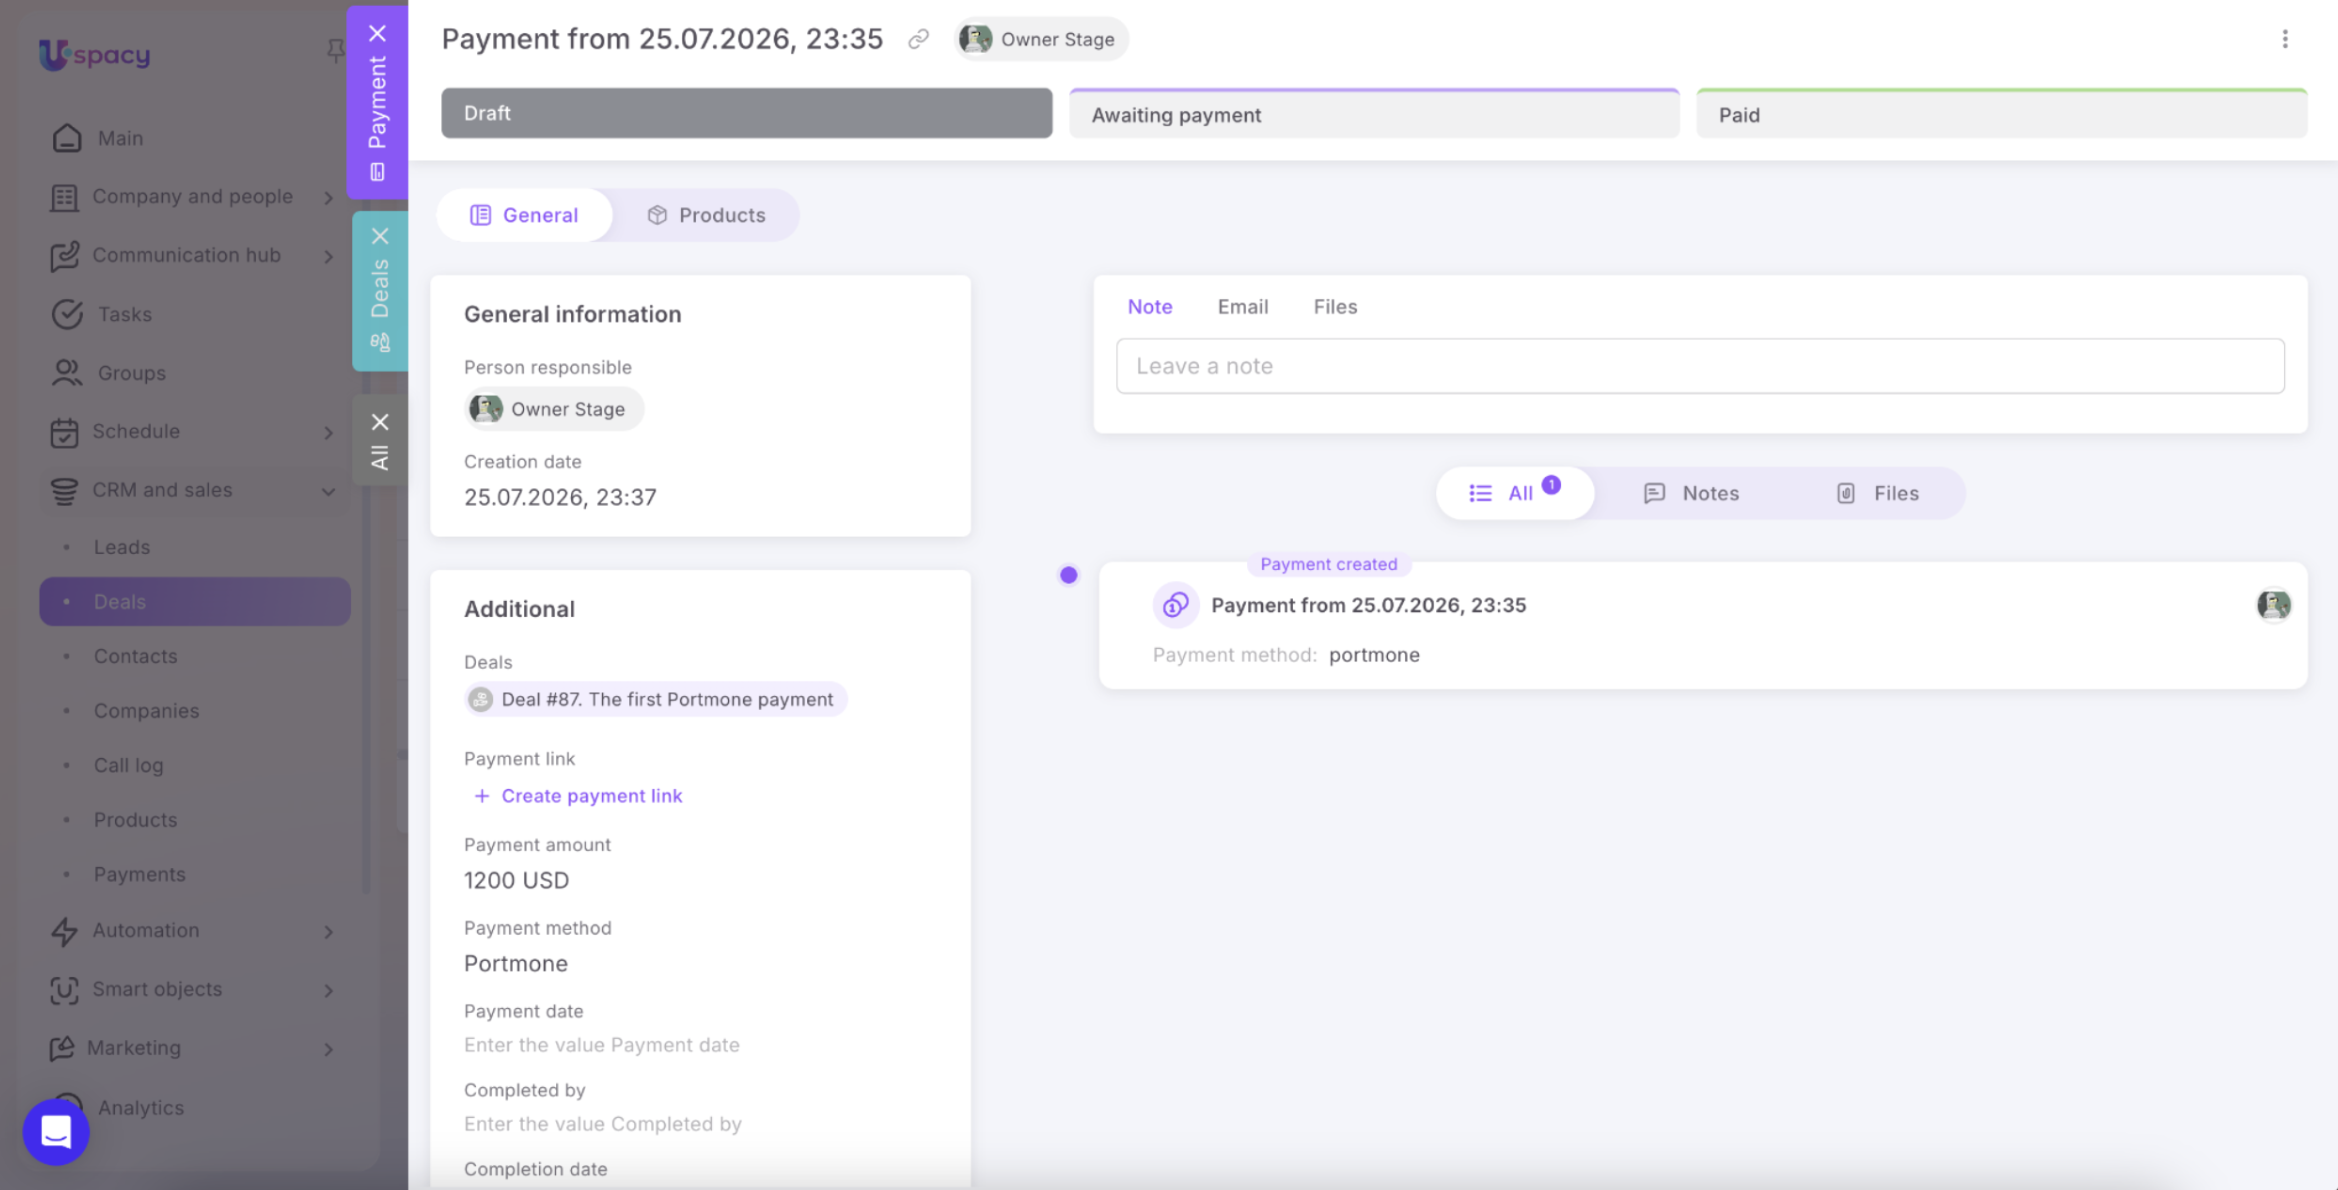
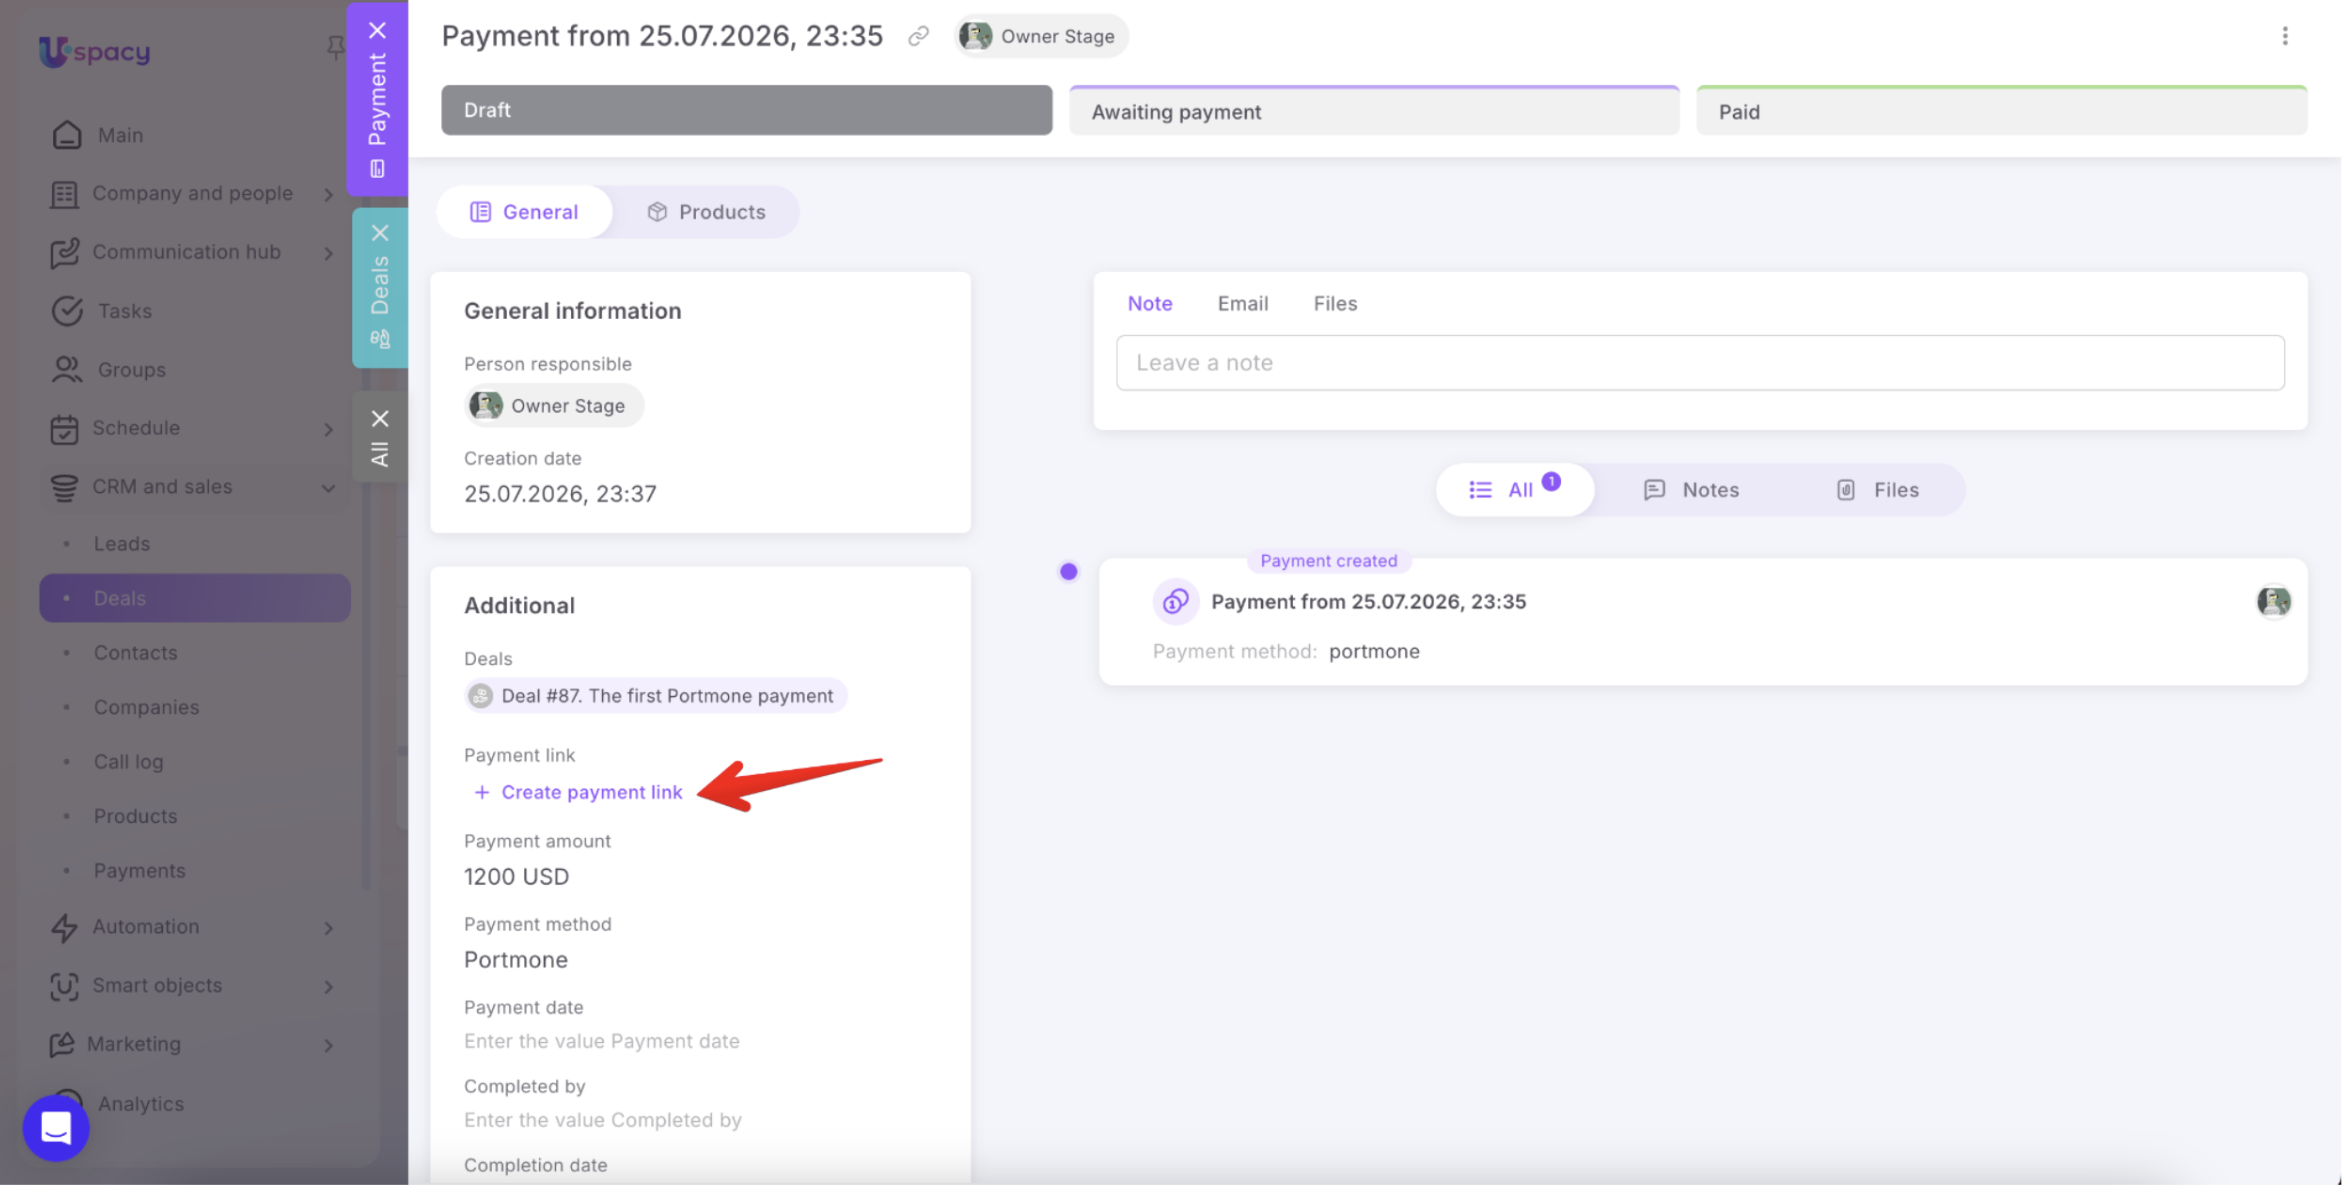
At this stage, no payment link is generated, so the client cannot make a payment yet. After reviewing the payment details, open the payment record and click Create payment link.
After the payment link is successfully generated, the payment status changes from Draft to Awaiting payment, and the link is added to both the payment record and the activity feed. From that moment, the payment link remains valid for the period specified in the integration settings.
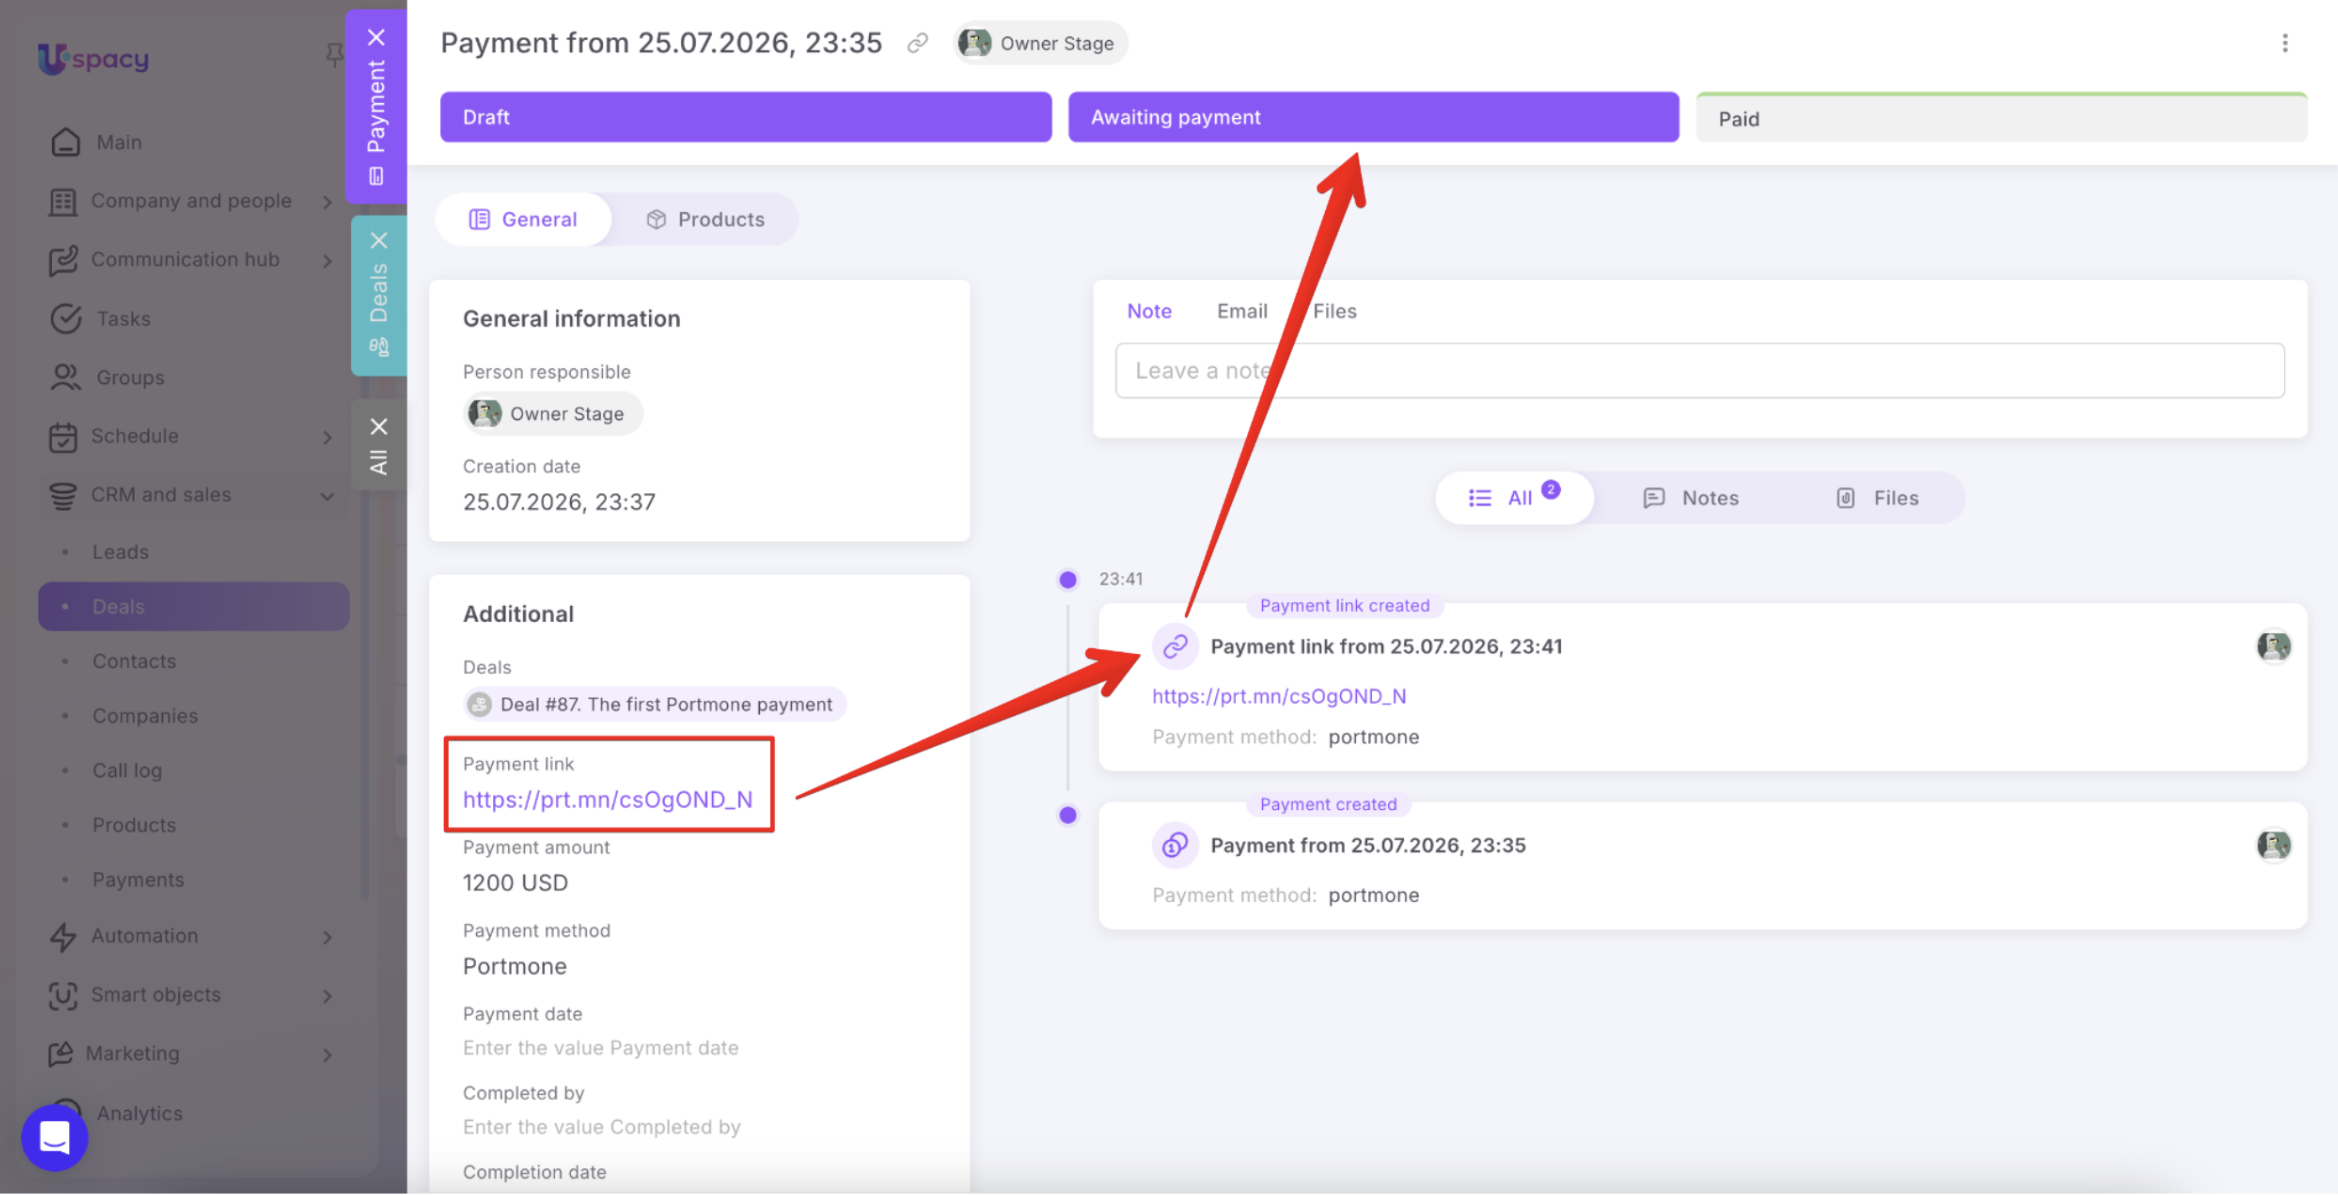
Copy the payment link and send it to your client via any preferred communication channel.
At the same time, if all the payment details have already been verified and you're ready to send the payment request to the client immediately, you can streamline the process by generating the payment link as part of the save action. This is exactly what the second option is designed for.
🟣 Save and create payment link. Uspacy saves the payment, requests a payment link from LiqPay, and immediately changes the payment status to Awaiting payment.
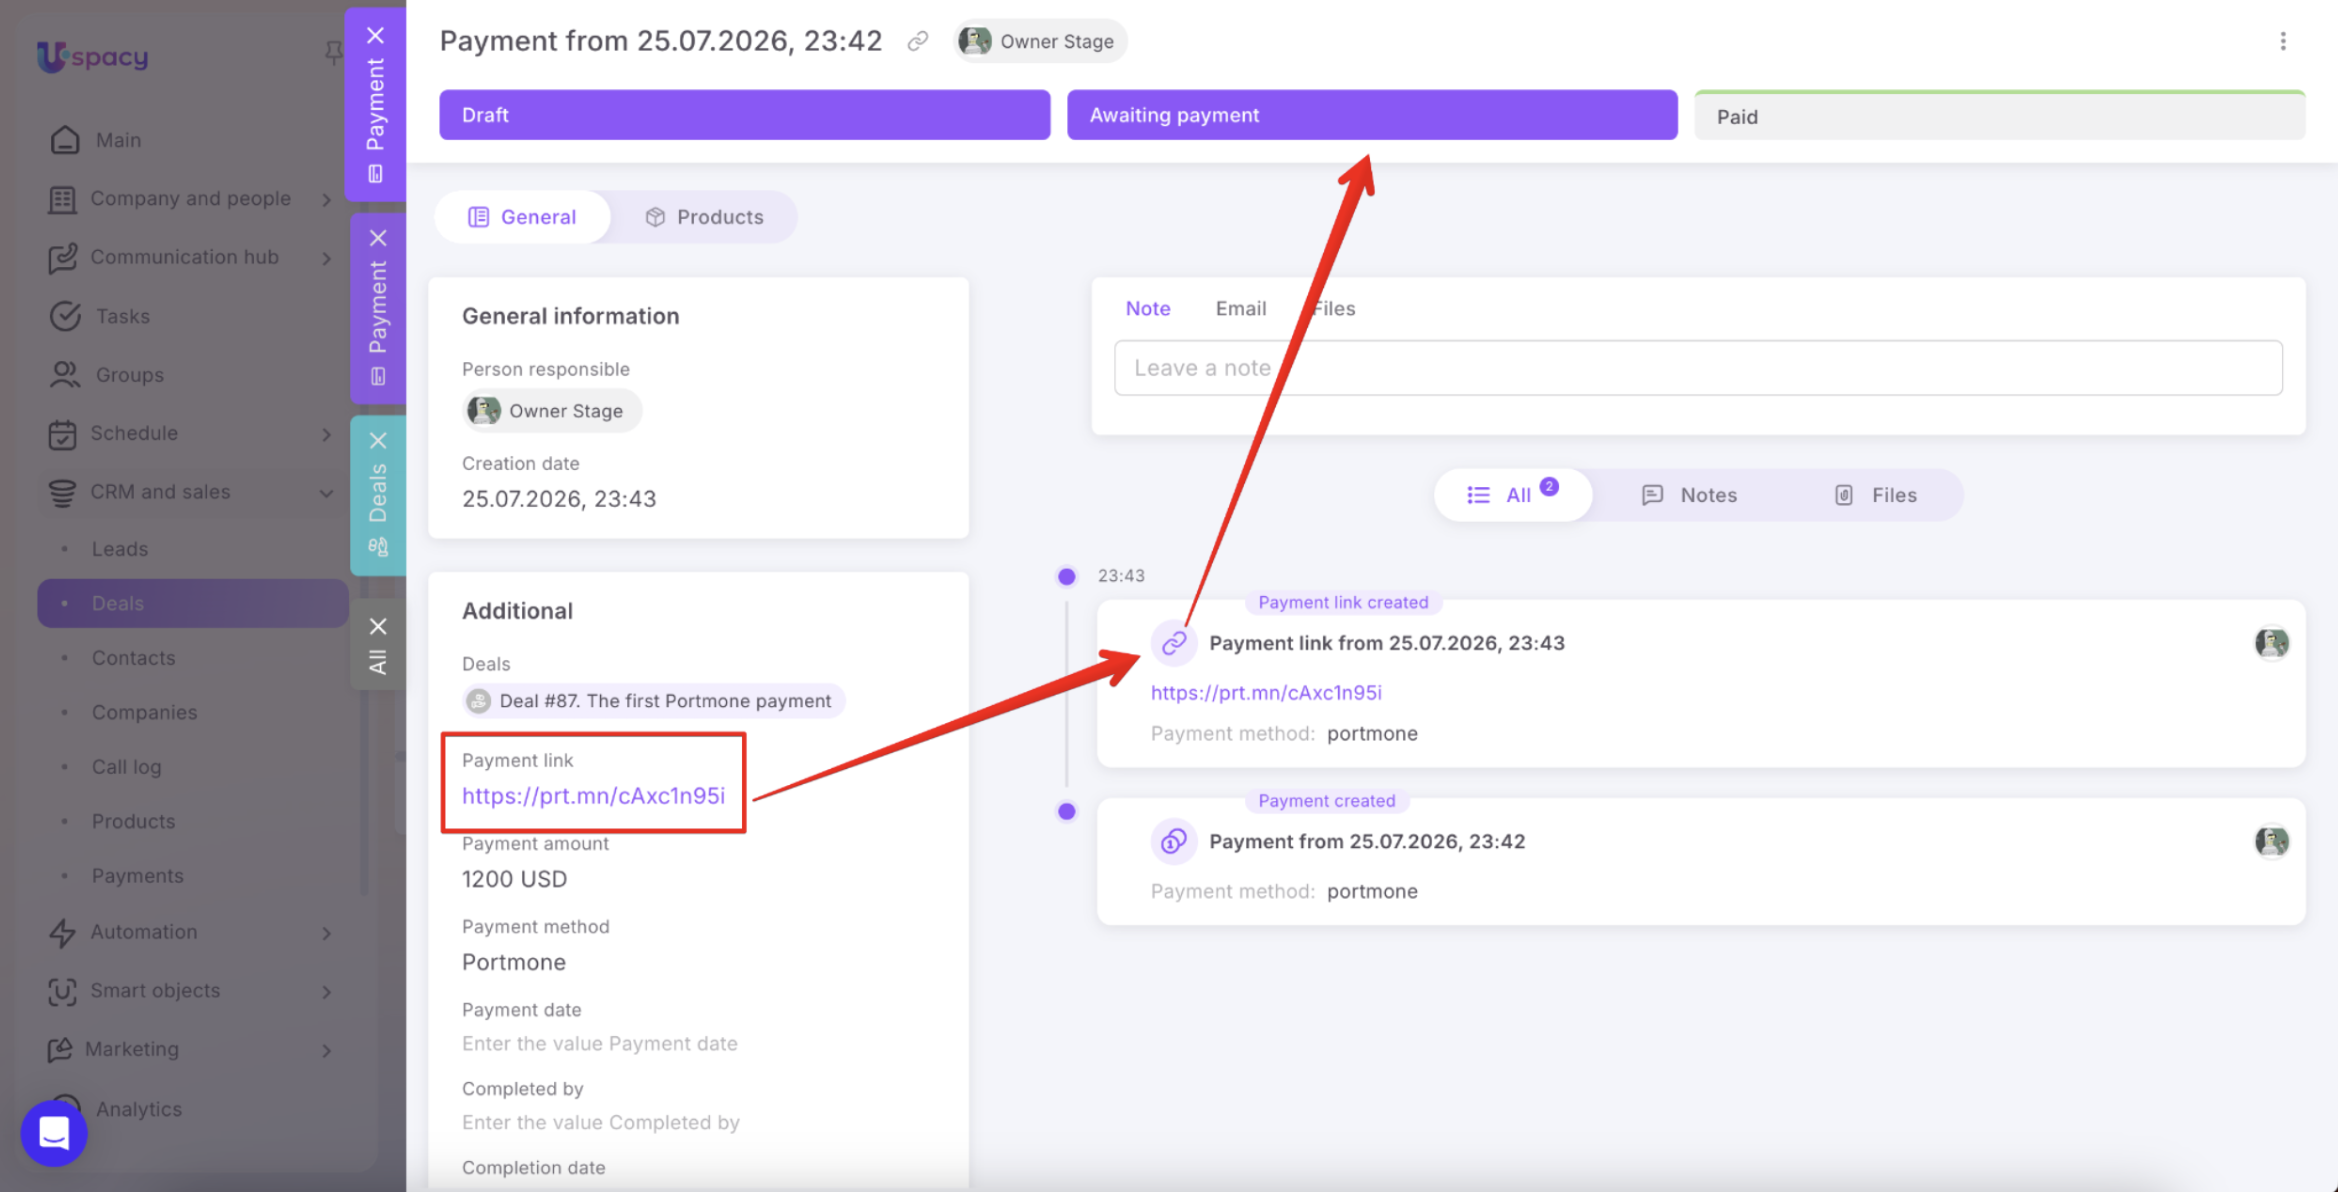
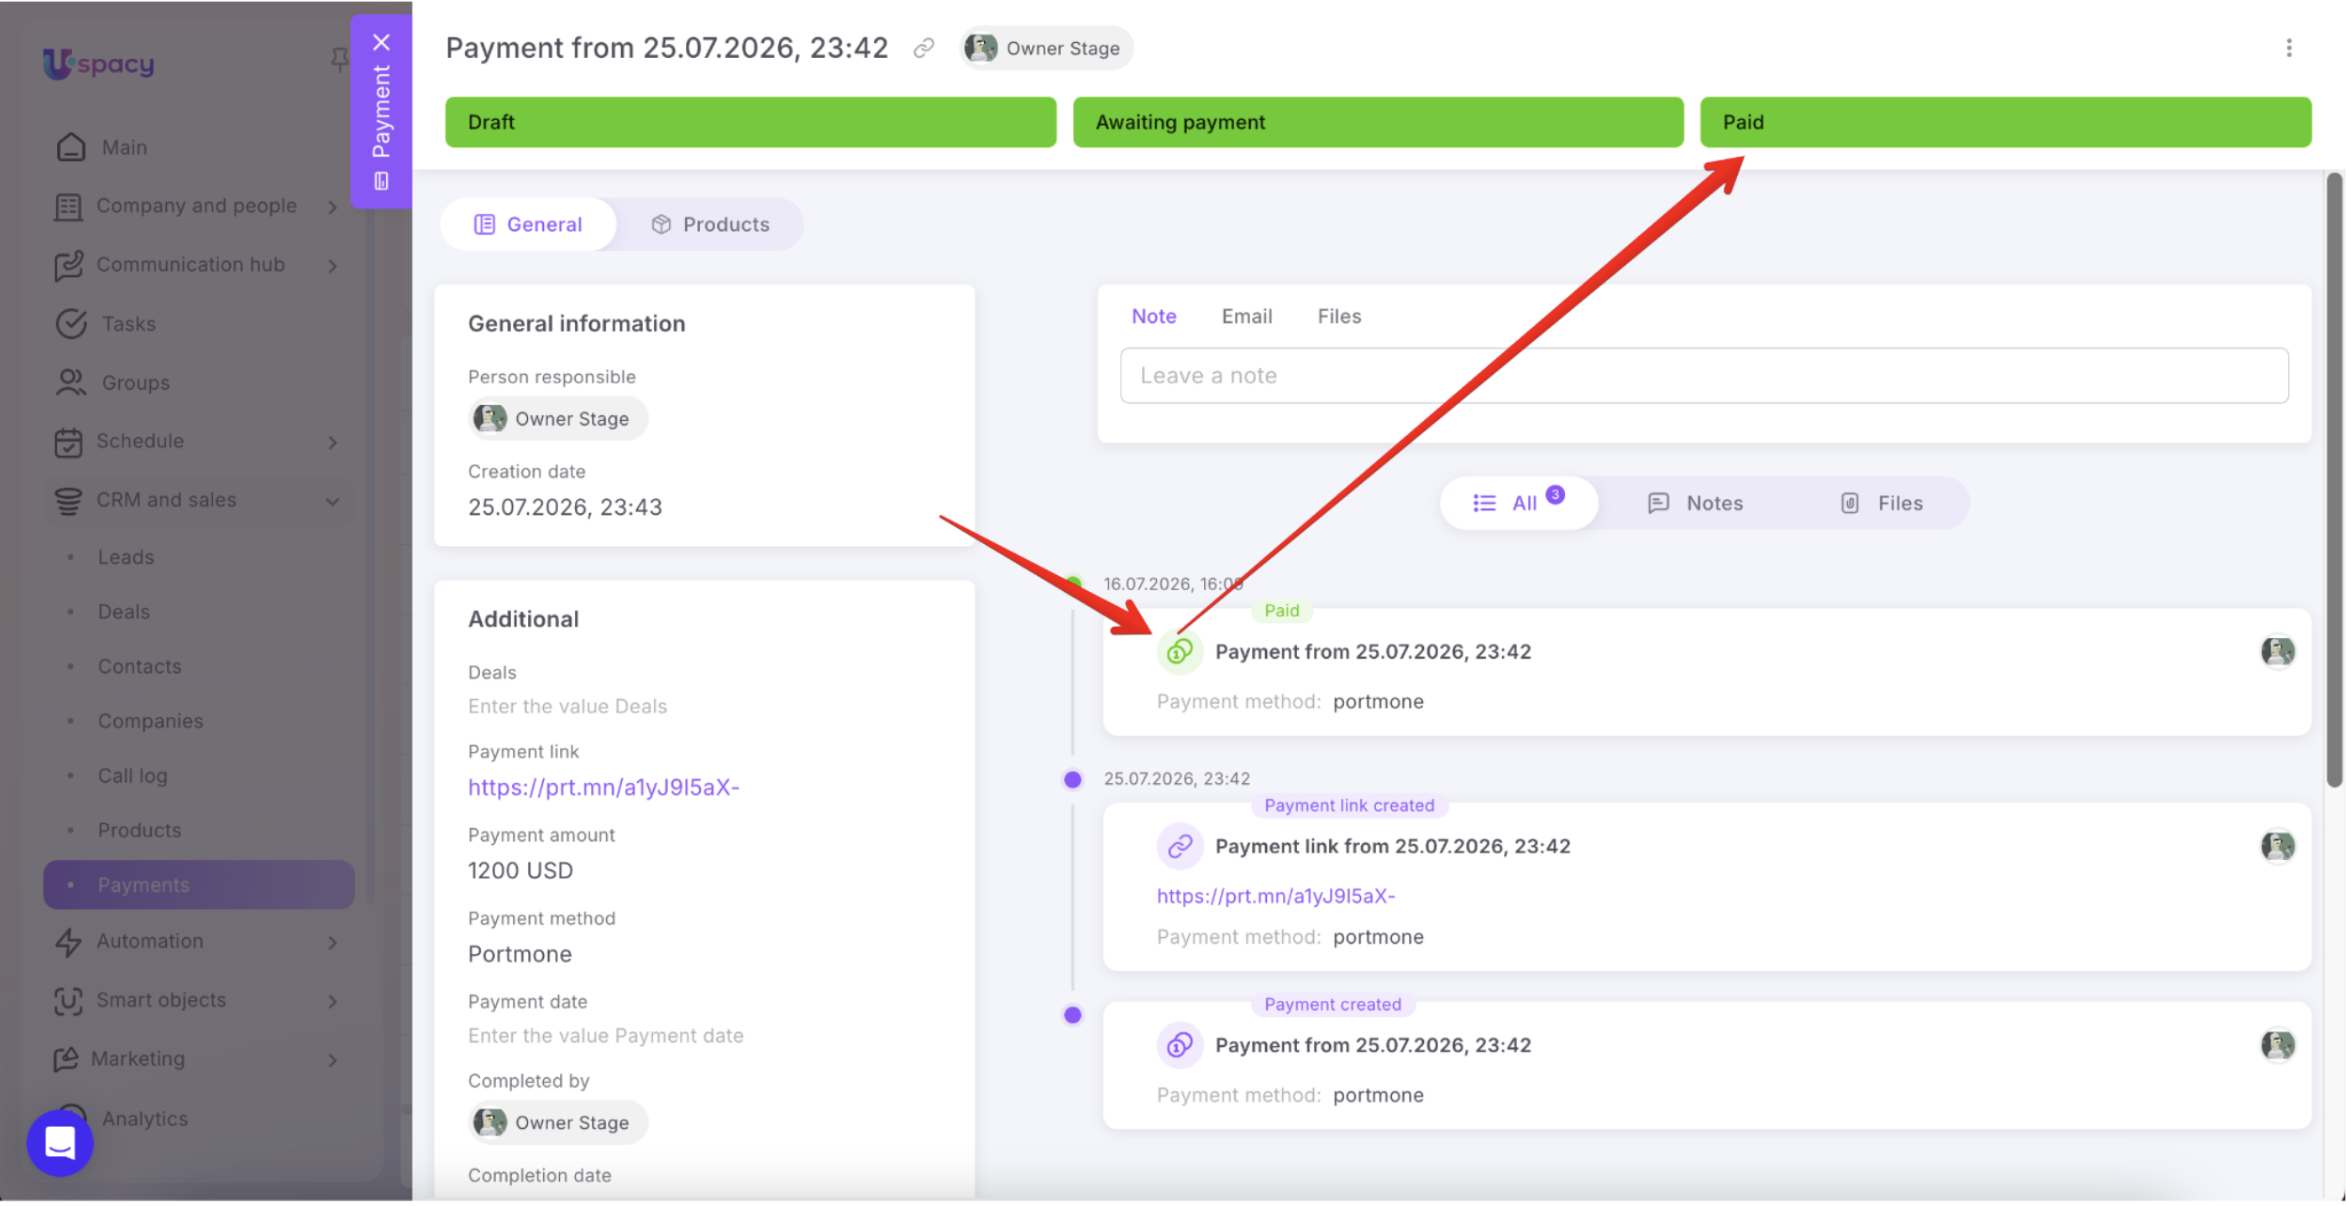
When the client opens the link and completes the payment successfully, Portmone sends the payment result back to Uspacy.
The payment status automatically changes to Paid. The payment record displays the payment date, and the activity history includes a corresponding system event.
If the payment link expires before the client completes the payment, the payment status changes to Canceled.
☝🏻 Important: You can delete a payment only while it is in the Draft status and before a payment link has been generated. Once a payment link has been created, the payment moves to Awaiting payment, and deletion is no longer available. Payments with the Paid or Canceled status also cannot be deleted because they represent completed payment outcomes.
Each payment record includes the following tabs:
- Note
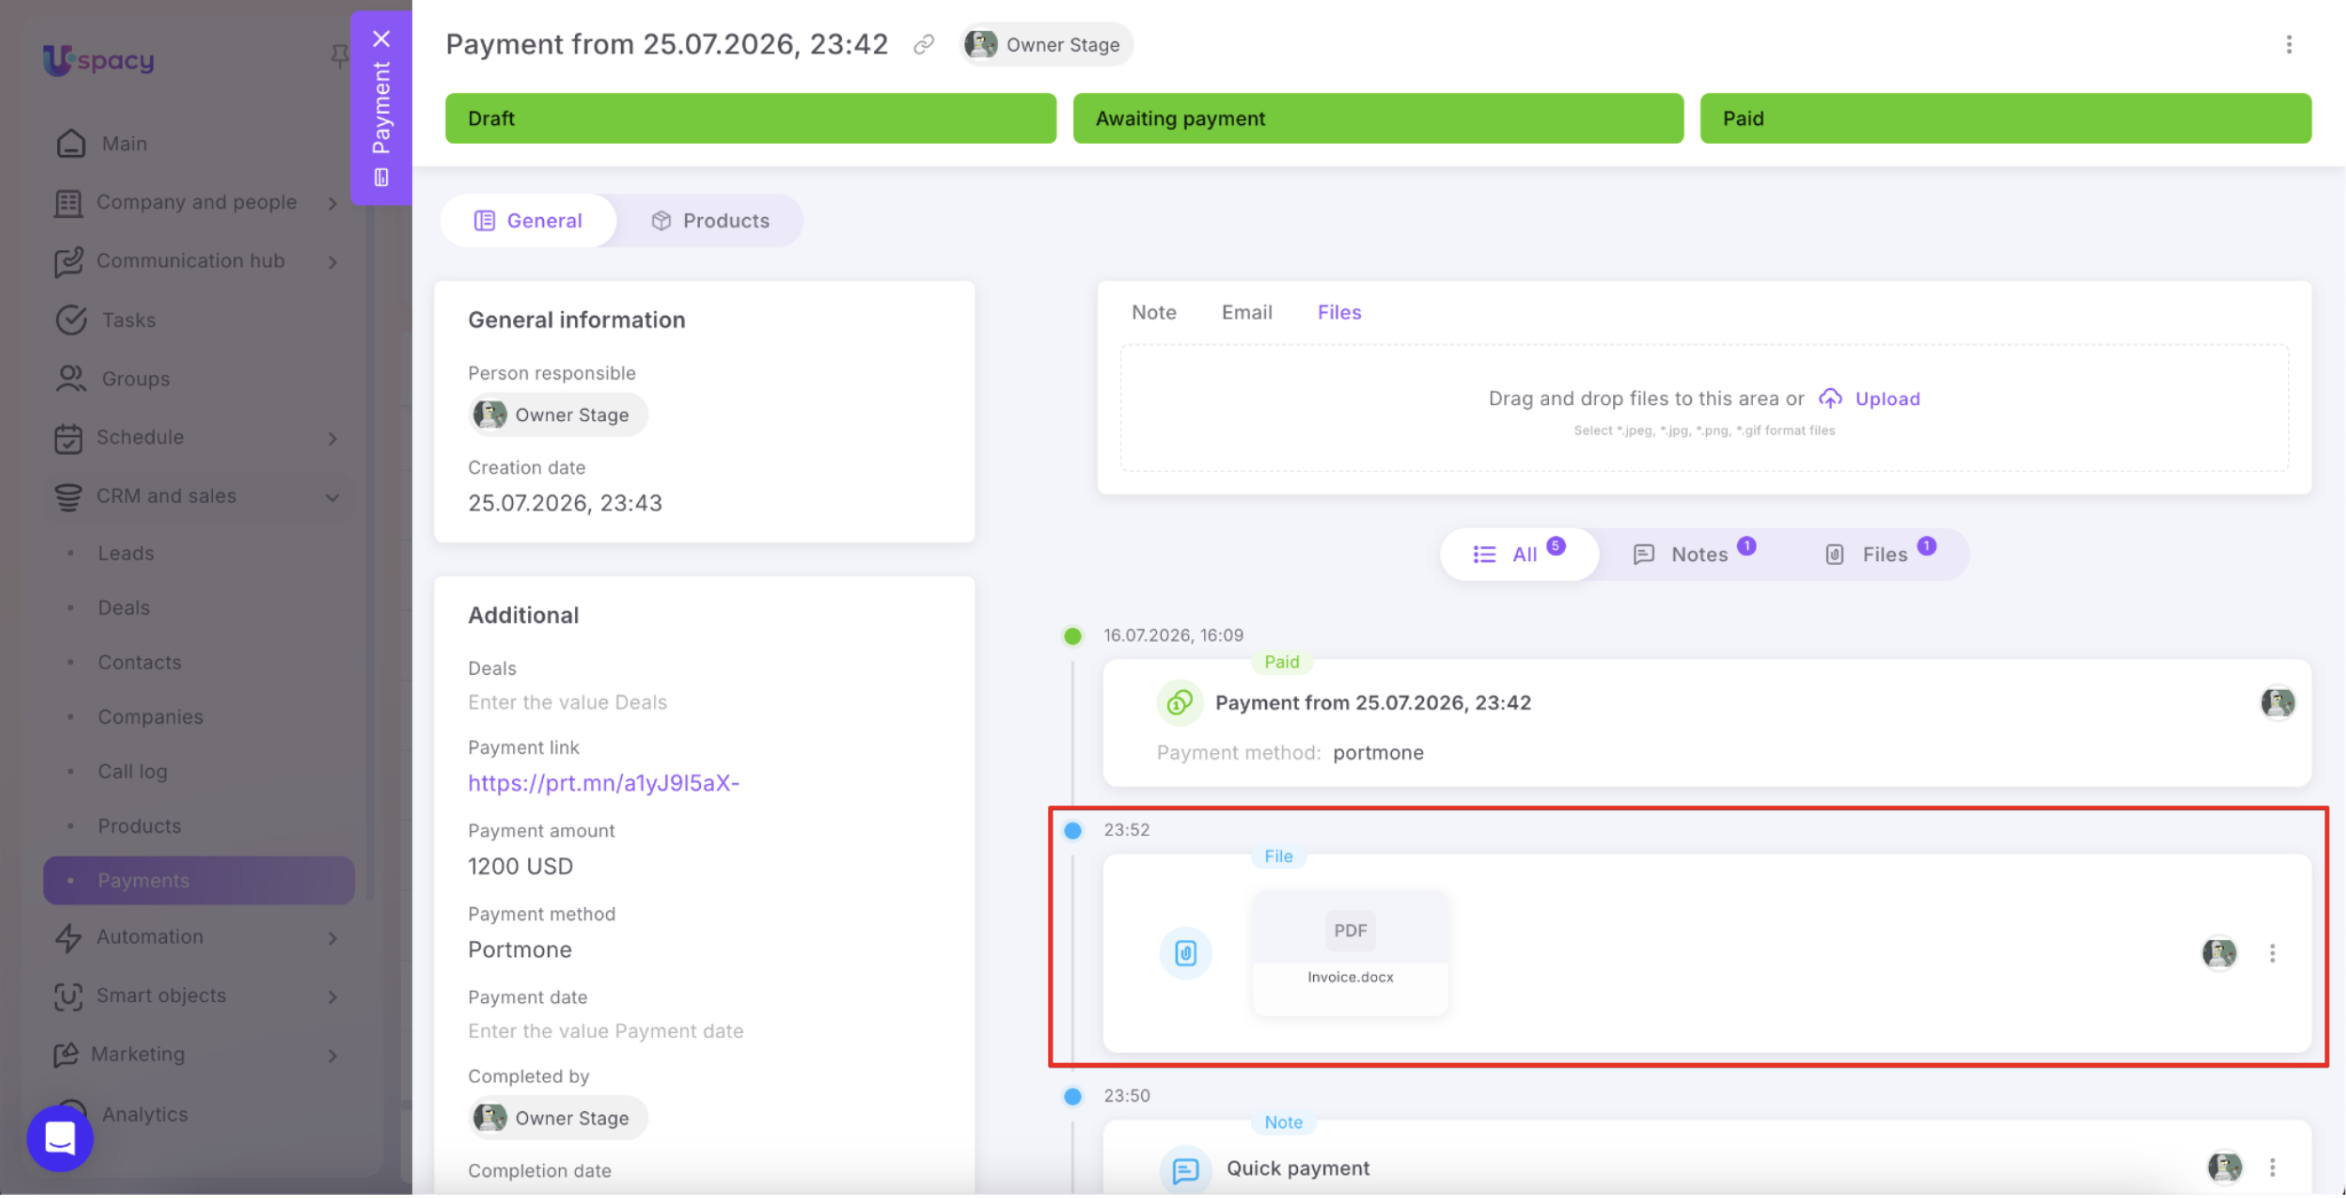
- Files
Use the Note tab to add internal comments, clarifications, or agreements related to the payment.
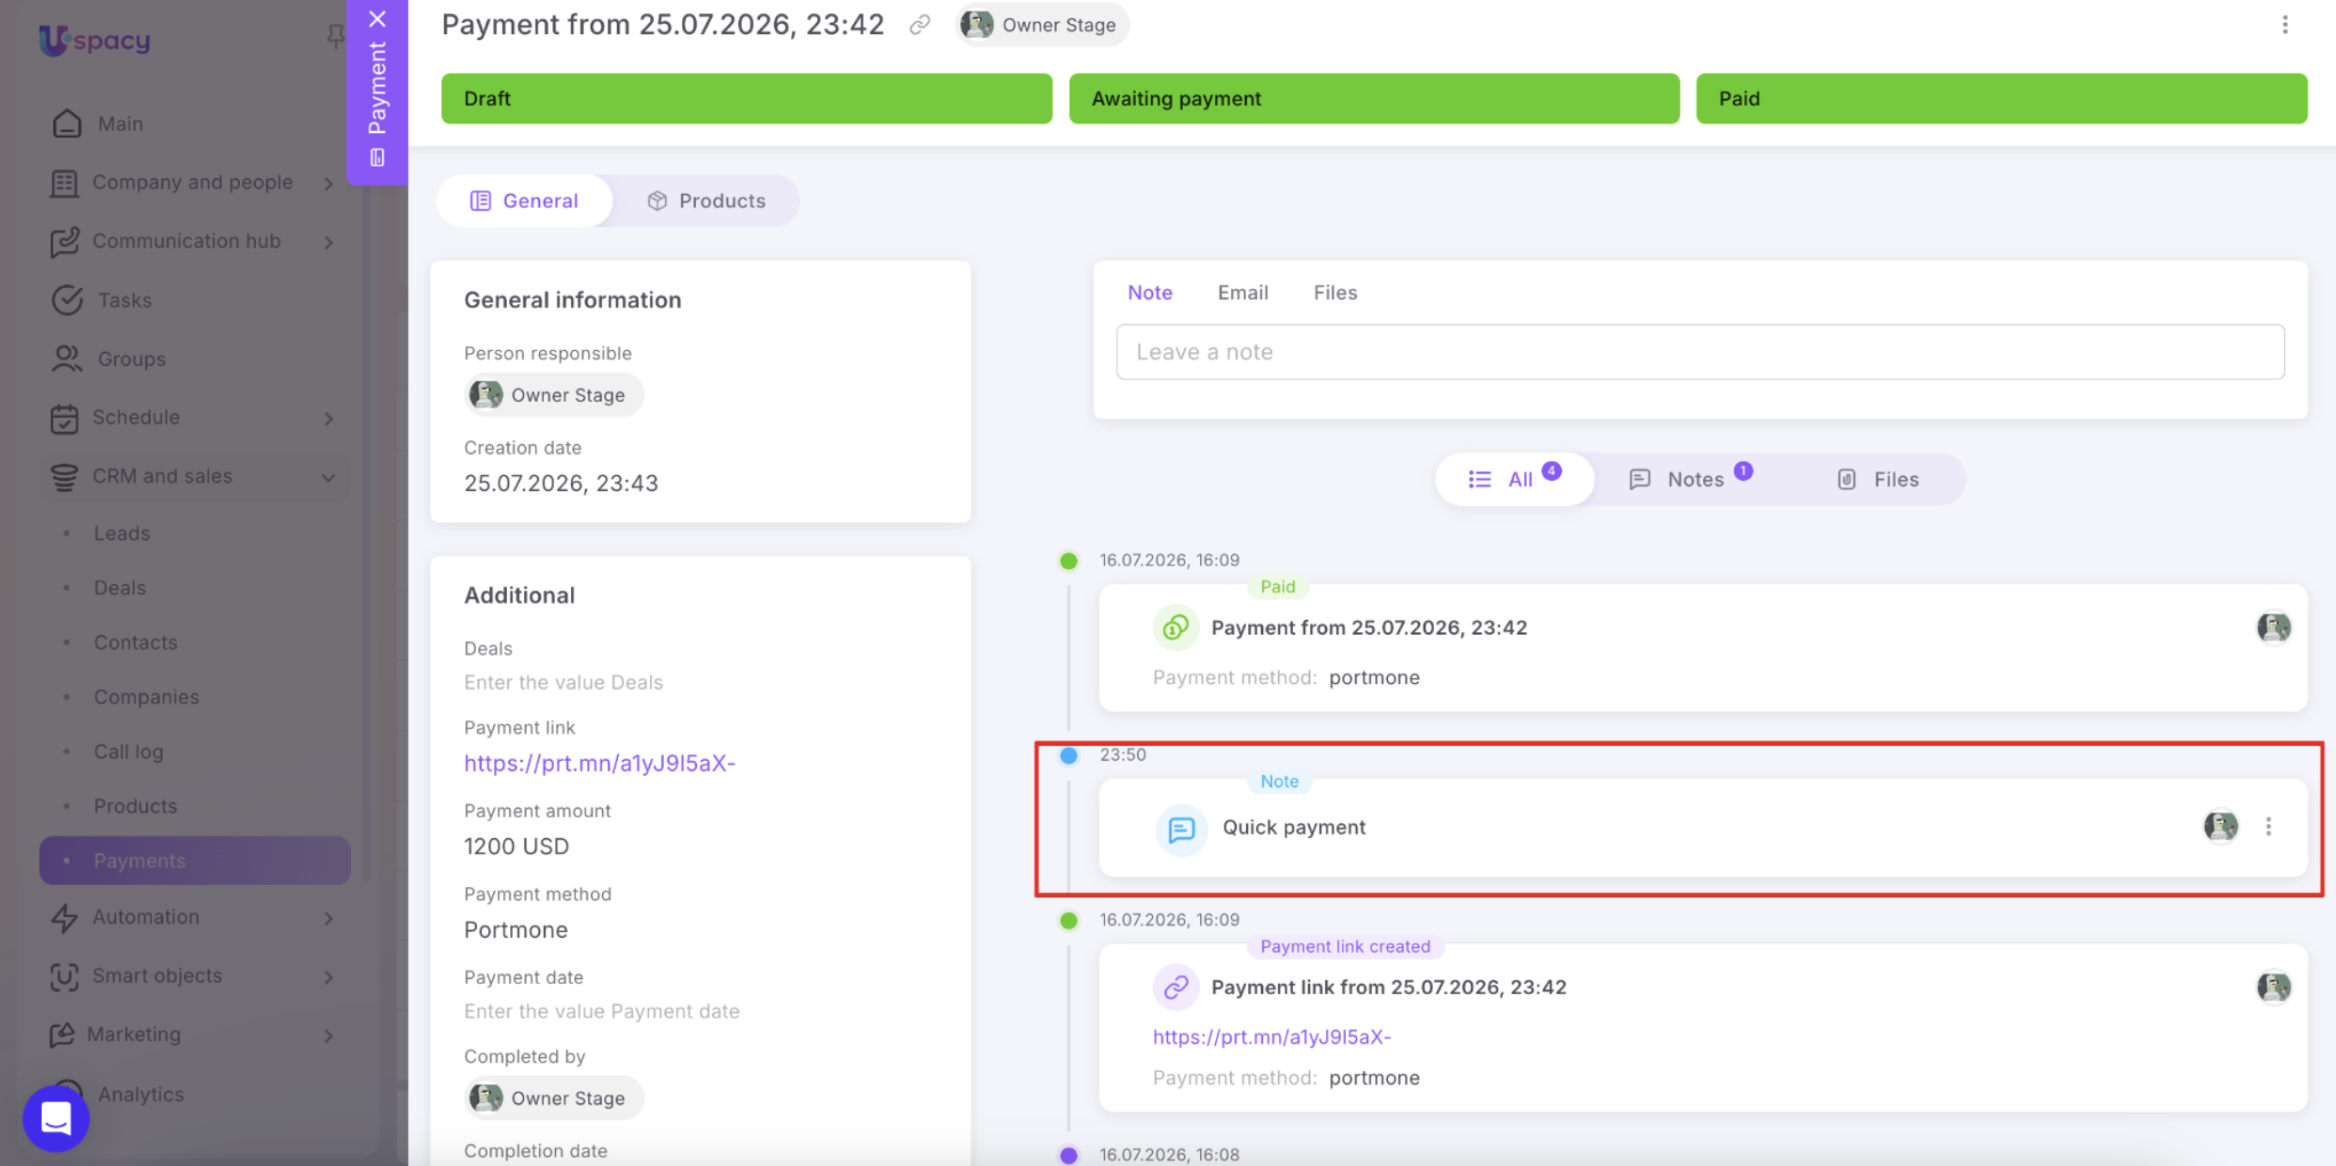
Use the Files tab to attach invoices, receipts, payment confirmations, or any other payment-related documents.
The Email tab lets you compose and send emails directly from the payment record. For example, you can notify the client that the payment has been received or inform them about the next steps in the order process.
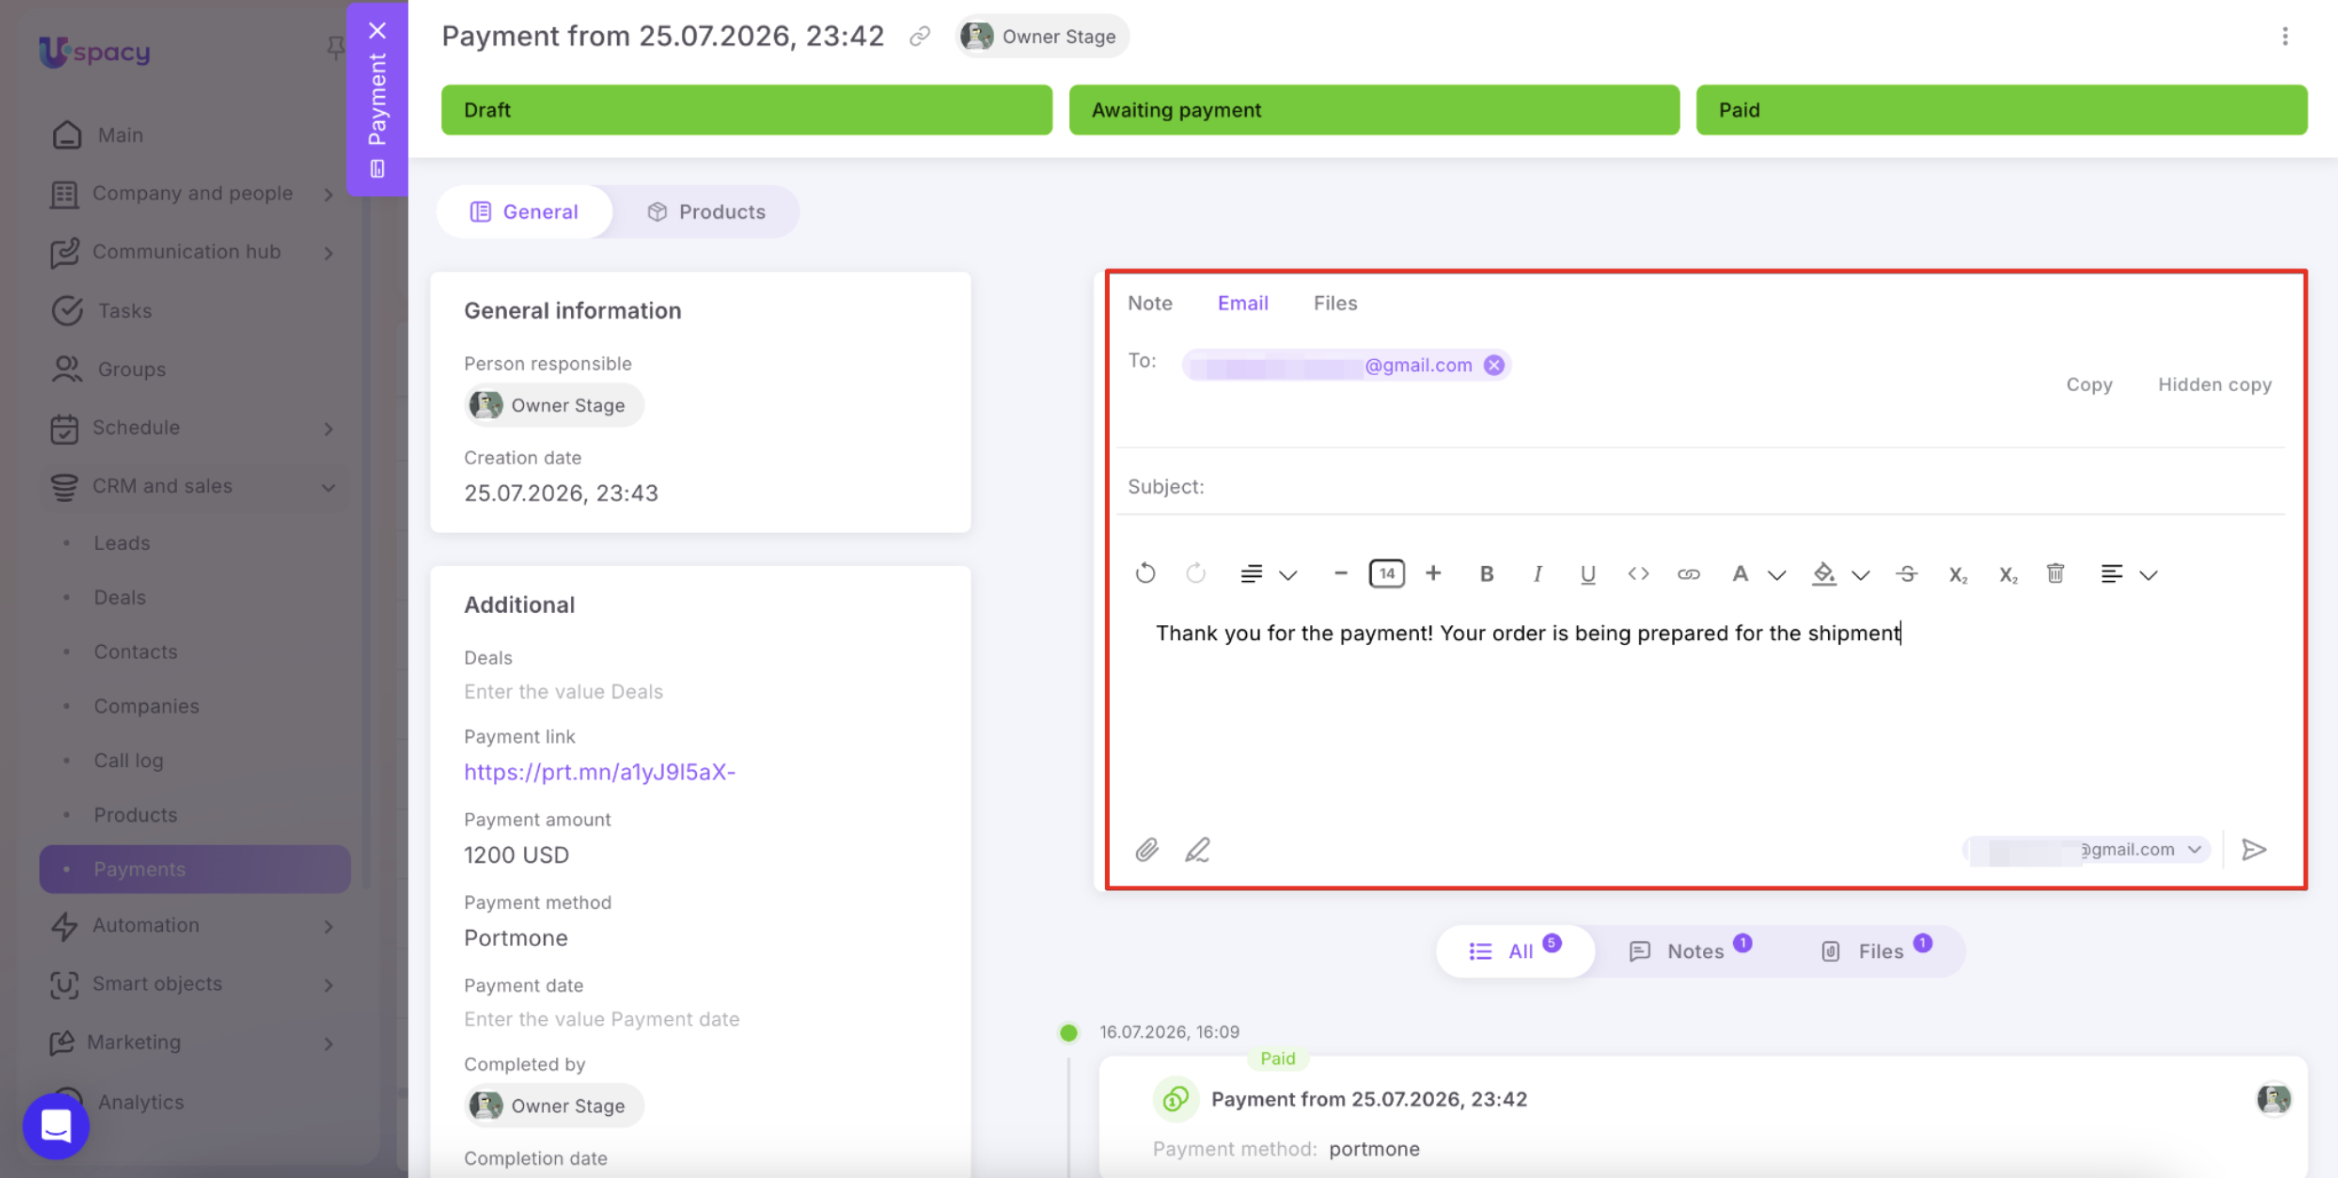
💡 Emails sent from this tab are not linked directly to the payment record. Instead, they appear in the activity history of the record where the recipient's email address is stored.
The Uspacy and Portmone integration enables you to create payments directly from CRM records and Smart Objects, generate secure payment links, and track payment results without switching between different systems.
All essential payment information remains available within your Workspace, including the payment amount, payment method, related records, payment link, payment date, and current status. The system automatically updates each payment when funds are received or when the payment link expires.
Use LiqPay payments to send payment links to clients faster, reduce manual payment verification, and keep your complete payment history centralized in Uspacy.
If you have additional questions or you need to contact the support, send a request to this email [email protected]
Created: July 24, 2026 / Updated: July 26, 2026