
When clients email you, it’s important not only to respond quickly but also to record any agreements or follow-up actions: call back, prepare a proposal, clarify details, or forward the request to a colleague. In Uspacy, you work with Email in the Communication hub—managing correspondence within the Space without switching between different services.
To make sure requests don’t get lost and the context is preserved, you can link emails to CRM elements. This makes the communication history available in the client’s record.
Correspondence often leads to follow-up actions. If it’s a short action that needs to be completed at a specific time—such as making a call, scheduling a meeting, or sending a response—it’s convenient to record it as an activity associated with the client in the CRM. When the work is more complex and requires a description, checklist, subtasks, or multiple participants, you can add links to tasks.
This way, a request received by email becomes a specific piece of work, and the team can see what has already been done and what still needs to be completed. Linking an email to a task helps preserve context: linked correspondence can be viewed directly in the task card on the Communication history tab.
How to link an email to tasks?
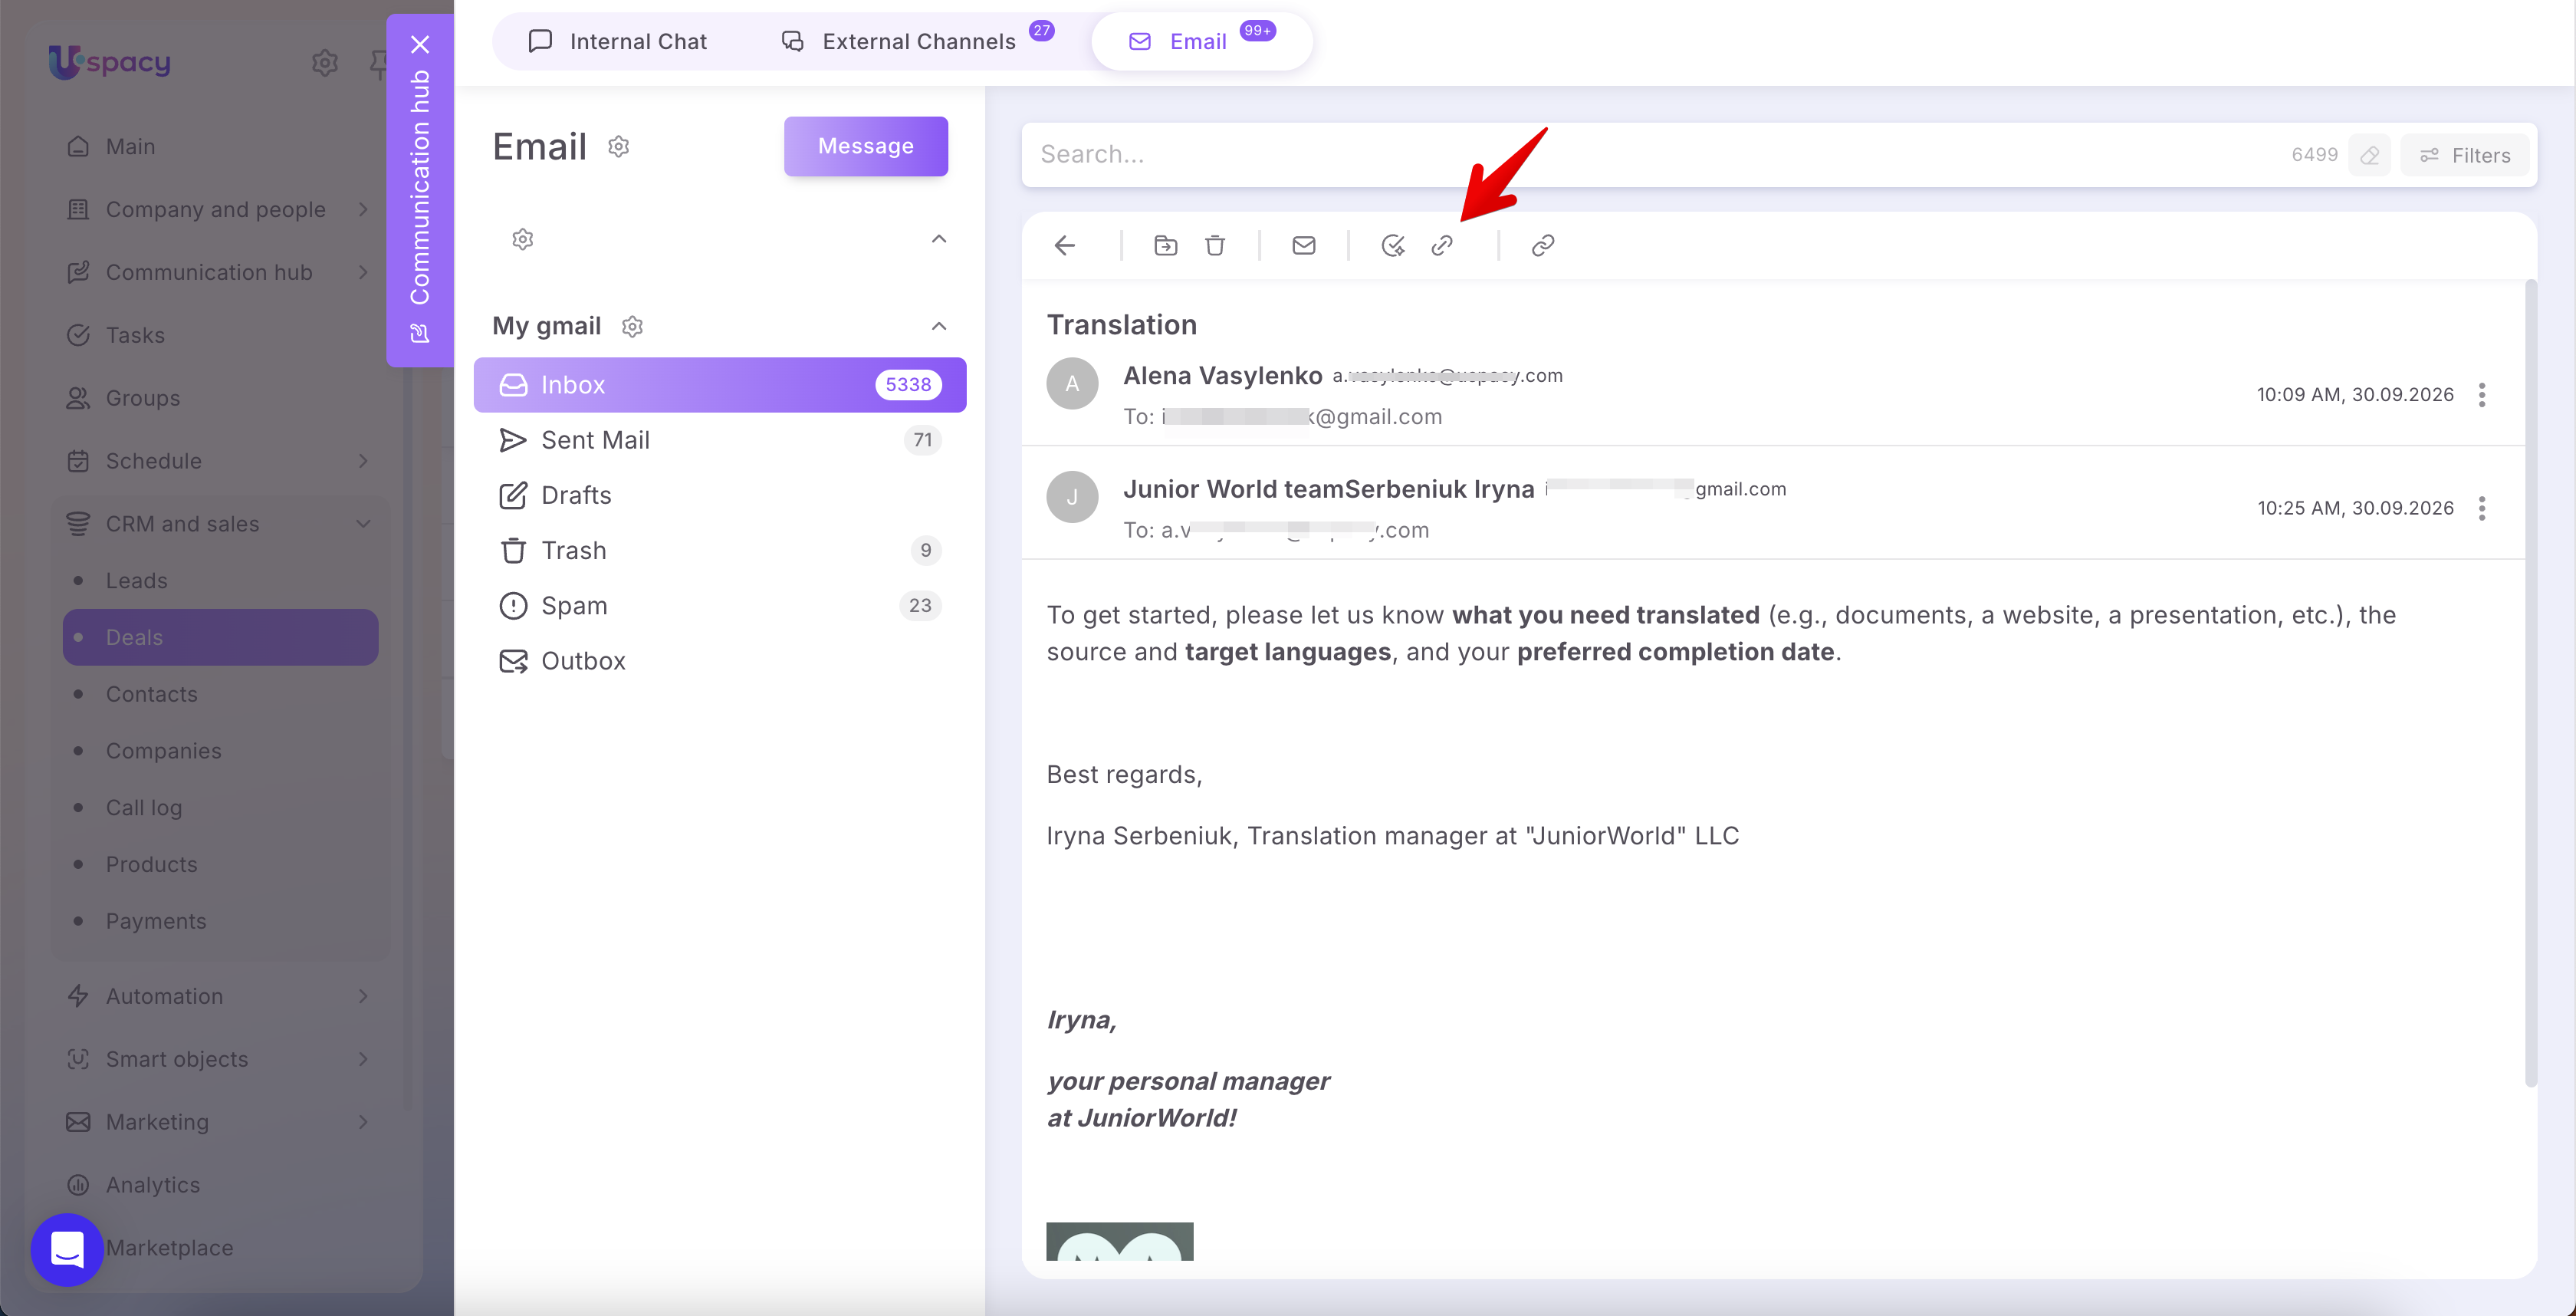
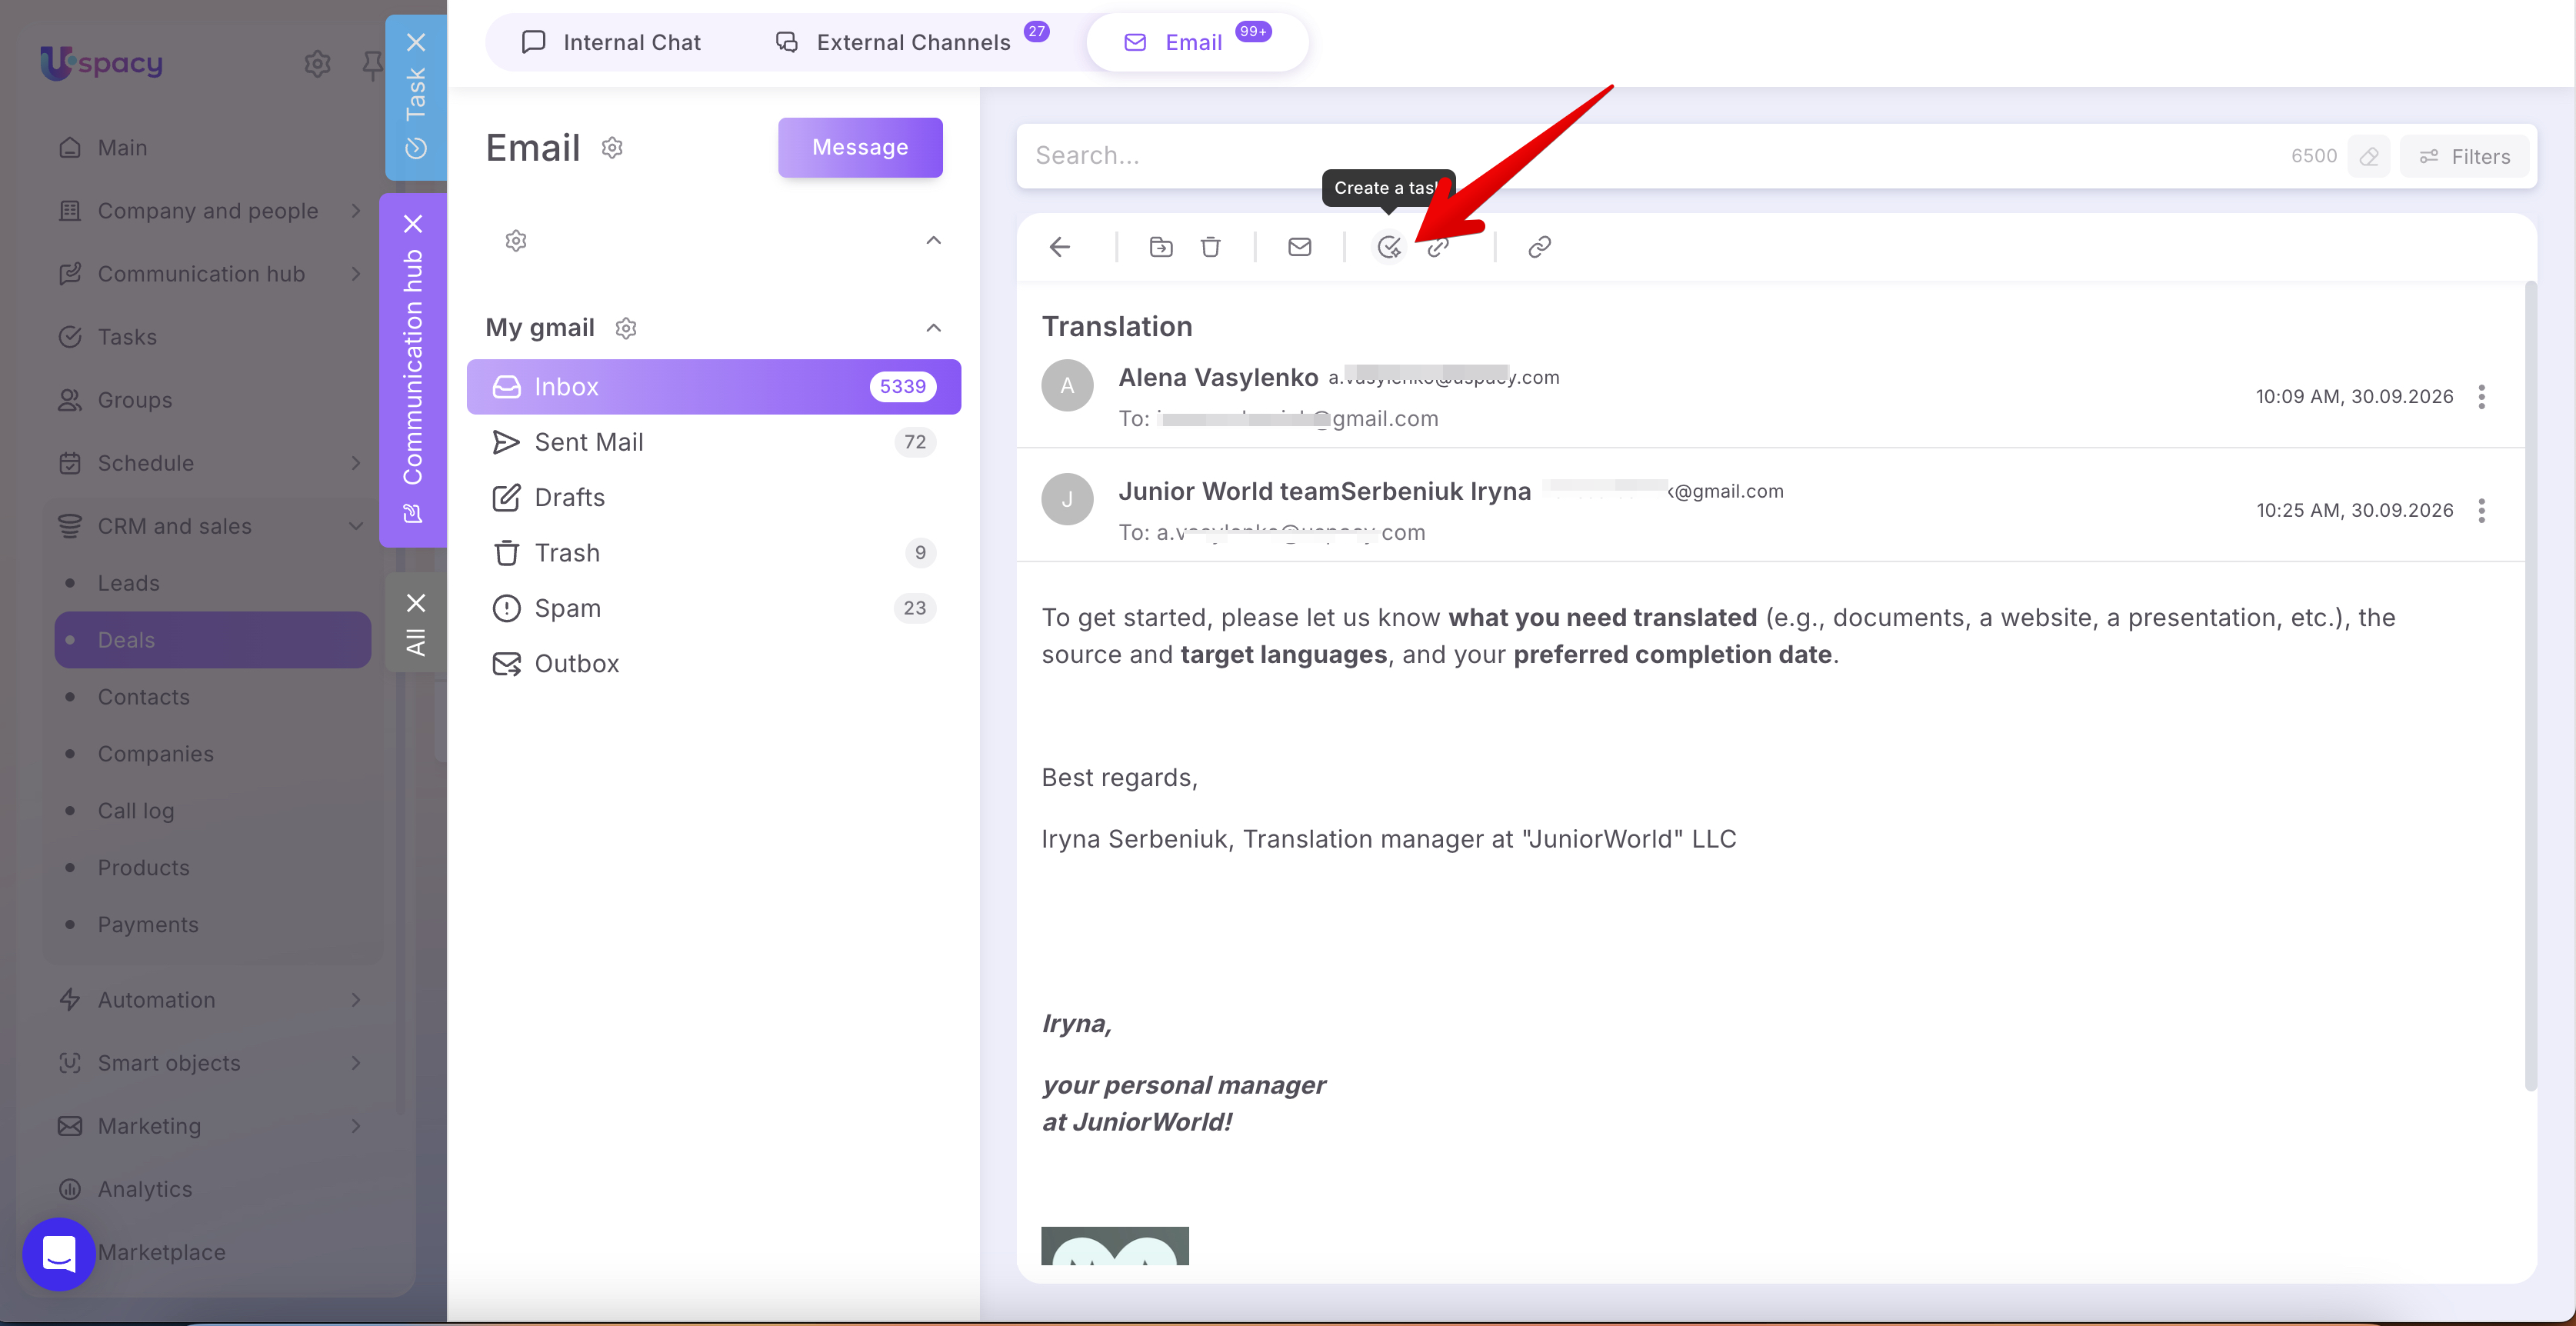
First, open the required email in the Email section of the Communication hub. On the top toolbar, click the entity links icon.
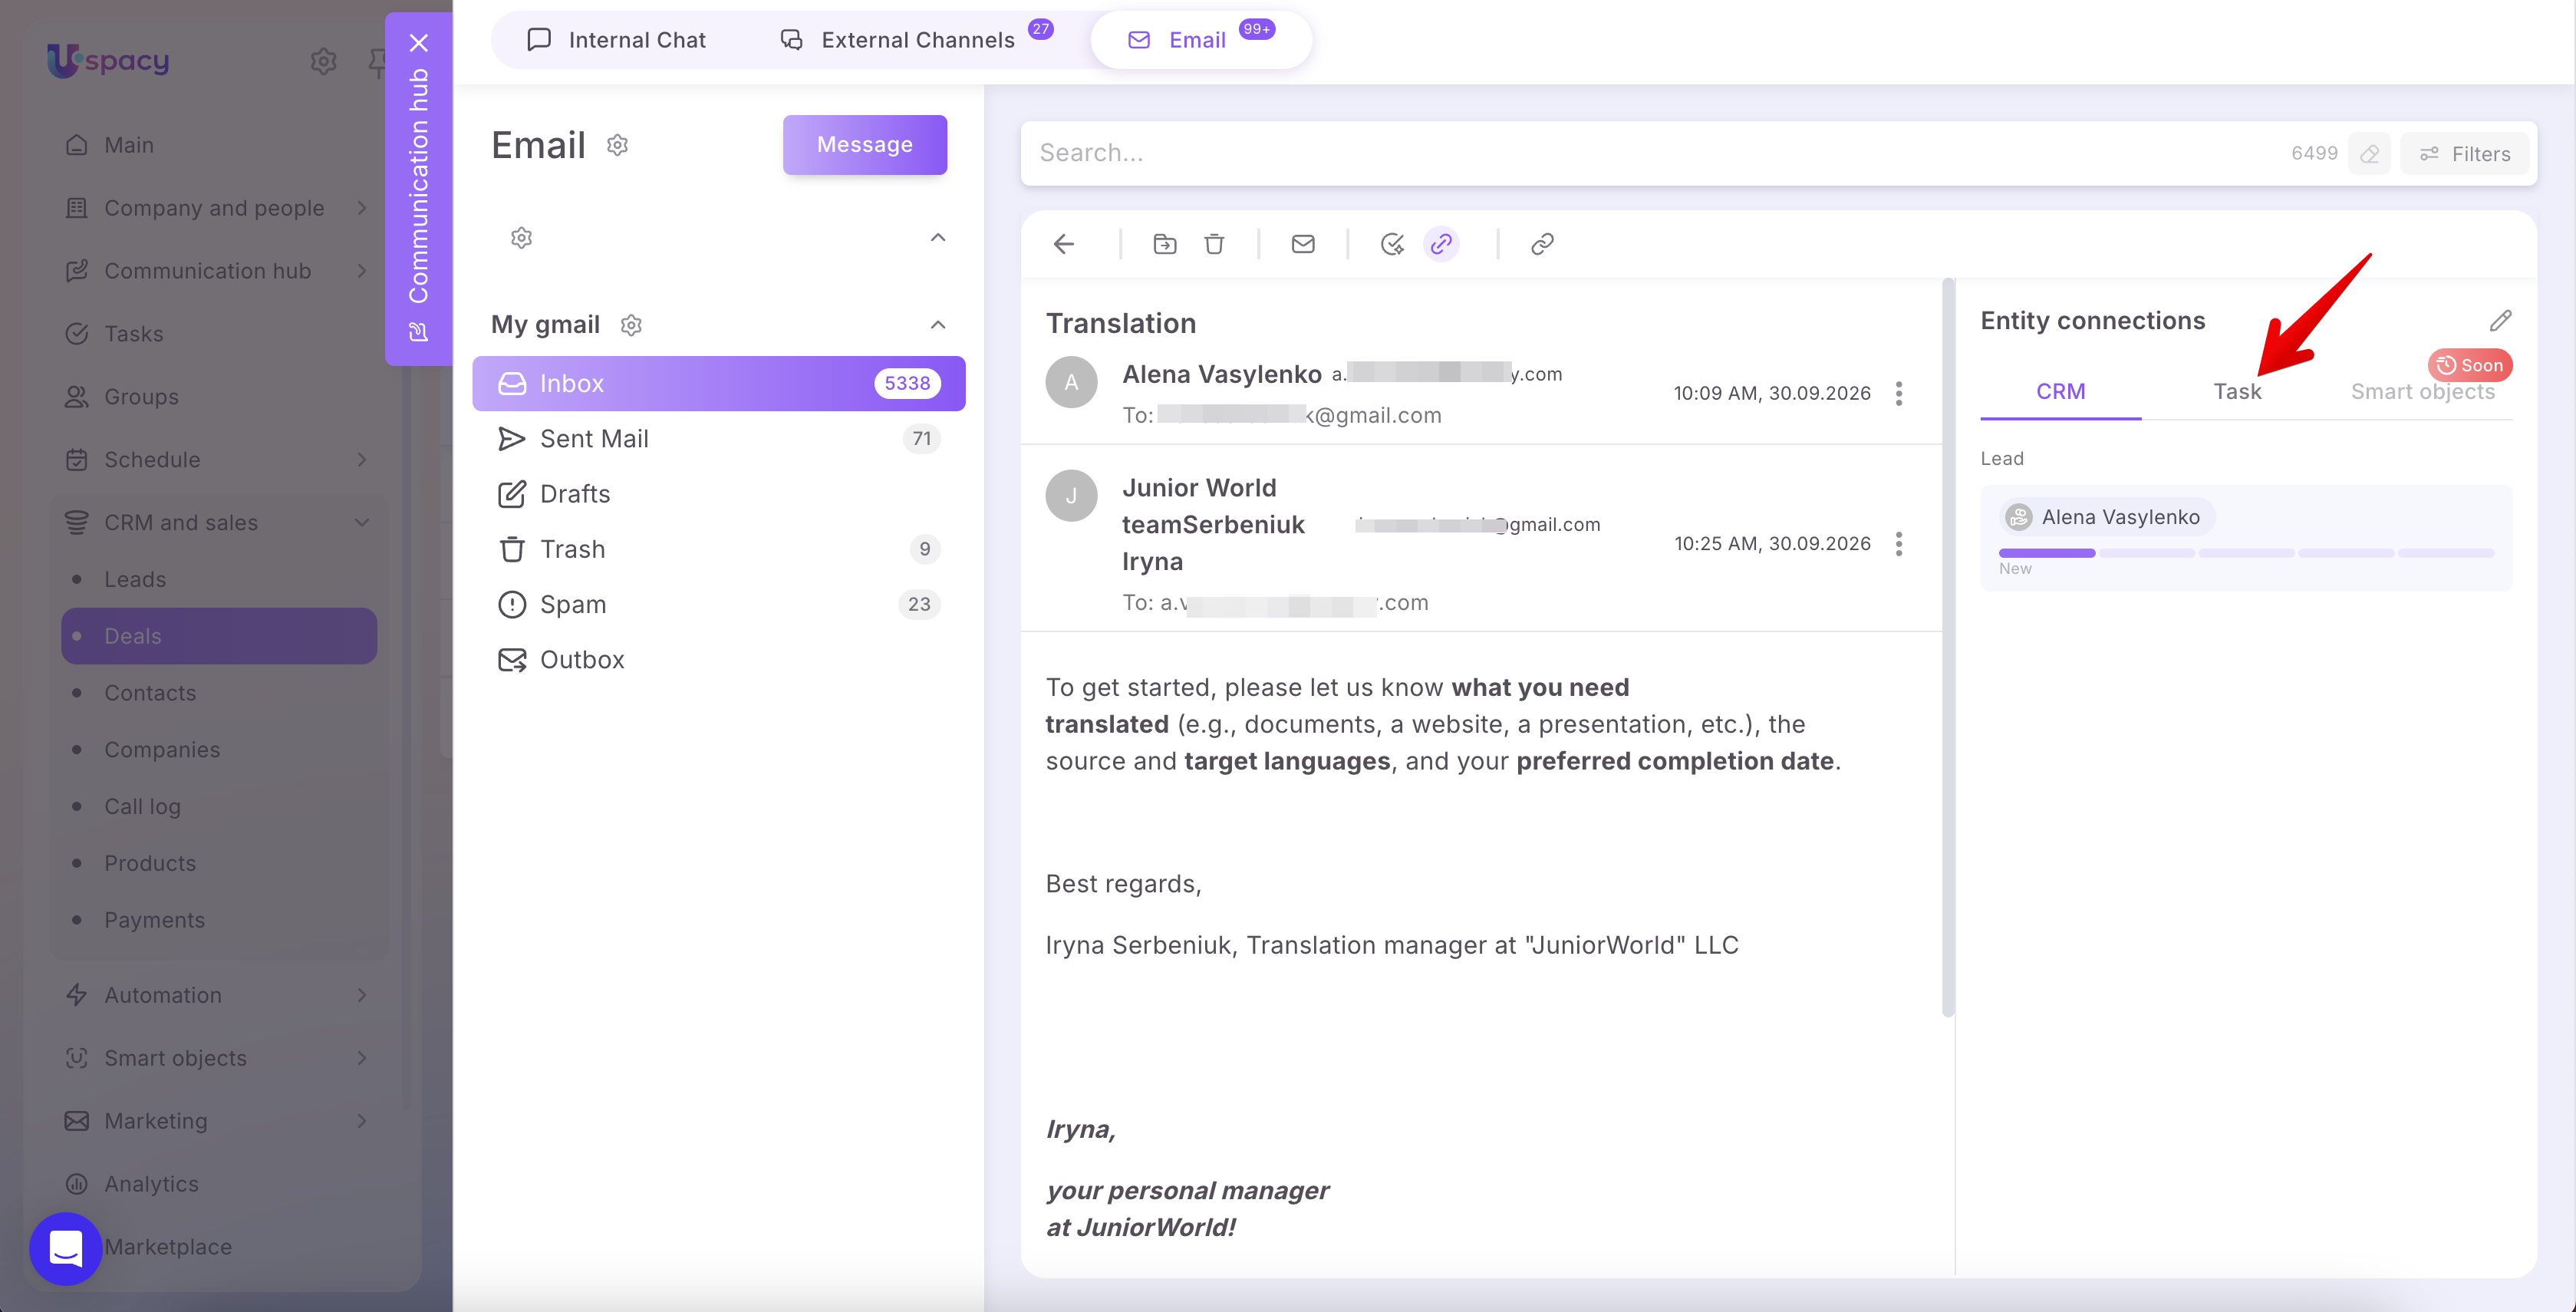
The Entity connections panel will open on the right. Go to the Tasks tab.
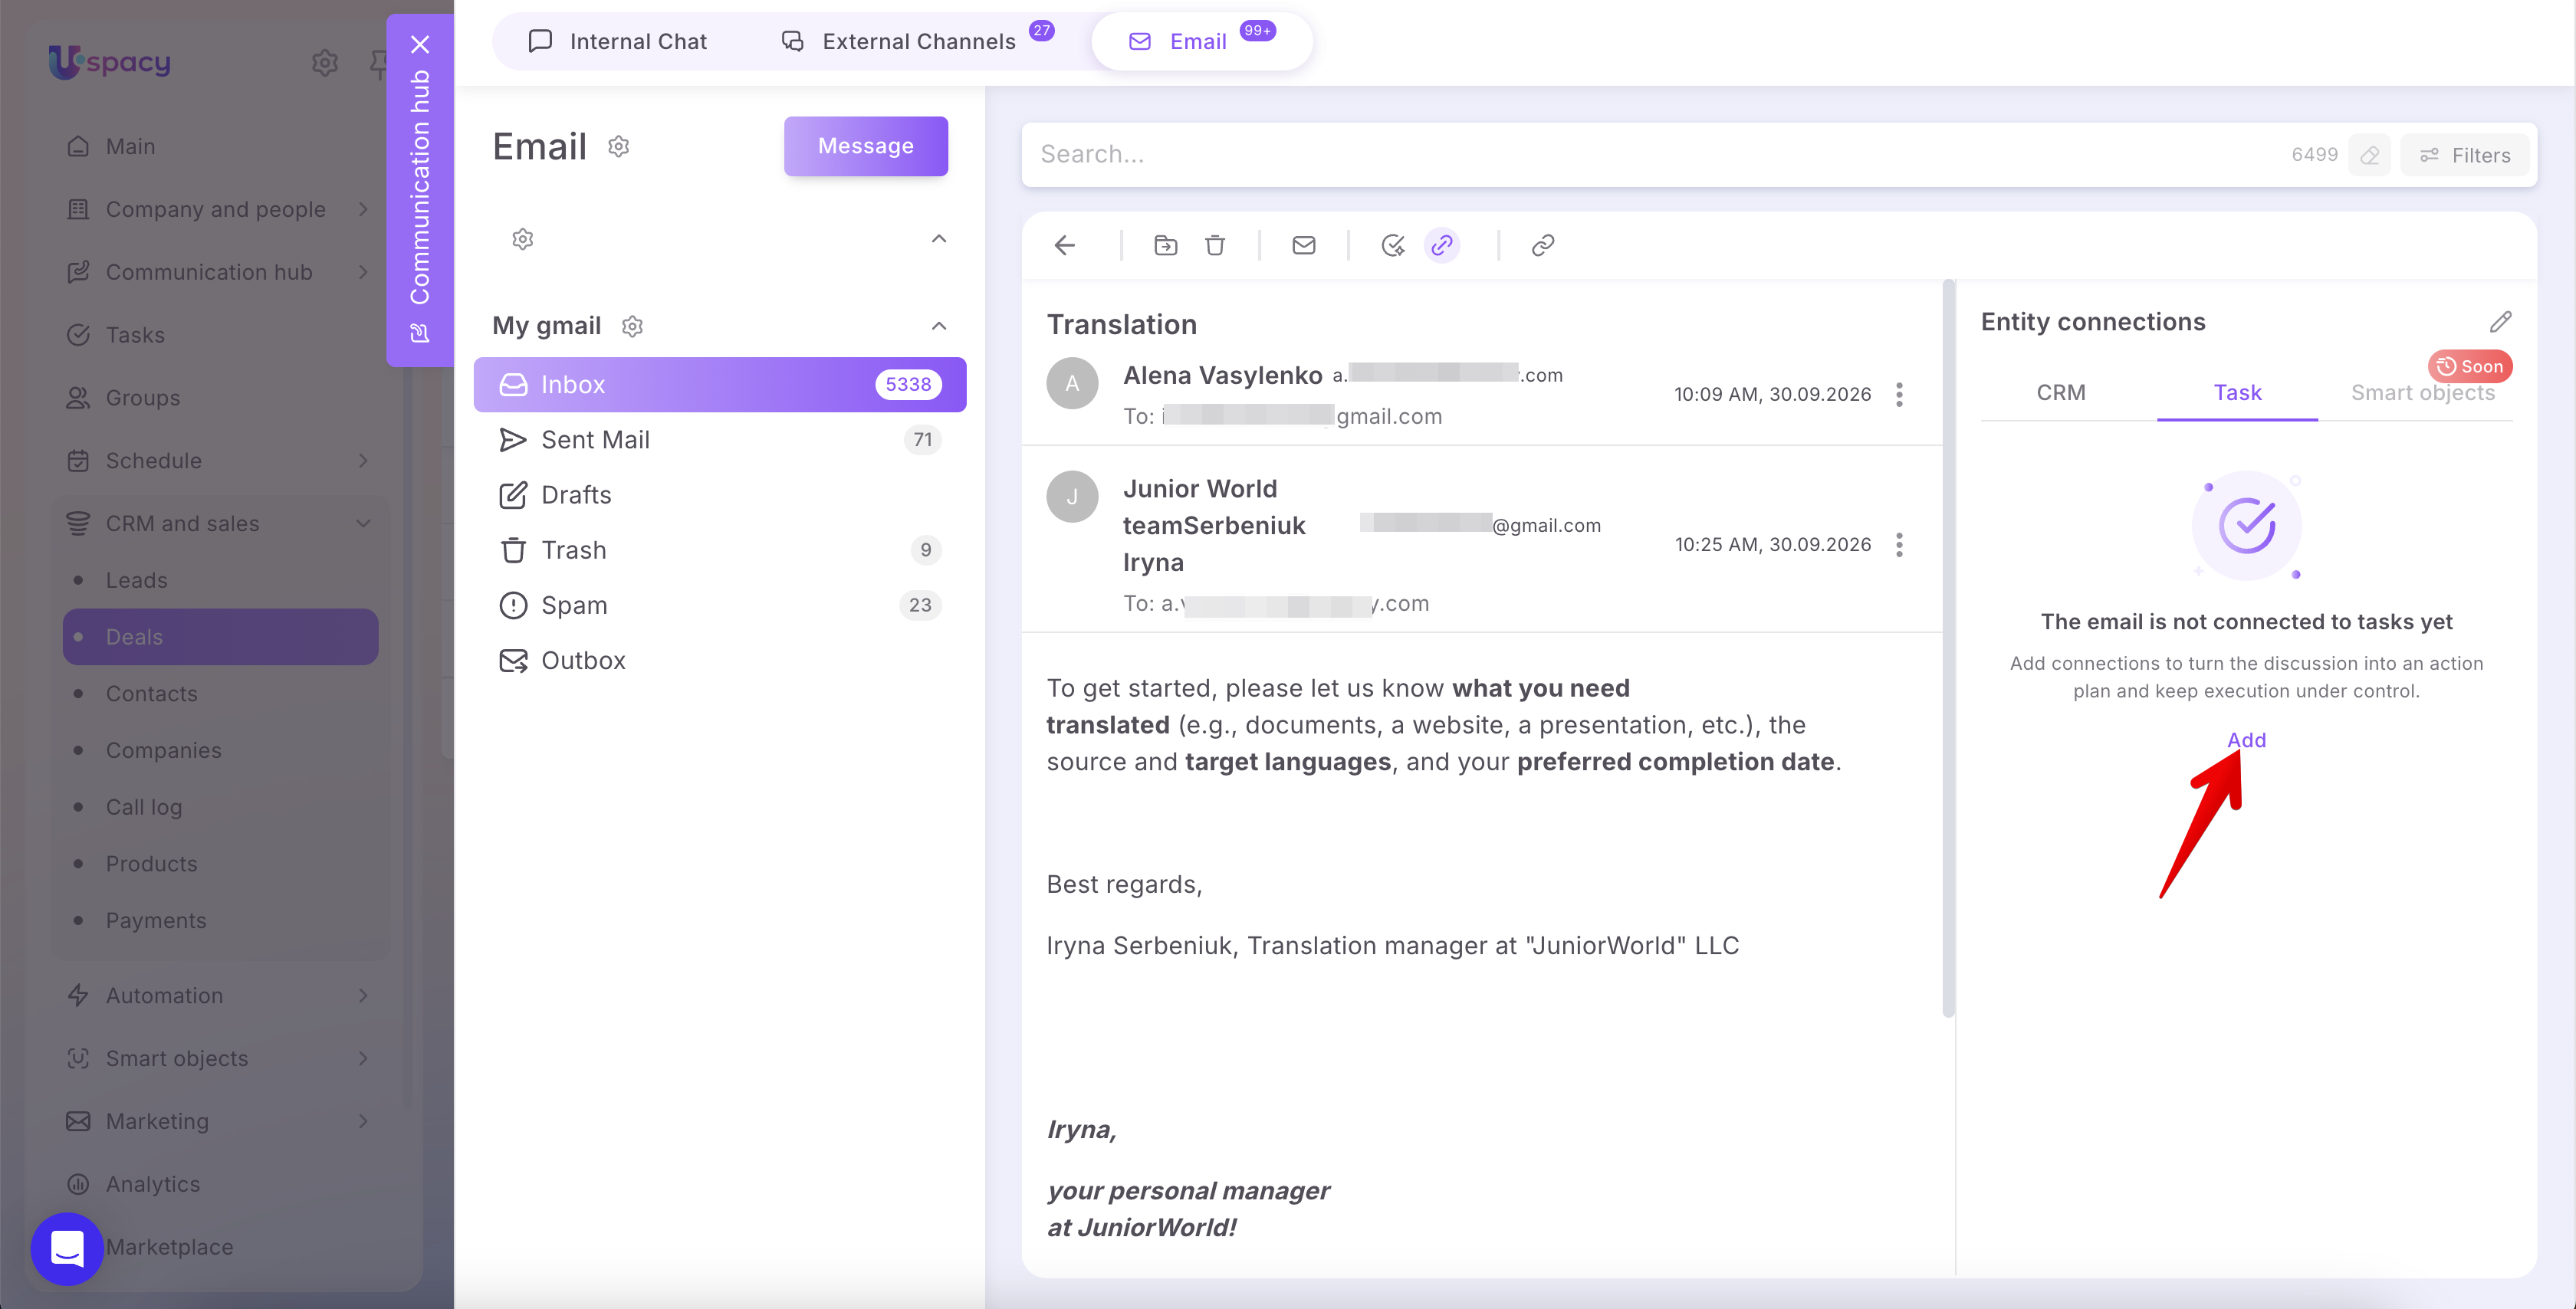
If the email does not yet have any task links, click Add.
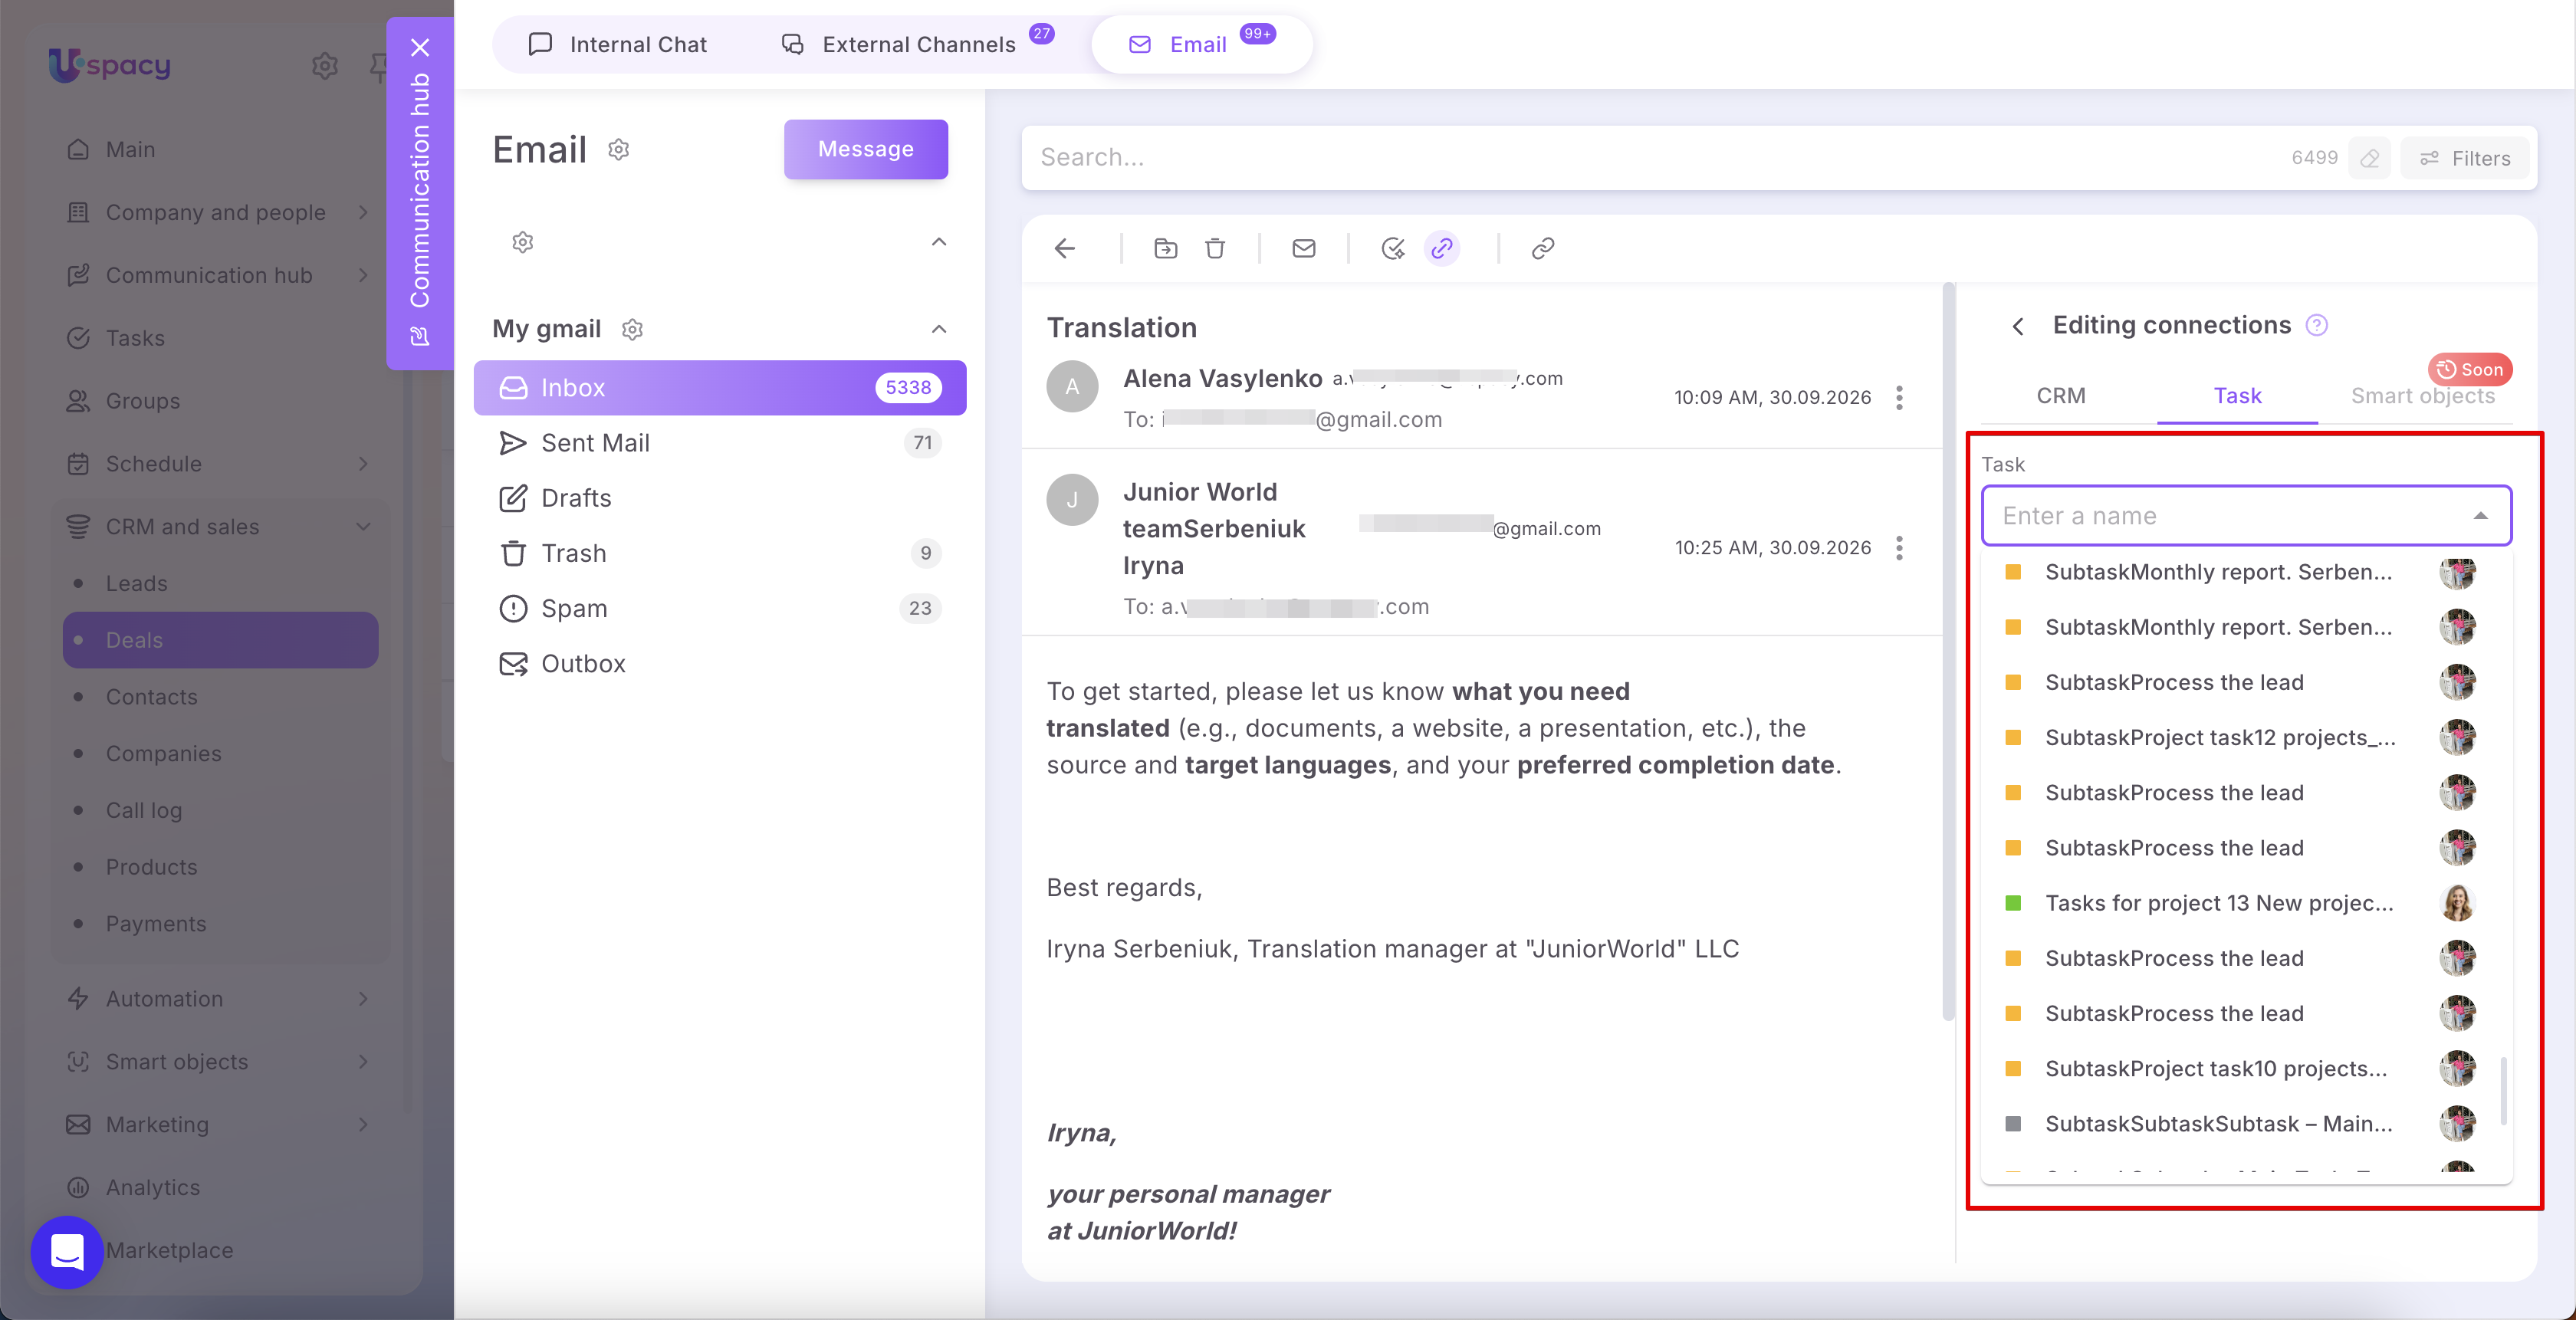
In the Editing connections panel, you can select a task that already exists in the Space or create a new one.
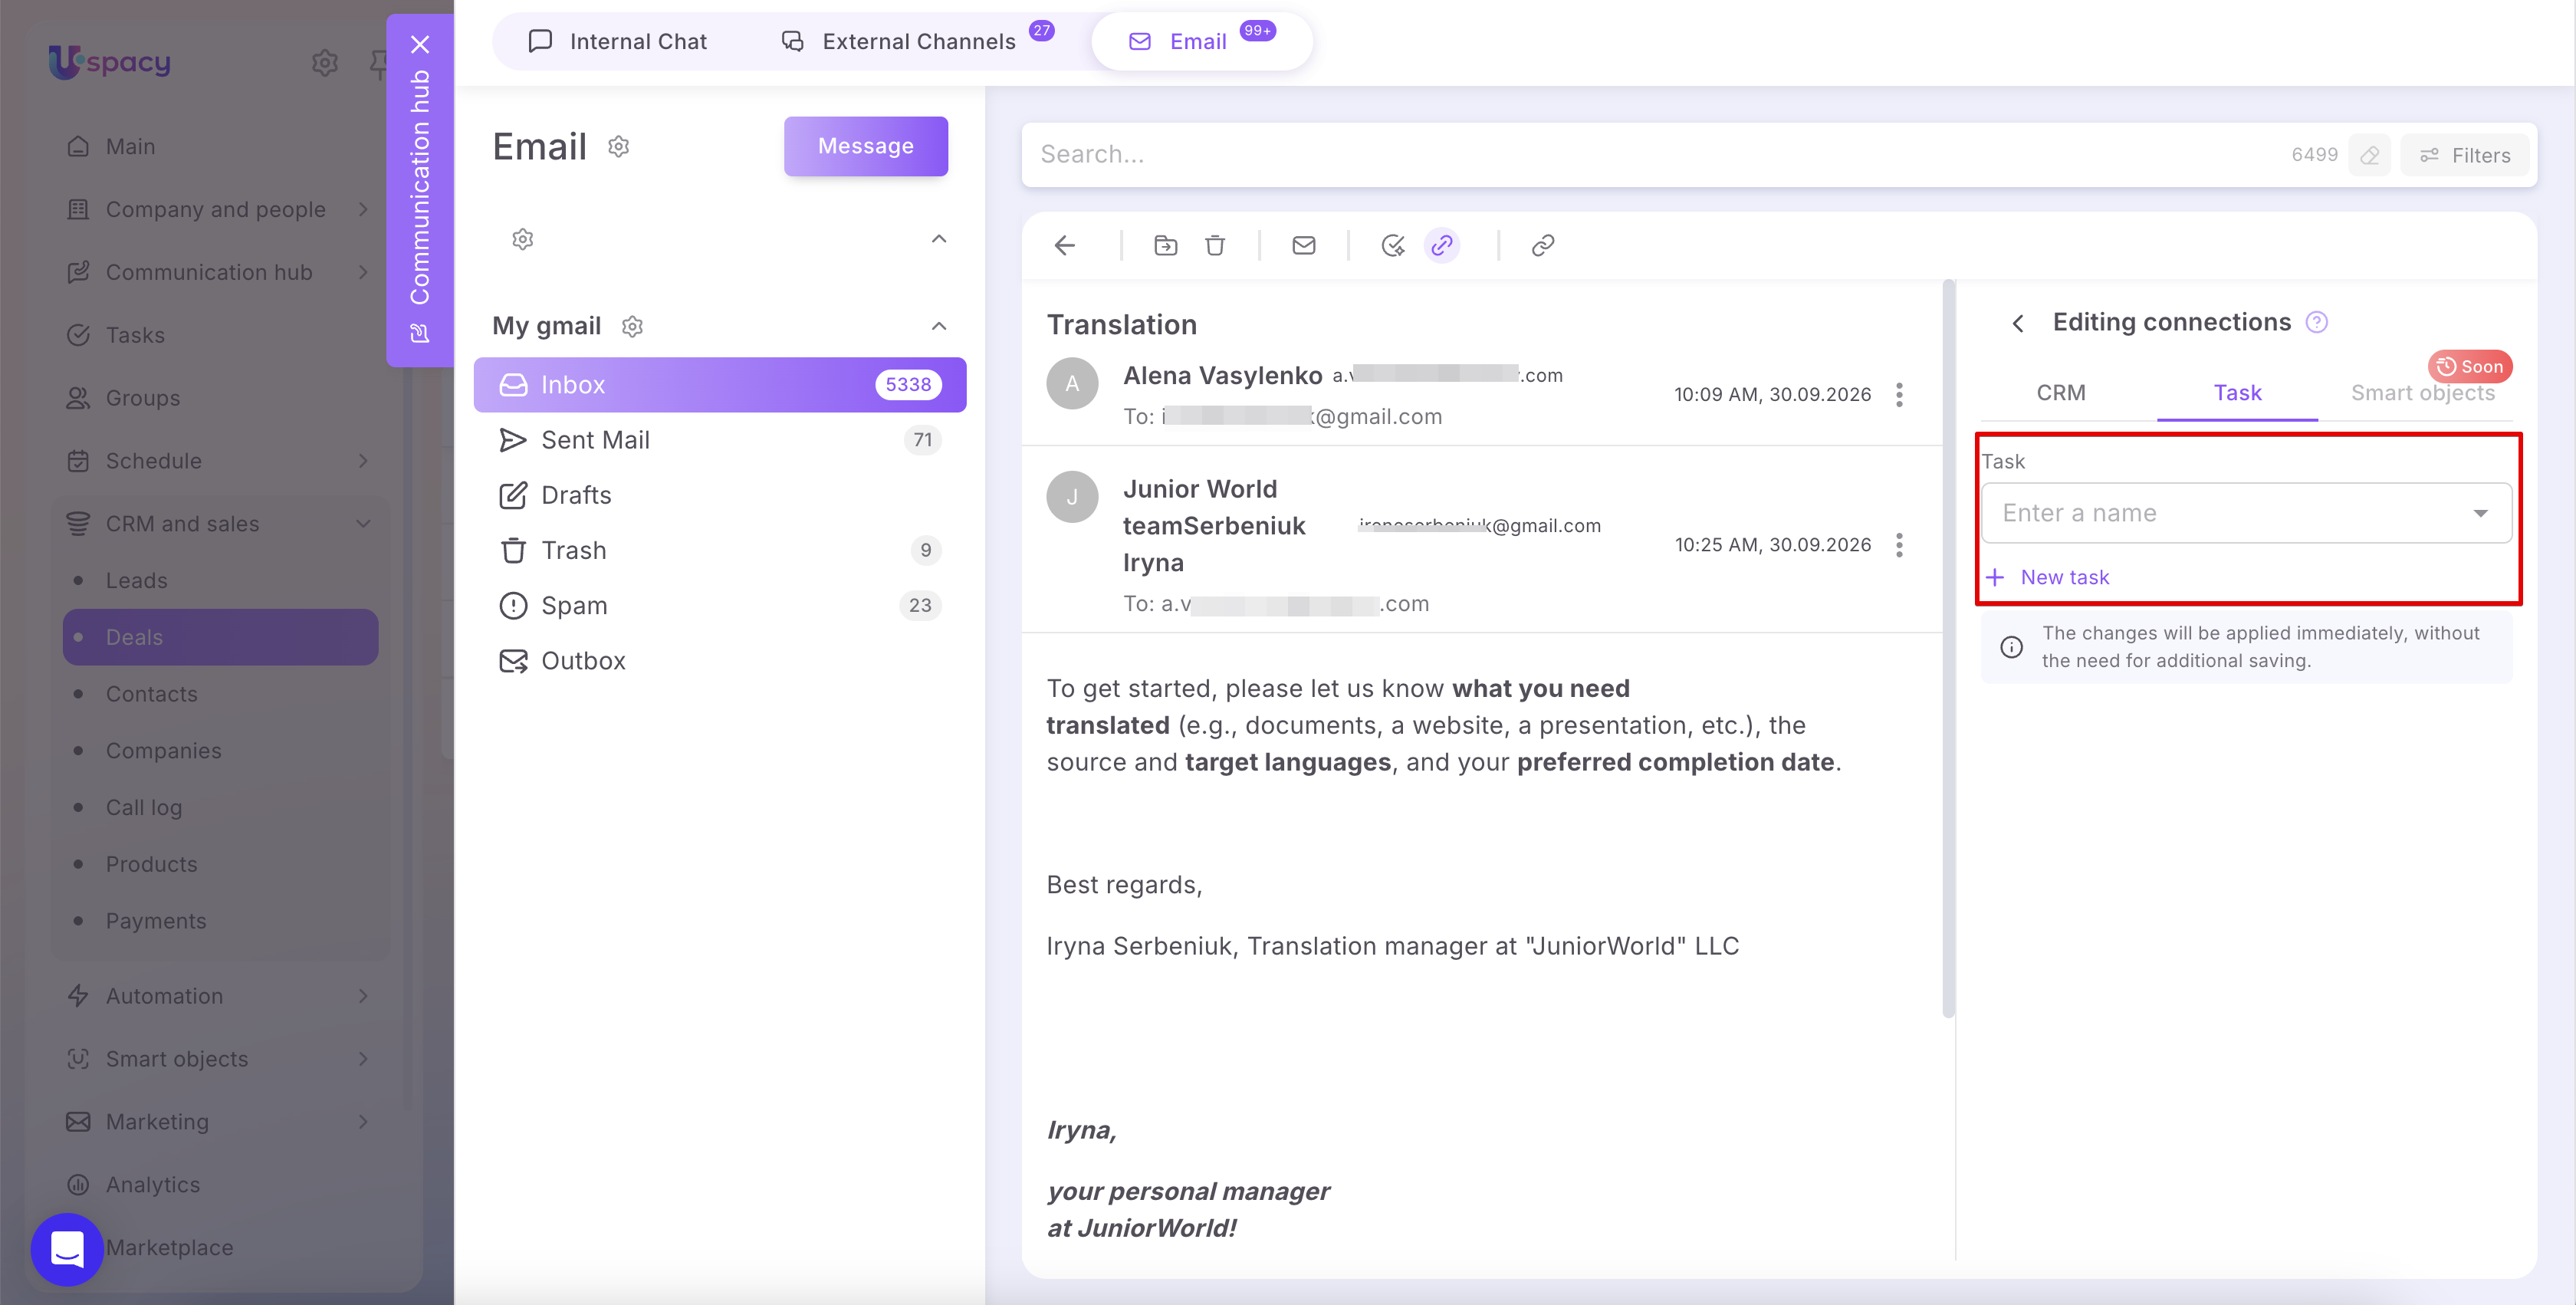
Click the Task field and find the required task in the list. To search quickly, enter its name.
Then select the task to link it to the email.
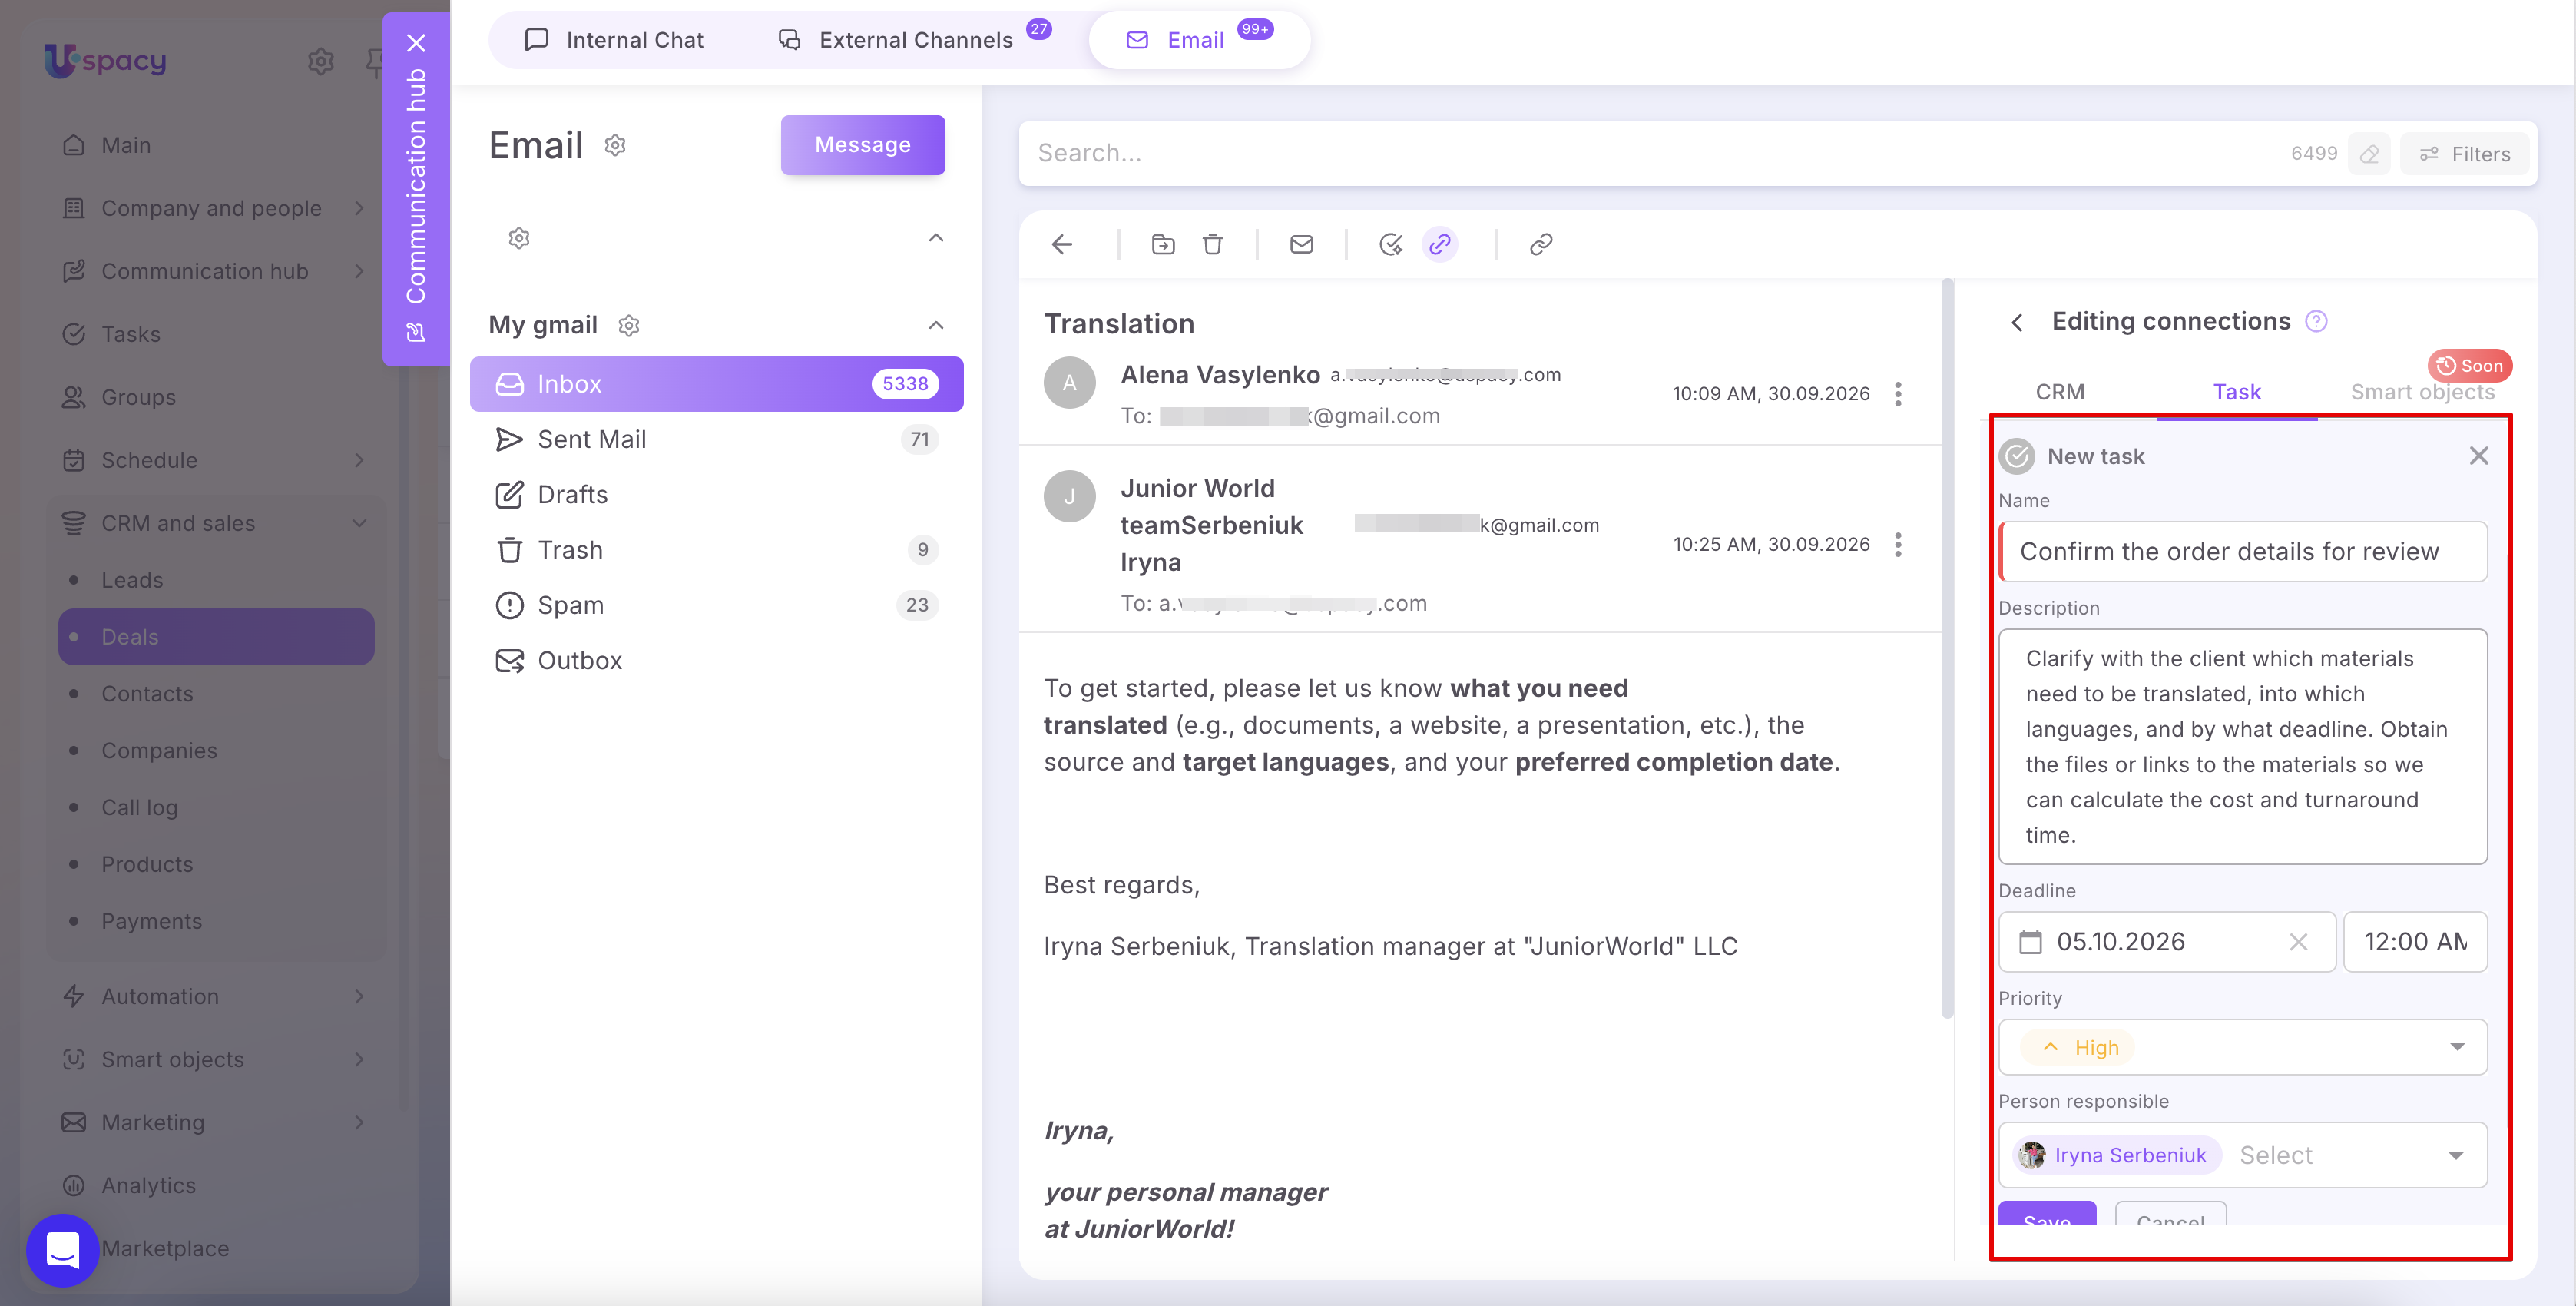
If the required task does not yet exist, click + New task. Complete the short form:
- Name — specify what needs to be done.
- Description — add details and the expected outcome.
- Deadline — specify the date and time by which the task should be completed.
- Priority — define the importance of the task.
- Person responsible — select the employee who will complete the task.
Then click Save.
The created task will appear among the tasks linked to the email. If needed, you can add other tasks as well—one email can have multiple links.
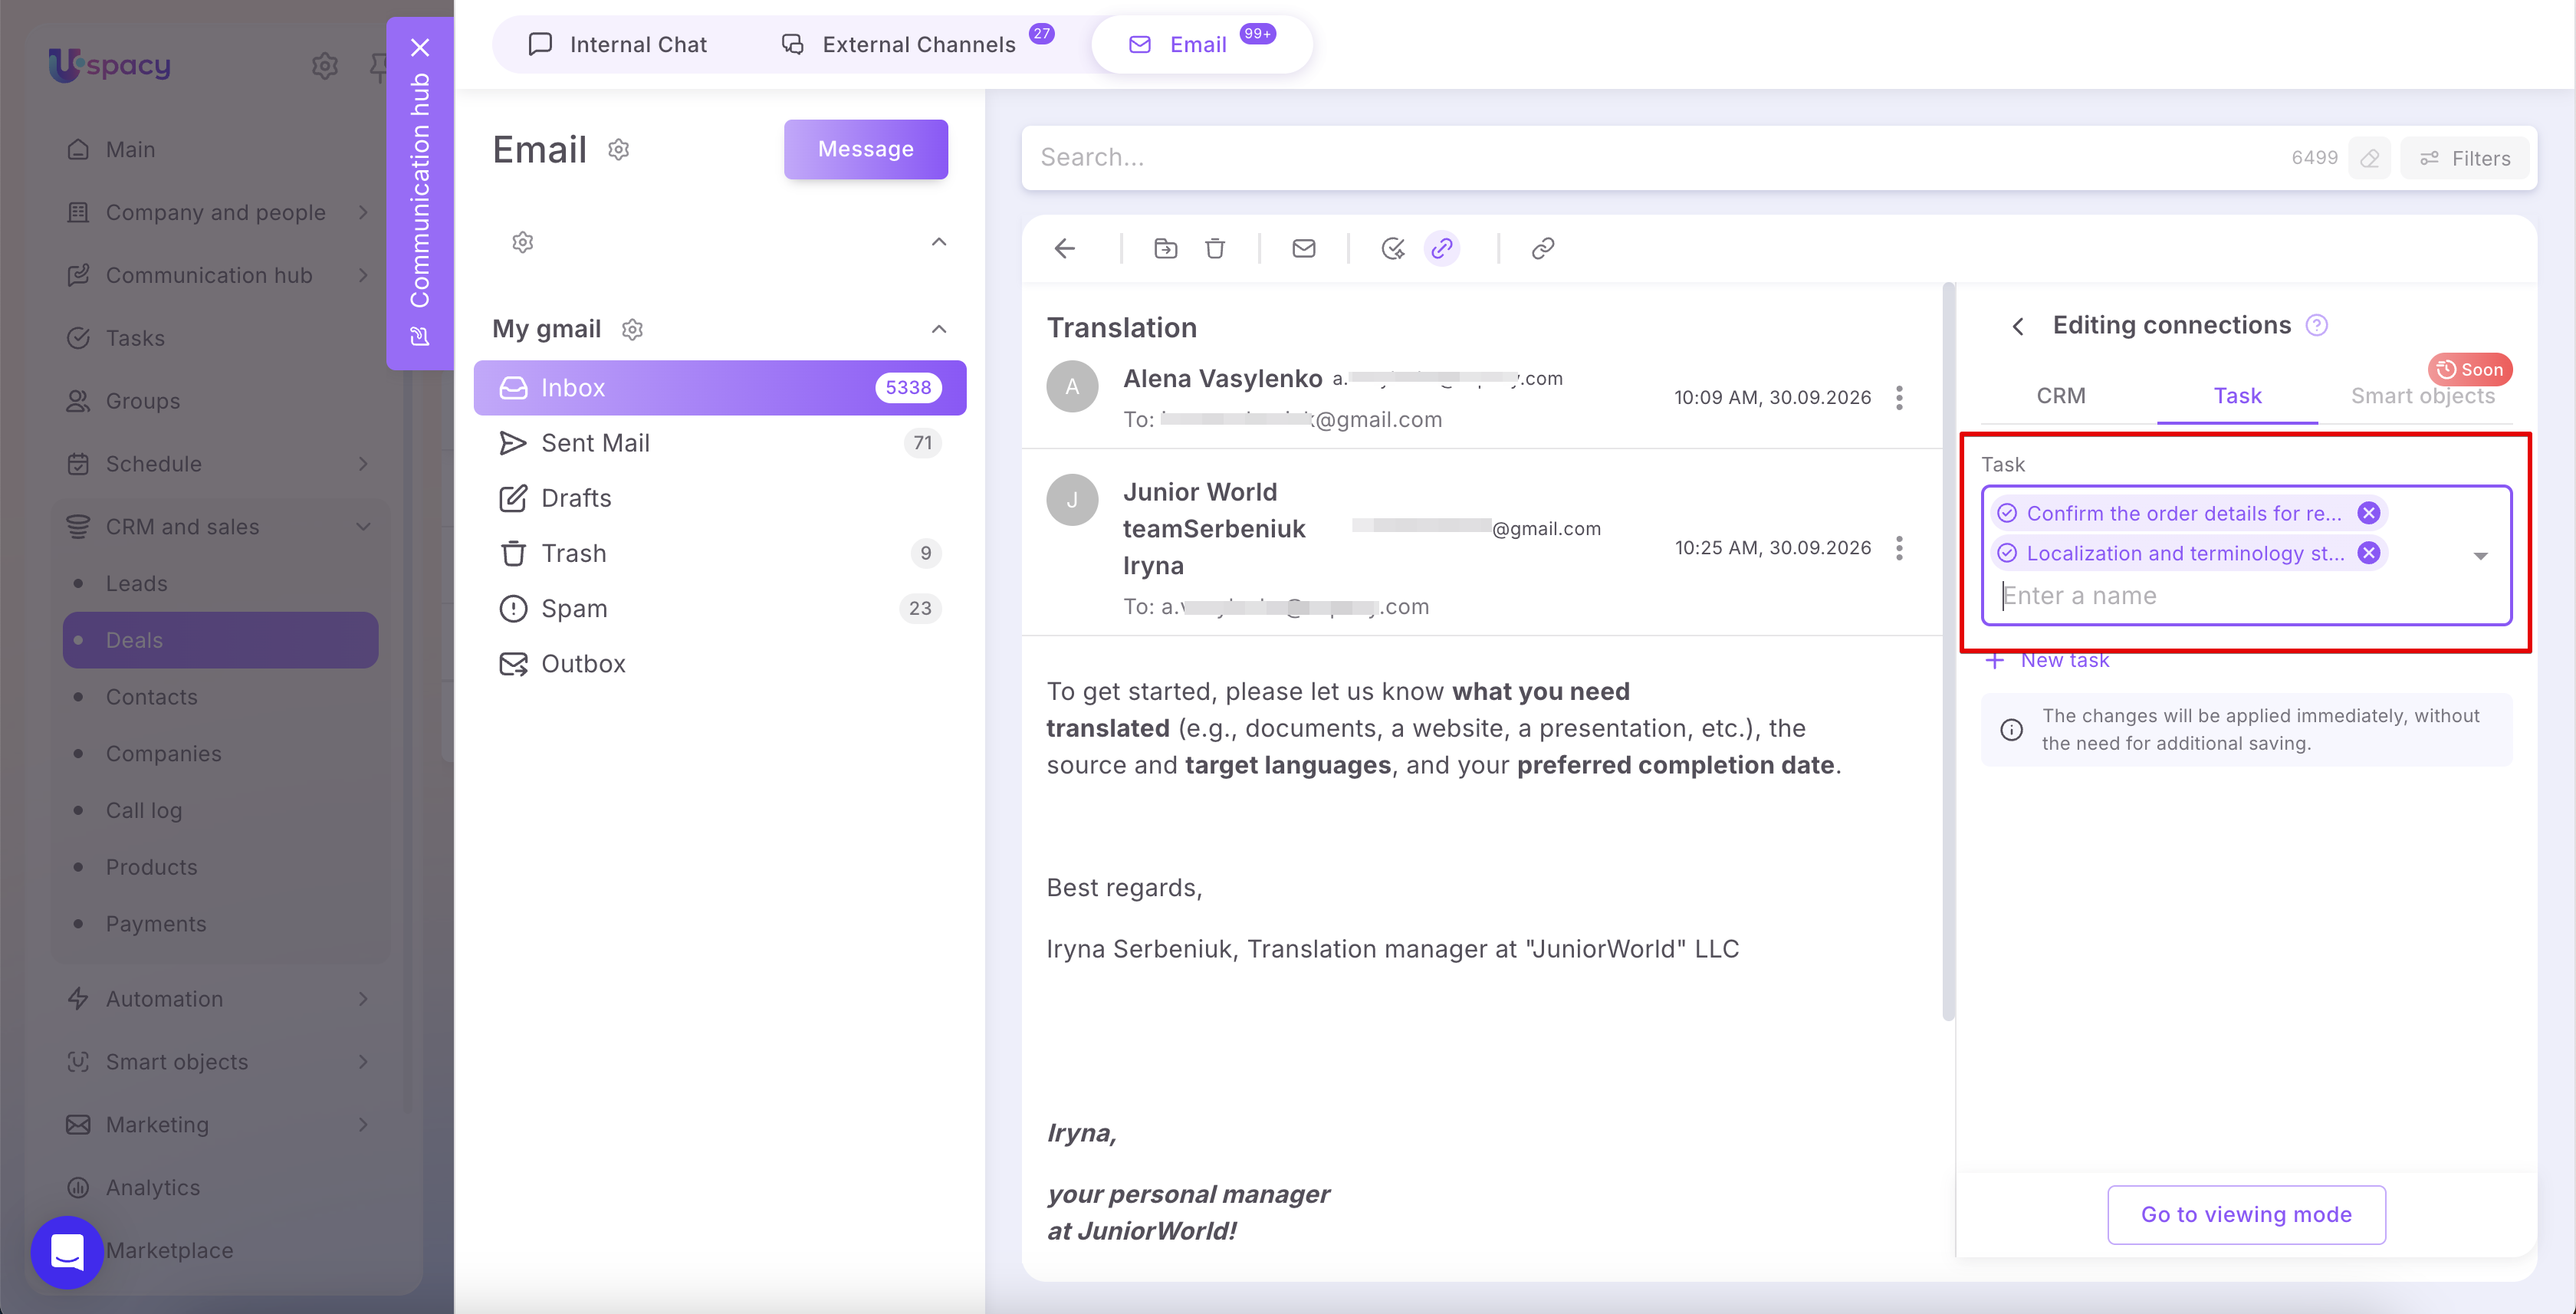
💡 All links you create are applied immediately, so no additional saving is required.
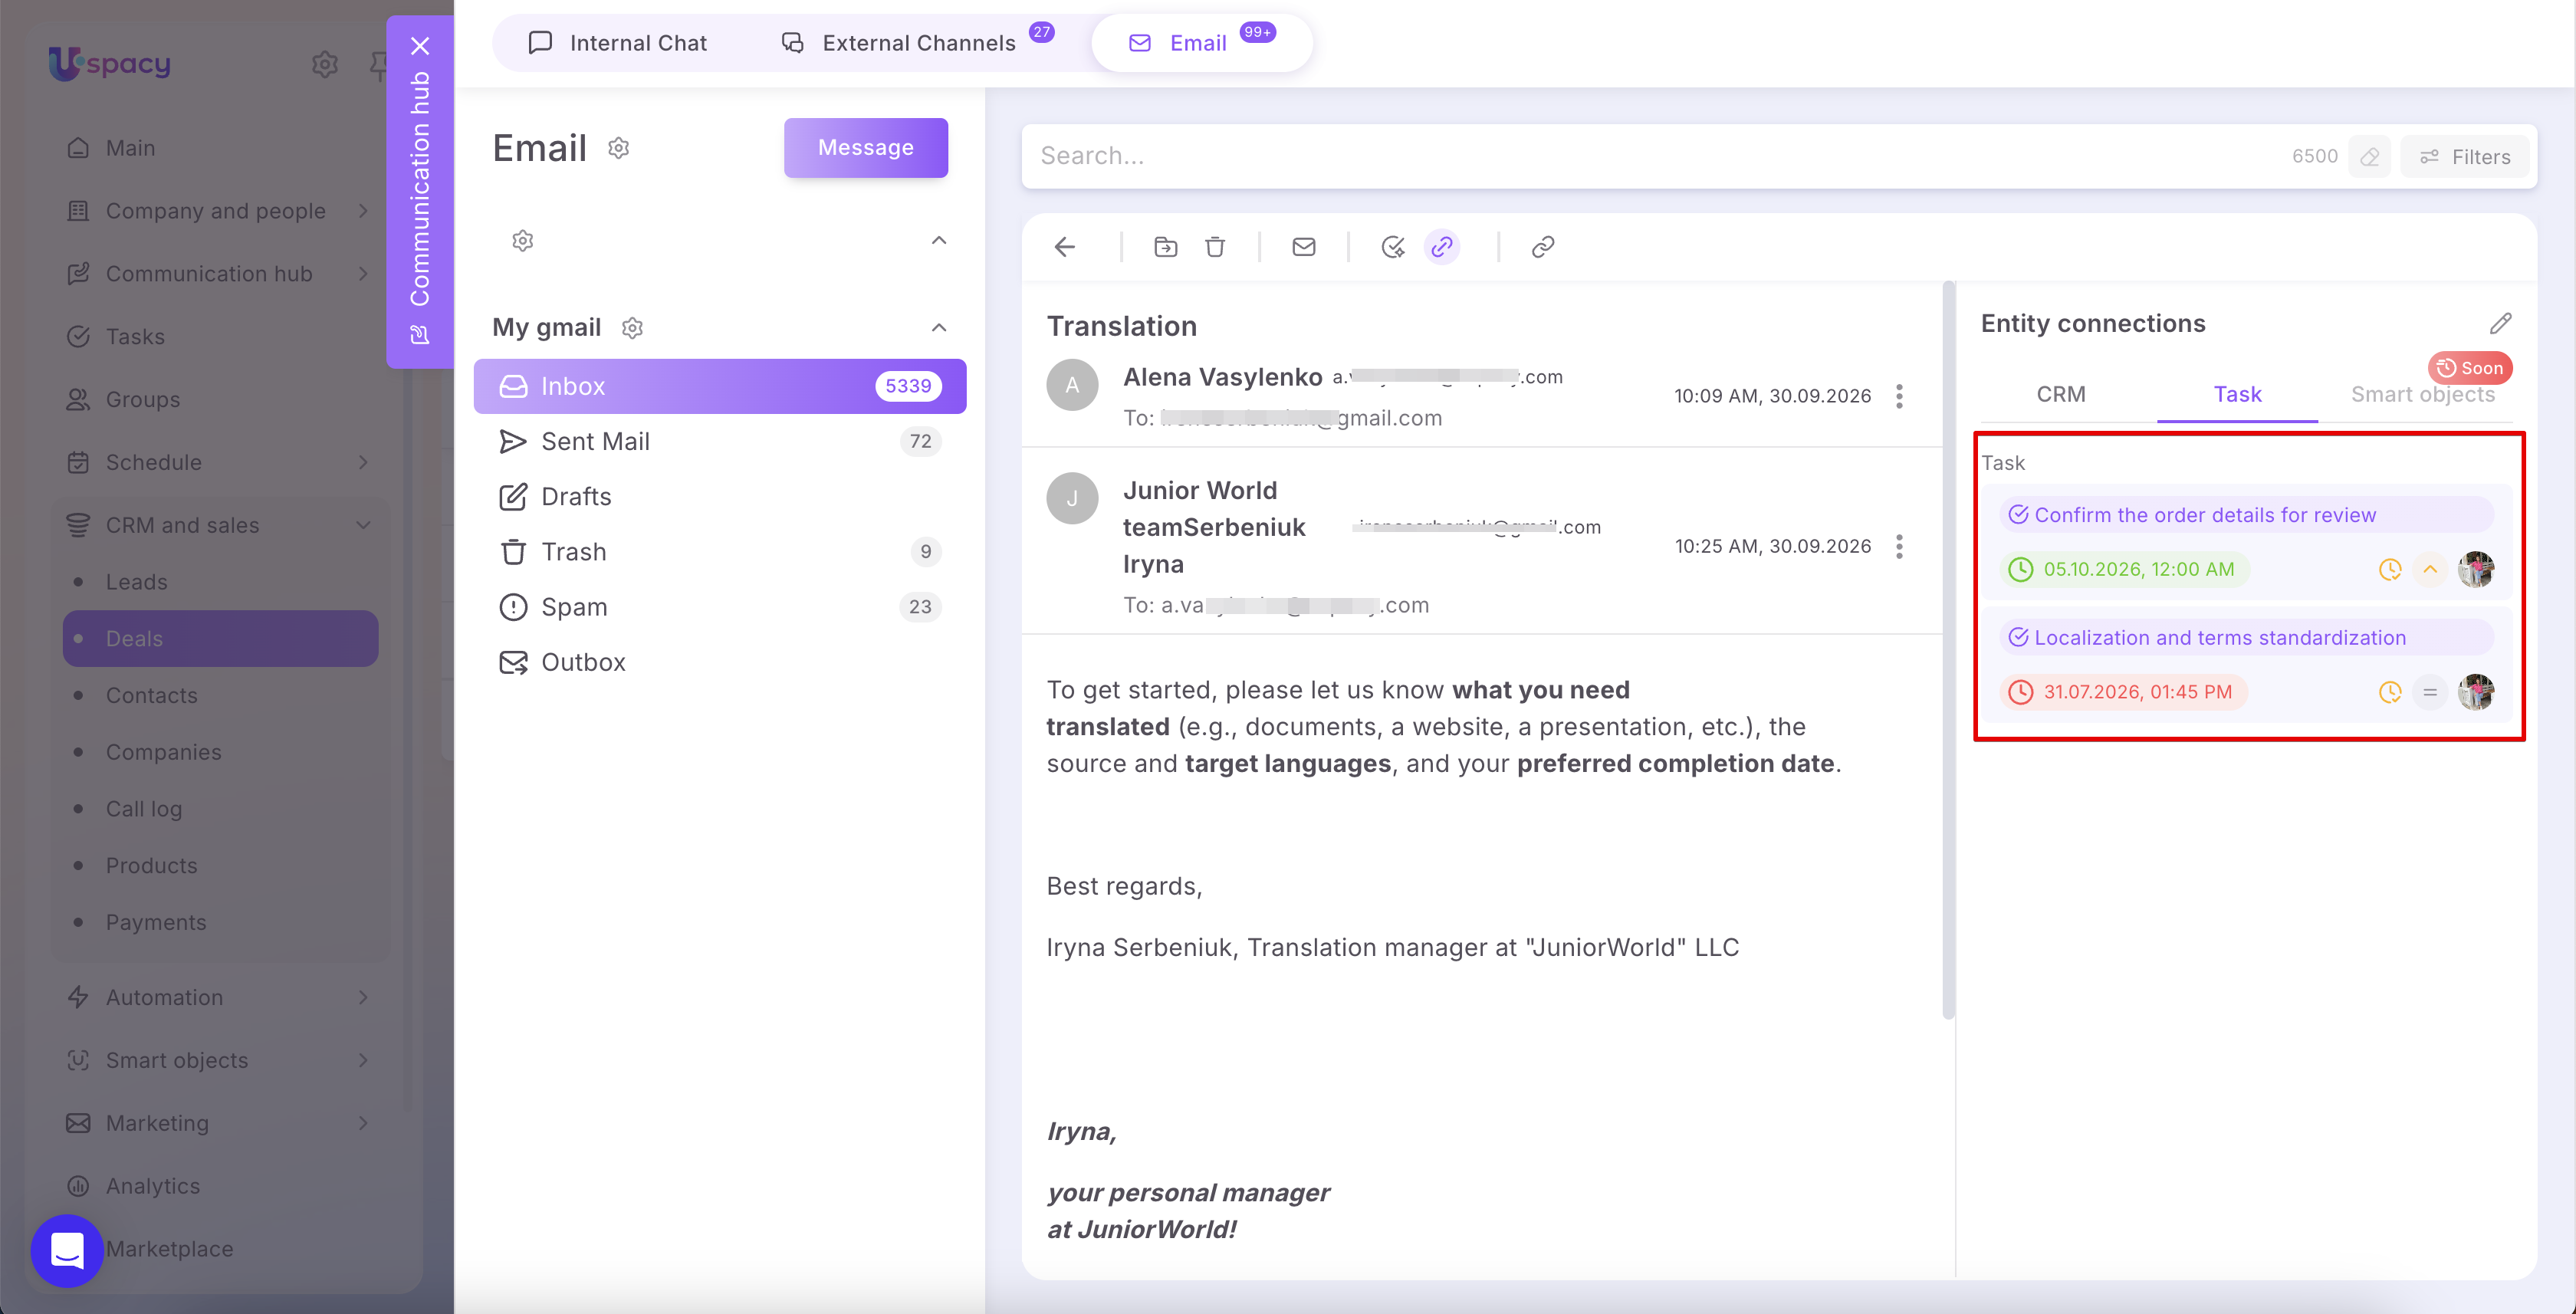
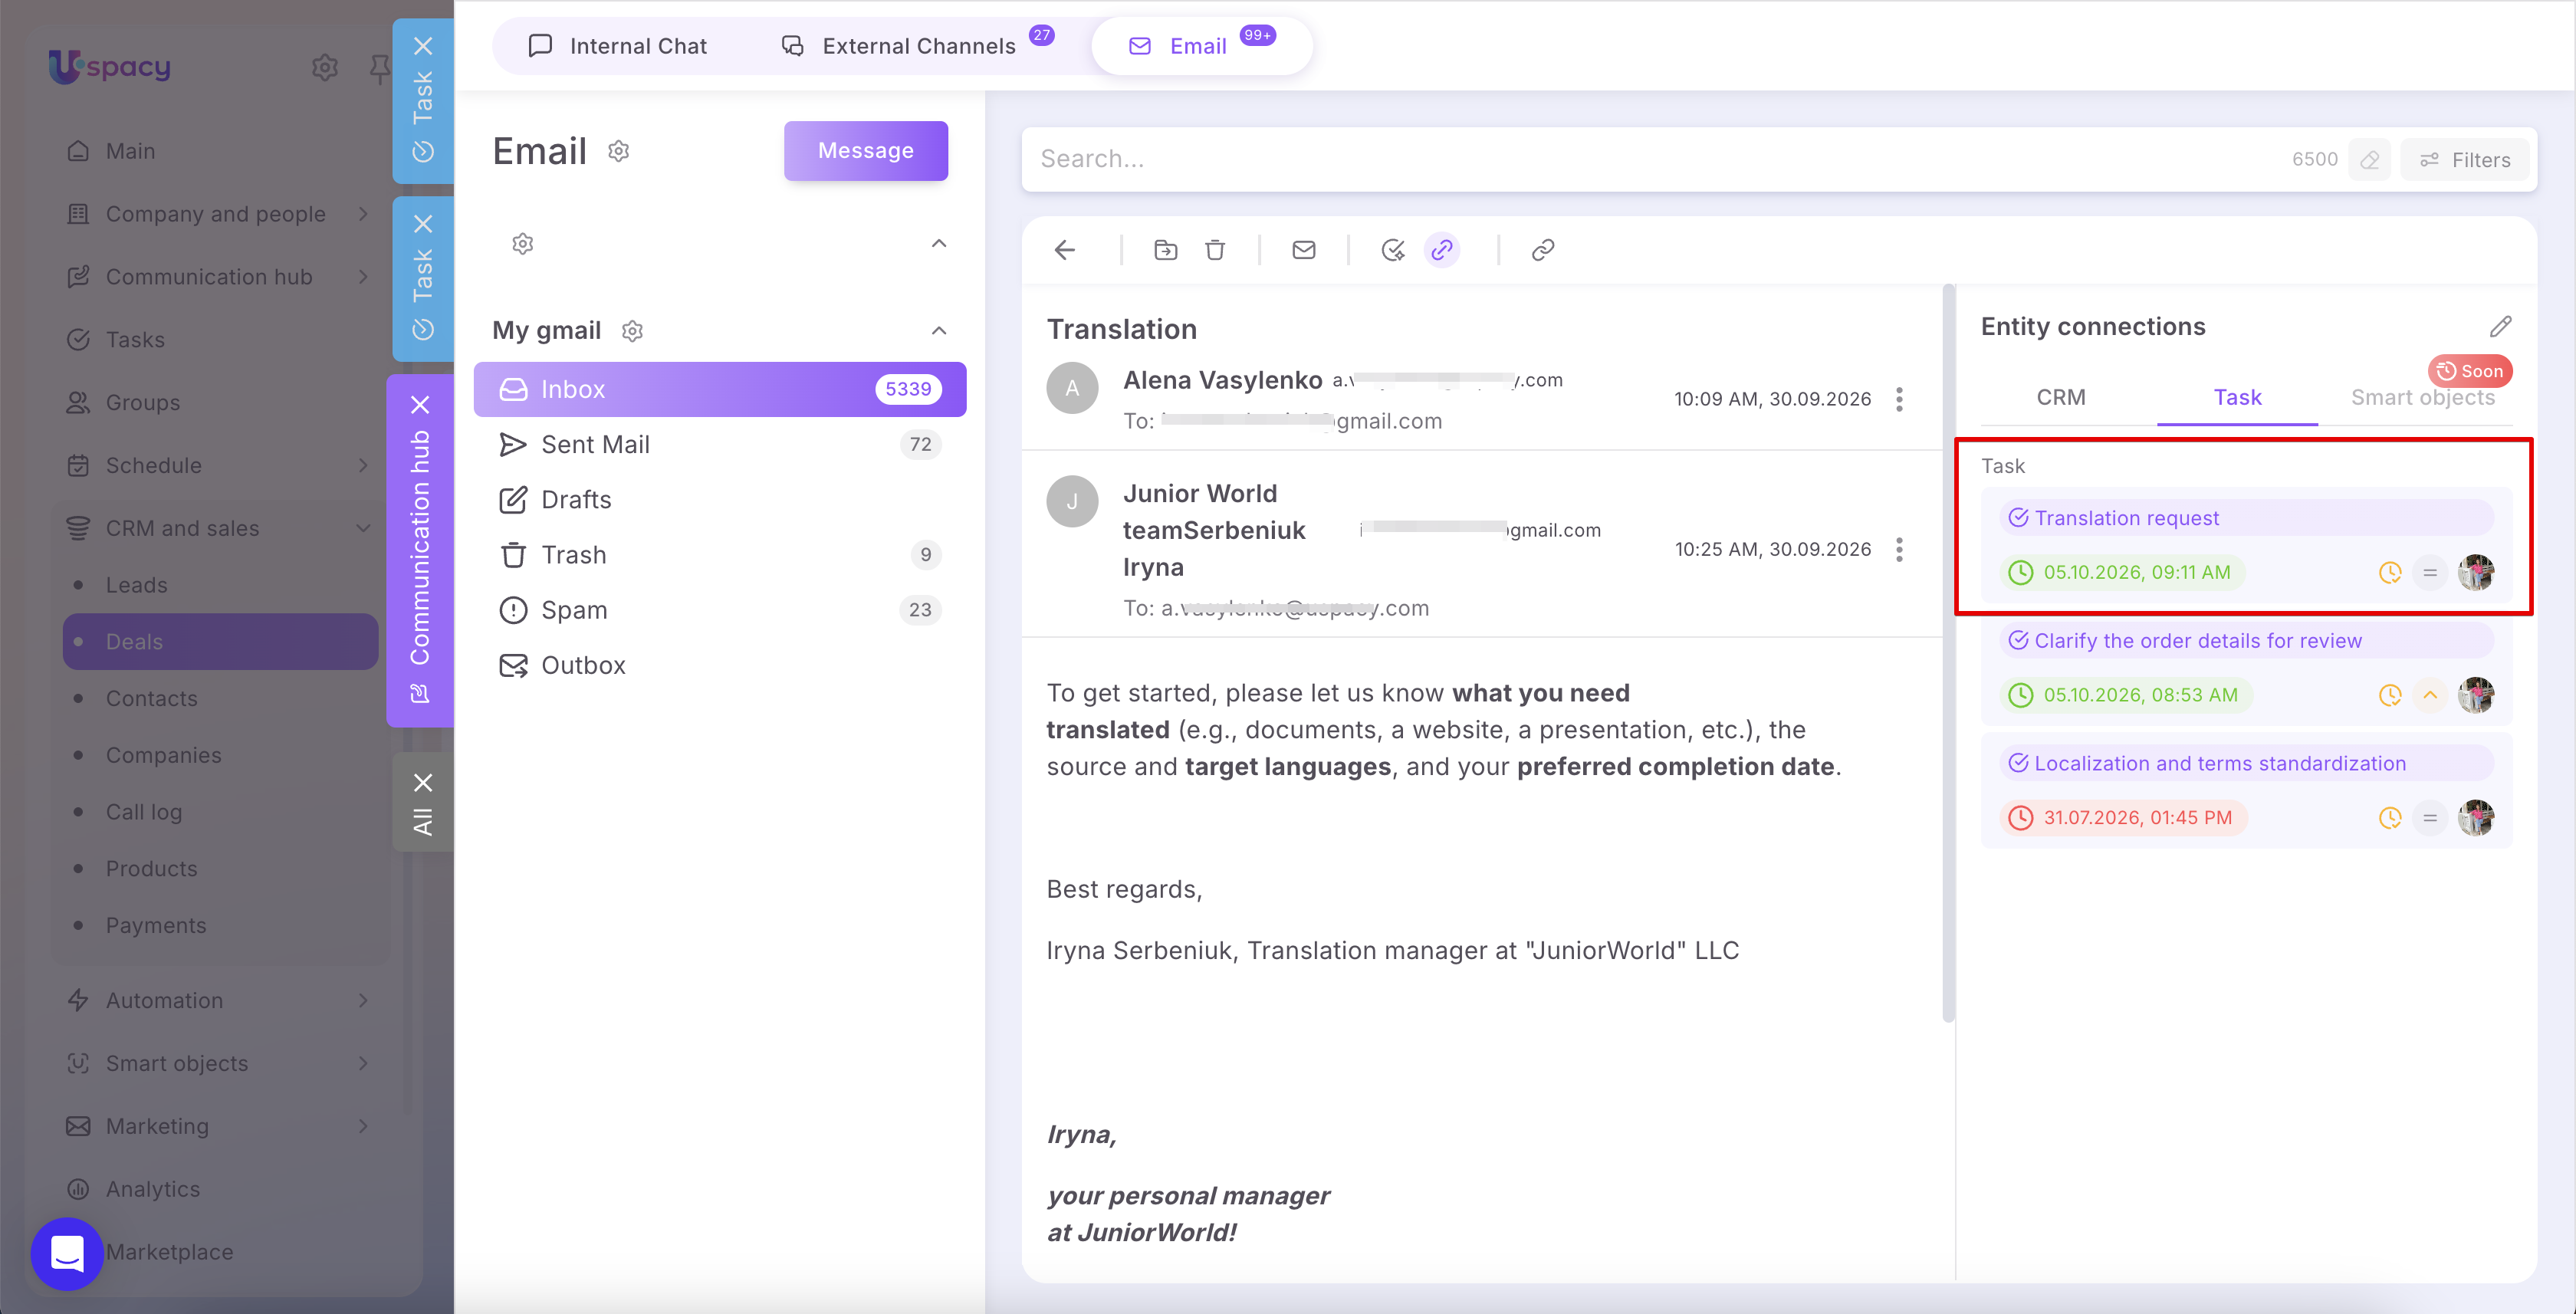
Click the Go to viewing mode button to see the final result.
The Tasks tab will display the linked tasks and key information about them: name, deadline, status, priority, and person responsible. This makes it easy to see which work is related to the correspondence and when it needs to be completed.
You can modify existing links at any time. To do so, click the pencil icon in the upper-right corner of the Entity connections panel.
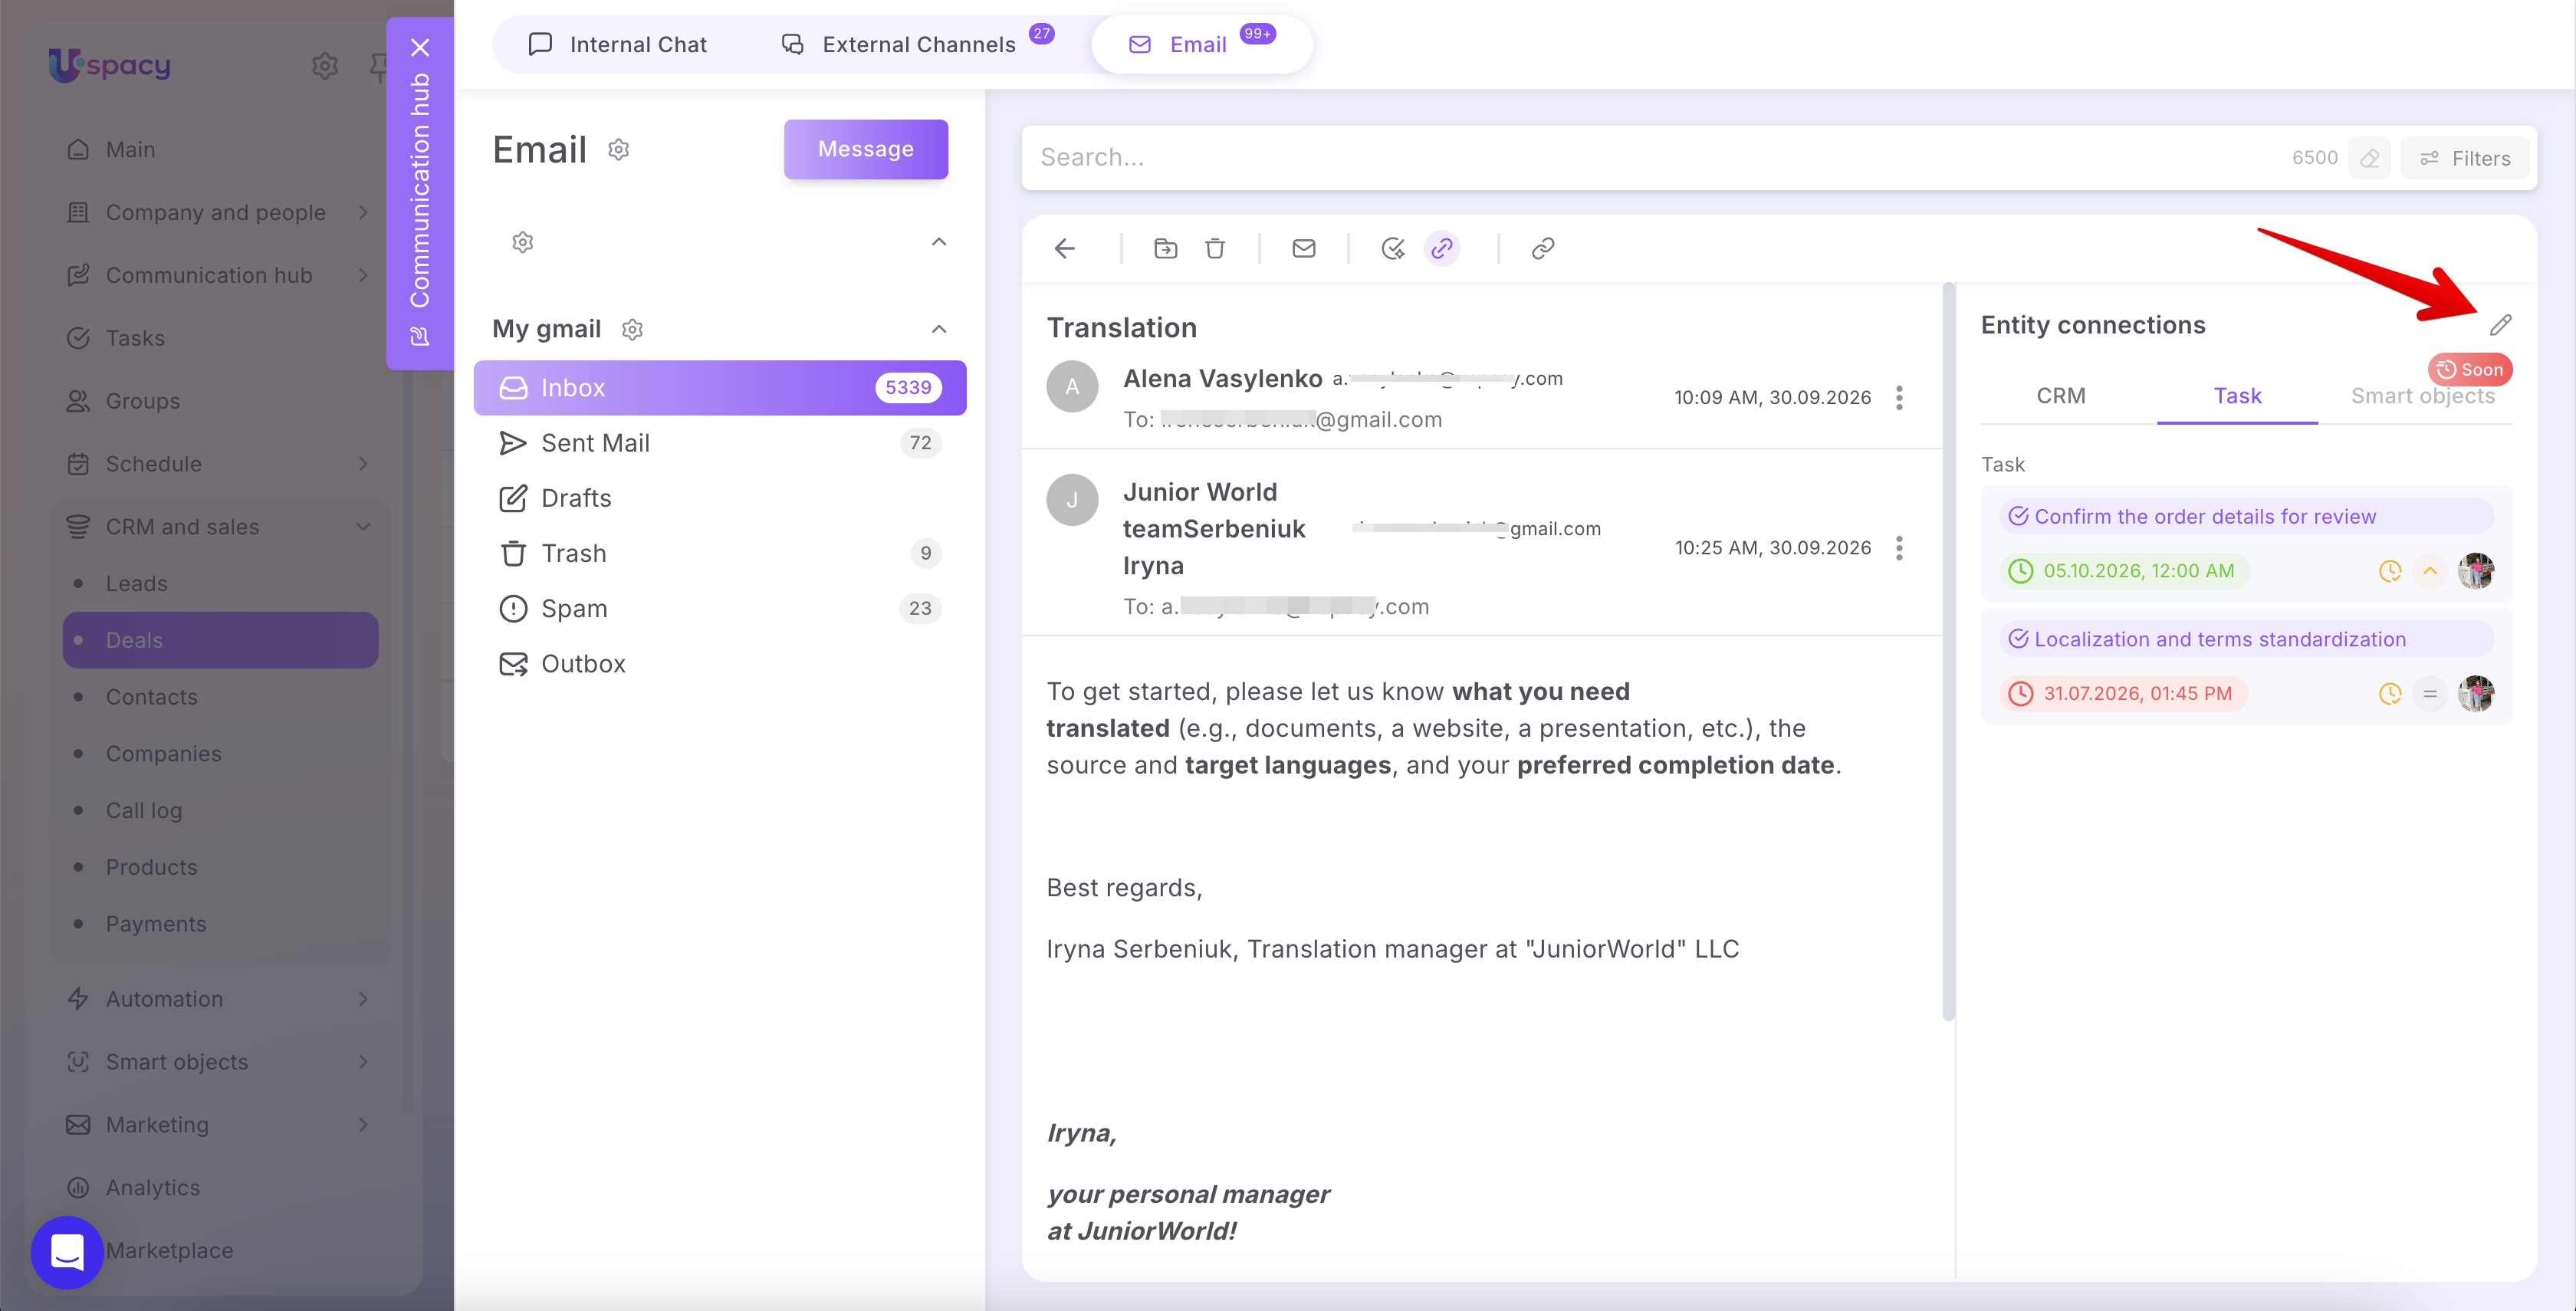
On the Tasks tab, add other tasks or create a new one.
To remove a link, click the X next to the task name.
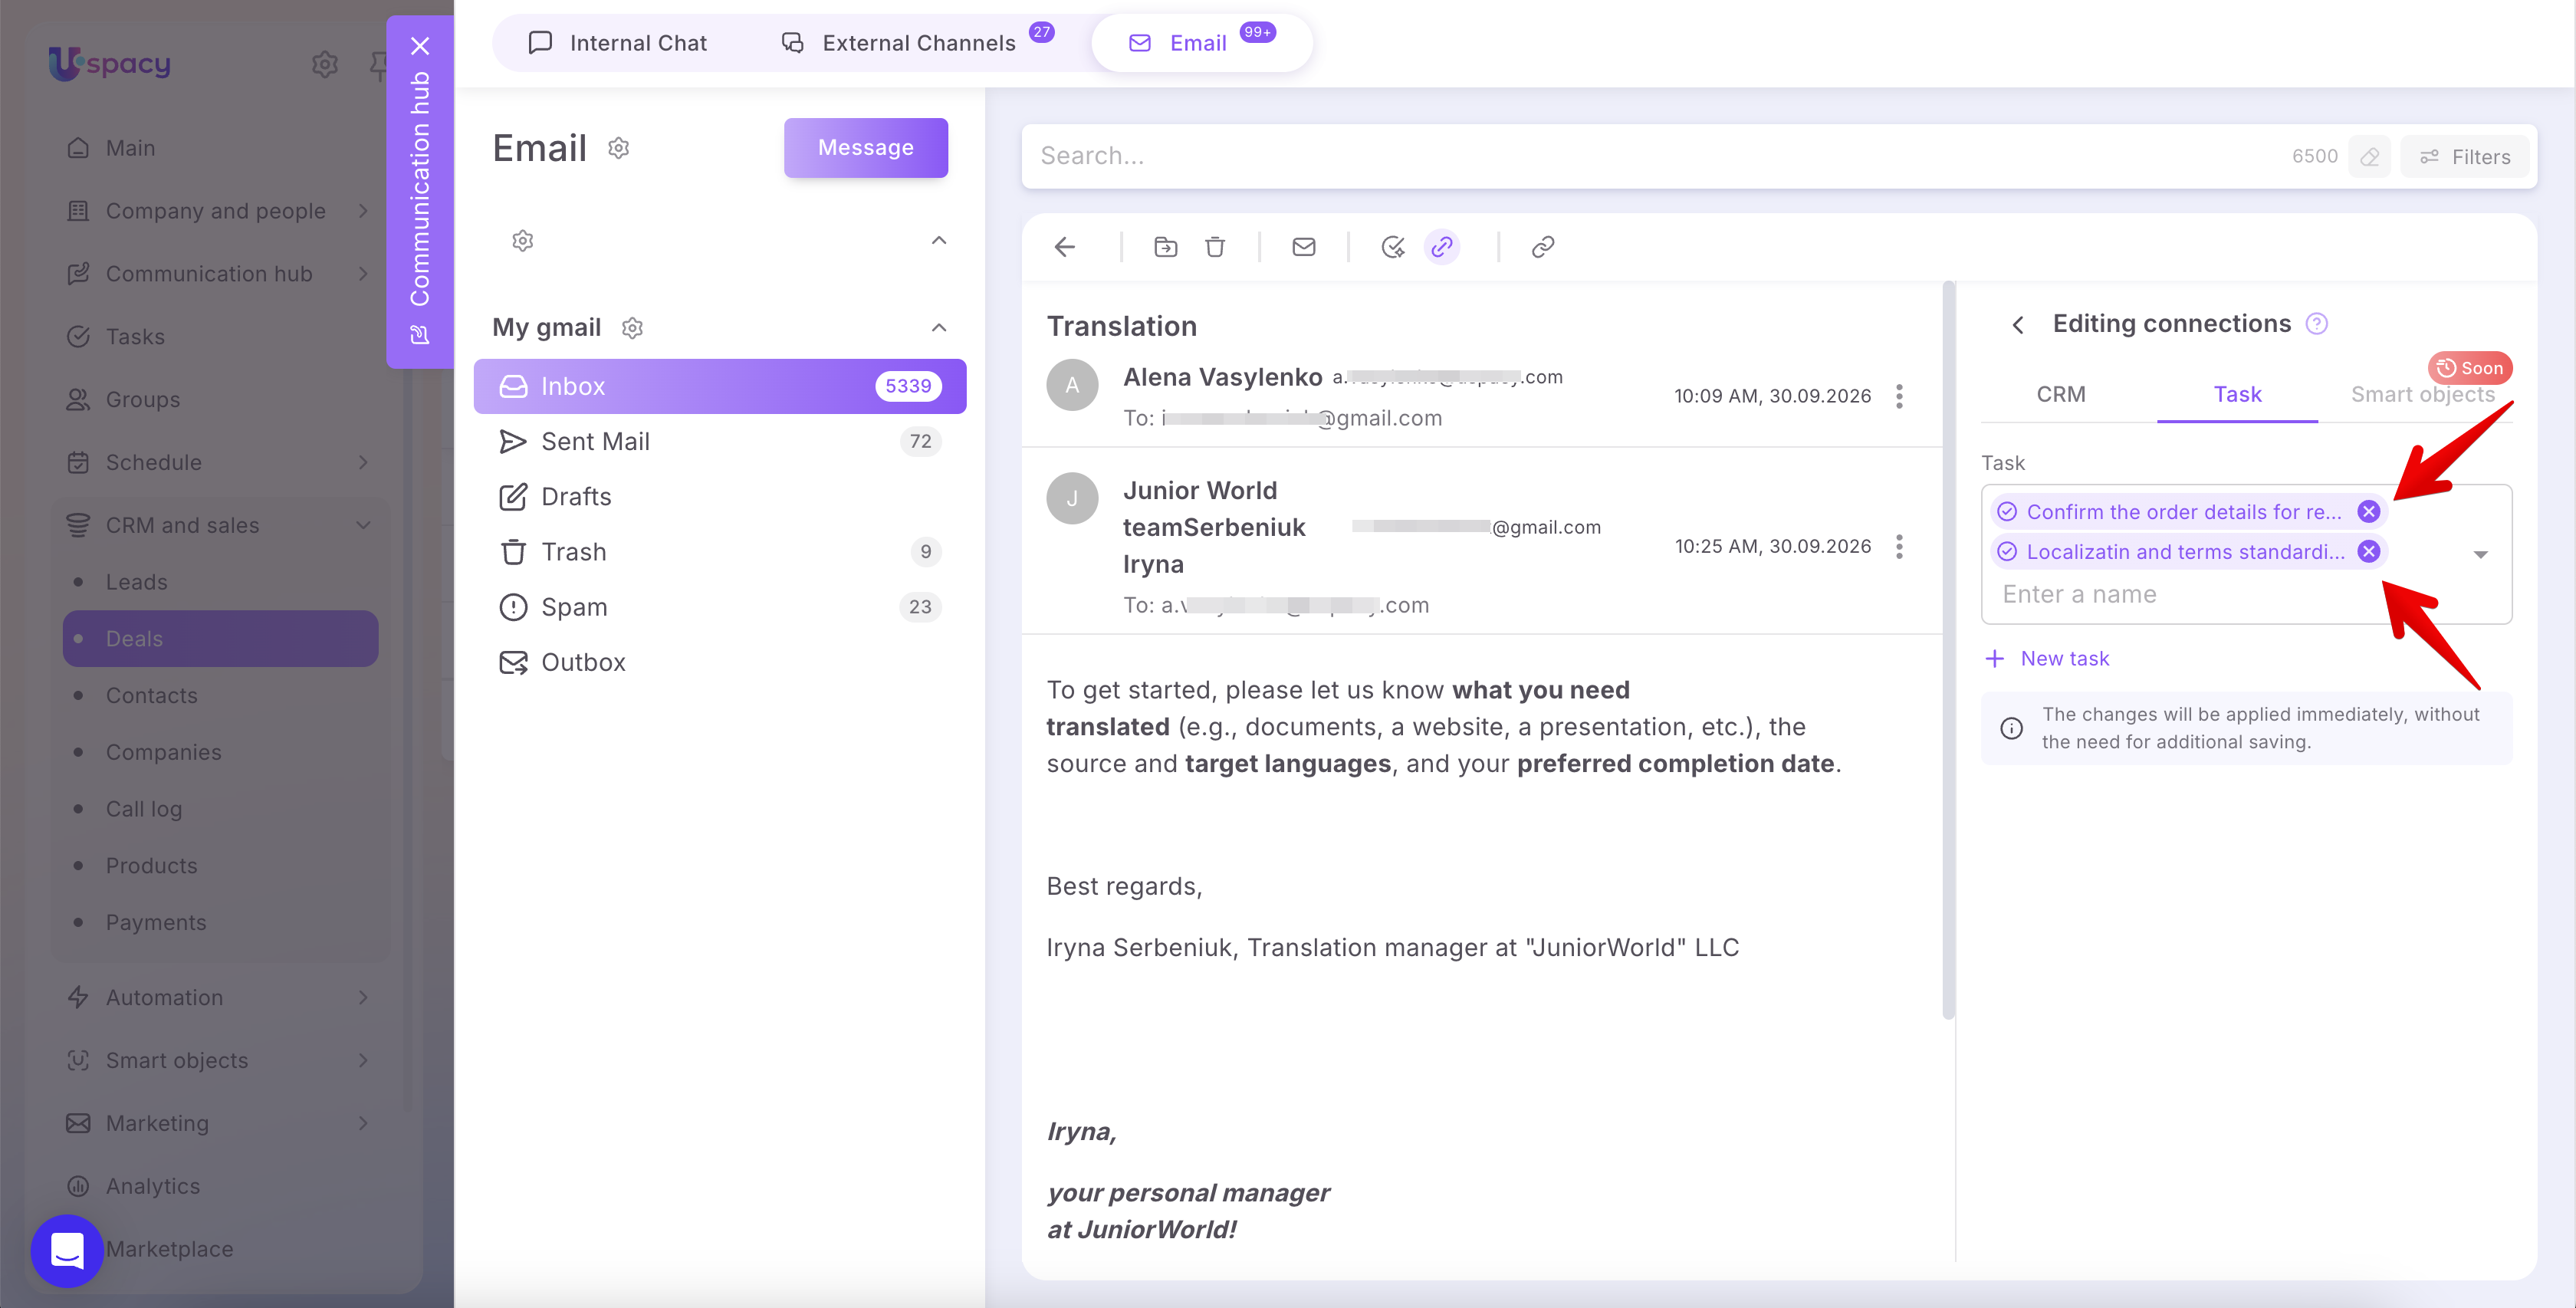
💡 Removing a link does not delete the task itself. It remains in the Space but is no longer displayed among the tasks linked to that email.
You don’t need to save the changes separately. To return to the list of linked tasks, click Go to viewing mode.
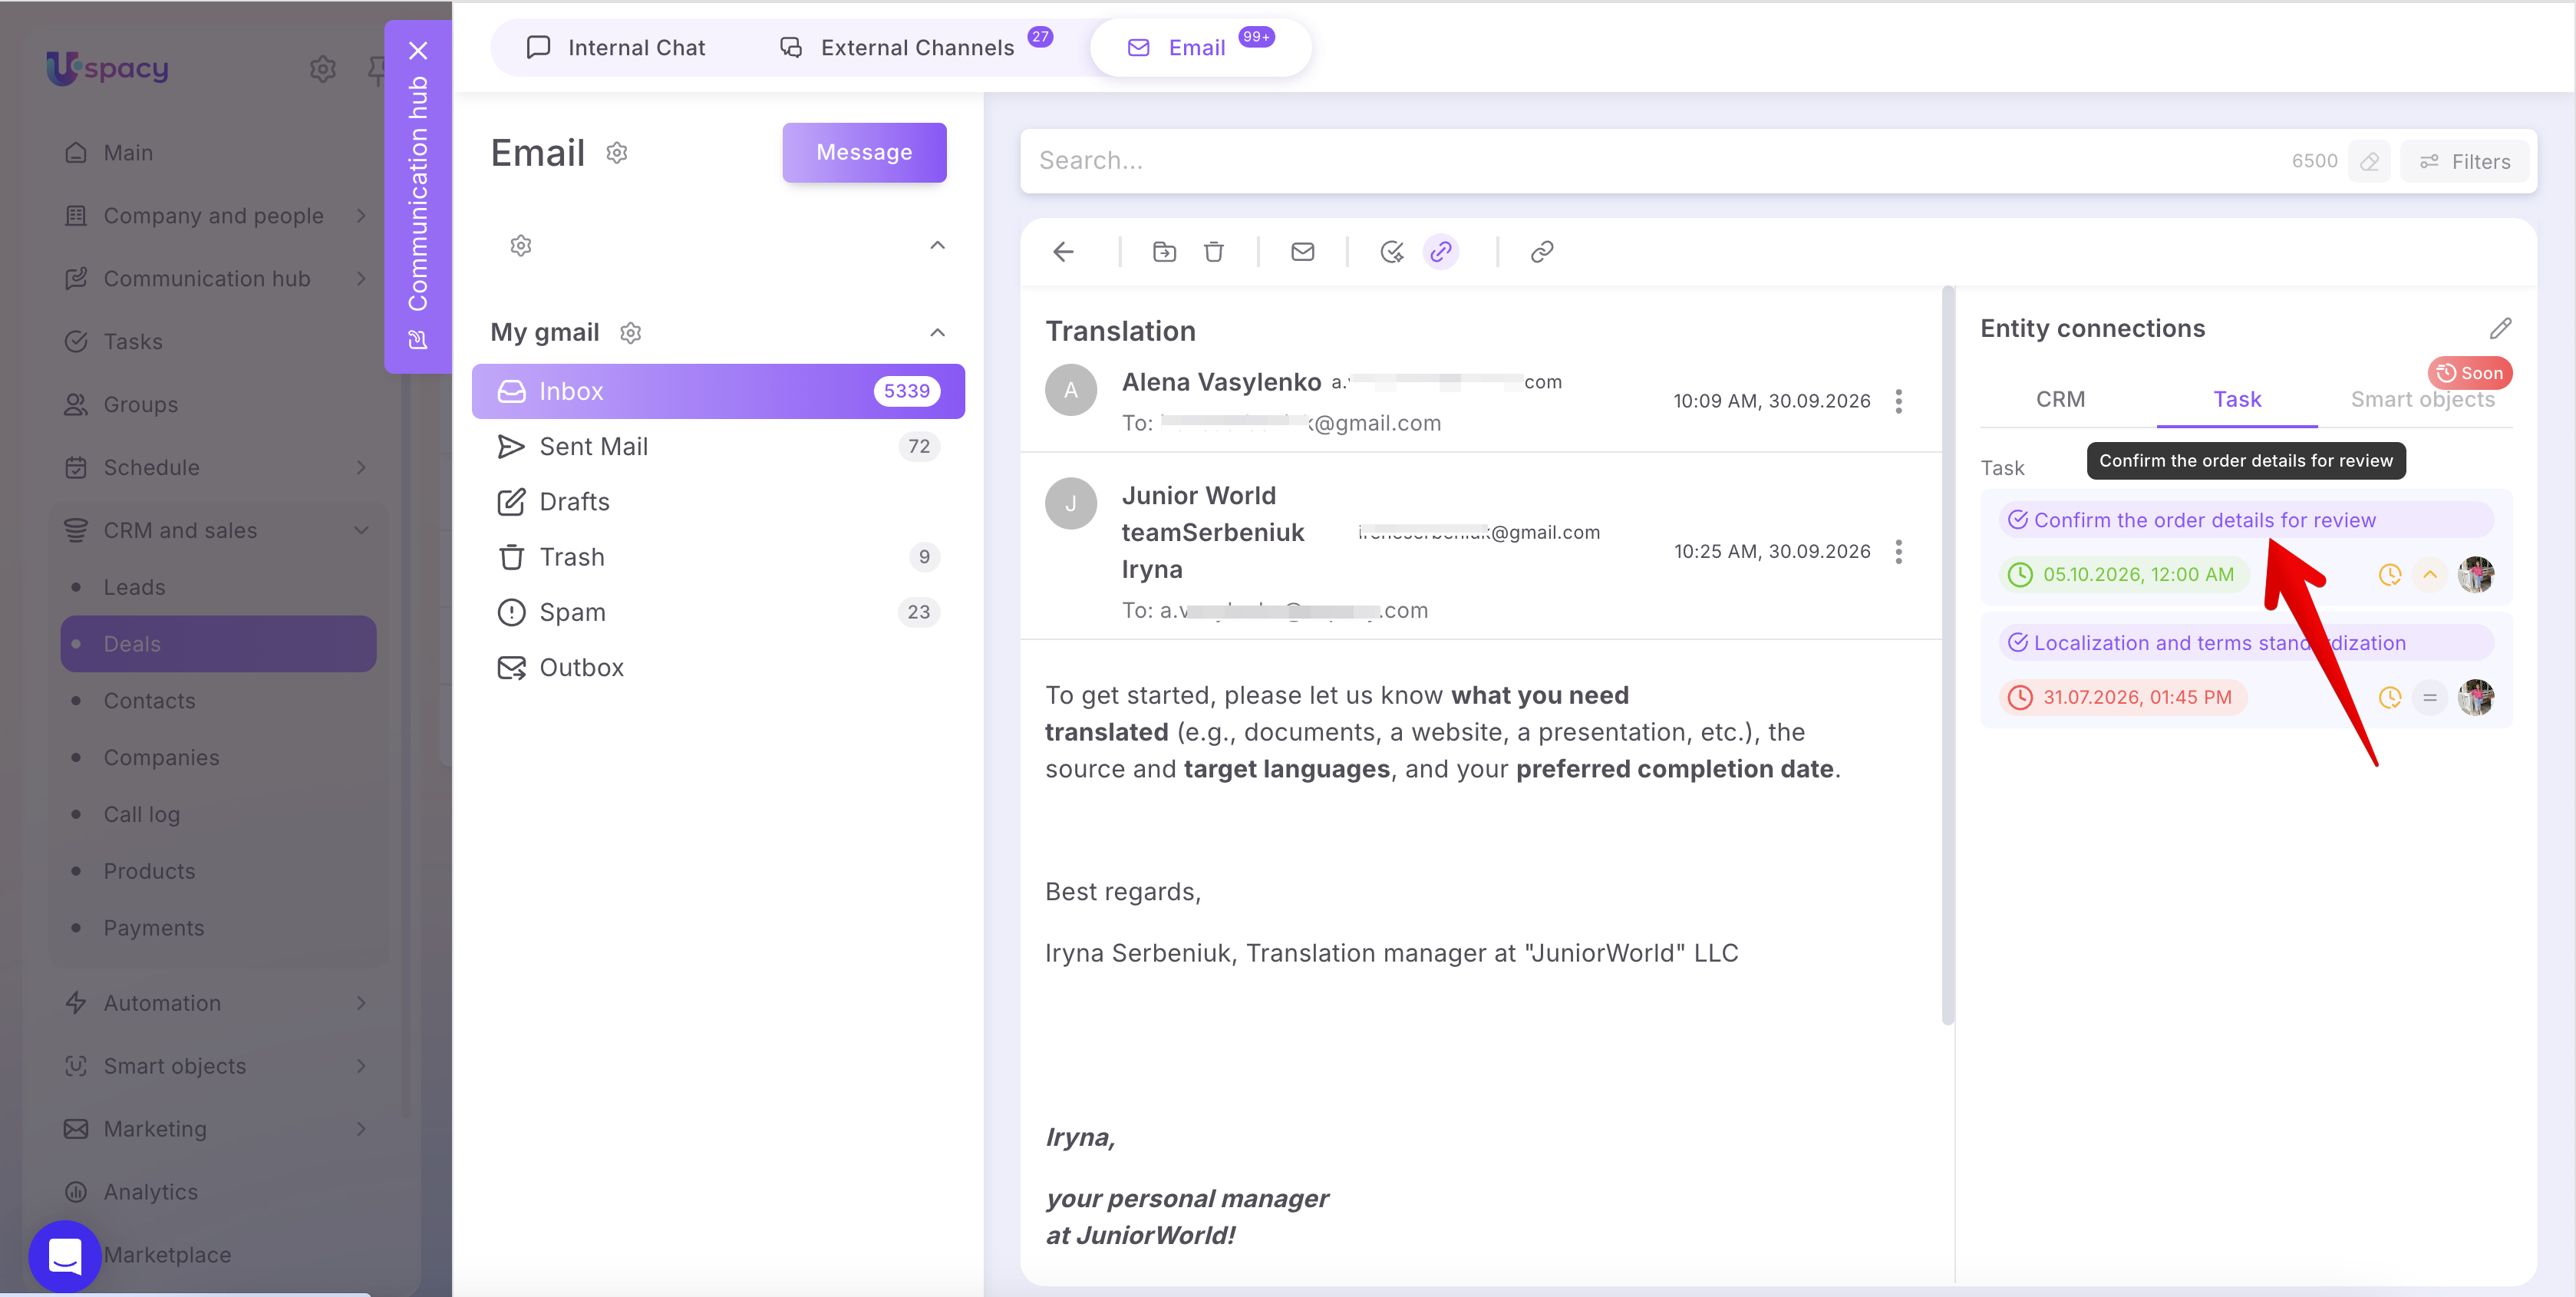
To open a linked task, click its name in the connections panel.
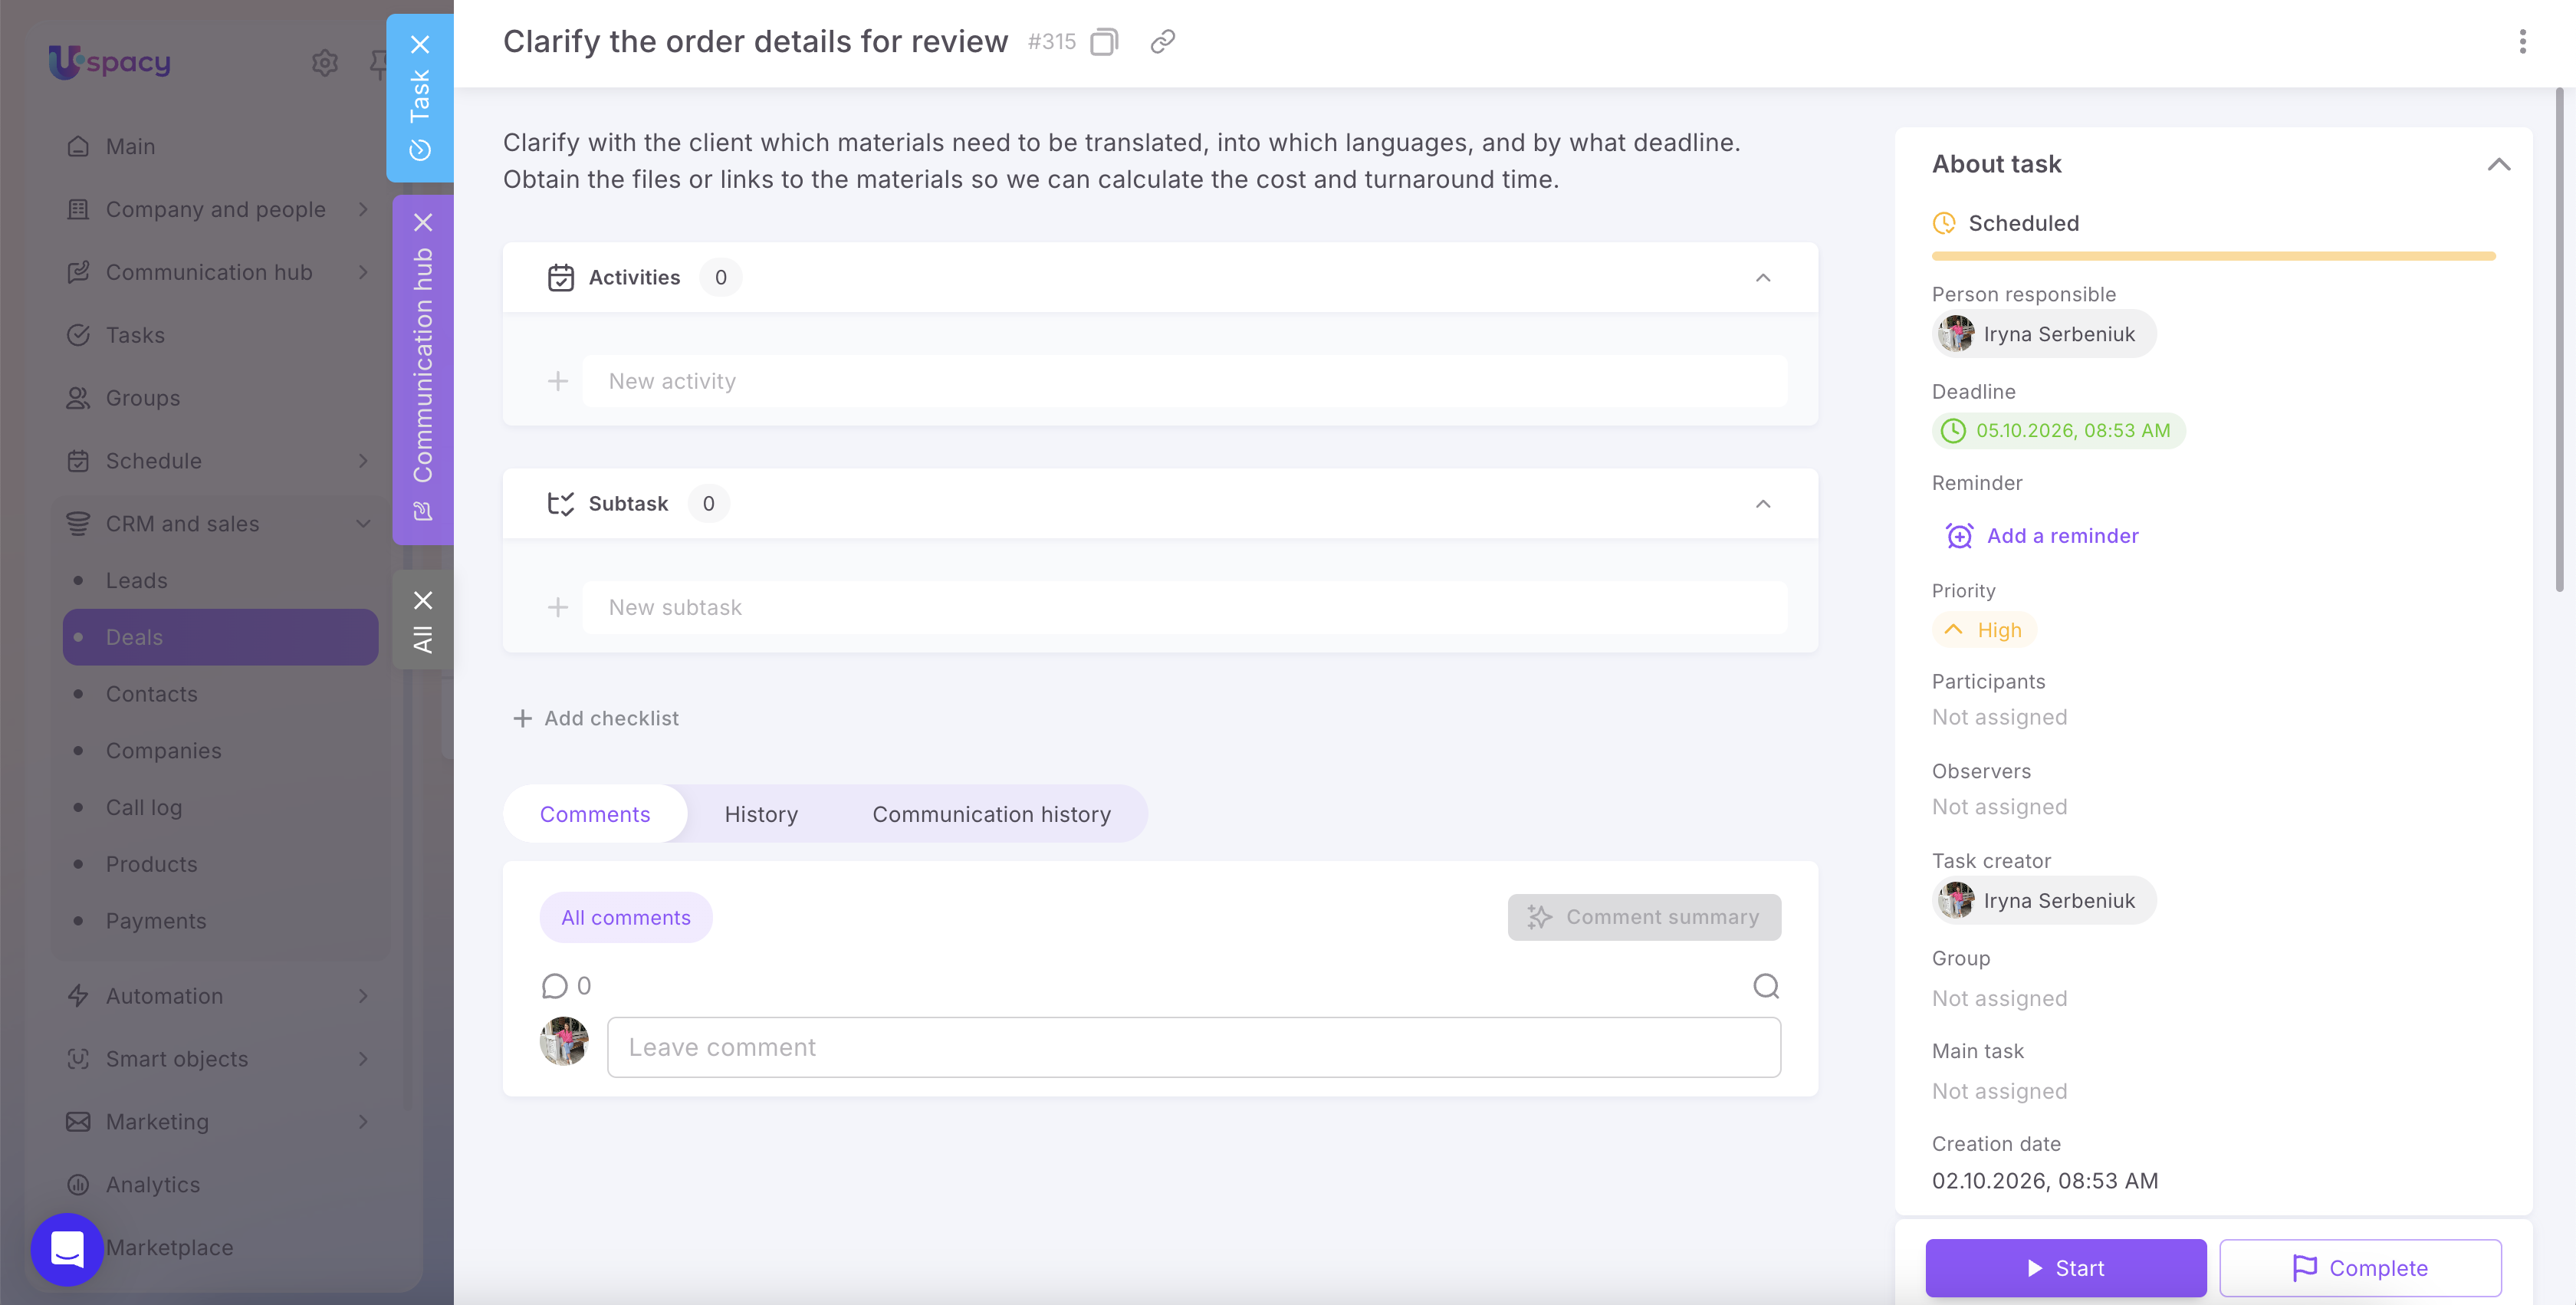
The task card will open. Here, you can view its description and other information, add a comment, or continue working according to your access permissions.
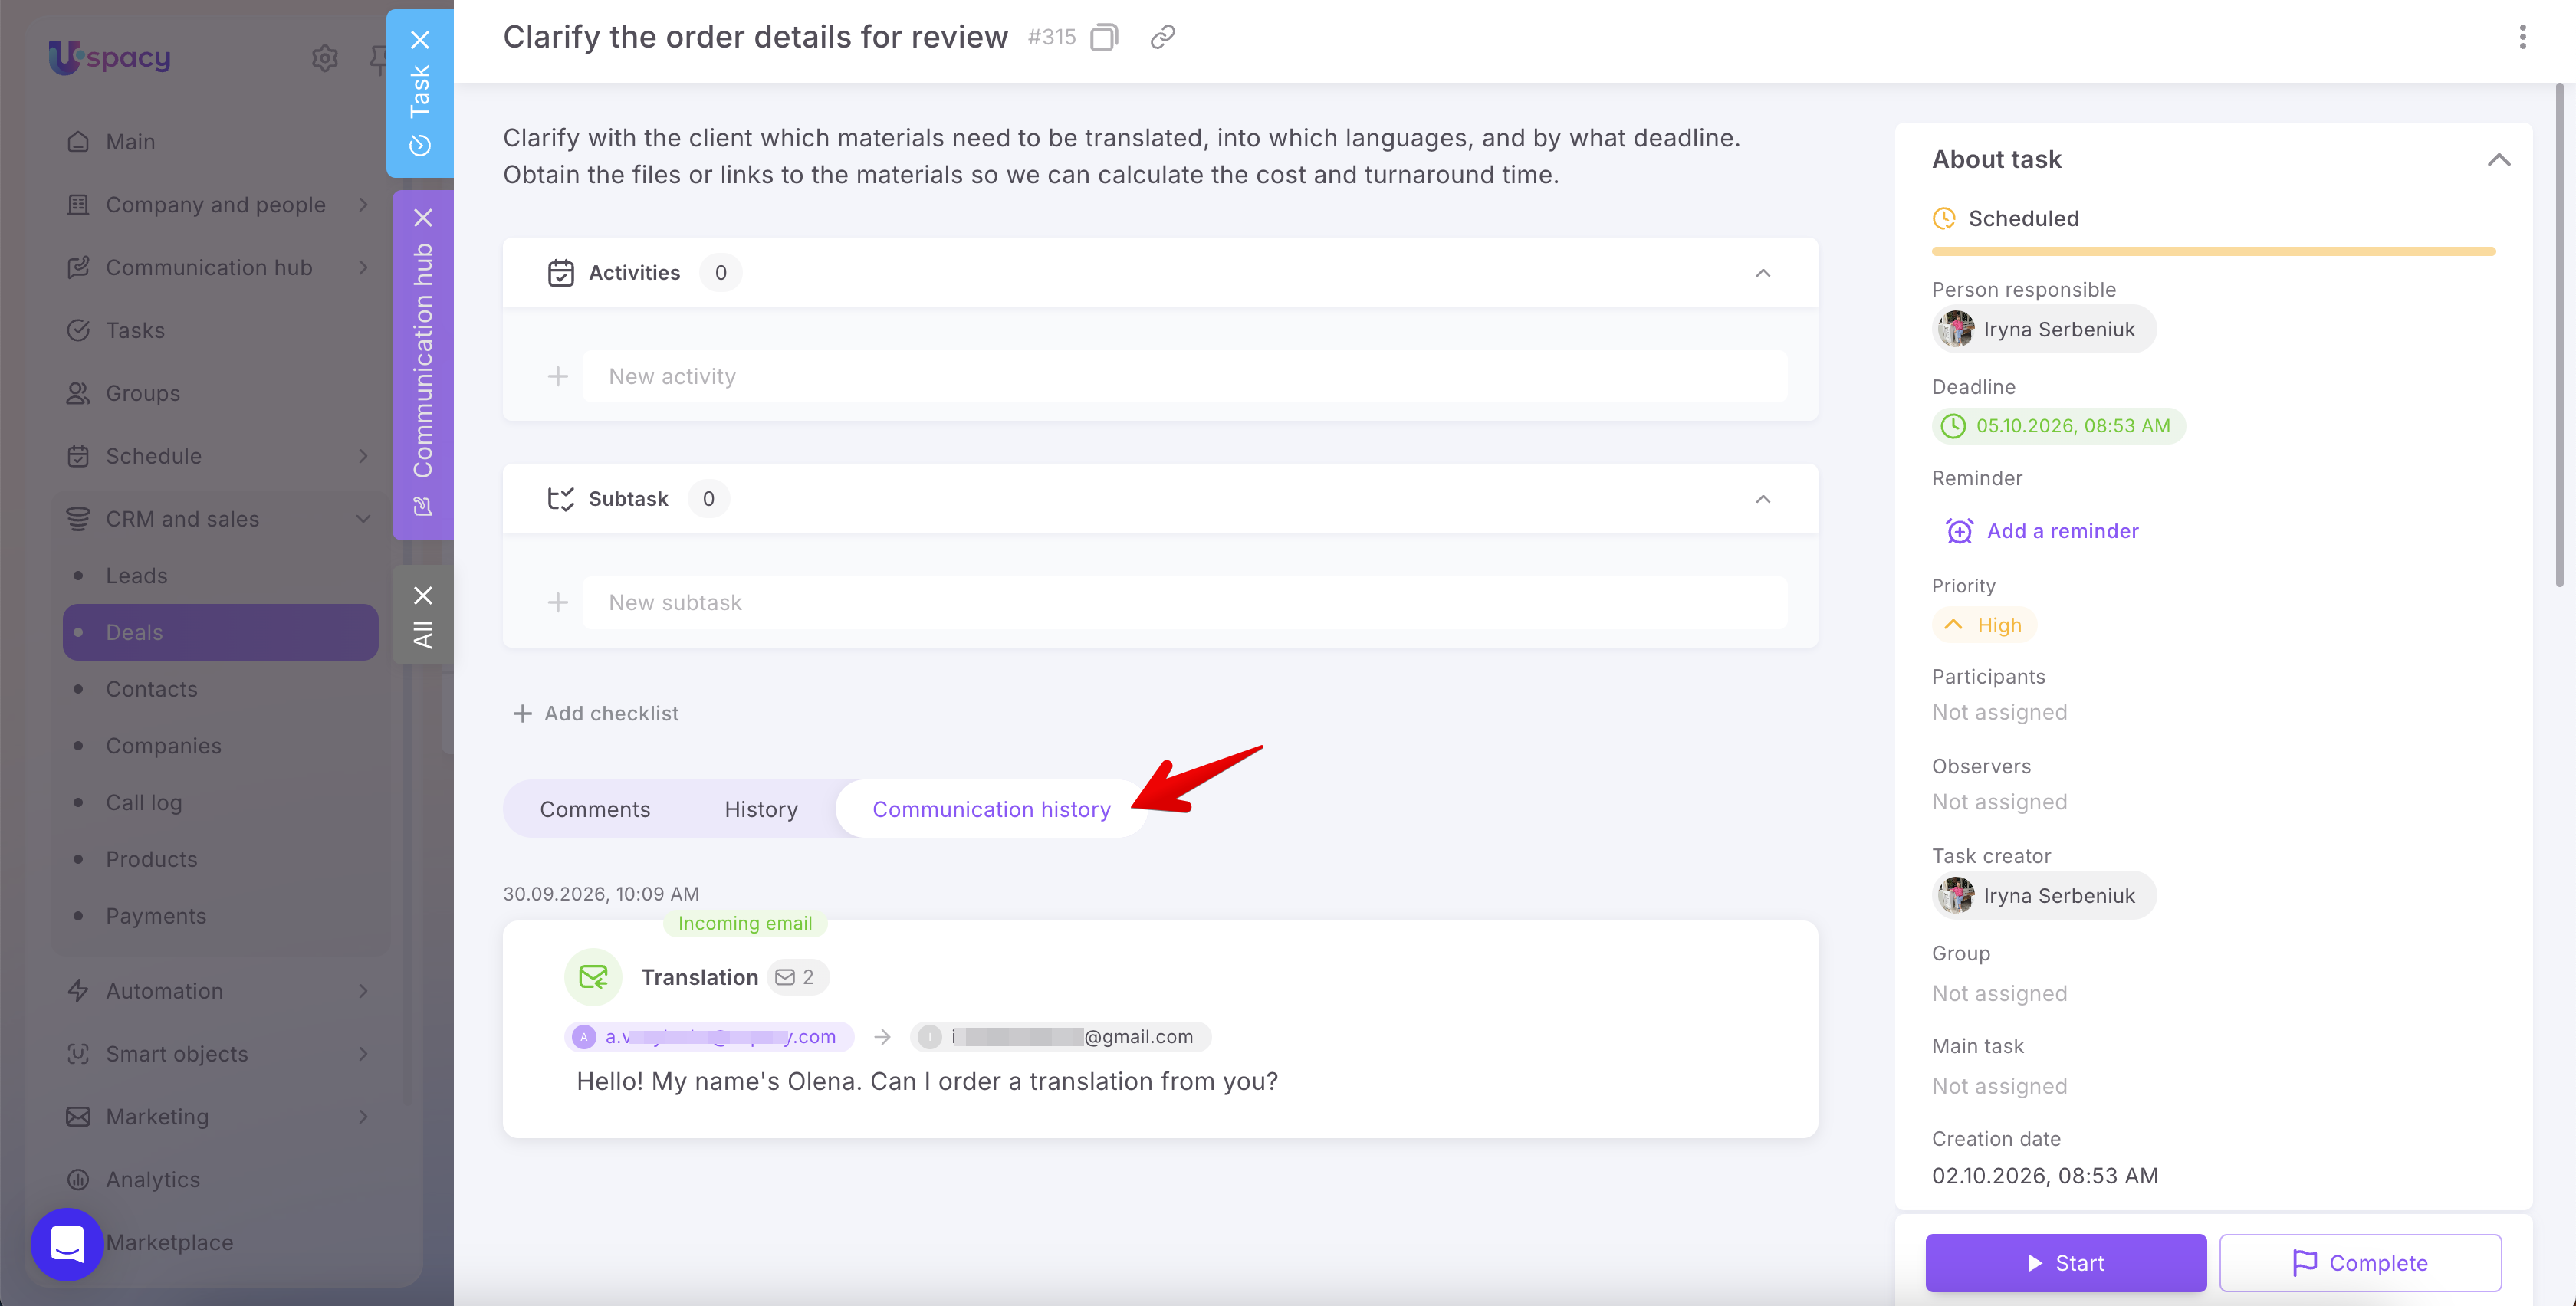
In the task card, go to the Communication history tab. Here, you’ll see the correspondence linked to the task.
The record displays the date and time, email subject, sender and recipient, as well as the beginning of the message text. The number of emails in the thread is shown next to the subject.
This makes it easy to recall the client’s request and the agreements that the task is based on.
Key features of linking tasks to emails
- You don’t need task editing permissions. Linking an email to a Task works even if you don’t have permission to edit that task. This differs from links to individual CRM entities, where editing permissions may be required.
- You need to be able to view the task. If you are not a member of the task, you won’t see it in the list and therefore won’t be able to link it.
- Linking is available only from the conversation. Currently, you cannot add an email link from the Task card. Linking must be done directly from the email using Entity connections.
- Tasks created from emails using AI are linked automatically. You don’t need to add the link manually. After the task is created, it will appear on the Tasks tab in the Entity connections panel. The linked correspondence will also be available in the task card on the Communication history tab.
In summary, linking emails to tasks helps you capture the work that arises during email correspondence. Select an existing task or create a new one directly from the email, assign it to the appropriate person, and set a deadline. Linked tasks will be available on a dedicated tab, where you can open their task cards.
If you have additional questions or you need to contact the support, send a request to this email [email protected]
Created: October 1, 2026 / Updated: October 2, 2026