
The Uspacy MCP Server allows you to connect ChatGPT to your Uspacy data and tools. Once configured, you can use natural language prompts to search your Workspace or perform supported actions.
For example, you can ask ChatGPT to find a contact or deal, display your task list, create an activity, update a CRM record, or move it to another funnel stage.
The Uspacy MCP Server provides 25 tools. Whether a request can be completed depends on the available MCP tools, your permissions in Uspacy, and the information included in your prompt.
What you need before you connect
Make sure that:
- the Codex desktop app is installed on your computer;
- you're signed in to your account;
- you have an active Uspacy account;
- you have access to the required Workspace;
- your Uspacy role allows you to view or modify the data you need.
Next, prepare the Uspacy MCP server URL. If you work with a single Workspace, you can use the general URL:
https://mcp.uspacy.com/mcp
In this case, the Workspace the user authenticated with most recently will be connected.
If you have multiple Workspaces and need to connect to a specific one, add its domain to the Uspacy MCP server URL:
https://mcp.uspacy.com/mcp/domain.uspacy.ua
For example, to connect to the company.uspacy.ua Workspace, use:
https://mcp.uspacy.com/mcp/company.uspacy.ua
💡 If you work with multiple Workspaces, we recommend using the URL that includes the domain of the desired Workspace. This ensures that Codex works with data from the correct Workspace.
How to add the Uspacy MCP Server
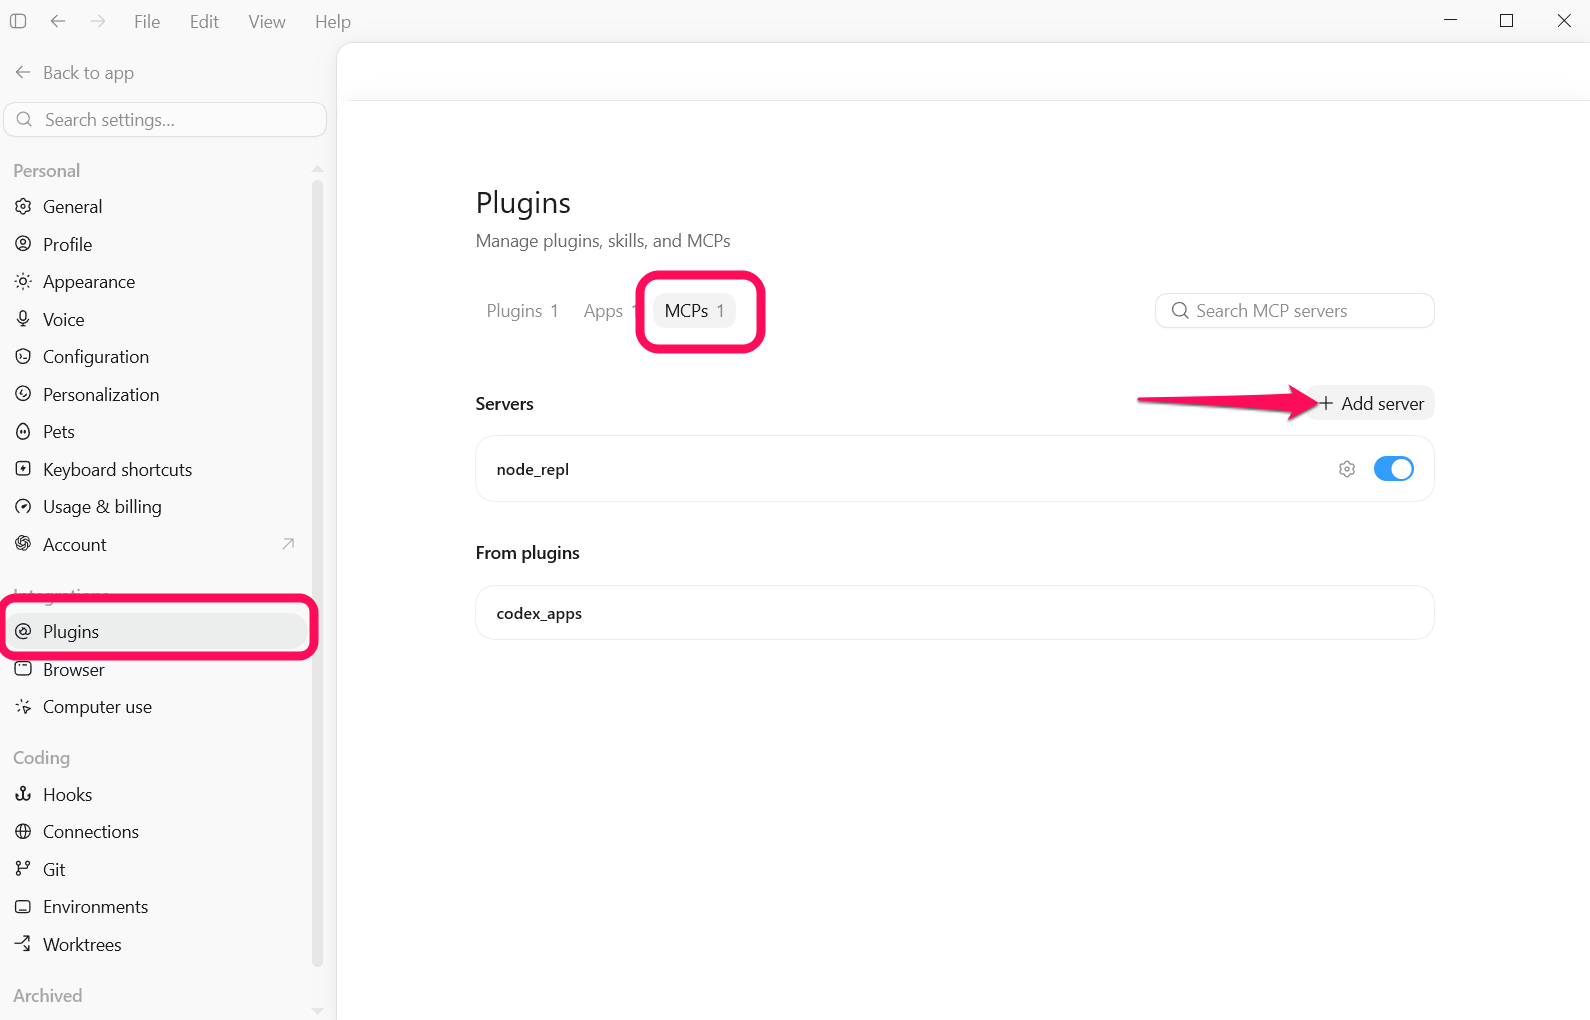
Open the Codex desktop app and go to settings. From the sidebar, select Plugins.
At the top of the page, open the MCPs tab. This page lists all MCP servers currently added to Codex. To create a new connection, click Add server.
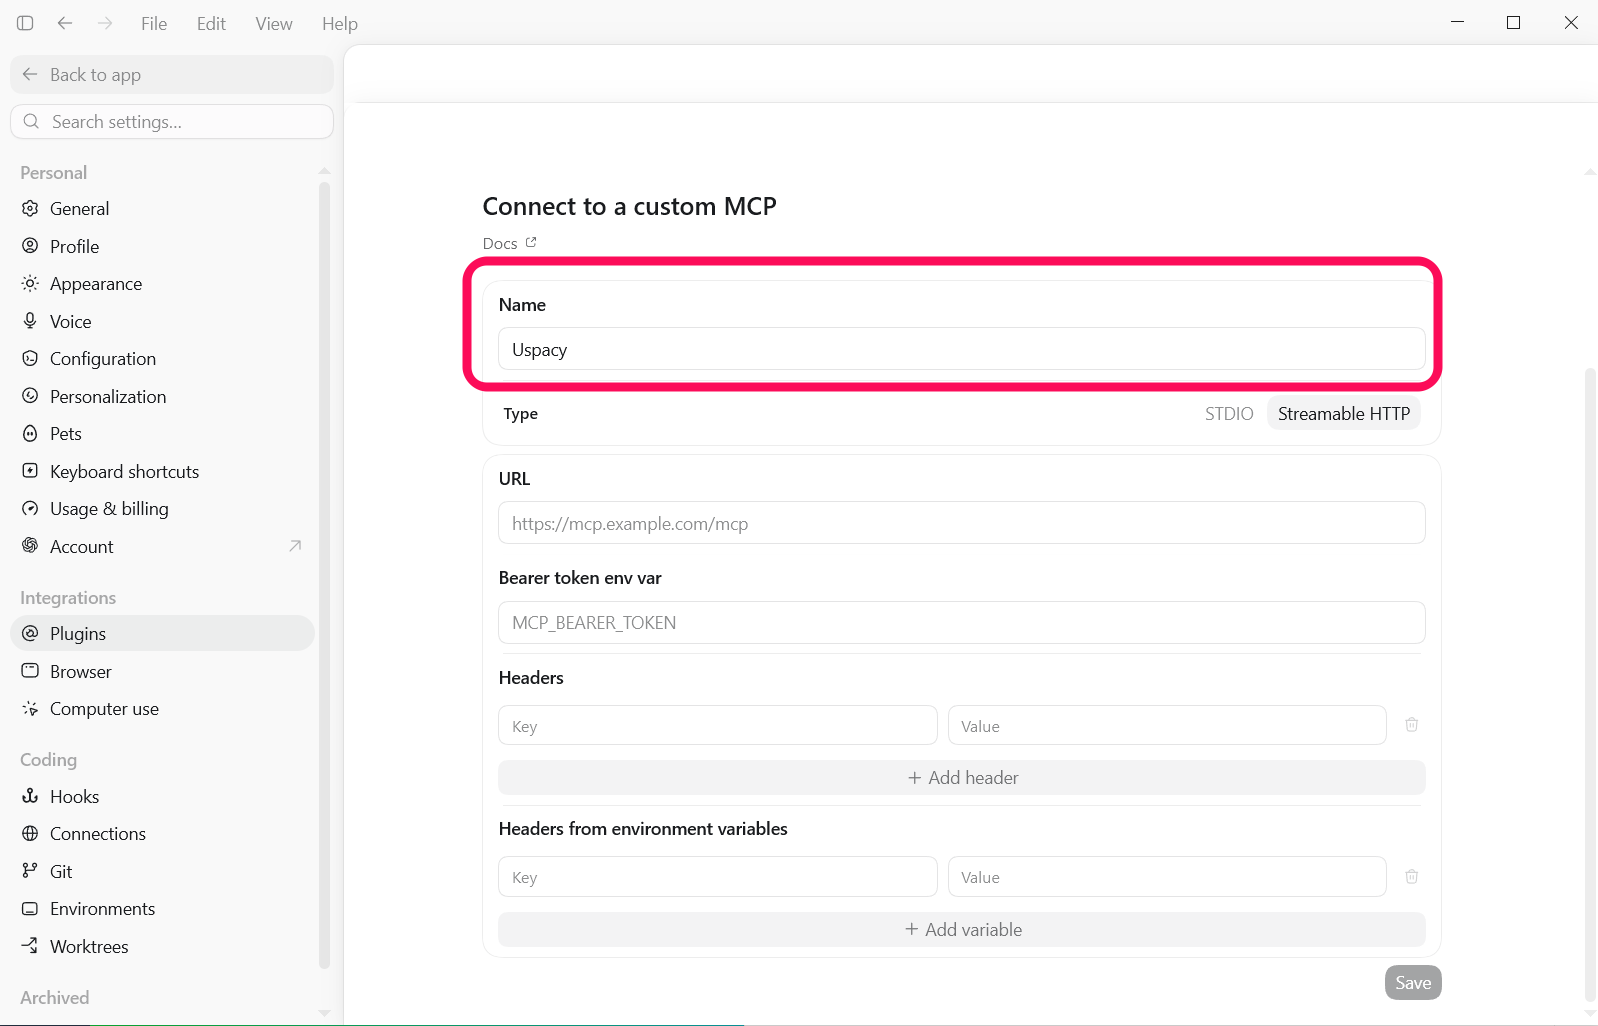
The Connect to a custom MCP page opens. In the Name field, enter a connection name, for example: Uspacy
The name is only used to help you identify the server in your list of connections. It does not affect how the Uspacy MCP Server works.
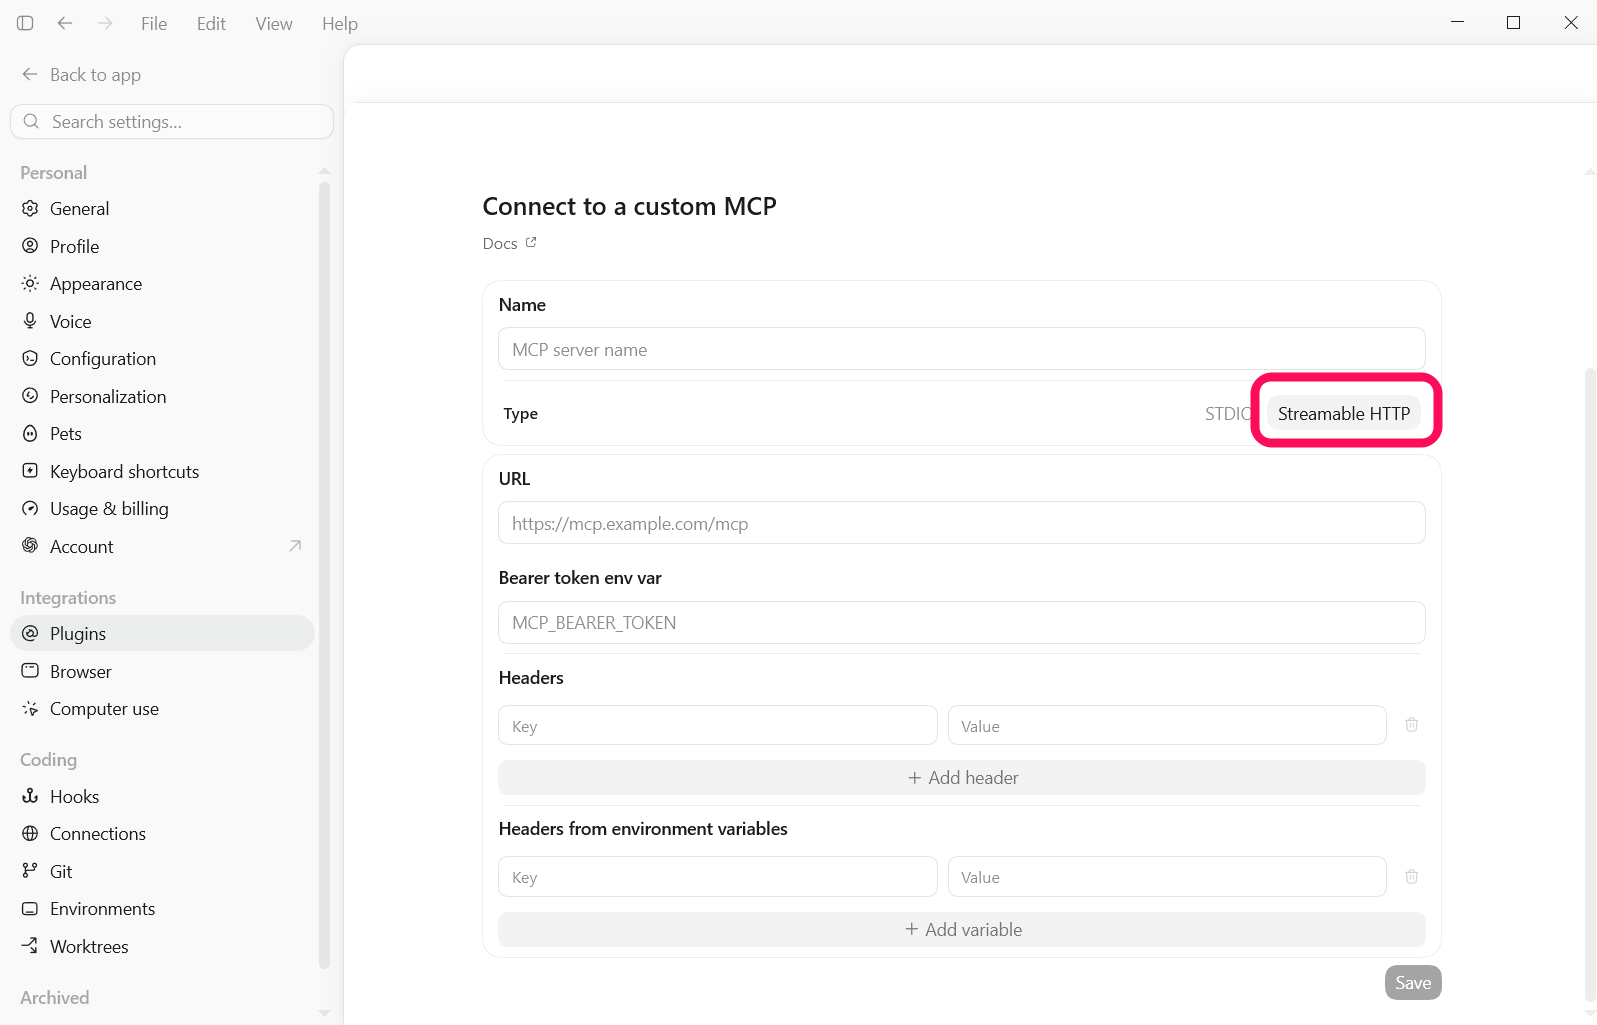
Under Type, select Streamable HTTP.
This connection type is used for remote MCP servers that Codex accesses through a URL. The STDIO option is intended for local MCP servers that are started on your computer using a command.
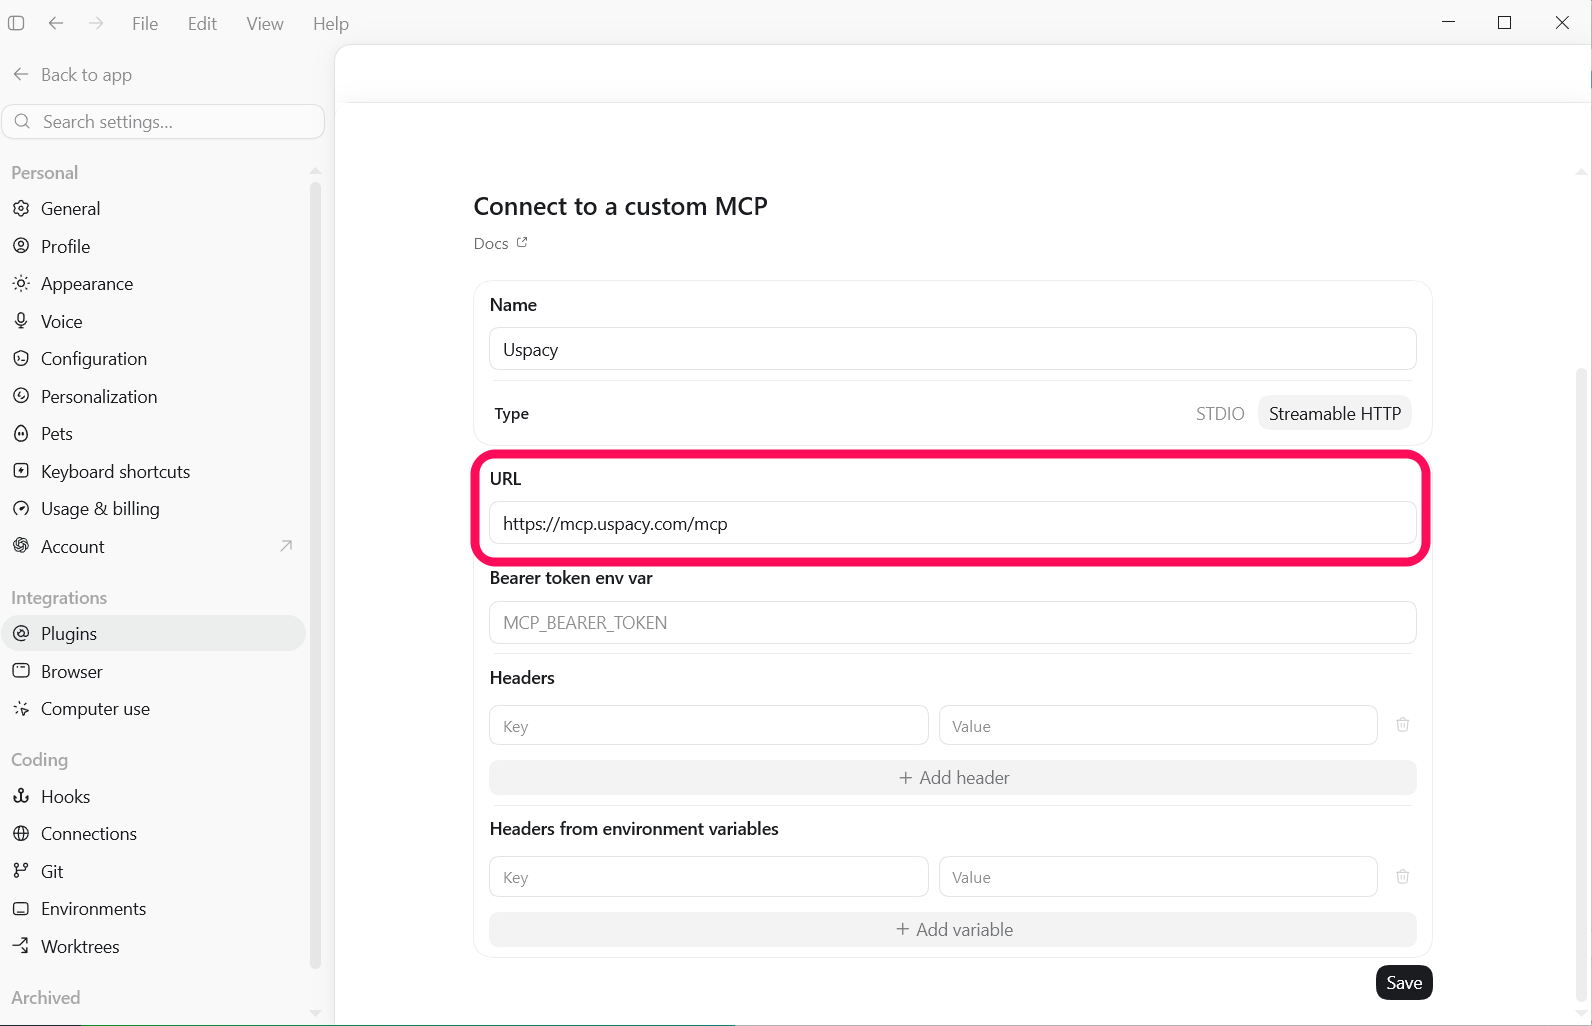
After selecting Streamable HTTP, additional connection settings appear. In the URL field, enter:
If you want to connect to the Workspace you authenticated with most recently, use:
https://mcp.uspacy.com/mcp
If you have multiple Workspaces and want to connect to a specific one, use the URL that includes its domain:
https://mcp.uspacy.com/mcp/domain.uspacy.ua
For example:
https://mcp.uspacy.com/mcp/company.uspacy.ua
Leave the following fields empty: Bearer token env var, Headers, Headers from environment variables.
Review the settings and click Save.
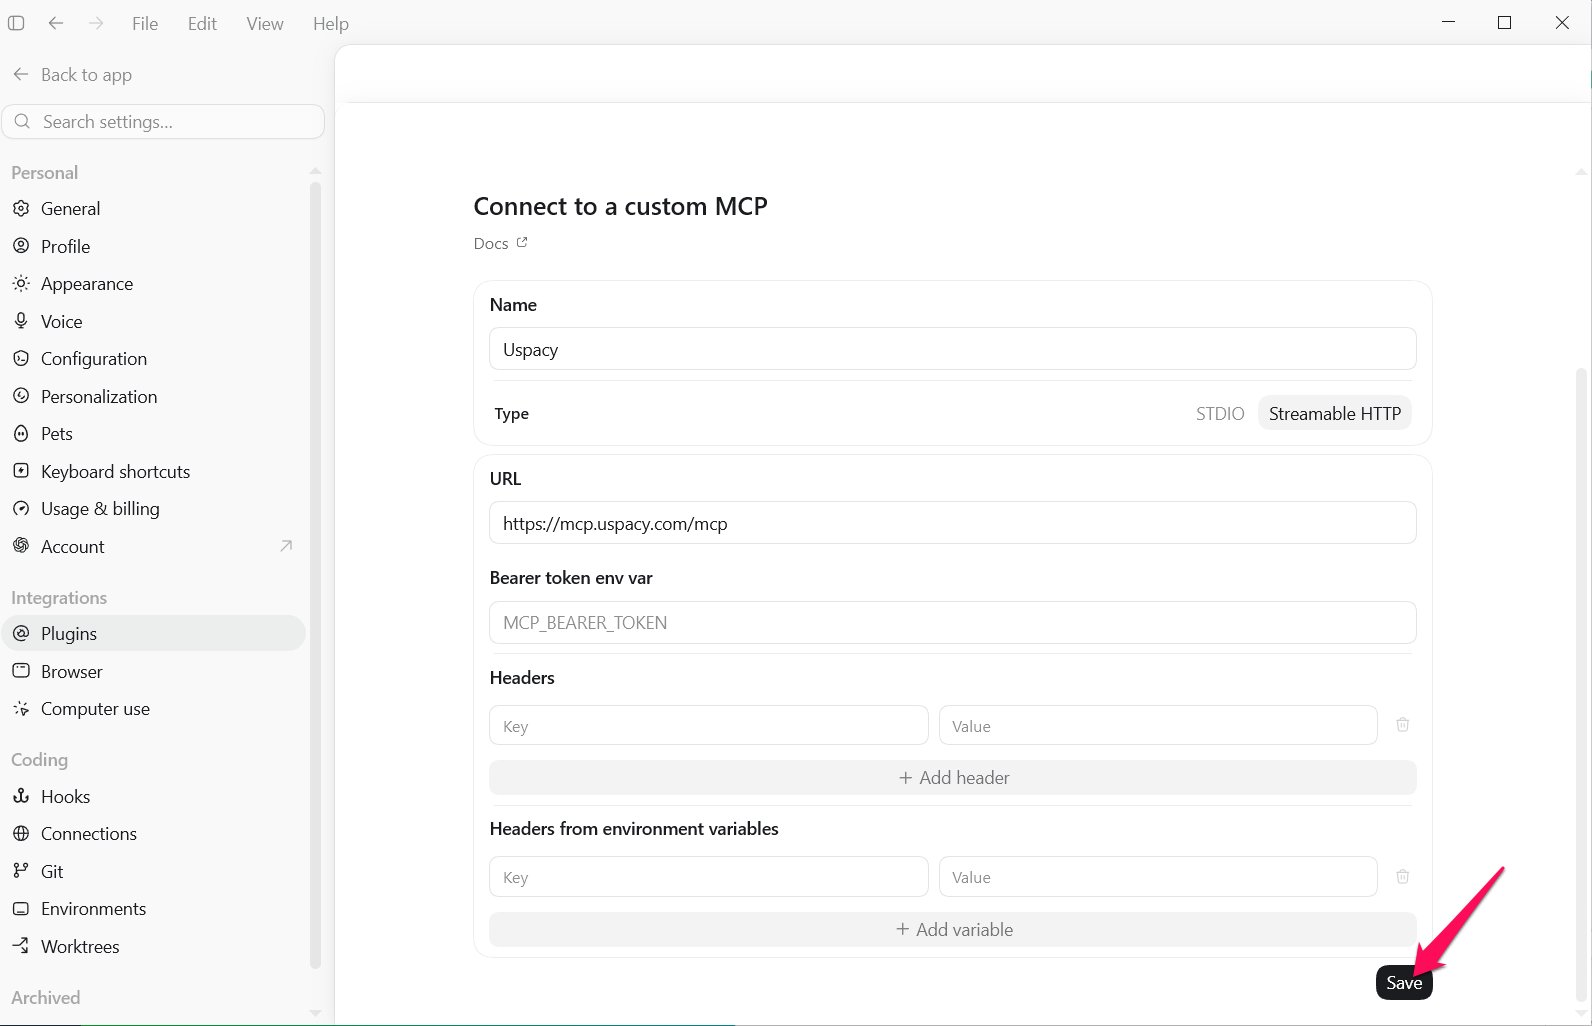
Your completed configuration should look like this:
- Name: Uspacy
- Type: Streamable HTTP
- URL: https://mcp.uspacy.com/mcp or the URL that includes the domain of a specific Workspace.
- All other fields: Leave blank
Important: Make sure to use the correct Uspacy MCP server URL format. For a general connection, use https://mcp.uspacy.com/mcp. To connect to a specific Workspace, use the following format: https://mcp.uspacy.com/mcp/domain.uspacy.ua.
How to authenticate with Uspacy
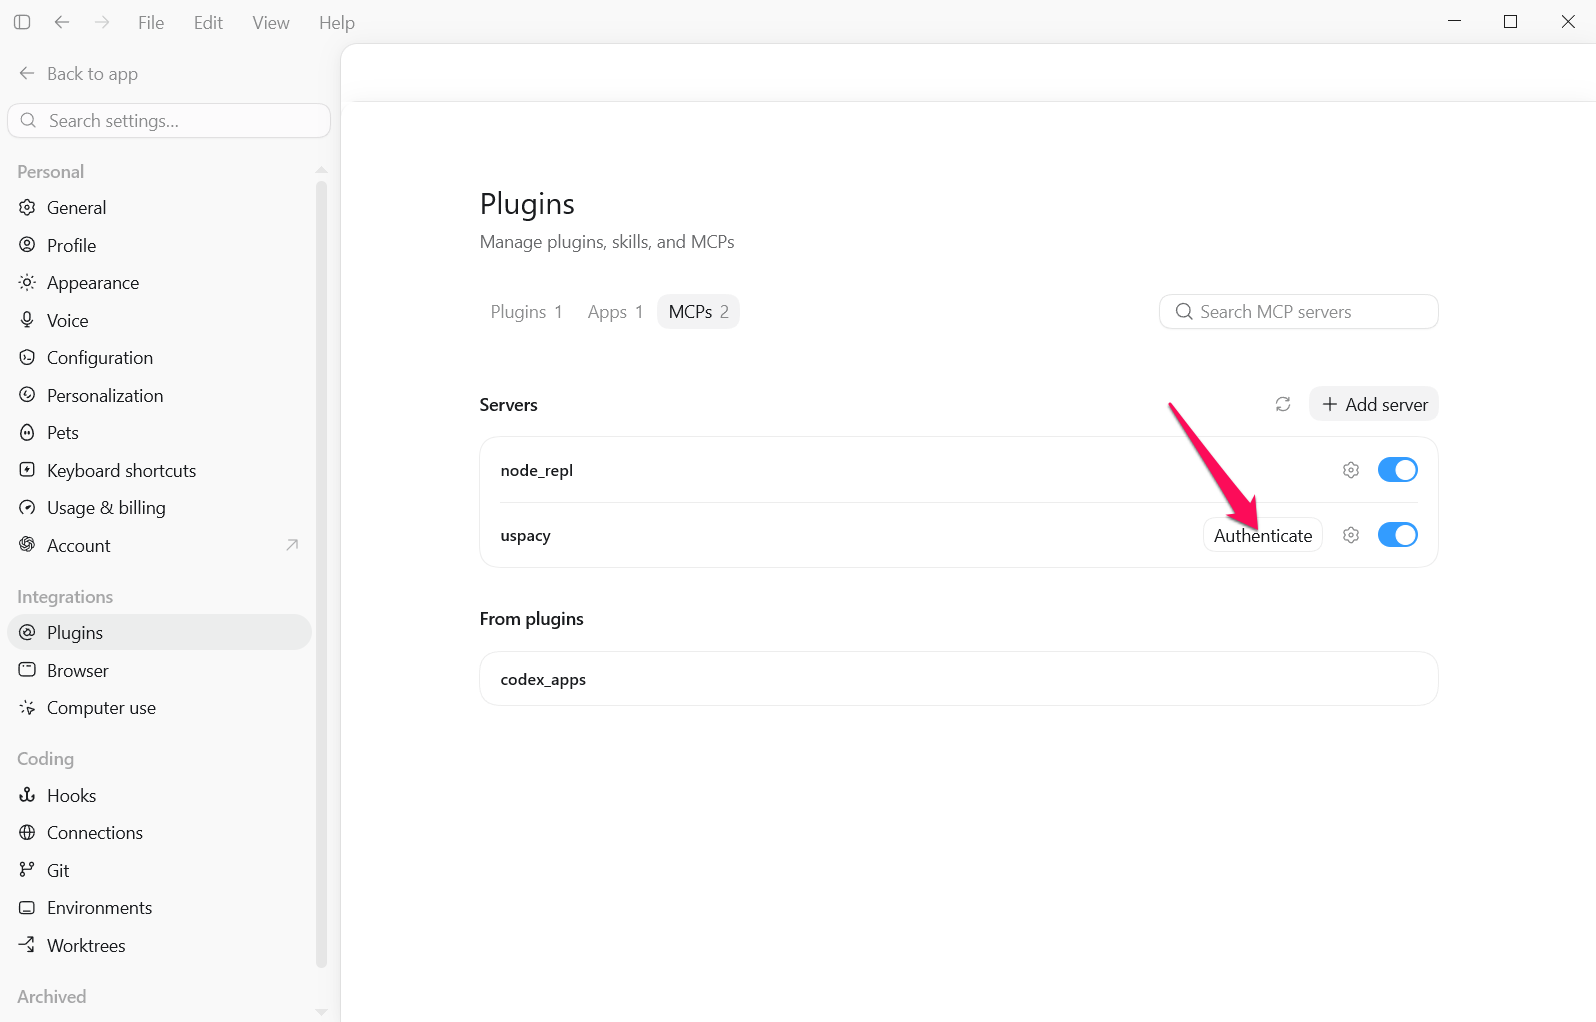
After saving the server, it appears on the MCPs tab. Next to the Uspacy connection, you'll see the Authenticate button, which you must use to authorize Codex to access your Uspacy account.
To authenticate:
1. Click Authenticate next to the Uspacy server.
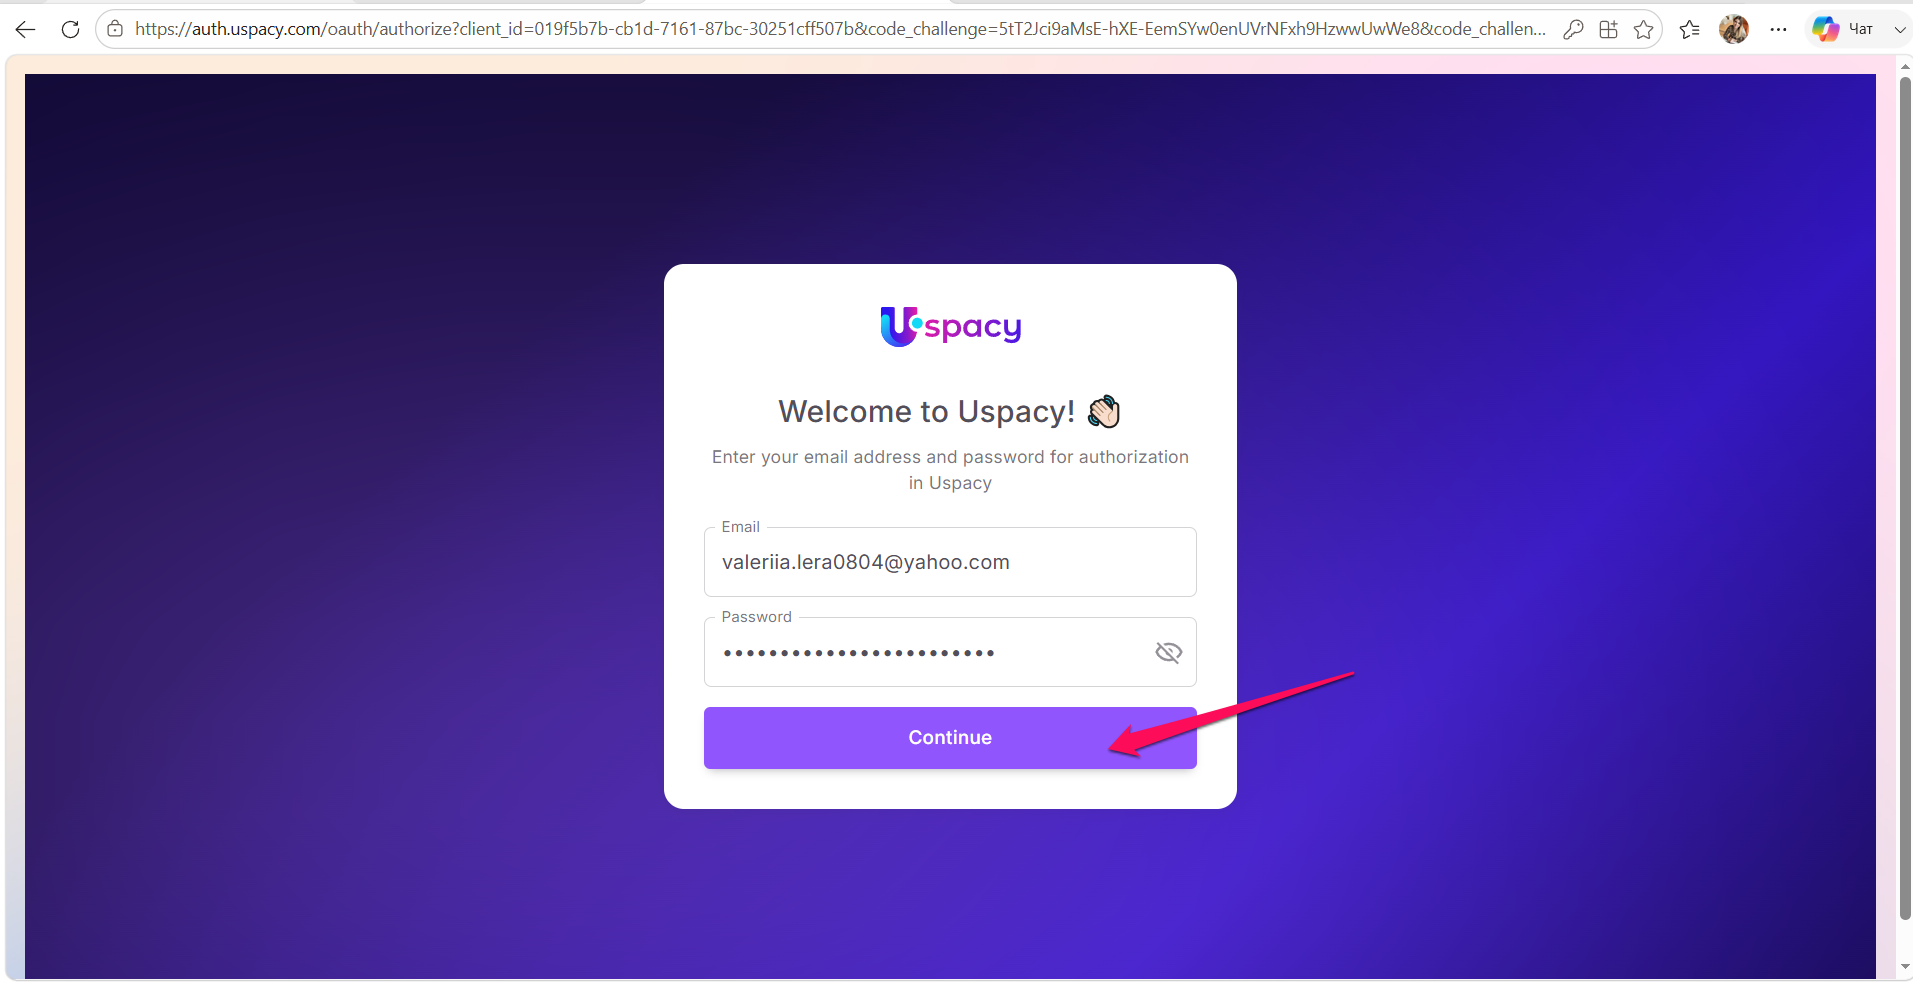
2. Your browser opens the Uspacy sign-in page. Enter the email address and password for your Uspacy account, then click Continue.
Note: Authentication applies to a specific Uspacy account. Codex can access only the data available to the user whose credentials were used during authentication.
The Workspace Codex works with also depends on the URL specified when setting up the MCP connection. If you use the general URL, https://mcp.uspacy.com/mcp, the Workspace the user authenticated with most recently will be selected. If the URL includes a specific Workspace domain, the connection will use that Workspace.
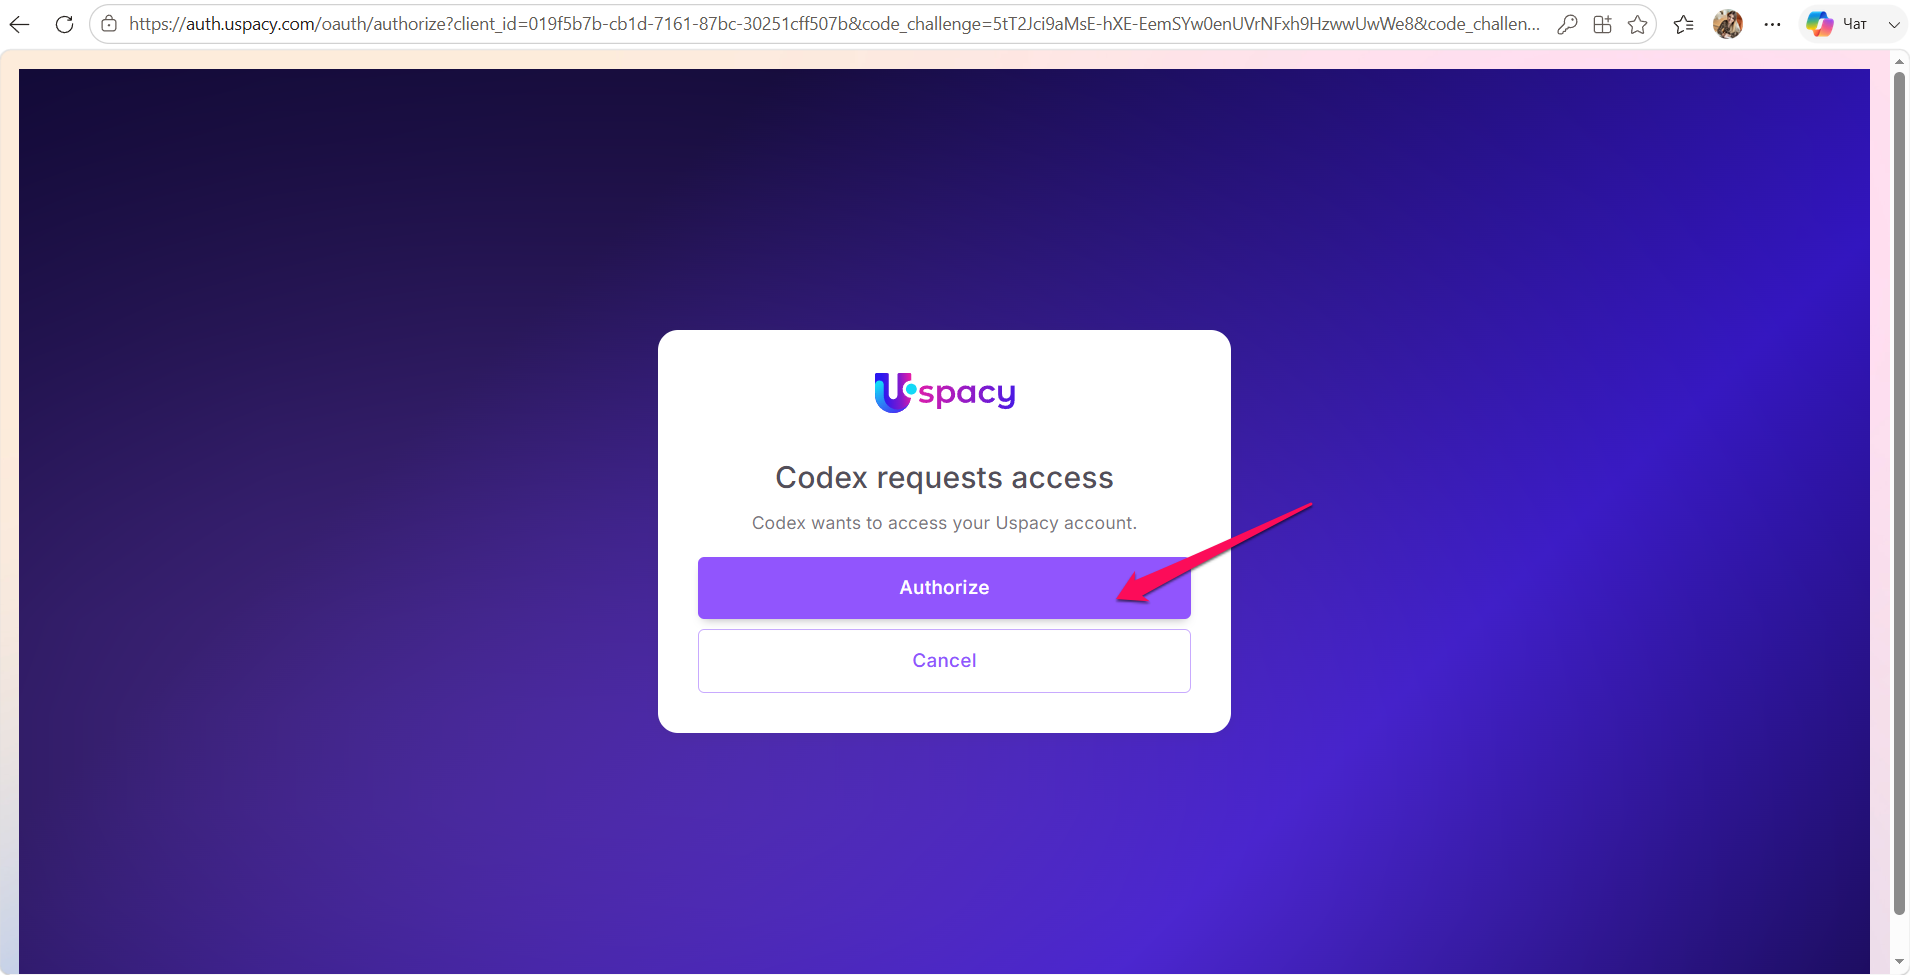
3. On the authorization page, verify that the connection is being created for Codex, then click Authorize.
4. Wait until you see the message: Authentication complete. You may close this window.
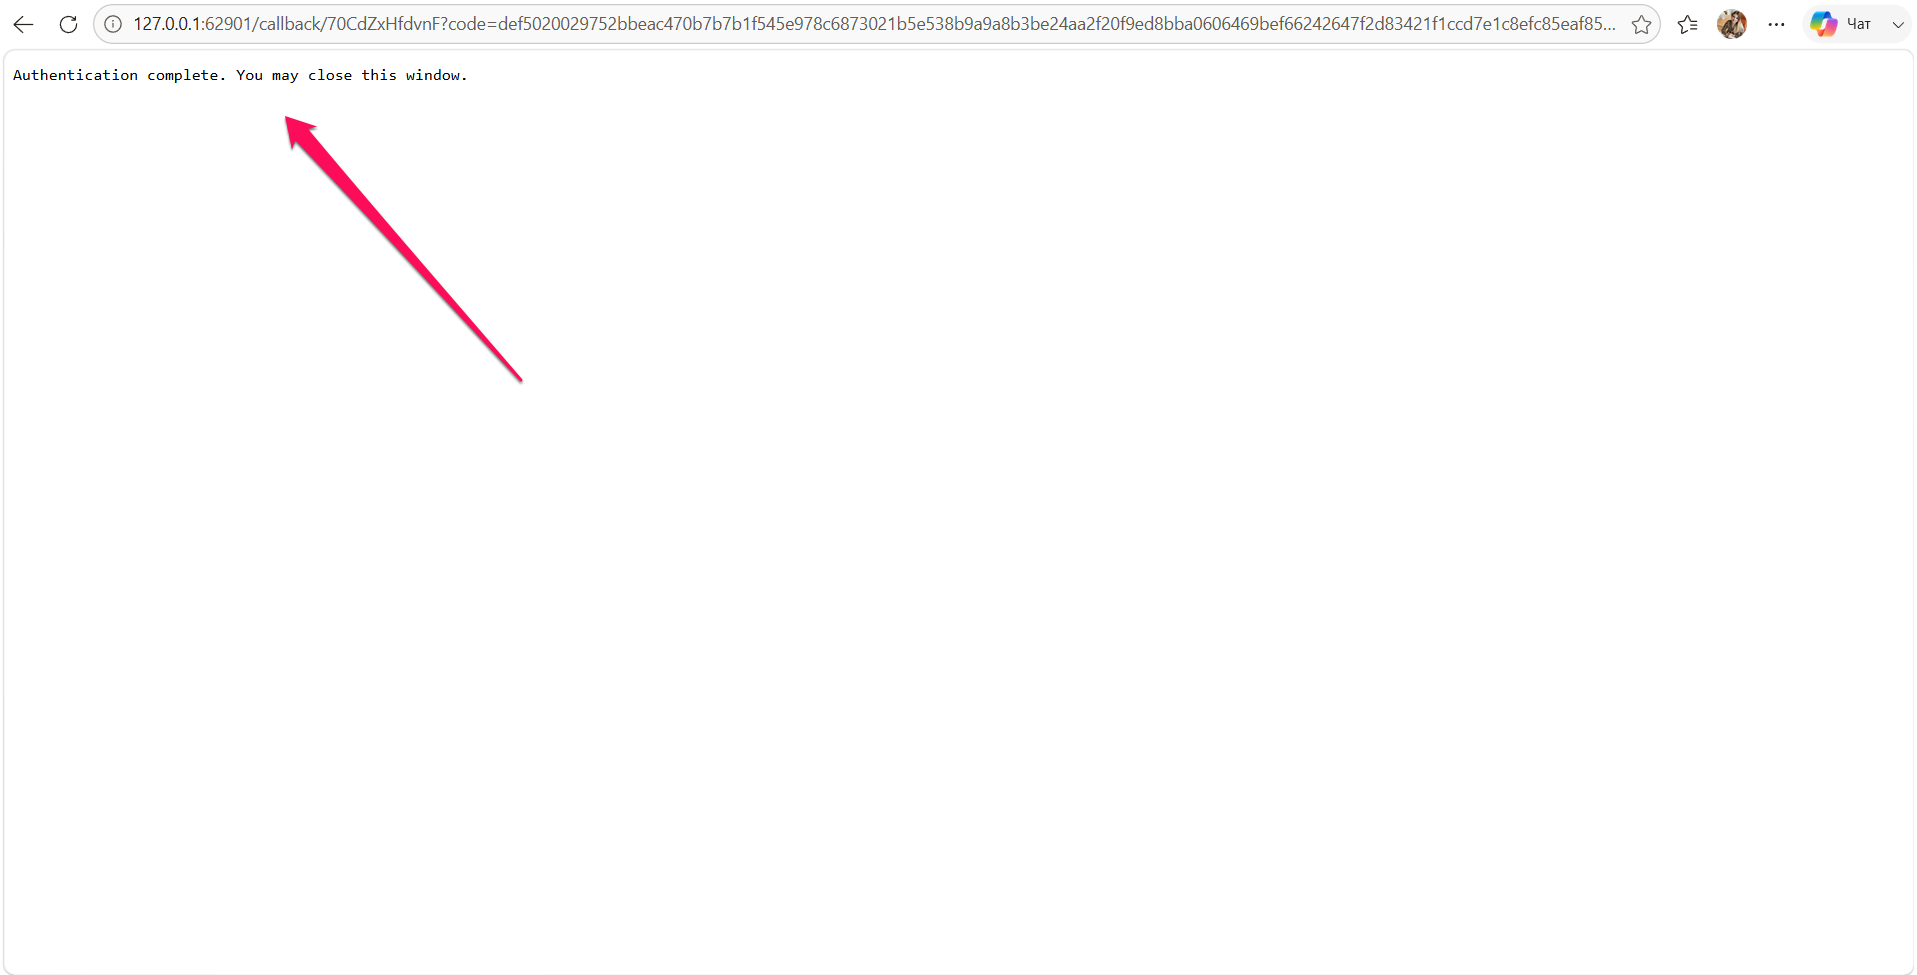
Close the browser tab and return to the Codex app.
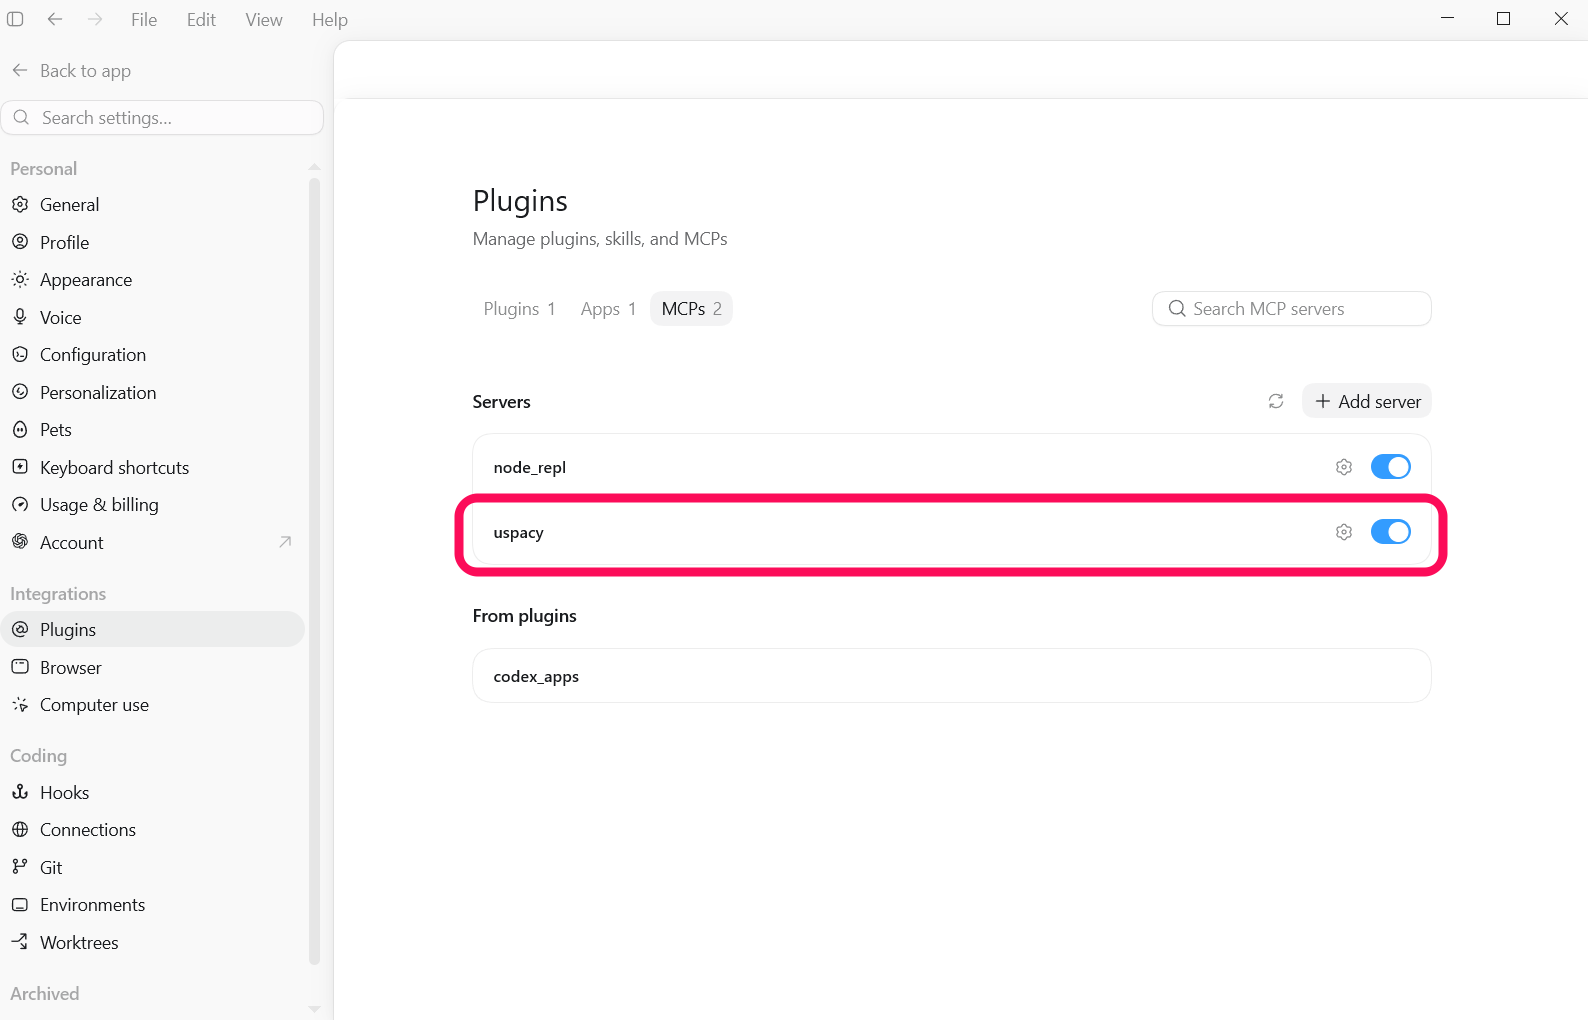
After successful authentication, the Authenticate button disappears. Make sure the toggle next to the Uspacy server is turned on. If you disable it, Codex won't be able to use the Uspacy MCP Server tools.
How to verify that authentication is working
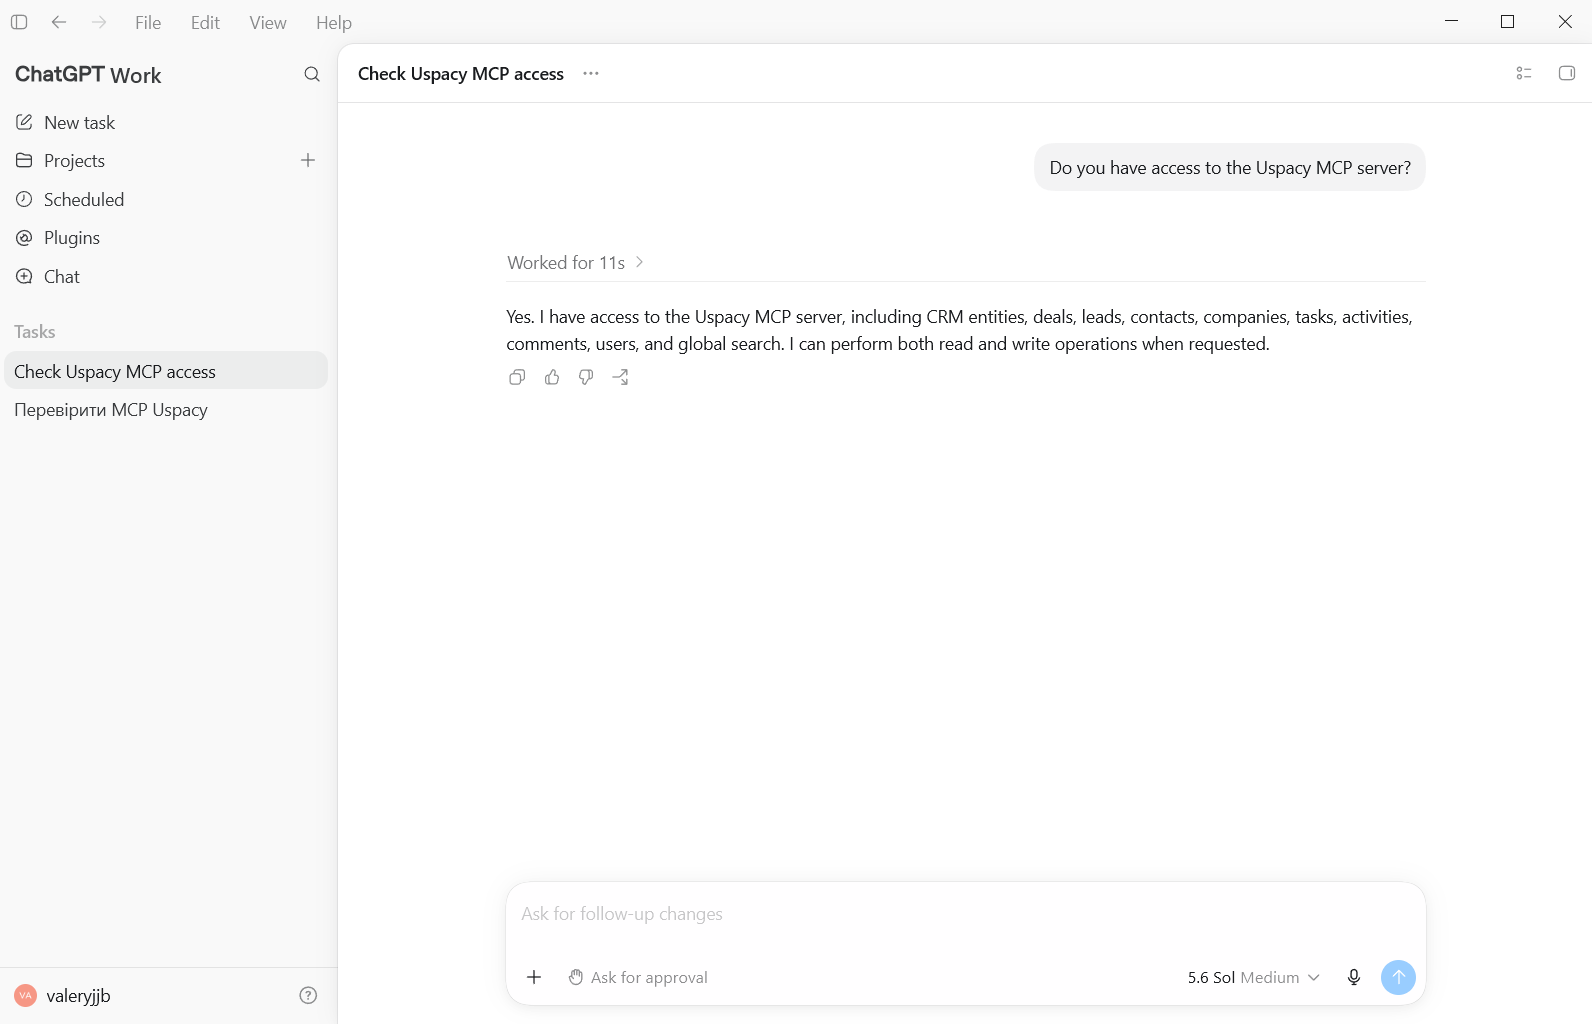
After connecting the server, create a new prompt in Codex, for example:
Do you have access to the Uspacy MCP Server?
Codex checks whether the MCP tools are available and may retrieve information about the currently authenticated user. If authentication is successful, the response confirms that the Uspacy MCP Server is connected and your account is accessible.
How to grant permission to use Uspacy tools
The first time Codex attempts to use a Uspacy tool, it may ask for permission to run that specific MCP tool. Until you approve the request, it remains in the Awaiting approval state and isn't executed.
You'll see the following options:
- Allow once — allow the tool to run only for the current request.
- Always allow — always allow this tool without asking again.
- Deny — prevent the tool from running.
For example, when verifying authentication, Codex may use the users_me tool to retrieve information about the currently authenticated Uspacy user. Click Allow once or Always allow to complete the verification.
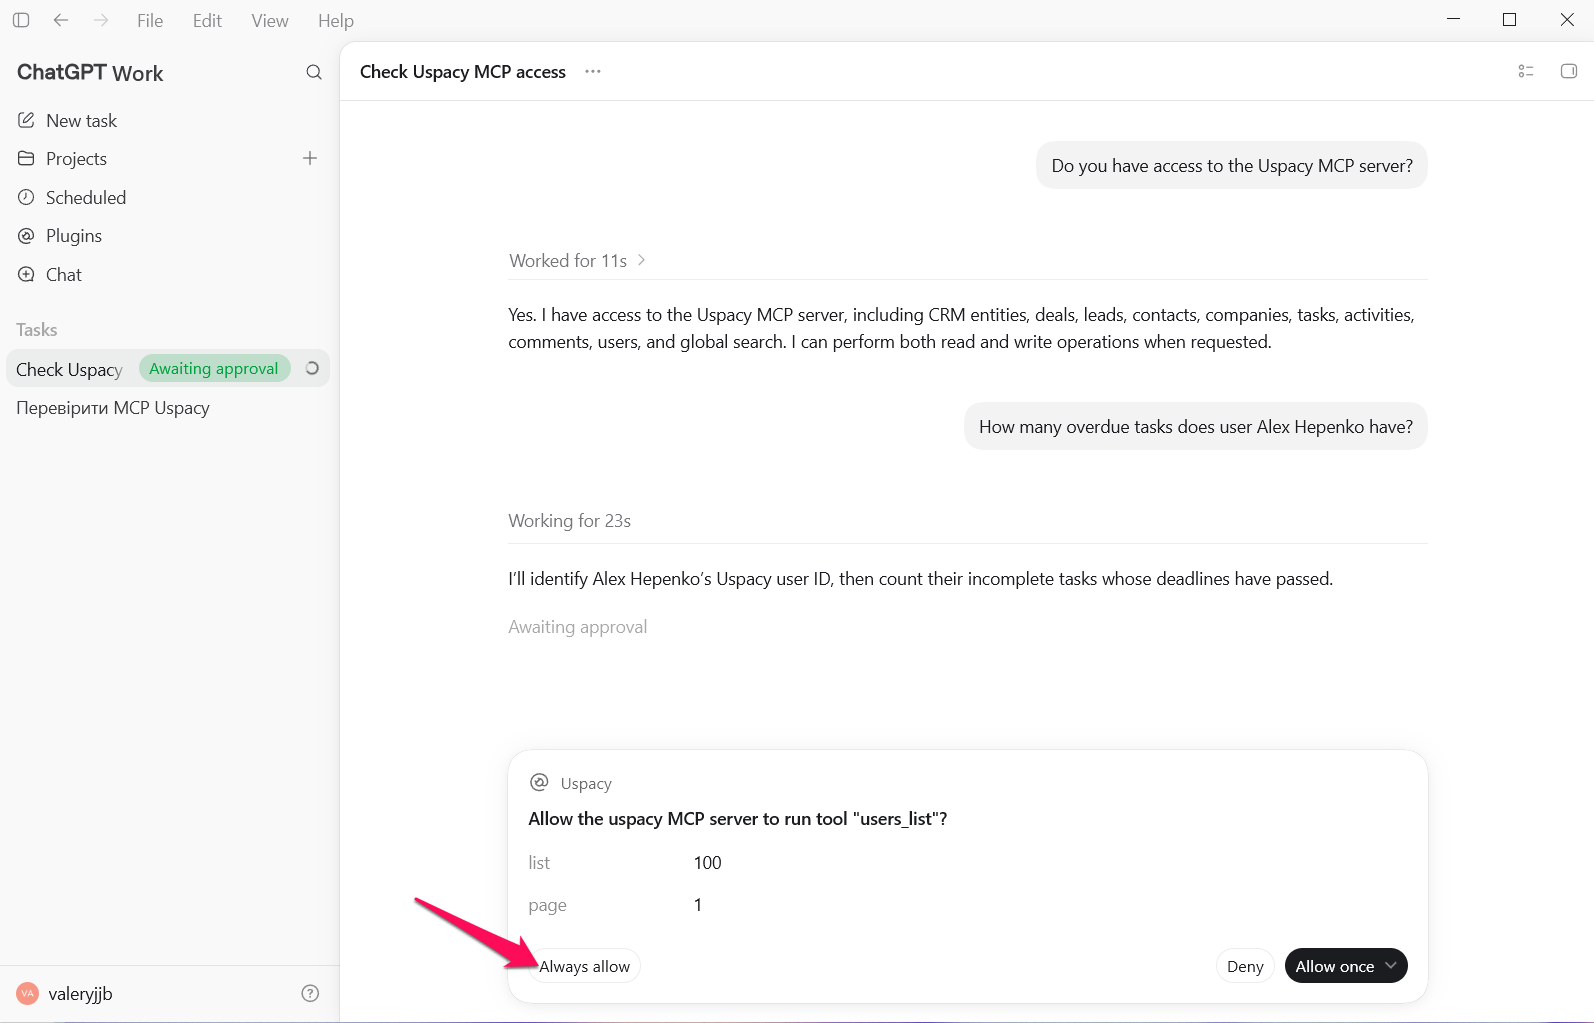
We recommend selecting Allow once when using a tool for the first time, especially for tools that create or modify data. Always allow is generally appropriate for low-risk operations that you expect to use frequently, such as viewing lists or searching for information.
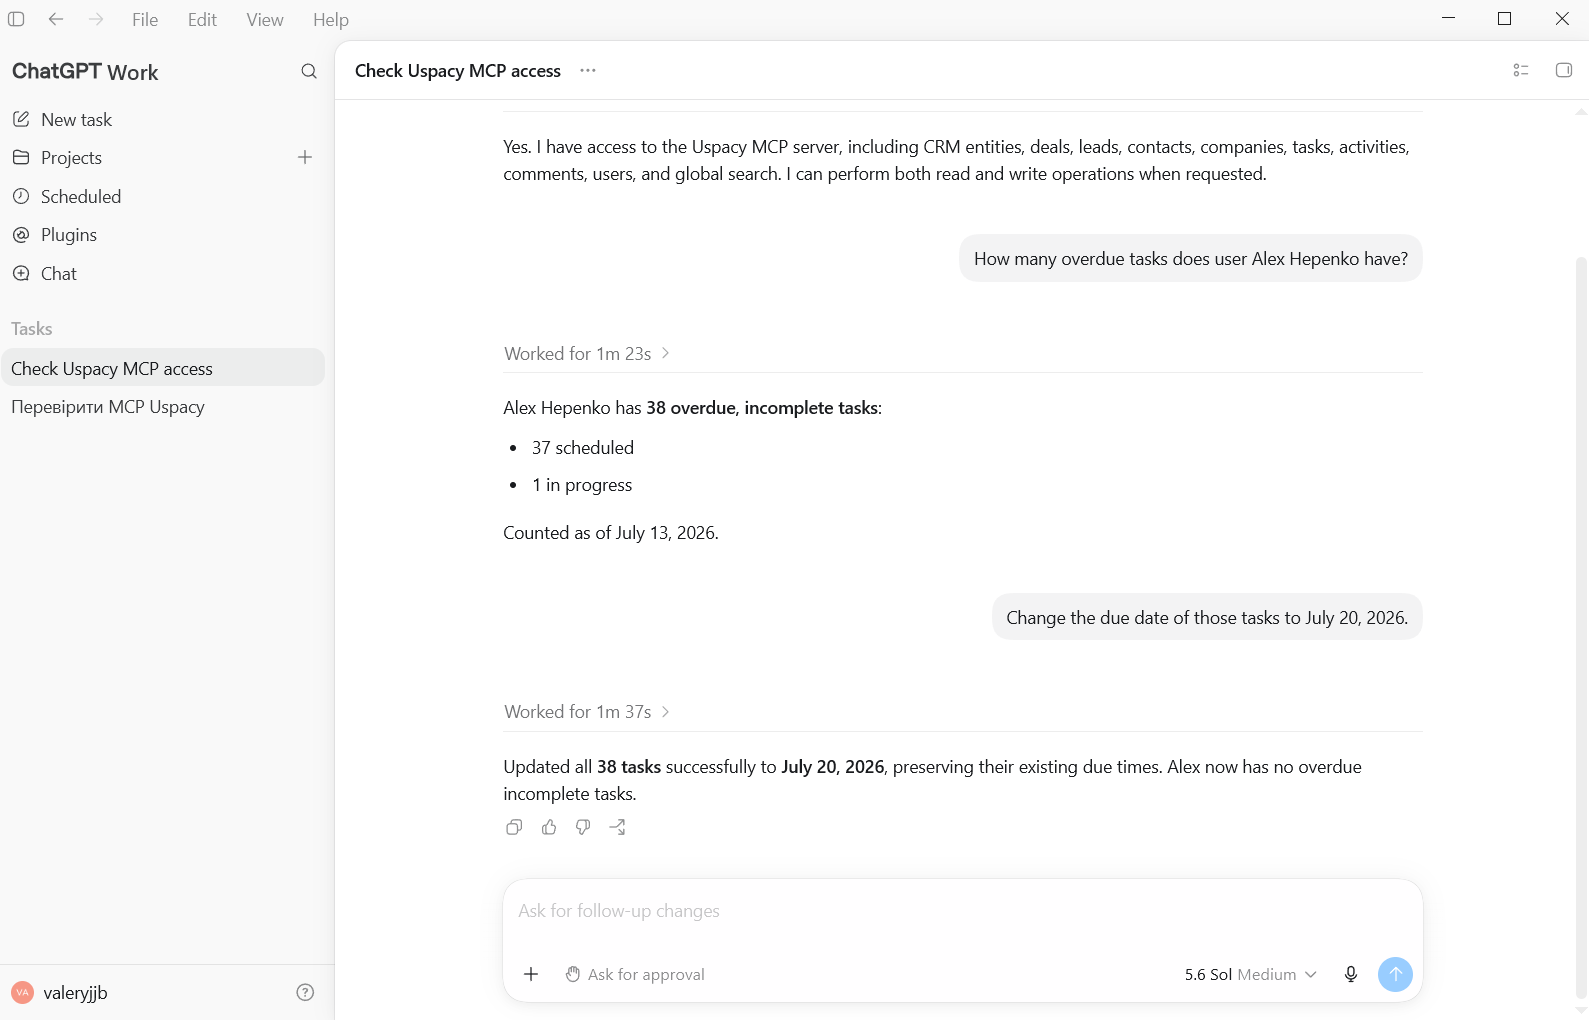
Once everything is configured, you can test retrieving Workspace data with a prompt such as:
How many overdue tasks does user Alex Hepenko have?
Next, test a request that modifies data. For example:
Change the due date for those tasks to July 20, 2026.
If the request is completed successfully, Codex confirms that the changes have been applied.
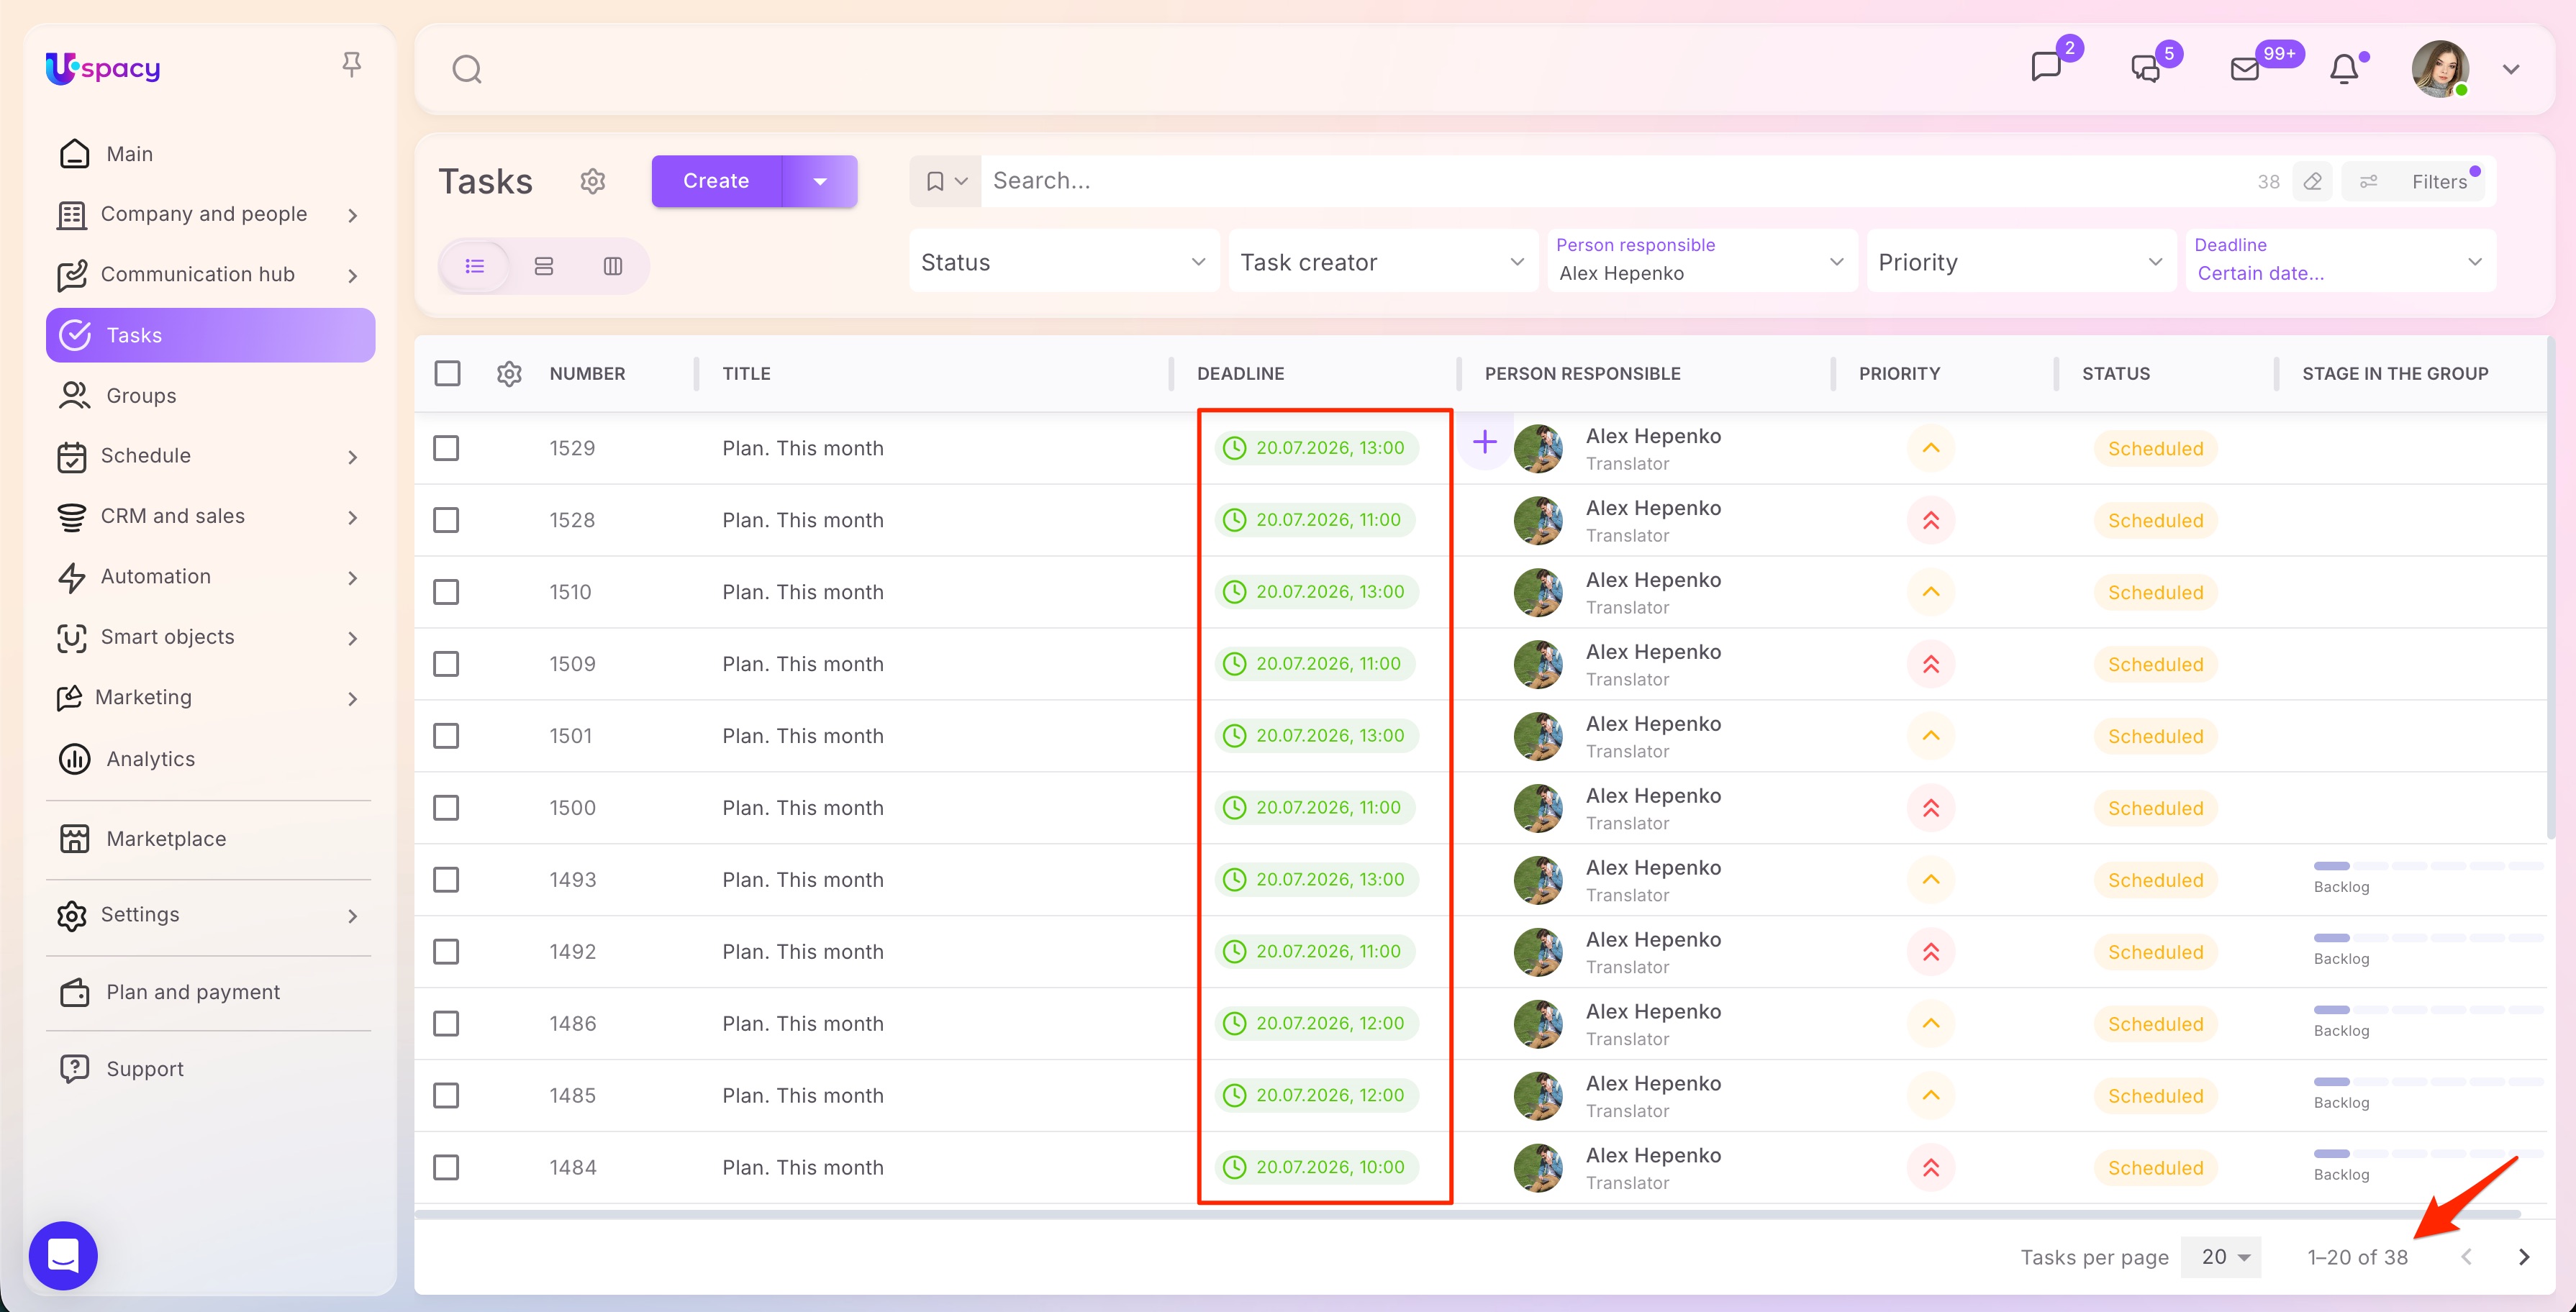
Finally, open the Tasks section in Uspacy and verify that the new due date has been saved for the appropriate tasks.
If you have additional questions or you need to contact the support, send a request to this email [email protected]
Created: July 14, 2026 / Updated: October 16, 2026